Table of Contents
Advertisement
Quick Links
Advertisement
Table of Contents

Subscribe to Our Youtube Channel
Related Manuals for Sakura Accu-Cut SRM 500


Summary of Contents for Sakura Accu-Cut SRM 500
- Page 1 Accu-Cut SRM™ 500 ® Operating Manual...
- Page 2 Note Dear Customer, Please read this operating manual carefully before using the instrument for the first time and make certain that you are familiar with the method of operation as well as the instrument’s controls to ensure that it is used correctly. All the information in this operating manual applies to the Accu-Cut SRM™...
-
Page 3: Table Of Contents
Contents Part 1 - Safety instructions Key to symbols Intended purpose User group/user profile Microtome safety devices Operating the instrument General precautions Part 2 - Introduction View of the Accu-Cut SRM™ 500 ® Technical data for the Accu-Cut SRM™ 500 ®... - Page 4 Part 4 - Working with the microtome Preparing, embedding and sectioning the object Information about how to avoid problems Troubleshooting Part 5 - Maintenance, cleaning and care Maintenance Cleaning and care Cleaning and care of section counter display Returning the microtome for repair or maintenance Decontamination Warranty Declaration of Conformity...
-
Page 5: Part 1 - Safety Instructions
WARNING Indicates a dangerous situation WARNING Manufacturer Date of manufacture Distributor UK Responsible Person Swiss Authorised Representative Consult operating manual PLEASE NOTE The up-to-date electronic operating manual can be found on our website: http://www.pfmmedical.com/downloads http://www.sakura.eu/ Accu-Cut SRM™ 500 Rev.05/2024-01-16 ®... - Page 6 In vitro diagnostic (IVD) medical device Catalogue number Serial number CE marking Biohazard warning The instrument must not be disposed of in normal domestic waste. It must be collected separately. Keep dry Fragile, handle with care 40°C Permissible temperature range at the place of use +10°C - +40°C 10°C Permissible temperature range for storage and transportation...
-
Page 7: Intended Purpose
1.2 Intended purpose Accu-Cut SRM™ 500 is a compact, manual rotary the Histopathological process. It may only be operated by ® microtome designed for preparation of thin sections of appropriately trained personnel. The sections obtained with human and animal tissue samples of varying hardness, the product should assist the pathologist in the evaluation as far as they are suitable for manual cutting. -
Page 8: Operating The Instrument
• The instrument must only be opened and repaired by • During the sectioning, do not place your fingers between service technicians trained and authorised by Sakura the sample and the knife/microtome blade. Finetek or by the manufacturer. -
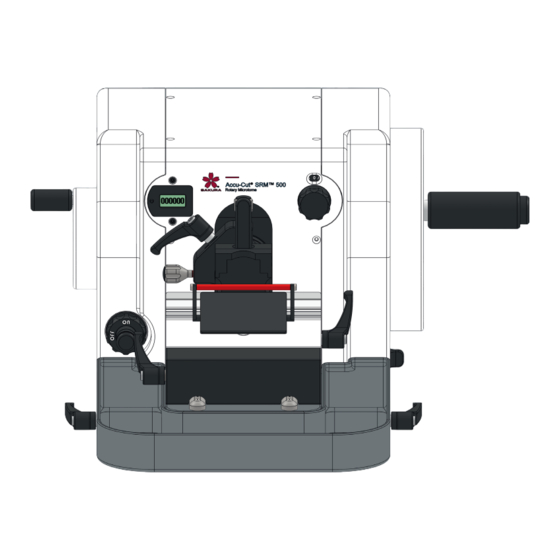
Page 9: Part 2 - Introduction
Scope of delivery http://www.pfmmedical.com/downloads Base device and Section waste tray http://www.sakura.eu/ Additional accessories such as blade holders The up-to-date hard-copy operating manual can be or object clamps are not included in the scope requested from your distributor at any time. -
Page 10: Part 3 - Operating Instructions
Part 3 - Operating instructions 3.1 Transportation, unpacking and setting up the instrument • Before unpacking the delivery, please check that it is • The instrument must be placed on a non-combustible, complete and undamaged. flat surface. • Disassemble the packaging and remove the instrument •... -
Page 11: Installing The Accessories
3.2 Installing the accessories Installing the object clamps with/without adapter Object orientation clamping lever Orientable adapter Object orientation adjustment screws Orientable adapter Universal cassette clamp, orientable Universal cassette clamp, non-orientable (without adapter) • Move the object mounting device into the upper position •... - Page 12 Clamping the sample Universal cassette clamp The universal cassette clamp is used for mounting standard embedding cassettes. The clamping lever is pulled upward to insert or withdraw the embedding cassette. The sample can be positioned horizontally or vertically, as required. Clamping lever Standard object clamp The standard object clamp is used for mounting paraffin...
- Page 13 Knife holder The knife holder consists of the knife holder base and the disposable blade holder upper jaw. The finger guard it fitted to the disposable blade holder upper jaw. Finger guard Disposable blade holder upper jaw Knife holder base Installing the knife holder base Knife holder base Guide rails...
- Page 14 Installing the disposable blade holder upper jaw Pressure plate Clearance angle adjustment clamping lever Pressure plate clamping lever Knife angle scale • Release and completely pull out the clamping lever for clearance angle adjustment. • Insert the adapter on the disposable blade holder upper jaw into the knife holder base, taking note of the position of the hole so that the clamping lever can later be re-inserted without any difficulty.
- Page 15 Clamping the microtome blade Finger guard Pressure plate Blade support Pressure plate clamping lever • Fold down the finger guard. • Release the clamping lever for the pressure plate. • Remove the microtome blade from the dispenser and carefully slide it under the pressure plate from the side. •...
-
Page 16: Sectioning Movement
3.3 Sectioning movement The sectioning movement of the Accu-Cut SRM™ 500 is ® controlled manually by turning the handwheel. The rotary motion is clockwise. The section is made as the object moves downwards. The upwards motion of the object is achieved by turning the handwheel further. -
Page 17: Coarse Adjustment Of The Object
3.6 Coarse adjustment of the object Coarse feed wheel Rear end position Front end position Quick adjustment of the distance between the blade edge selected section thickness or when the trimming device is and the object is achieved using the coarse feed wheel. activated. -
Page 18: Trimming Device/First Incision
3.8 Trimming device/first incision Coarse adjustment can also be made via the trimming device. Two trimming steps of 10 μm and 20 μm are available for this purpose. The trimming device is positioned at the front on the bottom left. During the trimming process, keep the button depressed in the selected position. -
Page 19: Sectioning The Sample
3.10 Sectioning the sample • Clamp the sample in the object clamp. • Section the sample using the two-stage trimming function • If necessary, align the sample to the knife. or by turning the coarse feed wheel while simultaneously • Release the handwheel lock. turning the handwheel. -
Page 20: Mounting The Object
3.12 Mounting the object The object is mounted using different clamping systems. An orientable adapter allows easy alignment of the object to the sectioning level. The orientable adapter can be screwed to the appropriate clamp if needed. WARNING Caution! It is imperative that the handwheel is locked when working in the object orientation area. -
Page 21: Object Orientation
3.15 Object orientation In order to move the object to the required position, the clamping lever must first be released (red marker point at the top). Movement of the object along the x- and y-axes is possible using the coaxial adjusting screws. The clamping lever is set to the clamp position as soon as the required position is reached. -
Page 22: Changing The Object Mounting Device
3.17 Changing the object mounting device Object orientation clamping lever Orientable adapter Object orientation adjustment screws Orientable adapter To change the object mounting device, release the clamping lever and remove it from the guide hole. Both adjusting screws must be turned as far as the red markers. Then the entire object clamp together with the orientable adapter can be removed upwards. -
Page 23: Knife Holder
3.19 Knife holder The knife holder consists of the knife holder base and the disposable blade holder upper jaw. For better cleaning of the disposable blade holder upper jaw as well as the pressure plate and the contact surfaces, the finger guard on both sides is “only”... -
Page 24: Disposable Blade Holder Upper Jaw Low Profile (Narrow Blade)
3.21 Disposable blade holder upper jaw low profile (narrow blade) In order to fix the microtome blade in the disposable blade holder upper jaw with the pressure plate, the gap between the pressure plate and the mounting rail must first be opened by moving the clamping lever for the pressure plate as far as it will go and inserting the microtome blade. -
Page 25: Section Waste Tray
3.23 Section waste tray The section waste tray is plastic-coated and therefore easy to clean. It is pushed onto the microtome via two guides on the inside and then positioned so that it is felt to latch. 3.24 Malfunctions and their correction Fault Possible cause Remedy... -
Page 26: Part 4 - Working With The Microtome
Part 4 - Working with the microtome 4.1 Preparing, embedding and sectioning the object The objects must be properly prepared and embedded Sectioning can be accelerated using the trimming device in suitable media before sectioning. Different forms and When doing so, the ranges from 10 μm (see marking) and 20 rectangular samples as well as the embedding cassette are μm (press trimming button to its stop and keep it pressed) used for embedding. -
Page 27: Troubleshooting
4.3 Troubleshooting Fault Possible cause Remedy Thick/thin sections Microtome blade is inadequately clamped Check the clamping and clean in the knife holder Knife holder is inadequately clamped Check the clamping and clean Object holder is inadequately clamped Check the clamping and clean Incorrect knife holder clearance angle Check, adjust the clearance angle (10°) Handwheel is hard to turn... -
Page 28: Part 5 - Maintenance, Cleaning And Care
Details can be carried out by a trained service technician authorised by be obtained from your distributor or directly from Sakura Sakura Finetek. Finetek Europe B.V. 5.2 Cleaning and care... -
Page 29: Returning The Microtome For Repair Or Maintenance
If this is not possible for any particular reason, the completed in advance and enclosed with the instrument. If instrument can be sent to Sakura Finetek. Before you send it is found that the instrument poses a potential hazard, we... -
Page 30: Warranty
To assert a claim under this warranty, the instrument concerned must be sent to Sakura Finetek, at the customer’s expense and risk, with a detailed description of the defect, and specifying the purchase order number, delivery note number and invoice number. - Page 31 Contact us to agree the return • by phone: +31 88 592 00 00 • by e-mail: Support@sakura.eu • by post: Sakura Finetek Europe B.V., Flemingweg 10a, 2408 AV Alphen aan den Rijn, The Netherlands Accu-Cut SRM™ 500 Rev.05/2024-01-16...
-
Page 32: Part 7 - Accessories
Part 7 - Accessories Universal cassette clamp Universal cassette clamp, REF 1506 orientable REF 1504 • Object clamp to be used with orientable adapter • Orientable version with • Quick-release clamp adapter system for all available • Quick-release clamp cassettes system for all available •... - Page 33 For your notes Accu-Cut SRM™ 500 Rev.05/2024-01-16 ®...
- Page 34 Accu-Cut SRM™ 500 Rev.05/2024-01-16 ®...
- Page 35 Accu-Cut SRM™ 500 Rev.05/2024-01-16 ®...
- Page 36 Sakura Finetek Europe B.V. Flemingweg 10a pfm medical gmbh 2408 AV Alphen aan den Rijn Wankelstraße 60 The Netherlands 50996 Köln Visit us at sakura.com Germany...
Need help?
Do you have a question about the Accu-Cut SRM 500 and is the answer not in the manual?
Questions and answers