
Subscribe to Our Youtube Channel
Related Manuals for Baker Hughes Masoneilan SteamForm 84003 Series


Summary of Contents for Baker Hughes Masoneilan SteamForm 84003 Series
- Page 1 84003 Series SteamForm ™ Trim Installation Guide for Horizontally Installed SteamForm Valves with Bolted Bonnet (model numbers ending in “AB”) Instruction Manual (Rev. A) Baker Hughes Data Classification : Public...
- Page 2 OPERATOR ARE STRICTLY LIMITED TO THOSE EXPRESSLY PROVIDED IN THE CONTRACT RELATING TO THE SUPPLY OF THE EQUIPMENT. NO ADDITIONAL REPRESENTATIONS OR WARRANTIES BY BAKER HUGHES REGARDING THE EQUIPMENT OR ITS USE ARE GIVEN OR IMPLIED BY THE ISSUE OF THESE INSTRUCTIONS.
-
Page 3: Table Of Contents
16. Remove Cradle from Assembly ......................17 17. Install Remaining Valve Components Per Valve Assembly ..............17 18. Install Packing Components and Actuator ....................18 © 2024 Baker Hughes Company. All rights reserved. Masoneilan 84003 Series Horizontal Trim Installation Guide... -
Page 4: Safety Guidelines
About this Manual Warranty • The information in this manual is subject to change Items sold by Baker Hughes are warranted to be without prior notice. free from defects in materials and workmanship for a period of one year from the date of shipment provided •... - Page 5 Air to close action Angle body with seal ring pressure seal Single-Acting (no springs) bonnet without HT seal ring desuperheater Air to open action section Graphite seal ring © 2024 Baker Hughes Company. All rights reserved. Masoneilan 84003 Series Horizontal Trim Installation Guide...
-
Page 6: Installation Kit Contents
Installation Kit Contents Part Description Installation Cradle Hold-Down Tie Hold-Down Bolt Hold-Down Nut Cradle Adjustment Bolts Spare Set of Trim Set Screws Swivel Hoist Rings for Diffuser Swivel Hoist Rings for Cage © 2024 Baker Hughes Company. All rights reserved. Baker Hughes... -
Page 7: Secure Installation Cradle For Trim Assembly
Remove hoist rings. Diffuser Lifting Holes Here, Use Swivel Type Hoist Rings Figure 3 - Seat Ring Diffuser Figure 4 - Swivel Type Hoist Rings © 2024 Baker Hughes Company. All rights reserved. Masoneilan 84003 Series Horizontal Trim Installation Guide... -
Page 8: Locate Cage And Plug Subassembly Install Lifting Rings Onto Cage
Remove lifting rings from diffuser before installing cage. Install Seal Ring prior to installing Cage over Plug Subassembly. Figure 8 - Seal Ring Figure 7 - Cage Over Plug Subassembly © 2024 Baker Hughes Company. All rights reserved. Baker Hughes... -
Page 9: Install Lifting Rings Onto Plug Subassembly
6. Lift Plug Subassembly and Cage and Position onto Seat Ring Diffuser Lift Point WARNING Place protective material here to prevent damage to trim. Figure 11 - Seat Ring Diffuser Placement © 2024 Baker Hughes Company. All rights reserved. Masoneilan 84003 Series Horizontal Trim Installation Guide... -
Page 10: Secure The Cage To The Diffuser Using Set Screws
Figure 12 - Cage to Diffuser Set Screws 8. Lift Plug Subassembly, Cage and Diffuser as One Piece (Cartridge) Lift Point Lift Point Figure 13 - Lift Plug Subassembly, Cage and Diffuser 10 | © 2024 Baker Hughes Company. All rights reserved. Baker Hughes... -
Page 11: Install Seat Ring Gasket
Avoid applying sealant to the graphite face of the gasket. Figure 14 - Installing Seat Ring Gasket © 2024 Baker Hughes Company. All rights reserved. | 11 Masoneilan 84003 Series Horizontal Trim Installation Guide... -
Page 12: Remove Installation Cradle From Grating And Install Onto Valve Body
Use these bolts to adjust cradle position on body. Align these bores to be concentric. Tighten nuts after properly adjusted. Figure 15 - Installing onto Valve Body 12 | © 2024 Baker Hughes Company. All rights reserved. Baker Hughes... -
Page 13: Lift Trim Assembly Using Lift Points On Plug. Place Into Assembly Cradle
9. Lower trim onto cradle tight to body studs. Figure 16 - Placement into Assembly Cradle © 2024 Baker Hughes Company. All rights reserved. | 13 Masoneilan 84003 Series Horizontal Trim Installation Guide... -
Page 14: Lower Trim Assembly (Cartridge) Into The Cradle
Lift Point Lower until trim assembly is resting in cradle as shown. Figure 18 - Lowering Trim Assembly into Cradle 14 | © 2024 Baker Hughes Company. All rights reserved. Baker Hughes... -
Page 15: Slide Trim Assembly (Cartridge) Into Valve Body
Note: Pry Bars are not included Optional to use pry bars through these slots to drive trim into body. Figure 19 - Slide Trim Assembly into Valve Body © 2024 Baker Hughes Company. All rights reserved. | 15 Masoneilan 84003 Series Horizontal Trim Installation Guide... -
Page 16: Slide Trim Fully Into Valve Body
Figure 20 - Slide Trim Assembly into Valve Body 15. Push Plug Subassembly Fully into Cage. Push Plug Subassembly Fully into Cage. Figure 21 - Plug Assembly into Cage 16 | © 2024 Baker Hughes Company. All rights reserved. Baker Hughes... -
Page 17: Remove Cradle From Assembly
Install body gasket, conical spring, bonnet, and bonnet nuts as shown. Reference valve assembly drawings for component arrangement and torque values. Figure 23 - Installing Remaining Components © 2024 Baker Hughes Company. All rights reserved. | 17 Masoneilan 84003 Series Horizontal Trim Installation Guide... -
Page 18: Install Packing Components And Actuator
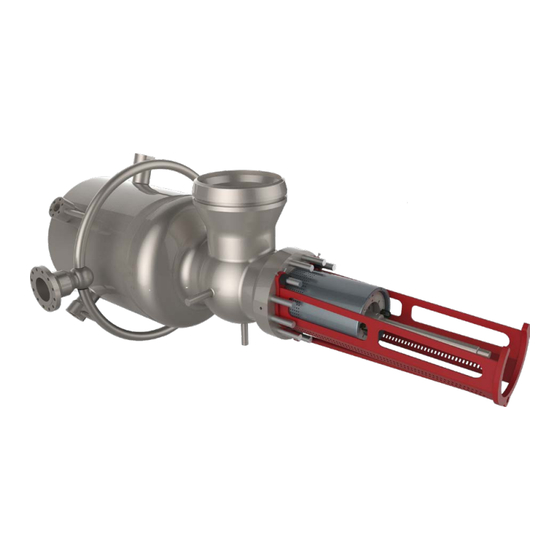
Figure 24 - Installing Packing Box and Actuator Masoneilan 84003 SteamForm Horizontally Installed Bonnet and Trim Removed Figure 25 - 84003 SteamForm Horizontally Installed ** USE THIS GUIDE IN REVERSE ORDER FOR VALVE DISASSEMBLY** 18 | © 2024 Baker Hughes Company. All rights reserved. Baker Hughes... - Page 19 Notes: © 2024 Baker Hughes Company. All rights reserved. | 19 Masoneilan 84003 Series Horizontal Trim Installation Guide...
- Page 20 Copyright 2024 Baker Hughes Company. All rights reserved. Baker Hughes provides this information on an “as is” basis for general information purposes. Baker Hughes does not make any representation as to the accuracy or completeness of the information and makes no warranties of any kind, specific, implied or oral, to the fullest extent permissible by law, including those of merchantability and fitness for a particular purpose or use.
Need help?
Do you have a question about the Masoneilan SteamForm 84003 Series and is the answer not in the manual?
Questions and answers