Table of Contents
Advertisement
Quick Links
Advertisement
Table of Contents

Related Manuals for IRIS ORCA Series


Summary of Contents for IRIS ORCA Series
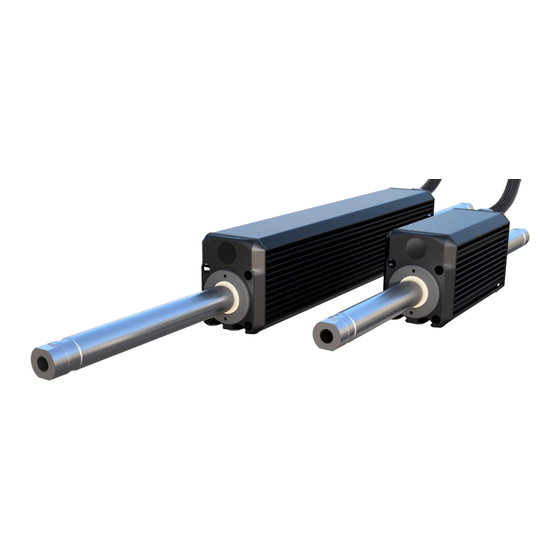
- Page 1 ORCA™ SERIES MOTOR Reference Manual 220115 This document applies to the following Orca™ Series linear motor firmware: ● 6.2.8 For more recent firmware versions, please download the latest version of this reference manual at https://irisdynamics.com/downloads...
-
Page 2: Table Of Contents
CONTENTS Revision History ............................... 6 Introduction ............................... 7 Safety Warnings .............................. 8 Powering the Motor ............................9 Fuse ..................................9 Ground ................................9 Chassis ................................9 Communication Interfaces ......................... 10 Methods of Motor Control .......................... 11 Modbus RTU Serial Interface ........................11 IrisControls Software .......................... - Page 3 Error Thresholds ..........................19 Save Tuning Button ........................19 Apply Tuning Button ........................20 Invert Position Button ........................20 Zero Position Button ........................20 Zeroing Configuration ........................20 Start Auto Zero Button ......................... 20 Set Kinematic Profile Button ...................... 20 Kinematic Panel .............................
- Page 4 Active Connection Info ......................... 26 Modbus Options ..........................27 Save Modbus Options Button ....................27 Orca IO SmartHub Page ..........................28 IrisControls Logging............................. 29 Orca Registers ............................... 29 Control Registers ............................30 CTRL_REG_0 ............................30 CTRL_REG_1 ............................30 CTRL_REG_2 ............................31 CTRL_REG_3 ............................
- Page 5 Software Triggering ..........................40 Configuring a Motion ........................... 40 Kinematic Status............................ 41 Haptic Controller ............................42 Effects ................................ 42 Configuring Effects ..........................44 User Configurations ............................. 45 Motor Performance Limits ......................... 45 Maximum Temperature ........................45 Maximum Force............................45 Maximum Power............................ 45 Communication Timeout ........................
-
Page 6: Revision History
Revision History Version Date Author Reason January, 2022 Initial Draft April, 2022 Include GUI and Kinematic sections August, 2022 Review and update September, 2022 sj Update for 6.x.5 changes. February, 2023 Update for 6.1.6 changes. April, 2023 Formatting, memory map update May, 2023 rm, ab, Update GUI, add Haptics section, change section... -
Page 7: Introduction
Introduction This document describes the functions and operation of Orca™ Series linear motors having integrated drivers and an integrated sensor suite. Figure 1: Block Diagram... -
Page 8: Safety Warnings
Figure 2: Orca Series Motor Setup Safety Warnings WARNING The motor’s shaft contains STRONG magnets. Keep away from ferrous metals and sensitive electronics. WARNING Ensure the motor is mounted in a safe location to avoid danger or damage to people or property. -
Page 9: Powering The Motor
Powering the Motor Orca Series motors are powered by DC voltage. The Orca Series variant name specifies the voltage at which the motor is most efficient, however all Orca Series motors can be powered by 12 – 60 VDC. Flying lead power connections are provided for each motor. Orca Series motors are configured to be able to draw significant currents and proper attachment of the power lines to a suitable power source is important. -
Page 10: Communication Interfaces
Splitter Port Signaling Protocols RS485 IrisControls (GUI) Half IrisBootloader Duplex RS422 Full Modbus RTU Duplex* * See UG230323 – Orca Series Modbus over Half-Duplex RS485 for information on setting up a half-duplex connection on this port. -
Page 11: Methods Of Motor Control
Orca IO SmartHub (optional and sold separately) The Orca IO SmartHub provides control of Orca Series motors in Force, Position, and Kinematic Modes through simple digital and analog inputs. Real-time force and position data are fed back from the motor and provided as analog outputs. -
Page 12: Modes Of Operation
Modes of Operation The motor operates in five main modes of operation: Sleep Mode (1), Force Mode (2), Position Mode (3), Haptic Mode (4), and Kinematic Mode (5). Force Mode (2) and Position Mode (3) are meant to be used with a Modbus communication stream and cannot be entered directly through the IrisControls GUI. -
Page 13: Kinematic Mode (5)
resulting from all enabled haptic effects is used as the force target. A Modbus stream can be used to update the constant force effect, or updating other effect configurations. Kinematic Mode (5) In Kinematic Mode, the position controller works similarly to when in Position Mode (3), however, position commands will be dictated by the kinematic controller rather than a Modbus stream. -
Page 14: Getting Started With Iriscontrols
Required Software Orca Series motors can be configured through an integrated graphical user interface (GUI). To connect to an Orca Series motor’s GUI, first download the latest version of the IrisControls software on a Windows PC. The latest release is always available at www.irisdynamics.com/downloads... -
Page 15: Required Hardware
Figure 5: RS485 to USB cable Figure 6: RJ45 Splitter Connect the RJ45 communication cable from the Orca Series motor to the single port side of the RJ45 splitter. Connect the RJ45 connector end of the blue RS485 cable to the splitter input labeled 1. -
Page 16: Troubleshooting Connection
Troubleshooting Connection Correct Splitter Port If the COM port does not show up in the drop down menu, ensure that the blue RS485 to USB cable is plugged into port 1 of the RJ Splitter and that the motor’s data cable is plugged into the single side of the splitter. -
Page 17: Navigating The Gui
Figure 9: Orca GUI with Home Page Open The home page is the default page opened upon connecting to an Orca Series motor. A screenshot of the home page is shown in Figure 9. This page displays the firmware version, hardware version, firmware build date, and the motor serial number. -
Page 18: Position / Kinematics Page
Position / Kinematics Page The position page provides a real time graph displaying the target position, measured position, and target force of the motor. Below the graph, the currently set parameters of the position controller are displayed, including proportional gain, integral gain, derivative gain, and maximum force output. -
Page 19: Tuning Panel
Tuning Panel Figure 11: IrisControls Tuning Panel PID Tuning - Max Force / Gain Adjustment The maximum force output and position controller gains can be edited here. The maximum force (Fmax) determines the upper limit of force that the position controller can command. -
Page 20: Apply Tuning Button
Apply Tuning Button To update the gains to their target values while operating in Position Mode (3), press the update gains button. Invert Position Button Change direction of positive movement. This should only be done while the motor is in Sleep Mode (1) to avoid unexpected movement. -
Page 21: Kinematic Panel
Kinematic Panel The kinematic page provides an interface to the kinematic controller feature of the Orca Series motor. For more information on the capabilities of the kinematic controller, refer to the Kinematic Controller section of this manual. Figure 12: IrisControls Kinematic Panel Reset Defaults Button Resets current kinematic settings to the factory default demo motion profile. -
Page 22: State Indicator
State Indicator The state indicator will read CONTROLLER IDLE if the kinematic controller is not currently executing a motion. It will read RUNNING if a motion is in progress, with a number to the right indicating which motion ID is running. Configuring a Motion Use the page buttons to navigate to the page with the desired motion ID. -
Page 23: Force / Haptics Page
Force / Haptics Page The haptics page provides an interface for the haptics features of the Orca Series motor. Figure 14: IrisControls Force / Haptics Page Force Graph This plot displays the force sensed by the motor and the force commanded by all haptic effects. -
Page 24: Target And Sensed Force Sliders
Target and Sensed Force Sliders These sliders cannot be interacted with, they display the current target (or commanded) force along with the sensed force. Individual Haptic Effect Panels Each of the other panels on this page provide an interface for adjusting the various haptics effects available to the motor. -
Page 25: Application Notes
Application Notes: 50 N force for 1 second followed by 9 seconds of rest. To accomplish this type of setup the ‘Oscillator’ and ‘Constant’ effects are used in combination. Using a 25 N amplitude for the oscillator will give a 50 N spread between the maximum and minimum values. -
Page 26: Modbus Page
Modbus Page Orca Series motors support the Modbus RTU serial communication protocol as a control method. This GUI page allows the user to view the status of the Modbus communication. Figure 16: IrisControls Modbus Page Last Received Modbus Message All bytes of the last received Modbus message are displayed on this page. If the message was successful, bytes will be displayed in white, if there is an error with the message;... -
Page 27: Modbus Options
speed stream) the Connected label will be highlighted orange. If communication is taking place without connection negotiation, Disconnected will be highlighted. Modbus Options Default Modbus behaviour can be configured here to match any Modbus client setup or to increase messages framerate without requiring negotiation. Default baudrate up to 1250000 bps can be configured. -
Page 28: Orca Io Smarthub Page
Orca IO SmartHub Page This panel contains the status and configuration options for the Orca IO SmartHub. To find more information on how to configure and use the Orca IO SmartHub,, please see the Orca IO SmartHub User Manual available at irisdynamics.com/downloads. Figure 17: IrisControls Orca IO SmartHub Page... -
Page 29: Iriscontrols Logging
IrisControls Logging While connected to IrisControls, Orca Series motors provide periodic logging of various sensor data. Logging will start automatically upon connection with IrisControls. Log data will be saved to a file named “Orca_[serial number]_data_log.txt” in the the logs folder located by default in the IrisControls folder in the Users directory. -
Page 30: Orca Registers
System data like sensor readings, user settings, and controller setpoints are stored in and can be accessed from a collection of registers. Registers can be read and, in some cases, modified by the Modbus or GUI interface. For the list and description of available registers on an Orca Series motor, see Orca Memory Map. -
Page 31: Ctrl_Reg_2
CTRL_REG_2 Control register 2 is used for functions that save register data to nonvolatile memory. save Save the parameter section of registers to flash parameters memory. (400 - 419) 1 - 4 RESERVED Save the tuning section of registers to flash tuning save memory. -
Page 32: Ctrl_Reg_4
CTRL_REG_4 Control register 4 is used to set defaults for sections of registers that are saved to permanent memory. Note that the sections must still be saved through control register 2 to keep these values through power cycles. parameter Set the parameter section of registers to defaults their default values. -
Page 33: Sensors
“Zero Position” bit of “Control Register 0.” The Orca Series motor will take its current shaft position as zero at startup every time the motor is power cycled as the absolute position will be lost if the motor loses 5V. -
Page 34: Power Sensor
The shaft alignment is absolute in nature (persists throughout power cycles); however, it repeats every shaft period interval. This interval is listed on the motor’s datasheet as “Shaft Magnetic Period.” The position sensor is active in all modes of operation. Power Sensor Power being consumed or generated is measured and reported with low latency and high bandwidth. -
Page 35: Controllers
Controllers The integrated logic included in Orca Series motors carries out several feedforward and feedback controllers with very low latency loops that provide high performance motion and force control without a lot of tuning and setup required. Force Controller Internal control loops control the phase currents in the motor to achieve a commanded force, compensating for shaft position, speed, winding temperature, and supply voltage. -
Page 36: Force Saturation Level
Higher P-gain results in a stronger spring effect. Orca Series motors have fast feedback loops which enable relatively high proportional gains. In systems where some steady-state error may be acceptable, it is possible to achieve good motion control using only the proportional action. -
Page 37: Derivative Action (Error)
This action is often not required, especially when fast transient response is desired. However, D-gain will prevent the shaft from moving too fast and can improve stability and reduce overshoot. It is safe to use derivative action alone if a brake force is required. The derivative gain register value is scaled up by a factor of 2 for increased resolution. -
Page 38: Enable On Startup
● Must be one of the following Orca modes of operation or will default to mode 1 (Sleep). ○ Sleep Mode (1) ○ Force Mode (2) ○ Position Mode (3) ○ Haptic Mode (4) ○ Kinematic Mode (5) ● Configurable through the AUTO_ZERO_EXIT_MODE register or the dropdown on the position page on the IrisControls GUI. -
Page 39: Kinematic Controller
Figure 21: Position and Acceleration of Type 1 kinematic motion Up to 32 motions can be saved to a single Orca Series motor. Motions are configured either from the Kinematic GUI page, or through direct writes to the Orca memory map. Motions can... -
Page 40: Software Triggering
be initiated either by Modbus messages, or from digital triggers through the Orca IO SmartHub. Software Triggering Motions initiated writing desired motion number KIN_SW_TRIG[MOTION_ID] field. This register will be set to 0x1000 initially and will return to 0x1000 after processing a software trigger request. Software triggers of motions with a number higher than 32 will be ignored. -
Page 41: Kinematic Status
01 = min. jerk The Type field is interpreted as a 2-bit number indicating motion type. The Auto-Start Next bit is 1 when the chain feature is enabled and 0 when it is disabled. Kinematic Status The KINEMATIC_STATUS registers is used to indicate the state of the kinematic controller to indicate the active motion ID and whether a motion is in progress or finished, KINEMATIC_STATUS Running Flag... -
Page 42: Haptic Controller
Haptic Controller Orca Series motors are equipped with a haptic controller that provides a series of force effects which can be combined to create force targets based on shaft position, speed, and acceleration, in addition to periodic force options. The sum of the haptic effects is sent as the force target to the force controller. - Page 43 Damper: The damper effect applies a force to reduce the speed of the motor’s ● movement. Gain (N·s/mm): Rate at which the force increases proportional to the speed of the motor. Inertia: The inertia effect applies a force that attempts to reduce the acceleration of ●...
-
Page 44: Configuring Effects
Configuring Effects Effects are individually configured through sets of registers shown in a table below. Note: the units for each effect configuration, as well as the scaling factors applied to each gain. Effect Parameter Register CONTANT_FORCE_MN Force (mN) Constant Force CONSTANT_FORCE_MN_H Filter Strength (0-10000) CONST_FORCE_FILTER Gain (64·N/mm) -
Page 45: User Configurations
User Configurations Some properties of the motor can be configured to suit the application. In all cases, this configuration is done by writing to various registers and, when satisfied, saving those settings to permanent memory by writing the CONTROL_REG_2 [usr_opt_save_flag]. Motor Performance Limits Parameter User Register... -
Page 46: Input And Output Filters
Input and Output Filters Input and output filters are available for both force and position values. These are infinite impulse response (IIR) filters. In this case 0 represents no filter and 9999 is maximum filtering. User Register Description Valid Range FORCE_FILT Filter on motor’s sensed force. -
Page 47: Errors
Kinematic (5) Errors The motor will generate error codes when a user setting, or a device limit is reached or exceeded. Depending on the error, certain features will not be available until the error is cleared. Some errors, like temperature and power, which trigger when a parameter exceeds a device maximum can be configured using motor registers to trigger earlier as the application requires. -
Page 48: Configuration Errors
Configuration Errors These errors indicate calibrations or settings have not been done or have been made invalid. These errors can be cleared by running the appropriate calibration routine, followed by committing the valid results to permanent memory. Force Clipping When the force controller is asked to play forces that would require a phase to exceed its rated current, the Force Clipping error is asserted. -
Page 49: Shaft Image Failed
Shaft Image Failed The shaft image is a calculation of the shaft’s alignment with the windings based on magnetic field measurements. If this image is detected to be invalid, the shaft might not be inserted, it might be an invalid shaft for the device, or the device may require calibration. This error is cleared by resolving the underlying issue and commanding the motor into Sleep Mode (1). -
Page 50: Appendix : Orca Memory Map
APPENDIX : Orca Memory Map All registers can be assumed to be unsigned 16 bit integers unless otherwise specified. Address Name Width Description CTRL_REG_0 Basic system functions. CTRL_REG_1 Reserved. CTRL_REG_2 Saving registers to permanent memory. CTRL_REG_3 Set mode of operation. CTRL_REG_4 Return to default. - Page 51 POS_CMD Commanded actuator position in micrometers. Lower 2 bytes. Upper and lower bytes combine create signed 32 bit integer. POS_CMD_H Commanded actuator position in micrometers. Upper 2 bytes. 32 - 132 Reserved PC_PGAIN Position controller proportional gain. PC_IGAIN Position controller integral gain. PC_DVGAIN Position controller velocity gain.
- Page 52 USER_MAX_FORCE_H User configurable maximum force output in millinewtons. Upper 2 bytes. USER_MAX_POWER User configurable maximum power burn in watts. SAFETY_DGAIN Speed damping gain value used when communications are interrupted. 144 - 149 Reserved PC_SOFTSTART_PERIOD Time in ms over which the position controller max force output will ramp from zero any time a mode of operation in which the position...
- Page 53 USR_MB_BAUD_LO Default Modbus baudrate low 16 bits. Leaving this register at 0 will use the system default of 19200 bps. Upper and lower bytes combine create unsigned 32 bit integer. USR_MB_BAUD_HI Default Modbus baudrate high 16 bits. Leaving this register at 0 will use the system default of 19200 bps.
- Page 54 AUTO_ZERO_EXIT_MODE Mode to enter after completing auto-zeroing. Reserved MB_FORCE_FILTER Input filter value for Modbus Force inputs. 0-9999 where 0 is no filtering. MB_POS_FILTER Input filter value for Modbus Position inputs. 0-9999 where 0 is no filtering. 177 - 262 Reserved UART0_UP_RATE Number of bytes transmitted in the last second by UART0.
- Page 55 270 - 271 Reserved MOTOR_FRAME_COUNT Number of complete motor frames in the last second. MB_FREQ Number of successful Modbus messages in the last second. 274 - 312 Reserved GUI_PERIOD Period between IrisControls GUI communications in milliseconds. 314 - 316 Reserved MODE_OF_OPERATION Active mode the actuator is currently running in.
- Page 56 339 - 341 Reserved SHAFT_POS_UM Shaft absolute position in micrometers. Lower 2 bytes. Upper and lower bytes combine create signed 32 bit integer. SHAFT_POSITION_H Shaft absolute position in micrometers. Upper 2 bytes. SHAFT_SPEED_MMPS Shaft speed in millimeters per second. Lower 2 bytes. Upper and lower bytes combine create signed 32 bit integer.
- Page 57 351 - 354 Reserved AVG_POWER Average sensed actuator output power in watts. COIL_TEMP Estimated coil temperature in degrees Celsius. 357 - 400 Reserved MAX_TEMP Absolute maximum motor temperature before over temperature error. MIN_VOLTAGE Minimum motor voltage in volts before invalid voltage error. MAX_VOLTAGE Maximum motor voltage in volts before invalid voltage error.
- Page 58 RELEASE_STATE Firmware minor version. REVISION_NUMBER Firmware revision number. COMMIT_ID_LO Firmware commit ID lower 2 bytes. COMMIT_ID_HI Firmware commit ID upper 2 bytes. Reserved HW_VERSION Target hardware version for this firmware. 415 - 416 Reserved COMMS_TIMEOUT Time between successful force or position commands before a communications error occurs.
- Page 59 MB_CNT0 Return bus message count. Refer to Modbus specification. MB_CNT1 Return bus communication error. Refer to Modbus specification. MB_CNT2 Return server exception error count. Refer to Modbus specification. MB_CNT3 Return server message count. Refer to Modbus specification. MB_CNT4 Return server no response count. Refer to Modbus specification.
- Page 60 MB_CNT13 Unexpected emission. MB_CNT14 Unexpected reception. 479 - 481 Reserved MB_BAUD Current Modbus serial baudrate. Lower 2 bytes. MB_BAUD_H Current Modbus serial baudrate. Upper 2 bytes. MB_IF_DELAY Current Modbus inter frame delay in microseconds. MB_ADDRESS Current Modbus server address. 486 - 495 Reserved MESSAGE_0_SIZE Size of last received Modbus...
- Page 61 S0_GAIN_N_MM Strength of spring force. S0_CENTER_UM Location of spring center, low 2 bytes Upper and lower bytes combine create signed 32 bit integer. S0_CENTER_UM_H Location of spring center, high 2 bytes. S0_COUPLING Coupling type, 0 (Both), 1 (Positive), 2 (Negative). S0_DEAD_ZONE_MM Zone from center where no spring effect exists.
- Page 62 S2_GAIN_N_MM Strength of spring force. S2_CENTER_UM Location of spring center, low 2 bytes. S2_CENTER_UM_H Location of spring center, high 2 bytes. S2_COUPLING Coupling type, 0 (Both), 1 (Positive), 2 (Negative). S2_DEAD_ZONE_MM Zone from center where no spring effect exists. S2_FORCE_SAT_N Maximum force that the spring can output.
- Page 63 O1_FREQ_DHZ Frequency of periodic effect. O1_DUTY Pulse width modulation of signal as a % of duty cycle max value. CONST_FORCE_FILTER Amount of filtering on constant force inputs. 0 - 9999 where 0 is no filter. HAPTIC_SOFTSTART Amount of time in milliseconds for force to ramp up upon enabling Haptic Mode.
- Page 64 ILOOP_FORCE_MAX Force that maps to 20 mA. Low 2 bytes. In millinewtons. Upper and lower bytes combine create signed 32 bit integer. ILOOP_FORCE_MAX_HI Force that maps to 20 mA. High 2 bytes. In millinewtons. ILOOP_POS_MIN Position that maps to 4 mA. Low 2 bytes.
- Page 65 ILOOP_D2_HIGH_ID Kinematic motion id value for rising edge digital 2. ILOOP_D2_LOW_ID Kinematic motion id value for falling edge digital 2. 777 - 779 Reserved 780 - 785 KIN_MOTION_0 786 - 791 KIN_MOTION_1 792 - 797 KIN_MOTION_2 798 - 803 KIN_MOTION_3 804 - 809 KIN_MOTION_4 810 - 815...
- Page 66 858 - 863 KIN_MOTION_13 864 - 869 KIN_MOTION_14 870 - 875 KIN_MOTION_15 876 - 881 KIN_MOTION_16 882 - 887 KIN_MOTION_17 888 - 893 KIN_MOTION_18 894 - 899 KIN_MOTION_19 900 - 905 KIN_MOTION_20 906 - 911 KIN_MOTION_21 912 - 917 KIN_MOTION_22 918 - 923 KIN_MOTION_23 924 - 929...
- Page 67 960 - 965 KIN_MOTION_30 966 - 971 KIN_MOTION_31 KIN_HOME_ID ID of kinematic motion triggered when Kinematic Mode enabled or when Home signal asserted from Analog interface.
Need help?
Do you have a question about the ORCA Series and is the answer not in the manual?
Questions and answers