
Related Manuals for SAINT-GOBAIN NORTON clipper CV 270 230V WD


Summary of Contents for SAINT-GOBAIN NORTON clipper CV 270 230V WD
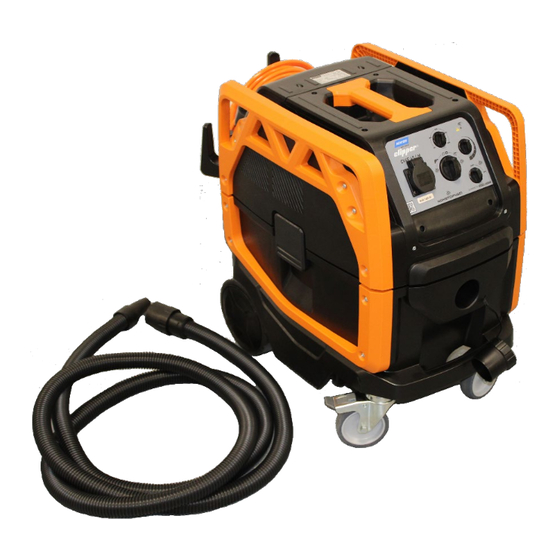
- Page 1 DUST EXTRACTOR CV 270 230V WD OPERATING INSTRUCTIONS Translation of the original instructions...
- Page 2 VERS. 2023.02.28 CV 270 230V WD_MAN_EN_V1...
- Page 3 Valid for machines as of serial number: 0000000000000 Storage site for the technical documents: Saint-Gobain Abrasives 190, Bd. J. F. Kennedy 4930 BASCHARAGE, LUXEMBOURG This declaration of conformity loses its validity when the product is converted or modified without agreement.
- Page 4 VERS. 2023.02.28 CV 270 230V WD_MAN_EN_V1...
-
Page 5: Table Of Contents
VERS. 2023.02.28 CV 270 230V WD_MAN_EN_V1 CV270 OPERATING INSTRUCTIONS TABLE OF CONTENTS 1 BASIC SAFETY ADVICE ......................6 1.1 INTRODUCTION ........................6 1.2 GENERAL WARNINGS ......................7 1.3 UNPACKING ..........................8 1.4 DISPOSING OF THE APPLIANCE ..................8 1.5 REFERENCE LEGISLATIONS ....................8 2 MACHINE PLATE ........................ -
Page 6: Basic Safety Advice
VERS. 2023.02.28 CV 270 230V WD_MAN_EN_V1 BASIC SAFETY ADVICE 1.1 INTRODUCTION The employer must inform, educate and train the user following what is prescribed by the • current laws. Before working with this machine, prepare and train by carefully reading this manual. Not •... -
Page 7: General Warnings
VERS. 2023.02.28 CV 270 230V WD_MAN_EN_V1 1.2 GENERAL WARNINGS Plastic bags, polystyrene, paper clips, etc. must not be left within the reach of children, as • these are potential sources of danger. Ensure that the voltage matches that indicated on the data plate before turning the appliance •... -
Page 8: Unpacking
VERS. 2023.02.28 CV 270 230V WD_MAN_EN_V1 1.3 UNPACKING After removing the package as indicated in the instructions shown on the package itself, check the integrity of the appliance and all components supplied. If any evident damage is noticed, con- tact the retailer or an authorized technical support center. 1.4 DISPOSING OF THE APPLIANCE Proceed in accordance with local legislation in order to protect the environment. -
Page 9: Machine Plate
VERS. 2023.02.28 CV 270 230V WD_MAN_EN_V1 2 MACHINE PLATE 1 Manufacturer 2 Model 3 Article 4 Container capacity 5 Vacuum 6 Air flow 7 Machine weight 8 Serial N° 9 Electrical characteristics... -
Page 10: Technical Data
VERS. 2023.02.28 CV 270 230V WD_MAN_EN_V1 3 TECHNICAL DATA CV270 Dust suction device ■ Liquid suction device ■ Voltage - Frequency 220 - 240 V~ 50/60 Hz Maximum power (suction) 1350 W Nominal power (suction) 1100 W Power load electrical socket 2400 W [1700 W (UK)] Total power Σ... -
Page 11: Type Of Use
VERS. 2023.02.28 CV 270 230V WD_MAN_EN_V1 4 TYPE OF USE This appliance has been designed to vacuum liquids or solids or both, according to the technical data table from the introduction to this manual. Uses different from those listed above are not allowed. Any use different from the one for which the appliance has been built represents an anomalous condition which could harm the appliance and constitute a serious hazard for the user. -
Page 12: Preparing The Appliance
VERS. 2023.02.28 CV 270 230V WD_MAN_EN_V1 5 PREPARING THE APPLIANCE Vacuum cleaner For appliances equipped with suitable accessories: Release the levers (1 Fig. A) and remove the entire head unit (2 Fig. B). • Check that the fleece filter bag (4 Fig. C) is inserted in the waste container (3 Fig. C). •... - Page 13 VERS. 2023.02.28 CV 270 230V WD_MAN_EN_V1 Insert the sleeve (7 Fig. D) of the suction hose into the nozzle (8 Fig. D) on the waste container. • • To release the sleeve (7 Fig. D), turn it slightly and pull it outwards. When the nozzle (8 Fig. D) is not in use, close it with the cap (9 Fig.
- Page 14 VERS. 2023.02.28 CV 270 230V WD_MAN_EN_V1 Join the two rigid extensions (12-13 Fig. G). • Attach the chosen accessory to the rigid extension (13 Fig. H) (suction nozzle, brush • attachment, crevice tool, etc., Fig. H). The suction force can be adjusted on the grip, by turning the handle (14 Fig. I). Rotate the handgrip over the little window (15 Fig.
- Page 15 VERS. 2023.02.28 CV 270 230V WD_MAN_EN_V1 The reduction sleeve can be installed on the flexible tube (10 Fig. E).
-
Page 16: Tools Connection
VERS. 2023.02.28 CV 270 230V WD_MAN_EN_V1 5.2 Tools connection Lift the cover (16 Fig. J) and connect the power tool plug to the outlet (17 Fig. J) present on the head of the vacuum cleaner [maximum power allowed 2400 W - 1700 W (UK)). -
Page 17: Liquid Suction
VERS. 2023.02.28 CV 270 230V WD_MAN_EN_V1 5.3 Liquid suction Risk of electric shock! In the event of foam or liquid leakage, switch off the apparatus immediately. Empty the recovery tank and clean the filters as described in the relevant paragraphs. Clean the water level sensors regularly and check the state of wear as described in the relevant paragraph. - Page 18 VERS. 2023.02.28 CV 270 230V WD_MAN_EN_V1 Insert the sleeve (7 Fig. D) of the suction hose into the nozzle (8 Fig. D) on the waste container. • To release the sleeve (7 Fig. D), turn it slightly and pull it outwards. Connect the ergonomic handle by screw- ing it on (11 Fig.
- Page 19 VERS. 2023.02.28 CV 270 230V WD_MAN_EN_V1 Join the two rigid extensions (12-13 Fig.G). • Attach the chosen accessory to the rigid extension (13 Fig. H) (suction nozzle, floor tool, etc. • Fig. H).
-
Page 20: Use Of The Appliance
VERS. 2023.02.28 CV 270 230V WD_MAN_EN_V1 6 USE OF THE APPLIANCE To block the device, use the brake control (25 Fig. M) on the castor wheels. 6.1 Starting the appliance as a dust suction or liquid suction device Insert the main plug (26 Fig. N) into the electrical socket. - Page 21 VERS. 2023.02.28 CV 270 230V WD_MAN_EN_V1 6.1.1 Main power switch (27 Fig. O) Turned to “ ”: The socket for the electrical tool (17 Fig. J) is undercurrent and the suction • unit is switched off. Turned to “ ”: The suction unit is always started. •...
- Page 22 VERS. 2023.02.28 CV 270 230V WD_MAN_EN_V1 6.1.2 “NONSTOPVAC!” filter cleaning switch (28 Fig. O) The machine features a filter cleaning sys- tem called “NONSTOPVAC!”. When started, an automated cleaning cycle is run when operating to ensure the best suction and filtering performance. When turned to “ON”...
- Page 23 VERS. 2023.02.28 CV 270 230V WD_MAN_EN_V1 6.1.4 Suction tube diameter switch (30 Fig. O) To ensure the correct air suction speed, turn the switch to the same value as the diameter of the flexible tube used. When the bag or the waste container is full, there is an increase in noise and the appliance no longer sucks.
-
Page 24: Switching Off The Appliance
VERS. 2023.02.28 CV 270 230V WD_MAN_EN_V1 6.2 Switching off the appliance Turn the main power switch (27 Fig. O) to “ ” to switch the device off. • • (If used) disconnect the plug of the electrical tool socket (17 Fig. J). •... - Page 25 VERS. 2023.02.28 CV 270 230V WD_MAN_EN_V1 Roll up the cable (33 Fig. P) and store it on the hook (34 Fig. P). • • Dismantle the accessories (extensions, brushes, etc.) and store them in the special slots on the rear side as shown in Fig. P.
-
Page 26: Cleaning And Maintenance
VERS. 2023.02.28 CV 270 230V WD_MAN_EN_V1 7 CLEANING AND MAINTENANCE Before performing any maintenance operation, unplug the appliance from the electrical socket. These operations can be performed, in accordance with the current laws, only by specialized and trained personnel, while wearing the necessary safety clothing. In any case, always refer to the current national standards and laws. -
Page 27: Waste Container Emptying
VERS. 2023.02.28 CV 270 230V WD_MAN_EN_V1 7.2 Waste container emptying Release the levers (1 Fig. A) and remove the entire head unit (2 Fig. B). • Place the vacuum cleaner over a drain and then lift the waste container (3 Fig. Q) using the •... -
Page 28: Daily Cleaning
VERS. 2023.02.28 CV 270 230V WD_MAN_EN_V1 7.3 Daily cleaning 7.3.1 Main filter checking and clean Raise the rear door (36 Fig. R) using the lever. • Remove the main filter (37 Fig. R). • Clean the filter (37 Fig. R) with a jet of air from the inside outwards; the filter can be washed •... -
Page 29: Periodic Checks
VERS. 2023.02.28 CV 270 230V WD_MAN_EN_V1 7.4 Periodic checks 7.4.1 Water level sensors cleaning Release the levers (1 Fig. A) and remove the entire head unit (2 Fig. B). • Turn the entire head unit upside down. • Clean the water level sensors (41 Fig. S) and check the state of wear. •... - Page 30 VERS. 2023.02.28 CV 270 230V WD_MAN_EN_V1 7.4.2 Vacuum motor filter checking and clean • Release the two catches (42 Fig. T) and remove the cover (43 Fig. T). • Remove the sponge filter (44 Fig. T) • Clean the sponge with a jet of air (45 Fig. T). •...
-
Page 31: Faults: Causes And Cures
VERS. 2023.02.28 CV 270 230V WD_MAN_EN_V1 8 FAULTS: CAUSES AND CURES 8.1 Troubleshooting PROBLEM CAUSE SOLUTION Insert the plug into the electrical Plug not inserted. The suction motor does not socket. start and does not work. No current. Check the power supply line. The filter “... -
Page 32: Customer Service
Spare parts for the motor can be ordered with the manufacturer of the motor or with their dealer, which is often quicker and cheaper. This machine has been manufactured by: Saint-Gobain Abrasives S.A. 190, Bd. J. F. Kennedy L- 4930 BASCHARAGE Grand-duché... -
Page 33: Spare Parts
VERS. 2023.02.28 CV 270 230V WD_MAN_EN_V1 8.3 Spare parts In order to consult the spare parts lists, we invite you to visit the after-sales website of Norton Clipper by using the following address: https://spareparts.nortonabrasives.com For a quick access, you can also use the QR Code shown below using your mobile phone: This electronic catalogue provides exploded views and spare parts lists for different machines designed by Norton Clipper so you can find references you need. - Page 34 VERS. 2023.02.28 CV 270 230V WD_MAN_EN_V1...
- Page 35 VERS. 2023.02.28 CV 270 230V WD_MAN_EN_V1...
- Page 36 SAINT-GOBAIN ABRASIVES GMBH FAX: +47 63 87 06 01 168 66 BROMMA • SVERIGE SWEDEN BIRKENSTRASSE 45-49 SAINT-GOBAIN HPM POLSKA SP. Z O.O. D-50389 WESSELING TEL: +46 8 580 881 00 UL. NORTON 1, 62-600 KOŁO FAX: +46 8 580 881 30 GERMANY 62-600 KOŁO...
Need help?
Do you have a question about the NORTON clipper CV 270 230V WD and is the answer not in the manual?
Questions and answers