Advertisement
Quick Links
Advertisement

Subscribe to Our Youtube Channel
Summary of Contents for Otto BOX-1 WF319086AAA
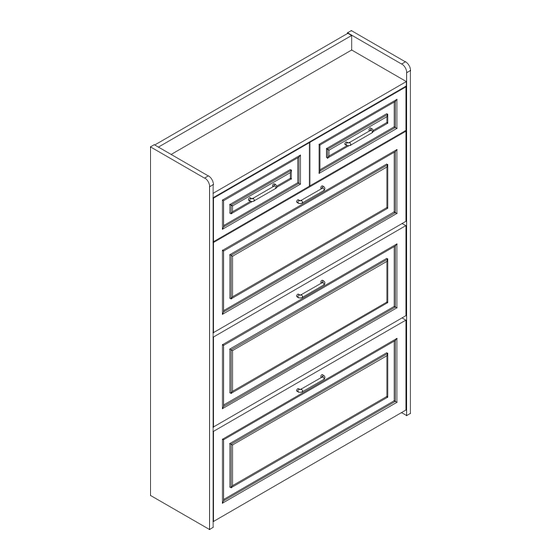
- Page 1 BOX-1 WF319086AAA BOX-2 WF319087AAA Tool Required Not Provided 2PERS 55 MIN...
- Page 2 Dear customer, Thank you for purchasing this product. So that your appliance serves you well, please read all the instructions in this user's manual. If you have any questions, please contact our customer care center. Cher client, Nous vous remercions d'avoir achete ce produit. Afin que vous puissiez profiter pleinement de votre appareil, veuillez lire toutes les instructions de ce manuel d'utilisation.
- Page 3 WARNING Serious or fatal injury may occur from unexpected assembly or use. 1. During the assembly process, keep all parts away from babies or children. 2. Always securely fix this product to the wall. Make sure the wall area to be drilled is free from hidden electrical wires, water and gas pipes.
- Page 4 ADVERTENCIANCIA Puede producirse lesiones graves o fatales debido a un montaje o uso inesperado. 1.Durante el proceso de montaje, mantenga todas las piezas alejadas de bebés o niños. 2.Siempre fije este producto de forma segura a la pared. Asegúrese de que el área de la pared donde se realizará...
- Page 5 -芷豆五一 , 上 EN_QUICKFIT : T ighten quickfit until shoulder is flush with panel.Do not overtighten or undertighten. FR_RACCORD RAPIDE:Faites serrer le raccord rapide jusqu'a ce que l'epaulement soit parfaitement encastre dans le panneau. II ne faut ni trop serrer ni insuffisamment serrer. ES_QUICKFIT:Apriete quickfit hasta que el hombre se descargue con el panel.
- Page 7 WF319086AAA WF319087AAA...
- Page 8 WF319086AAA WF319087AAA...
- Page 9 ⑲ ① ⑫ ③ ④ ⑤ ⑫ ⑤ ⑮ ⑭ ⑨ ⑯ ⑥ ⑫ ② ⑬ ⑮ ⑭ ⑫ ⑯ ⑦ ⑬ ⑩ ⑱ ⑱ ⑱ ⑧ ⑧ ⑧ ⑰ ⑰ ⑰...
- Page 10 Ø15*11.5 43PCS Ø6*40 43PCS Ø8*40 8PCS M3.5*14 48PCS M3.5*35 8PCS 5PCS 2PCS 2PCS 2PCS L=200mm 4PCS 10PCS M4*12 4PCS M3.5*16 18PCS 12PCS 6PCS 6PCS 3PCS 3PCS 2PCS 6PCS...
- Page 11 Schritt 1 Step 1 ① ⑲ × √ Schritt 2 Step 2 ⑲ ①...
- Page 12 Schritt 3 Step 3 ④ Put hardware A into the hole first ④ Stecken Sie zuerst Hardware A in das Loch × C X 4PCS √ E1 X 2PCS Schritt4 Step 4 ⑤ ⑤...
- Page 13 Schritt 5 Step 5 ① ④ Schritt 6 Step 6 ① ④ ⑤ ⑤...
- Page 14 Schritt 7 Step 7 ③ Schritt 8 Step 8 ⑤ ⑤ ⑨ ⑩ ⑪ ③...
- Page 15 Schritt 9 Step 9 ⑫ ⑫ ⑫ ⑫ Px2pcs Schritt 10 Step 10 x14pcs Cx2pcs Lx3pcs x1pcs Mx3pcs...
- Page 16 Schritt 11 Step 11 ② ⑲ ⑫ ⑫ ⑨ ⑩ Schritt 12 Step 12 a=b √...
- Page 17 Schritt 13 Step 13 I I I ⑧ Ix18PCS x3PCS x3PCS x6PCS x3PCS Schritt 14 Step 14 ⑱ ⑰ ⑧...
- Page 18 Schritt 15 Step 15 ① ⑧ ② ⑧ ⑧ Ox6PCS Fx6PCS...
- Page 19 Schritt 16 Step 16 ①...
- Page 20 Schritt 17 Step 17 ⑦ ⑥ Schritt 18 Step 18 ⑬ Put hardware A into the hole first Stecken Sie zuerst Hardware A in das Loch ⑭...
- Page 21 Schritt 19 Step 19 ⑬ ⑥ ⑭ ⑬ ⑯ ⑭ Schritt 20 Step 20 ⑬ ⑦ ⑭ ⑯ ⑬ ⑭...
- Page 22 Schritt 21 Step 21 ⑮ ⑬ ⑭ Dx4pcs Schritt 22 Step 22 ⑮ ⑬ ⑭ Dx4pcs...
- Page 23 Schritt 23 Step 23 ⑦ ⑥ ⑦ ⑥ x4PCS x2PCS...
- Page 24 Schritt 24 Step 24 x2pcs x2pcs x2pcs wall x2pcs...


Need help?
Do you have a question about the BOX-1 WF319086AAA and is the answer not in the manual?
Questions and answers