Table of Contents
Advertisement
Available languages
Available languages
Quick Links
Advertisement
Table of Contents

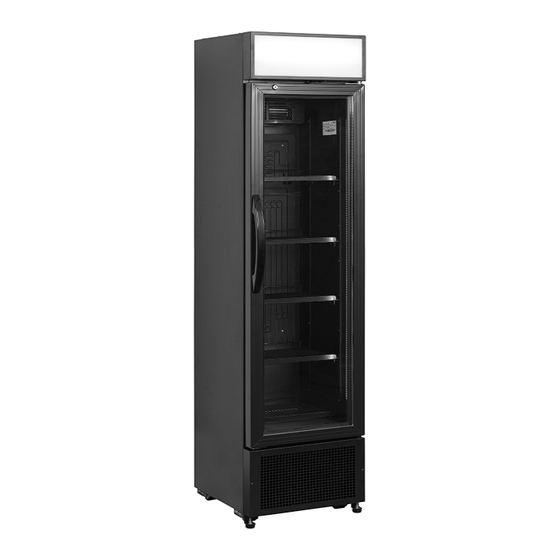
Related Manuals for Nordcap 435701175


Summary of Contents for Nordcap 435701175
- Page 1 Bedienungsanweisung Gewerbekühlschrank KU 175 G-SP Black [Art. 435701175] 2017-11...
-
Page 2: Auspackung Und Aufstellung
Wichtige Informationen: Die in diesem Dokument beschriebenen Kühler sind ausschließlich zur Aufbewahrung und Kühlung von Getränken in Flaschen oder Dosen vorgesehen. Lesen Sie diese Bedienungsanleitung durch, um den vollen Nutzen vom Schrank zu erzielen. Der Braucher ist für die vorschriftsgemäße Anwendung vom Schrank verantwortlich. ... - Page 3 Anschließen Der Schrank ist für den Anschluß an 220-240 V/50 Hz vorgesehen. Der Anschluß muss durch eine Steckdose gemacht werden, die leicht zugängig sein soll. Dieser Kühlmöbel muß gesetsmäßig extra geschützt werden. Dies gilt auch bei der Auswechslung eines existierenden Kühlmöbels, der nicht extra geschützt ist. In jedem Fall ist ein Drei-Punkte-Stecker zu verwenden, und das Kabel mit grüner/gelber Isolierung muß...
- Page 4 Thermostat (Siehe auch Seite 137) Der Thermostat ist auf einer Skala von 1-7 einstellbar, was ungefähr 2-12 ºC entspricht. Eine Einstellung von 3-4 wird in den meisten Fällen optimal sein. Das Kühlsystem kann durch die Einstellung auf null abgeschaltet werden. Der Thermostat kann je nach Modell wie folgt platziert sein: 1.
- Page 5 Abtauen Der Schrank taut automatisch ab. Das Tauwasser wird in einen Behälter im Kompressorraum zur Verdampfung geleitet. Schloß Die Schränke mit Drehtür sind mit einem Schloß versehen, das oben im Türrahmen platziert ist. Licht In den Schränken mit Licht kann der Lichtschalter wie folgt platziert sein: 1.
-
Page 6: Auswechslung Vom Licht
Auswechslung vom Licht Achtung! Vor der Auswechslung von Lichtquellen ist die Stromversorgung zum Schrank immer abzubrechen Innenlicht: Neon: Die Abdeckung abmontieren und die Röhre durch ein entsprechendes Typ ersetzen. LED: Das LED-Innenlicht ist durch ein entsprechendes Typ zu ersetzten. Kontaktieren Sie Ihren lokalen Lieferanten für originale Ersatzteile. -
Page 7: Wechsel Vom Türanschlag
Wechsel vom Türanschlag Gewisse Modelle haben wechselbare Türanschläge. Folgen Sie den untigen Anweisungen, um den Türanschlag von rechts auf links zu wechseln und umgekehrt. 1. Das Bodenpaneel abmontieren. 2. Bodenscharnier und Stützbeschlag 3. Toppaneel abmontieren. abmontieren. 4. Die Tür heben und etwa 10 cm nach 5. - Page 8 Wandbeschlag Gewisse Modelle sind für Montage an der Wand vorgesehen. Sehen Sie unten. Max. Belastung: FS60CP 20 kg. FS80CP 30 kg. FSC100 30 kg. Bohren Sie zwei Löcher mit einem Durchmesser von 8 mm und einer Tiefe von 40 mm, mit dem angegebenen Abstand A. Setzen Sie 8 mm Dübel ein.
-
Page 9: Wartung
Wartung Der Schrank hat ein geschlossenes Kühlsystem, das normalerweise keine Wartung fordert. ACHTUNG! Vor Reinigung immer die Stromversorgung zum Schrank abbrechen! Wir empfehlen, den Kondensator 2 bis 4 Mal im Jahr zu reinigen, um den Energieverbrauch zu reduzieren und die Lebenszeit der technischen Teile zu verlängern. Dies lässt sich am besten mit einem Staubsauger mit Bürste-Mundstück machen. - Page 10 Service Bei Versagen im Kühlsystem, prüfen Sie zunächst, ob es an der Stromversorgung liegt. Wenn der Grund nicht gefunden werden kann, müssen Sie Ihren Lieferanten kontaktieren. Dabei immer Typnamen und Seriennummer vom Schrank mitteilen. Diese Informationen befinden sich auf dem Typenschild, das sich im Schrank oben rechts befindet. Verwenden Sie immer autorisierten Kundendienst und originale Ersatzteile.
-
Page 11: Important Instructions
Important Instructions: The appliances mentioned in this document are only intended for preservation and cooling of beverages in bottles and cans. Read the manual In order to obtain full benefit of the appliance. It is the user’s responsibility to utilize the appliance according to the instructions. ... -
Page 12: Electrical Connections
Electrical Connections The appliance is intended for 220-240 V/50 Hz. The connection should be effected to an accessible socket. This appliance should have extra protection according to the power regulations. This is also the case when replacing an existing appliance which does not have the extra protection. Always use a 3 pin plug. - Page 13 Thermostat (Also see page 137) The thermostat setting has a scale 1-7, corresponding to approx. 2-12 ºC. In most cases a setting of 3-4 will be optimum. The cooling system can be switches off at 0. Depending on model the thermostat can be placed as follows: 1.
-
Page 14: Internal Light
Defrosting The appliance has automatic defrost. Discharge water is led to evaporation in a drip tray placed in the compressor compartment. Lock The appliance with hinged door has a lock. The lock is placed at the top of the door. Internal Light Appliance with internal light has a light switch. -
Page 15: Replacing The Light
Replacing the Light REMEMBER to switch off the power before replacing the light! Internal Light: The internal fluorescent light is replaced by demounting the light cover. Replace the tube with an equivalent type. The internal LED light should be replaced by an equivalent type. Contact your local supplier for original spare parts. -
Page 16: Door Reversal
Door Reversal Some models have reversible doors. Follow the below mentioned instructions for door reversal from right to left and vice versa. This operation is easily done by carefully lying down the cabinet at its back or on a sack truck. 1. -
Page 17: Wall Fitting
Wall Fitting Some models are prepared for wall fitting. See below. Max. Load: FS60CP 20 kgs. FS80CP 30 kgs. FSC100 30 kgs. Drill 2 holes with a diameter of 8 mm and a depth of 40 mm and a distance as shown on the drawing (A). Insert 8 mm plugs. -
Page 18: Maintenance
Maintenance The appliance has a closed cooling system, which normally does not require any maintenance. REMEMBER to switch off the power before cleaning the appliance! However, it is recommended to clean the condenser 2-4 times a year by means of a brush or a vacuum cleaner. - Page 19 Service In case of no cooling check failure in the power supply. In case you are unable to find any failure, please contact your dealer. You need to inform your dealer of the model number and serial number stated on the rating label normally placed inside on the right side of the cabinet.
- Page 21 CODE: A1304000128...
- Page 22 999-211117, rfj...
- Page 23 Großmoorbogen 5 Hermann-Bopp-Straße 4 Tel.+49 421 48557-0 Tel.+49 30 936684-0 Tel.+49 211 540054-0 Tel.+49 40 766183-0 Tel.+49 6132 7101-0 Fax+49 421 488650 Fax+49 30 936684-44 Fax+49 211 540054-54 Fax+49 40 770799 Fax+49 6132 7101-20 www.nordcap.de bremen@nordcap.de berlin@nordcap.de erkrath@nordcap.de hamburg@nordcap.de ingelheim@nordcap.de...
Need help?
Do you have a question about the 435701175 and is the answer not in the manual?
Questions and answers