Table of Contents
Advertisement
Quick Links
Advertisement
Table of Contents

Subscribe to Our Youtube Channel
Related Manuals for THOMSON TM9245


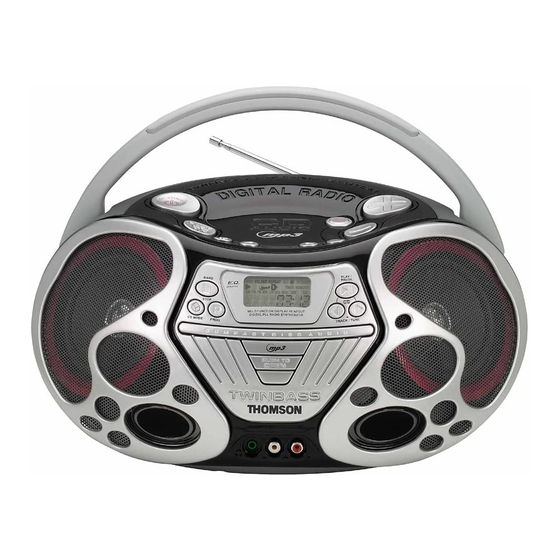
Summary of Contents for THOMSON TM9245
-
Page 2: Safety Information
Safety Information For UK Only If the colours of the wires in the mains lead of this apparatus may not correspond with the CONNECT THE MAIN LEAD INTO A MAINS coloured markings identifying the terminals in POWER SOCKET your plug, proceed as follows: POWER SUPPLY 230V. - Page 3 ALERTING YOU OF I M P O R T A N T S I D E . R E F E R S E R V I C I N G " D A N G E R O U S...
-
Page 4: Important Information
• Keep your unit away from humid areas and 5 cm abnormally hot places. • Do not touch the player with wet hands. If any liquid enters the player cabinet, take the player to a trained technician for • The ventilation should not be impeded by inspection. -
Page 5: Table Of Contents
Battery Power ..........3 Maintenance ........14 Important Battery Information ....3 Cleaning the Exterior ........14 What’s so special about this audio CD / mp3 Handling CDs ..........14 disc player? ............4 Cleaning CDs ..........14 CD Lens Care ..........14 General Controls ........ -
Page 6: Before You Begin
Plug the power supply cord into the AC power • Never leave the tray open as dust could jack on the back of the unit, and into an AC cover the laser lens and/or the tray could be power supply outlet that accepts the plug bumped into accidentally. -
Page 7: Battery Power
- if disposed of in fire, or • Before inserting the batteries, observe the - if an attempt is made to charge a battery polarities (that is, + and -) of the battery, not intended to be recharged... -
Page 8: What's So Special About This Audio Cd / Mp3 Disc Player
CD-ROM. You may download MusicMatch Jukebox You can store up to 12 hours of music on a single (www.musicmatch.com), and follow the disc (at 128kbps). installation and operation instructions in order to enjoy mp3 playback. -
Page 9: General Controls
In Radio mode - selects the next radio preset location. CD MODE - In CD / mp3 / WMA mode - selects among repeat current track, repeat current VOLUME + / - - Increases or decreases volume. -
Page 10: Display
/ WMA playback. track information. - Random playback. In Radio mode, displays radio frequency. STEREO - Stereo reception in FM tuner mode. AUX - The unit is in AUX mode. - In CD playback mode. II - In CD pause mode. -
Page 11: Sound Features
Volume Control Press BASS BOOST to turn the digital bass boost Press VOLUME + and - to adjust the volume to system on and off. the desired listening level. The volume level shows on the display briefly. Preset Equalizer Curves... -
Page 12: Tuning To A Station
2. Press FOLDER repeatedly to access the desired preset stations. Setting Preset Stations Manually 1. In radio mode, press STOP / BAND to select radio band. 2. Press TRACK/TUNE to select the station to be saved as a preset station. -
Page 13: Mp3 And Cd Player
Loading Disc II icon is displayed in pause mode. 1. Press the CD OPEN button to slide disc tray out. 2. Place a disc on the disc tray with the label Skip and Search side facing up. 1. Press TRACK/TUNE to skip to the 3. -
Page 14: Id3 (Mp3 Cd Only)
2. Press FOLDER to play the first track in If the current track has ID3 tag, the title, artist the previous folder. and album name scrolls across the display. 3. Press TRACK/TUNE to go back to the If the current track does not have ID3, “NO TAG”... -
Page 15: Creating A Program
Note: Note: Note: Note: For normal audio CDs: The unit remains in program 1. In CD stop mode, press PROG. to enter mode once programming program mode. track is done. The MEMORY icon shows on the display. 2. Press TRACK/TUNE to select the track to be stored. -
Page 16: Aux
Connect one end of the RCA cable (not included) to the AUX IN L / R connector on the main unit and the other end to the AUX Out connector on an external source. Make sure the colours of the cables match the connectors. -
Page 17: Troubleshooting Tips
• Make sure the files are in MPEG 1/2 layer 3 format. ESD Remark: In case of misfunction due to electrostatic discharge just reset the product (disconnect and reconnect of the power source may be required) to resume normal operation. -
Page 18: Maintenance
The descriptions and characteristics in this owner’s manual are for the purpose of general reference only and not as a guarantee. In order to provide you with the highest quality product, we may make changes or modifications without prior notice.
Need help?
Do you have a question about the TM9245 and is the answer not in the manual?
Questions and answers