Table of Contents
Advertisement
Advertisement
Table of Contents

Related Manuals for THOMSON SPEEDTOUCH 330


Summary of Contents for THOMSON SPEEDTOUCH 330
- Page 1 SpeedTouch™ USB/330 ADSL USB Modem Installation and User’s Guide SERIES...
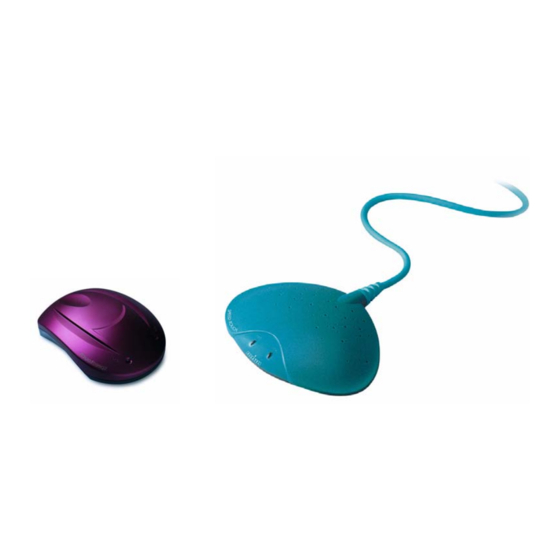
- Page 3 SpeedTouch™ USB/330 Installation and User’s Guide RFC1483 Bridged 3EC 36716 BAAA TCZZA Ed. 01...
- Page 4 THOMSON multimedia. The content of this document is furnished for informational use only, may be subject to change without notice, and should not be construed as a commit- ment by THOMSON multimedia. THOMSON multimedia assumes no responsibility or liability for any errors or inaccuracies that may appear in this document.
-
Page 5: Table Of Contents
Contents 1 SpeedTouch™ Introduction .......... 3 2 Get Acquainted to the SpeedTouch™......5 2.1. First Steps ......................6 2.2. What You Need ....................7 2.3. SpeedTouch™ Support ..................8 3 SpeedTouch™ for Microsoft Windows ......9 3.1. Installing the SpeedTouch™ ................10 3.2. - Page 6 5 Troubleshooting ............27 3EC 36716 BAAA TCZZA Ed. 01...
-
Page 7: Speedtouch™ Introduction
With the Award-winning SpeedTouch™ Asymmetric Digital Subscriber Line (ADSL) modem surfing the Internet will become a whole new experience. With download speeds up to 8 Megabits per second (Mbps), your SpeedTouch™ is the ideal solution for exploring the Internet, high-speed interactive gaming and enjoying online audio and video streaming. - Page 8 1 SpeedTouch™ Introduction Service Provider For readability, the term Service Provider (SP) will be used to designate all organizations which provide either DSL connectivity, Internet access or Corporate access, for example an Internet Service Provider (ISP). SpeedTouch™ Due to the continuous evolution of ADSL technology, existing products are regularly documentation and upgraded.
-
Page 9: Get Acquainted To The Speedtouch
2 Get Acquainted to the SpeedTouch™ 2 Get Acquainted to the SpeedTouch™ Introduction This chapter will assist you in getting acquainted with the SpeedTouch™ and will guide you through the first steps in preparing the SpeedTouch™ for Internet connectivity. In this chapter... -
Page 10: First Steps
The input/output wiring is moulded in an ergonomically designed pigtail. On the rear end of the pigtail you find the USB connector. That's the interface which connects the SpeedTouch™ to your Personal Computer (PC). The ADSL Line port is situated in the inline receptacle. -
Page 11: What You Need
USB devices. You may also use an USB hub to connect the SpeedTouch™. Note: Make sure you are not using low-powered USB ports to connect the Speed- Touch™. In case you are not sure of the type of USB port, see the User's Guide of your PC or USB port hub. -
Page 12: Speedtouch™ Support
These upgrades are regularly updated and can be found at: • http://www.speedtouch.com Procedure Step Action Download the newest web upgrade from the Internet to a location on your local PC or computer. Browse to the location where the web upgrade resides. Double-click it. Follow all instructions. Installation procedure When performing a web upgrade of the SpeedTouch™... -
Page 13: Speedtouch™ For Microsoft Windows
3 SpeedTouch™ for Microsoft Windows 3 SpeedTouch™ for Microsoft Windows Introduction This chapter describes how to install and use the STUSB for Microsoft Windows OSs. In this chapter Topic Page 3.1. Installing the SpeedTouch™ 3.2. Using the SpeedTouch™ 3.2.1. Bridging Connections 3.2.2. -
Page 14: Installing The Speedtouch
3 SpeedTouch™ for Microsoft Windows 3.1. Installing the SpeedTouch™ Introduction This section will assist you in installing the STUSB and preparing your PC for your Internet connectivity. • Microsoft Windows One of the following OSs must be readily installed on your PC: •... - Page 15 The SpeedTouch Setup wizard (application) will start automatically. Note: In case the SpeedTouch Setup wizard (application) does not start auto- matically, open a 'Run' window via Start > Run from the Start menu and enter following path: D:\Setup.exe, where D stands for the drive letter of your CD-rom drive.
- Page 16 Step Action The 'Software License Agreement for SpeedTouch™' window pops up: Click Yes to accept the terms of the agreement and to continue the installa- tion. The following window allows you to choose a destination folder for the STUSB driver software: In most cases the proposed destination is best suited for the STUSB driver software.
- Page 17 The 'Select Program Folder' window pops up: Click Next to proceed. The wizard copies STUSB driver software to your local disk: Note for Windows ME/2000/XP user only: If a 'Digital Signature' window pops up, click Yes to continue. 3EC 36716 BAAA TCZZA Ed. 01...
- Page 18 Click Finish to close the wizard. Plug the ADSL cable, provided in your package, into the inline receptacle of the STUSB. Plug the other end of the ADSL cable into the wall socket termi- nating ADSL service. Note: Depending onto which pins of the wall socket the ADSL signals are assigned, it might be necessary to plug in an RJ11 interchanger into the wall socket prior to connect the ADSL cable.
- Page 19 The Windows 'Found new Hardware' wizard pops up. This wizard will guide you through the installation procedure. Follow all the instructions. In most cases you only have to click Next to proceed with the installation procedure. At some point the STUSB Installation CD-Rom will be requested. At this point the SpeedTouch Setup wizard (application) will continue with the instal- lation of the STUSB software and applications.
-
Page 20: Using The Speedtouch
3 SpeedTouch™ for Microsoft Windows 3.2. Using the SpeedTouch™ STUSB status icon As soon your STUSB is installed, a STUSB status icon is shown at your desktop's system tray. STUSB status icon The STUSB status icon is colored, depending on the state of the STUSB device. If you... -
Page 21: Bridging Connections
For Bridging connections no connection procedure is needed. The STUSB functions as a network adapter providing instant and continuous connectivity to the Internet. Although not required for making a physical connection to your Service Provider, it may still ask for your credentials (user name and password) for accessing his resources and the Internet. -
Page 22: Bridged Pppoe Connections
3.2.2. Bridged PPPoE Connections PPPoE session client To use your STUSB for Bridged PPPoE, you will need a PPPoE session client application, readily installed on your PC. This application will build connection icons for easy connectivity to your Service Provider. -
Page 23: Speedtouch™ For Mac Os
4 SpeedTouch™ for Mac OS 4 SpeedTouch™ for Mac OS Introduction This chapter describes how to install and use the SpeedTouch™ for Mac OSs. In this chapter Topic Page 4.1. Installing the SpeedTouch™ 4.2. Using the SpeedTouch™ 4.2.1. Bridging Connections 4.2.2. -
Page 24: Installing The Speedtouch
4 SpeedTouch™ for Mac OS 4.1. Installing the SpeedTouch™ Introduction This section will assist you in installing the SpeedTouch™ and preparing your computer for your Internet connectivity. • Mac OS One of the following OSs must be readily installed on your computer: •... - Page 25 ADSL cable. Plug the SpeedTouch™'s USB connector into the computer's USB port. An USB port can be easily located, it is marked with the typical USB symbol: A dialog box appears to announce that the installer has finished installation: As no further installation is required for the SpeedTouch™, click Quit to leave...
- Page 26 After you have correctly followed the SpeedTouch™ installation procedure, the following applications and icons are added to your system: • Control strip SpeedTouch USB status icon: An SpeedTouch™ status icon is added to the control strip, allowing instant status information of the SpeedTouch™. • SpeedTouch USB Diagnostics application: A SpeedTouch™...
-
Page 27: Using The Speedtouch
Note: In case the control strip is not visible, you must activate it via the Apple menu > Control Panels > Control Strip. In case the SpeedTouch™ status icon is not visible, you can drag the control strip to enlarge it. -
Page 28: Bridging Connections
Internet. Although not required for making a physical connection to your Service Provider, it may still ask for your credentials (user name and password) for accessing his resources and the Internet. -
Page 29: Bridged Pppoe Connections
This application will build connection icons for easy connectivity to your Service Provider. If your Service Provider requires you to use Bridged PPPoE, it should provide you with the PPPoE session client application. If they did not do so, contact your Service Provider for more information. - Page 30 4 SpeedTouch™ for Mac OS 3EC 36716 BAAA TCZZA Ed. 01...
-
Page 31: Troubleshooting
STUSB LEDs Your STUSB is equipped with two Bi-colored LEDs . These indicators indicate the status of the STUSB. Checking the STUSB status may be a first step in isolating the problem. Start-up phases At startup, the STUSB passes three phases:... - Page 32 5 Troubleshooting Both LEDs stay green. When an ATM cell is processed in a channel, the associated LED will go off for a short time. USB bus congestion The USB LED flashes red during a session in case of USB bus congestion.
Need help?
Do you have a question about the SPEEDTOUCH 330 and is the answer not in the manual?
Questions and answers