Advertisement
- 1 INTRODUCTION
-
2
OPERATING AND MAINTENANCE INSTRUCTIONS
- 2.1 Transport of equipment containing flammable refrigerants
- 2.2 Marking of equipment using signs
- 2.3 Storage of equipment/appliances
- 2.4 Storage of packed (unsold) equipment
- 2.5 Information on servicing
- 2.6 Repairs to sealed components
- 2.7 Repair to intrinsically safe components
- 2.8 Cabling
- 2.9 Detection of flammable refrigerants
- 2.10 Leak detection methods
- 2.11 Removal and evacuation
- 2.12 Charging procedures
- 2.13 Decommissioning
- 2.14 Labelling
- 2.15 Recovery
- 3 PRECAUTIONS AND INFORMATION
- 4 HUMIDITY CONCEPTS
- 5 PRODUCT DESCRIPTION
- 6 CONTROL PANEL
- 7 SPECIAL FUNCTIONS
- 8 CONDENSATE DISCHARGE
- 9 POSITIONING TIPS
- 10 BASIC MAINTENANCE
- 11 IN CASE THE DEHUMIDIFIER MALFUNCTIONS
- 12 PRODUCT TECHNICAL SHEET
- 13 SAFETY RULES
- 14 Documents / Resources
INTRODUCTION
This booklet contains some suggestions and precautions for operating the appliance correctly and performing maintenance, so that you can fully appreciate its features.
Store this booklet in a safe place for further reference.
Our nearest technical assistance centre remains at your disposal for any need you may have.
Despite the utmost care taken in publishing this booklet, some errors may nonetheless have been overlooked by our proof-reading department.
We therefore kindly ask you to report to us any mistakes you may notice, in order to help us improve our service.
OPERATING AND MAINTENANCE INSTRUCTIONS

Please carefully read the instructions provided in this manual before using the air conditioning unit

This appliance contains refrigerant gas R290

(for using R290/R32 refrigerant only)
- Do not use means to accelerate the defrosting process or to clean, other than those recommended by the manufacturer.
- The appliance shall be stored in a room without continuously operating ignition sources (for example: open flames, an operating gas appliance or an operating electric heater).
- Do not pierce or burn.
- Be aware that the refrigerants may not contain an odour.
- Appliance should be installed, operated and stored in a room with a floor area larger than 4 m2.
- Compliance with national gas regulations shall be observed.
- Keep ventilation openings clear of obstruction.
The appliance shall be stored so as to prevent mechanical damage from occurring. - A warning that the appliance shall be stored in a well-ventilated area where the room size corresponds to the room area as specified for operation.
- Any person who is involved with working on or breaking into a refrigerant circuit should hold a current valid certificate from an industry-accredited assessment authority, which authorises their competence to handle refrigerants safely in accordance with an industry recognised assessment specification.
- Servicing shall only be performed as recommended by the equipment manufacturer. Maintenance and repair requiring the assistance of other skilled personnel shall be carried out under the supervision of the person competent in the use of flammable refrigerants.
Transport of equipment containing flammable refrigerants
See transport regulations
Marking of equipment using signs
See local regulations
Storage of equipment/appliances
The storage of equipment should be in accordance with the manufacturer's instructions.
Storage of packed (unsold) equipment
Storage package protection should be constructed such that mechanical damage to the equipment inside the package will not cause a leak of the refrigerant charge.
The maximum number of pieces of equipment permitted to be stored together will be determined by local regulations.
Information on servicing
- Checks to the area
Prior to beginning work on systems containing flammable refrigerants, safety checks are necessary to ensure that the risk of ignition is minimised. For repair to the refrigerating system, the following precautions shall be complied with prior to conducting work on the system. - Work procedure
Work shall be undertaken under a controlled procedure so as to minimise the risk of a flammable gas or vapour being present while the work is being performed. - General work area
All maintenance staff and others working in the local area shall be instructed on the nature of work being carried out. Work in confined spaces shall be avoided. The area around the workspace shall be sectioned off. Ensure that the conditions within the area have been made safe by control of flammable material. - Checking for presence of refrigerant
The area shall be checked with an appropriate refrigerant detector prior to and during work, to ensure the technician is aware of potentially flammable atmospheres. Ensure that the leak detection equipment being used is suitable for use with flammable refrigerants, i.e. non-sparking, adequately sealed or intrinsically safe. - Presence of fire extinguisher
If any hot work is to be conducted on the refrigeration equipment or any associated parts, appropriate fire extinguishing equipment shall be available to hand. Have a dry powder or CO2 fire extinguisher adjacent to the charging area. - No ignition sources
No person carrying out work in relation to a refrigeration system which involves exposing any pipe work that contains or has contained flammable refrigerant shall use any sources of ignition in such a manner that it may lead to the risk of fire or explosion. All possible ignition sources, including cigarette smoking, should be kept sufficiently far away from the site of installation, repairing, removing and disposal, during which flammable refrigerant can possibly be released to the surrounding space. Prior to work taking place, the area around the equipment is to be surveyed to make sure that there are no flammable hazards or ignition risks. No Smoking signs shall be displayed. - Ventilated area
Ensure that the area is in the open or that it is adequately ventilated before breaking into the system or conducting any hot work. A degree of ventilation shall continue during the period that the work is carried out. The ventilation should safely disperse any released refrigerant and preferably expel it externally into the atmosphere. - Checks to the refrigeration equipment
Where electrical components are being changed, they shall be fit for the purpose and to the correct specification. At all times the manufacturer's maintenance and service guidelines shall be followed. If in doubt consult the manufacturer's technical department for assistance. The following checks shall be applied to installations using flammable refrigerants:
The charge size is in accordance with the room size within which the refrigerant containing parts are installed;
The ventilation machinery and outlets are operating adequately and are not obstructed;
If an indirect refrigerating circuit is being used, the secondary circuit shall be checked for the presence of refrigerant;
Marking to the equipment continues to be visible and legible. Markings and signs that are illegible shall be corrected;
Refrigeration pipe or components are installed in a position where they are unlikely to be exposed to any substance which may corrode refrigerant containing components, unless the components are constructed of materials which are inherently resistant to being corroded or are suitably protected against being so corroded. - Checks to electrical devices
Repair and maintenance to electrical components shall include initial safety checks and component inspection procedures. If a fault exists that could compromise safety, then no electrical supply shall be connected to the circuit until it is satisfactorily dealt with. If the fault cannot be corrected immediately but it is necessary to continue operation, an adequate temporary solution shall be used. This shall be reported to the owner of the equipment so all parties are advised.
Initial safety checks shall include:
That capacitors are discharged: this shall be done in a safe manner to avoid possibility of sparking;
That there no live electrical components and wiring are exposed while charging, recovering or purging the system;
That there is continuity of earth bonding.
Repairs to sealed components
- During repairs to sealed components, all electrical supplies shall be disconnected from the equipment being worked upon prior to any removal of sealed covers, etc. If it is absolutely necessary to have an electrical supply to equipment during servicing, then a permanently operating form of leak detection shall be located at the most critical point to warn of a potentially hazardous situation.
- Particular attention shall be paid to the following to ensure that by working on electrical components, the casing is not altered in such a way that the level of protection is affected. This shall include damage to cables, excessive number of connections, terminals not made to original specification, damage to seals, incorrect fitting of glands, etc.
Ensure that apparatus is mounted securely.
Ensure that seals or sealing materials have not degraded such that they no longer serve the purpose of preventing the ingress of flammable atmospheres. Replacement parts shall be in accordance with the manufacturer's specifications.
NOTE: The use of silicon sealant may inhibit the effectiveness of some types of leak detection equipment. Intrinsically safe components do not have to be isolated prior to working on them.
Repair to intrinsically safe components
Do not apply any permanent inductive or capacitance loads to the circuit without ensuring that this will not exceed the permissible voltage and current permitted for the equipment in use. Intrinsically safe components are the only types that can be worked on while live in the presence of a flammable atmosphere. The test apparatus shall be at the correct rating. Replace components only with parts specified by the manufacturer. Other parts may result in the ignition of refrigerant in the atmosphere from a leak.
Cabling
Check that cabling will not be subject to wear, corrosion, excessive pressure, vibration, sharp edges or any other adverse environmental effects. The check shall also take into account the effects of aging or continual vibration from sources such as compressors or fans.
Detection of flammable refrigerants
Under no circumstances shall potential sources of ignition be used in the searching for or detection of refrigerant leaks. A halide torch (or any other detector using a naked flame) shall not be used.
Leak detection methods
The following leak detection methods are deemed acceptable for systems containing flammable refrigerants. Electronic leak detectors shall be used to detect flammable refrigerants, but the sensitivity may not be adequate, or may need re-calibration. (Detection equipment shall be calibrated in a refrigerant-free area.) Ensure that the detector is not a potential source of ignition and is suitable for the refrigerant used. Leak detection equipment shall be set at a percentage of the LFL of the refrigerant and shall be calibrated to the refrigerant employed and the appropriate percentage of gas (25% maximum) is confirmed. Leak detection fluids are suitable for use with most refrigerants but the use of detergents containing chlorine shall be avoided as the chlorine may react with the refrigerant and corrode the copper pipe-work. If a leak is suspected, all naked flames shall be removed/ extinguished. If a leakage of refrigerant is found which requires brazing, all of the refrigerant shall be recovered from the system, or isolated (by means of shut off valves) in a part of the system remote from the leak. Oxygen free nitrogen (OFN) shall then be purged through the system both before and during the brazing process.
Removal and evacuation
When breaking into the refrigerant circuit to make repairs or for any other purpose conventional procedures shall be used. However, it is important that best practice is followed since flammability is a consideration. The following procedure shall be adhered to:
- Remove refrigerant;
- Purge the circuit with inert gas;
- Evacuate;
- Purge again with inert gas;
- Open the circuit by cutting or brazing.
The refrigerant charge shall be recovered into the correct recovery cylinders. The system shall be flushed with OFN to render the unit safe. This process may need to be repeated several times. Compressed air or oxygen shall not be used for this task.
Flushing shall be achieved by breaking the vacuum in the system with OFN and continuing to fill until the working pressure is achieved, then venting to atmosphere, and finally pulling down to a vacuum. This process shall be repeated until no refrigerant is within the system. When the final OFN charge is used, the system shall be vented down to atmospheric pressure to enable work to take place. This operation is absolutely vital if brazing operations on the pipework are to take place.
Ensure that the outlet for the vacuum pump is not close to any ignition sources and there is ventilation available.
Charging procedures
In addition to conventional charging procedures, the following requirements shall be followed. Ensure that contamination of different refrigerants does not occur when using charging equipment. Hoses or lines shall be as short as possible to minimise the amount of refrigerant contained in them.
Cylinders shall be kept upright.
Ensure that the refrigeration system is earthed prior to charging the system with refrigerant. Label the system when charging is complete (if not already).
Extreme care shall be taken not to overfill the refrigeration system.
Prior to recharging the system it shall be pressure tested with OFN. The system shall be leak tested on completion of charging but prior to commissioning. A follow up leak test shall be carried out prior to leaving the site.
Decommissioning
Before carrying out this procedure, it is essential that the technician is completely familiar with the equipment and all its detail. It is recommended good practice that all refrigerants are recovered safely. Prior to the task being carried out, an oil and refrigerant sample shall be taken in case analysis is required prior to re-use of reclaimed refrigerant. It is essential that electrical power is available before the task is commenced.
- Become familiar with the equipment and its operation.
- Isolate system electrically.
- Before attempting the procedure ensure that:
Mechanical handling equipment is available, if required, for handling refrigerant cylinders;
All personal protective equipment is available and being used correctly;
The recovery process is supervised at all times by a competent person;
Recovery equipment and cylinders conform to the appropriate standards. - Pump down refrigerant system, if possible.
- If a vacuum is not possible, make a manifold so that refrigerant can be removed from various parts of the system.
- Make sure that cylinder is situated on the scales before recovery takes place.
- Start the recovery machine and operate in accordance with manufacturer's instructions.
- Do not overfill cylinders. (No more than 80% volume liquid charge).
- Do not exceed the maximum working pressure of the cylinder, even temporarily.
- When the cylinders have been filled correctly and the process completed, make sure that the cylinders and the equipment are removed from site promptly and all isolation valves on the equipment are closed off.
- Recovered refrigerant shall not be charged into another refrigeration system unless it has been cleaned and checked.
Labelling
Equipment shall be labelled stating that it has been de-commissioned and emptied of refrigerant. The label shall be dated and signed. Ensure that there are labels on the equipment stating the equipment contains flammable refrigerant.
Recovery
When removing refrigerant from a system, either for servicing or decommissioning, it is recommended good practice that all refrigerants are removed safely.
When transferring refrigerant into cylinders, ensure that only appropriate refrigerant recovery cylinders are employed. Ensure that the correct number of cylinders for holding the total system charge is available. All cylinders to be used are designated for the recovered refrigerant and labelled for that refrigerant (i.e. special cylinders for the recovery of refrigerant). Cylinders shall be complete with pressure relief valve and associated shut-off valves in good working order. Empty recovery cylinders are evacuated and, if possible, cooled before recovery occurs. The recovery equipment shall be in good working order with a set of instructions concerning the equipment that is at hand and shall be suitable for the recovery of flammable refrigerants. In addition, a set of calibrated weighing scales shall be available and in good working order. Hoses shall be complete with leak-free disconnect couplings and in good condition. Before using the recovery machine, check that it is in satisfactory working order, has been properly maintained and that any associated electrical components are sealed to prevent ignition in the event of a refrigerant release. Consult manufacturer if in doubt.
The recovered refrigerant shall be returned to the refrigerant supplier in the correct recovery cylinder, and the relevant Waste Transfer Note arranged. Do not mix refrigerants in recovery units and especially not in cylinders. If compressors or compressor oils are to be removed, ensure that they have been evacuated to an acceptable level to make certain that flammable refrigerant does not remain within the lubricant. The evacuation process shall be carried out prior to returning the compressor to the suppliers. Only electric heating to the compressor body shall be employed to accelerate this process. When oil is drained from a system, it shall be carried out safely.
PRECAUTIONS AND INFORMATION
Never attempt to personally perform maintenance interventions that imply opening the machine: the presence of charged components and the gas contained in the refrigeration circuit make these operations particularly dangerous. Always contact a specialised technical assistance centre.
 Always unplug the appliance prior to effecting any operation. Prevent water from entering through the upper grille. Do not obstruct the air flow. Never use the dehumidifier outdoors. Do not use the appliance in places where corrosive vapours or dangerous substances are present. Do not place objects on top of the appliance. Before removing the appliance, make sure that the condensate collector tank is empty. Do not pull on the power cable to turn the appliance off. Never open the dehumidifier body. After turning the appliance off, wait a few minutes before turning it back on. Do not use the appliance on inclined surfaces. Do not use extensions for the power cable. |

- Do not turn the appliance on and off continuously and avoid tilting it. If the appliance does not switch on, unplug it from the socket and contact the local dealer for assistance.
- Do not spray insecticides or other chemical substances onto the appliance as they may cause warping of the plastic structure.
- This dehumidifier is exclusively designed for domestic use: any other use must be regarded as improper use.
The dehumidifier does not operate at temperatures below 5°C or above 32°C.
AFTER-SALES ASSISTANCE
If necessary, contact your dealer or the manufacturer's technical assistance centre for further information.
MAINTENANCE
Dirt may sometimes build up in the dehumidifier after it has been used for several seasons, resulting in a loss of efficiency. It is important to regularly empty the condensate water deposited in the appliance and periodically perform maintenance operations; contact the local dealer for technical assistance.
HUMIDITY CONCEPTS
AIR HUMIDITY

A certain amount of water vapour is always present in the air: the air's capacity to withhold water vapour increases with its temperature.
For example, at a temperature of 26°C, the maximum humidity content is 21.4 g of water vapour per kg of air, while at 30°C, the maximum humidity content evaporator condenser is 27.2 g of water vapour per kg of air. In actual fact, the maximum humidity contents constitute extreme cases which do not occur at our latitudes. In these conditions, air is said to be 'saturated' (i.e. it cannot contain any more humidity) and the water vapour begins to condense. 'Relative humidity' refers to the ratio between the air's actual humidity and the maximum possible humidity content at that particular temperature.
For example, if said temperature were to be 26°C, the actual humidity content would be 10.7 g of water vapour for each kg of air, and the relative humidity would be:

Relative humidity is always expressed as a percentage value (%). Apart from natural causes, the air's humidity in enclosed spaces can increase due to the number of people present, the activities being performed, etc. Both too little and too much humidity are harmful to the human body, for opposite reasons, and should thus be avoided.
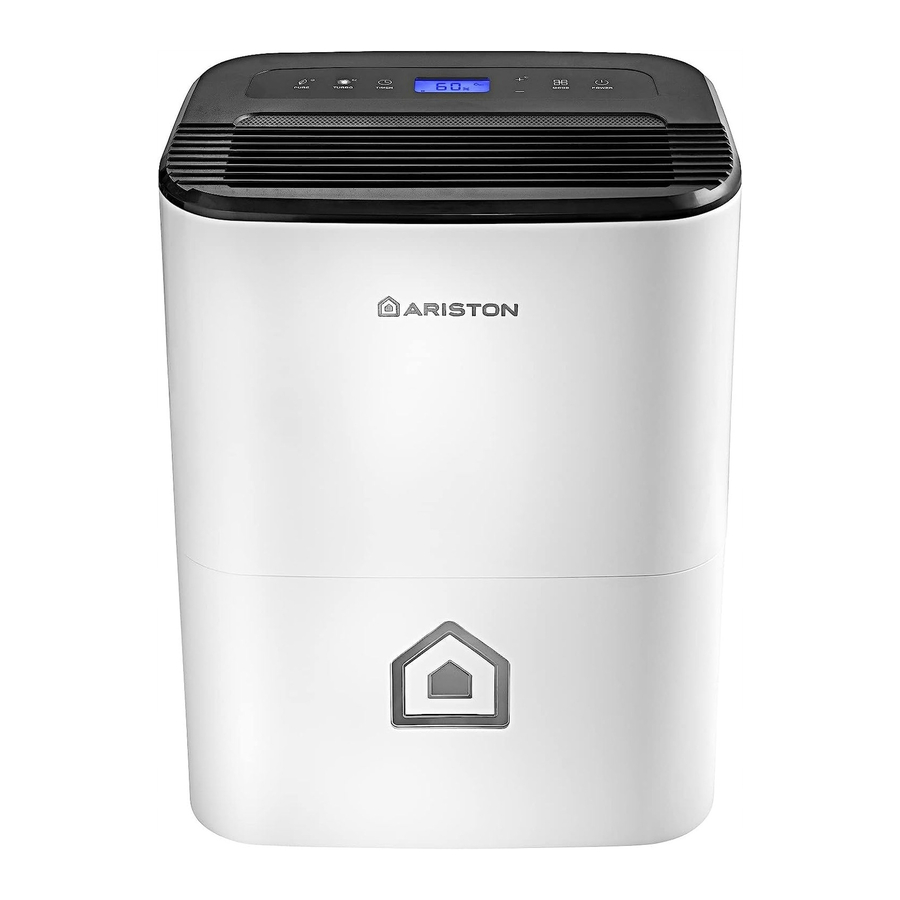
PRODUCT DESCRIPTION

CONTROL PANEL

- POWER BUTTON
![]()
Press to switch the dehumidifier on and off. - MODE BUTTON
![]()
Press to select the desired operating mode: STANDARD, SUPER LAUNDRY ROOM, CONTINUOUS or AUTO.
![]() , STANDARD mode - the dehumidifier runs until it reaches its humidity setting.
, STANDARD mode - the dehumidifier runs until it reaches its humidity setting.
![]() , SUPER LAUNDRY ROOM mode, the dehumidifier automatically sets the fan speed and relative humidity in relation to the ambient temperature. The mode remains active up to 10h.
, SUPER LAUNDRY ROOM mode, the dehumidifier automatically sets the fan speed and relative humidity in relation to the ambient temperature. The mode remains active up to 10h.
NOTE: in this mode you cannot change the fan speed or relative humidity settings.
![]() , CONTINUOUS mode, the dehumidifier runs at maximum power without time limit.
, CONTINUOUS mode, the dehumidifier runs at maximum power without time limit.
![]() , AUTO mode, the dehumidifier sets the relative humidity in relation to the ambient temperature to maximise occupant comfort, according to the following rules:
, AUTO mode, the dehumidifier sets the relative humidity in relation to the ambient temperature to maximise occupant comfort, according to the following rules:
NOTE: in this mode you cannot change the relative humidity setting.Detected room temperature Set relative humidity T ≤ 18°C 55% 18°C < T < 25°C 50% T ≥ 25°C 45%
On net models, press the MODE button for 3 seconds to initiate the Wireless connection mode. The LED DISPLAY shows AP for 8 min to indicate you can set Wireless connection. - HUMIDITY SETTING/TEMPERATURE DISPLAY
HUMIDITY SETTING
The relative humidity level can be set from 35% (minimum) and 80% (maximum), with 5% increments each time the '+' and '-' control buttons are pressed. When the set humidity level is reached, the compressor stops
NOTE: the humidity setting buttons are disabled in SUPER LAUNDRY ROOM, CONTINUOUS and AUTO modes.
TEMPERATURE DISPLAY
You can display the ambient temperature (°C) by holding down the "+" button for more than 3 seconds. You can do this whether the dehumidifier is running or not, so long as it is connected to its power supply. The ambient temperature dis- plays for 10 seconds. - LCD DISPLAY
The display shows the operating mode, actual and set relative humidity, ambient temperature, fan speed, timer, special functions and shutdown alarms.
When the dehumidifier is connected to its power supply, the actual relative humidity displays; to display the ambient temperature, hold down the "+" button for more than 3 seconds. - TIMER BUTTON
![]()
Pressing this button programs a delay after which the dehumidifier will start or stop. When set, the TIMER ON / TIMER OFF icon displays. Press or hold the "+" and "-" control buttons to set the delay: in 0.5 h (30 min) increments for 0-10 hours, and 1h (60 min) increments for 10-24 hours.
Set the delay to 0.0h to cancel the TIMER ON / TIMER OFF function.
NOTE: You can set the TIMER whether the dehumidifier is running or not, so long as it is connected to its power supply. - TURBO/SELF CLEAN BUTTON
TURBO![]()
Press to select the fan speed: normal (the "![]() " indicator light turns on) or turbo (the "
" indicator light turns on) or turbo (the "![]() " indicator light turns on).
" indicator light turns on).
NOTE: the TURBO button is disabled in SUPER LAUNDRY ROOM mode and when the SELF CLEAN, AIR PURIFIER and ANTI-MOULD special functions are enabled.
SELF CLEAN![]()
Pressing the TURBO button for more than 3 seconds enables the SELF CLEAN function. - PURE/ANTI-MOULD BUTTON
PURE![]()
Press this button to select the AIR PURIFIER function which uses the included HEPA (High Efficiency Particulate Air) filter to reduce the dust, bacteria and allergen content in the room.
ANTI-MOULD![]()
Pressing the PURE button for more than 3 seconds enables the ANTI-MOULD function.


 , STANDARD mode - the dehumidifier runs until it reaches its humidity setting.
 , SUPER LAUNDRY ROOM mode, the dehumidifier automatically sets the fan speed and relative humidity in relation to the ambient temperature. The mode remains active up to 10h.
 , CONTINUOUS mode, the dehumidifier runs at maximum power without time limit.
 , AUTO mode, the dehumidifier sets the relative humidity in relation to the ambient temperature to maximise occupant comfort, according to the following rules:
 " indicator light turns on) or turbo (the "

| Do not touch the selector with wet hands (risk of personal injury due to electrocution). Do not start or stop the appliance by simply plugging it into the power socket or unplugging it (risk of personal injury due to electrocution). Avoid prolonged direct exposure to the air flow (risk of personal injury due to sensitisation of the skin). |
SPECIAL FUNCTIONS
AUTO-RESTART
This function enables the dehumidifier to restart, after a power failure, from the last stored settings.
ANTI-FROST FUNCTION
Prevents the evaporator from frosting, thereby extending the dehumidifier's life and enhancing energy saving. When this function is active, the fan continues to run while the compressor stops and 'P1' appears on the display.
TANK FULL STOPPAGE
The dehumidifier stops when the condensate collection tank is full or incorrectly positioned. 'P2' displays together with indicator light ![]() .
.
NOTE: when the compressor stops, it is necessary to wait 3 minutes before it restarts.
ANTI-MOULD FUNCTION
Hold the PURE button down for more than 3 seconds to enable this function. It sets the fan speed and hours of operation of the dehumidifier (up to 4h) in relation to the measured actual humidity. This maximises occupant comfort while reducing the risk of mould and bacterial growth.
To disable the function, hold the PURE button down for more than 3 seconds or select an operating mode with the MODE button.
SELF CLEAN
Hold the TURBO button down for more than 3 seconds to enable this function; the displays reads SC for 5 seconds and then clears.
The SELF CLEAN function initiates as soon as the dehumidifier is switched off, and runs for 15 minutes; the display reads SC while the function is active.
The function cleans and dries the heat exchangers with ventilation/dehumidification cycles, thus keeping them in perfect working order.
To deactivate SELF CLEAN, hold down the TURBO button for 3 seconds; SC flashes on the display for 5 seconds and then clears.
AIR PURIFIER FUNCTION
This function significantly reduces the dust, bacterial and allergen content of the room, using the HEPA (High Efficiency Particulate Air) filter supplied with the dehumidifier.
Press the PURE button to activate the AIR PURIFIER function; all other modes and special functions are inhibited while it is running. Make sure you have fitted the HEPA filter as indicated in fig. A.

| Incorrectly installing the filter or forcing it into place can cause the dehumidifier to malfunction, overheat and even fail. |
CONDENSATE DISCHARGE
The dehumidifier can discharge the condensate water in two different ways:
DISCHARGE INTO TANK
The condensate water falls directly in the tank located in the lower section of the dehumidifier. When the tank is full, the dehumidifier automatically shuts down and the displays shows "P2" and the ![]() logo.
logo.
PROCEDURE FOR EMPTYING THE TANK:
- Pull out the tank slightly using the appropriate handles on the sides (Fig. A).
![]()
- Pull the tank out fully while being careful not to spill the condensate water.
- Do not place the tank on the ground as its irregular underside may cause the water to spill out.
- Empty out the water.
- Put the tank back into its housing. The dehumidifier will automatically start functioning again.

- Do not remove the float (located inside the tank) when emptying out the water.
- Make sure to put the tank properly back into its housing (after having emptied it).
- Incorrectly fitting the tank can stop the dehumidifier starting (make sure the "P2" has cleared from the display). Before removing the tank, it is advisable to tap the top part of the dehumidifier a few times to ensure that all the water has fallen into the tank. A few drops of water may nonetheless drip down once the tank has been pulled out.
- Before undertaking any operation on the appliance, make sure that the power supply has been disconnected.
CONTINUOUS DRAINAGE
Allows for discharging the condensate water without letting it fall into the collection tank. This function is particularly useful when the dehumidifier must be operated for long periods, making it difficult to empty the tank continuously.
INSTRUCTIONS
- Remove the rubber cap from the right-hand outlet located on the rear of the appliance (Fig. B).
![]()
- Connect the hose (not included) with 13,5 mm internal diameter to the outlet (Fig. C). Make sure that the other end of the hose terminates at a water collection point lying lower than the discharge outlet.
![]()
- Switch the appliance on.


| To restore standard draining into the tank, make sure to refit the rubber cap into the hole on the rest of the unit. |
POSITIONING TIPS
For the correct operation of your dehumidifier, we advise you to observe the distances shown in Fig. D.

Position the dehumidifier on a stable, smooth and horizontal surface.
The appliance can be moved using the wheels. Before moving the appliance, disconnect the power supply and empty the condensate collection tank.
BASIC MAINTENANCE
Before cleaning the appliance, unplug it and disengage the automatic switch.
CLEANING THE DEHUMIDIFIER
- Clean the dehumidifier using a cloth dampened in lukewarm water (no more than 40°C) and neutral soap. Do not use solvents or aggressive detergents.
- Do not spray water directly onto the appliance.
CLEANING THE TANK
Clean the condensate collection tank regularly (every 2-3 weeks) in order to prevent mould and bacteria build-up. Use water and non-aggressive detergents.
CLEANING THE FILTERS
Dust filter
Cleaning the filter regularly (to be performed at least every 30 days) is essential to ensure optimal dehumidifier performance.
- Remove the rear grille by raising the lower part and sliding it out downwards (Fig. E).
![]()
- Remove the filter from the grille and clean it using a vacuum cleaner or wash it with lukewarm water and neutral detergent.
- Dry it thoroughly (do not leave it exposed to sunlight).
- Put the filter and grille back in place.

HEPA filter: High Efficiency Particulate Air
(Supplied with the dehumidifier, not pre-installed)
Purifies the air and reduces dust, bacteria and allergens.
- Replace the filter every 12 months of use.
END-OF-SEASON MAINTENANCE
- Remove any condensate water present in the tank.
- Clean the appliance, tank and dust filter.
- Cover the appliance to protect it against dust.
- Store the dehumidifier in a dry and well-ventilated place.
IN CASE THE DEHUMIDIFIER MALFUNCTIONS
BEFORE CONTACTING THE TECHNICAL ASSISTANCE CENTRE, PERFORM THE FOLLOWING CHECKS:
| PROBLEM | CAUSE | SOLUTION |
| The appliance does not start by pressing the ON/OFF button. |
|
|
| The appliance is not able to dehumidify the room enough. |
|
|
| The appliance is very noisy. |
|
|
| 'E4' appears on the display. | Display panel communication error. | Unplug the unit and plug it back in. If error repeats, call for service. |
| 'P2' appears on the display. | Tank full. | Empty the tank and put it correctly back in place. |
| 'AS' appears on the display. | The humidity sensor is disconnected or has short-circuited. | Contact the technical assistance service. |
| 'ES' appears on the display. | The temperature sensor is disconnected or has short-circuited. | Contact the technical assistance service. |
PRODUCT TECHNICAL SHEET
| Type of appliance | Dehumidifier | |||
| Supplier brand | ARISTON | |||
| DEOS 21s NET | ||||
| Dehumidification(1) | litres/day | 20 | ||
| Power consumption(1) (max) | W | 360 (440) | ||
| Sound pressure(1) | dB(A) | 45.5 | ||
| Type of refrigerant | R290 | |||
| GWP(2) | 3 | |||
| Operating temperature | °C | 5/32 | ||
| Tank capacity | litres | 3 | ||
| Power supply and no. of phases | Hz - V - Ph | 50-230-1 | ||
| Type of compressor | Reciprocating | |||
| Maximum air flow rate | m3/h | 166 | ||
| Standard refrigerant charge | kg /t CO2 eq. | 0.075 | ||
| Dimensions | mm | 385x300x530 | ||
| Weight (net/gross) | kg | 14.95 / 16.15 | ||
- Relative to operation at 30°C and 80% relative humidity.
- Refrigerant loss contributes to climate change. In case of their release into the atmosphere, refrigerants with lower global warming potential (GWP) have less impact on global warming compared to refrigerants with a higher GWP. This appliance contains a refrigerant fluid with a GWP of 3. In other words, if 1 kg of this refrigerant fluid were released into the atmosphere, the impact on global warming would be 3 times greater compared to 1 kg of CO2, over a period of 100 years. In no case whatsoever must the user attempt to intervene on the refrigerant circuit or dismantle the product. In case of need, please contact a qualified professional.
SAFETY RULES
READ THIS MANUAL CAREFULLY AND STORE IT SAFELY, AS IT CONTAINS IMPORTANT INFORMATION FOR SAFE INSTALLATION, USE AND MAINTENANCE OF YOUR NEW APPLIANCE.

Symbol legend:
![]() Failure to comply with this warning implies the risk of injury to persons, which in some circumstances may be fatal.
Failure to comply with this warning implies the risk of injury to persons, which in some circumstances may be fatal.
![]() Failure to comply with this warning implies the risk of damage – even serious damage in some circumstances – to property and plants or harm to animals.
Failure to comply with this warning implies the risk of damage – even serious damage in some circumstances – to property and plants or harm to animals.
Ariston Thermo UK Ltd.
Artisan Building • Hillbottom Road
High Wycombe • HP12 4HJ
UNITED KINGDOM
Ariston Thermo SpA
Viale A. Merloni, 45 • 60044 Fabriano (AN) - ITALY
Customer Service 0333 240 8777
Call charges depend on your agreement with your network provider.
Documents / Resources
References

Download manual
Here you can download full pdf version of manual, it may contain additional safety instructions, warranty information, FCC rules, etc.
Advertisement


Need help?
Do you have a question about the Deos 21S and is the answer not in the manual?
Questions and answers