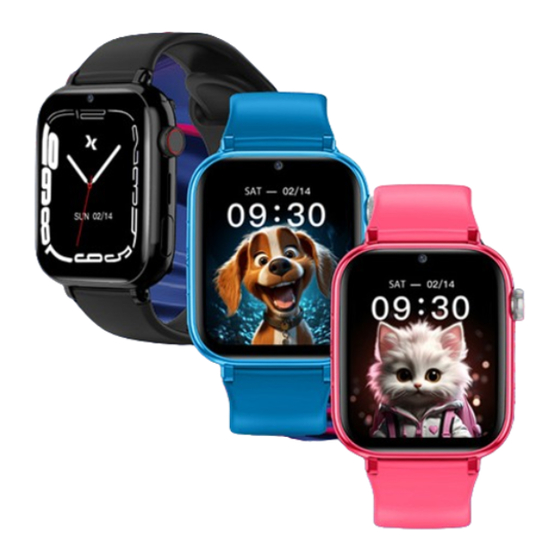
Maxcom FW59 kiddo User Manual
Hide thumbs
Also See for FW59 kiddo:
- User manual (52 pages) ,
- Manual (55 pages) ,
- User manual (56 pages)
Table of Contents
Advertisement
Available languages
Available languages
Quick Links
Advertisement
Table of Contents

Related Manuals for Maxcom FW59 kiddo


Summary of Contents for Maxcom FW59 kiddo
- Page 1 FW59 kiddo Mode d’emploi User manual...
-
Page 2: Contenu De La Boîte
CONTENU DE LA BOÎTE L’ensemble comprend: 1. Montre avec bracelet en silicone 2. Câble de chargement magnétique 3. Plateau SIM 4. Manuel de l’Utilisateur... - Page 3 CONSTRUCTION 1. Bouton rotatif/menu 2. Bouton Verrouillage/SOS 3. Emplacement SIM 4. Caméra 5. Port de chargement...
- Page 4 UNE CARTE SIM INSTALLATION DE LA CARTE SIM 1. Préparez votre carte Nano SIM . Votre forfait de carte d’appel doit inclure un forfait Internet et des appels vocaux . Il peut être acheté auprès des opérateurs de télécommunications locaux. Veuillez vous référer à...
-
Page 5: Installation De La Carte Sim
INSTALLATION DE LA CARTE SIM 1. Retirez le plateau de la carte SIM, puis insérez le chipset dans le plateau. 2. Allumez votre montre... - Page 6 APPLICATION Scannez le code QR ci-dessous avec votre téléphone et téléchargez l’ application MAXCOM TRACKER...
- Page 7 INSCRIPTION Une fois l’application installée, exécutez-la et enregistrez votre compte. Après l’enregistrement, vous pouvez immédiatement commencer à coupler votre montre.
- Page 8 CONNECTER LA MONTRE Pour associer votre montre, allumez-la en maintenant enfoncé le bouton de verrouillage. Alors: 1. Appuyez sur le bouton rond pour accéder au menu 2. Choisir un appareil” 3. Sélectionnez „Code d’enregistrement” 4. Scannez le code avec votre téléphone à l’aide de l’application en cliquant sur cette icône 5.
- Page 9 Pour localiser correctement la montre, assurez-vous que la carte SIM de la montre est active et a accès à Internet. Dans l’application Maxcom Tracker, touchez la carte sur l’écran principal pour accéder à la localisation. Vous trouverez ici le dernier emplacement de la montre, son état de charge et la pos-...
- Page 10 En bas de l’écran, vous pouvez vérifier la date de dernière localisation de la montre, comment elle a été localisée (LBS, GPS, WiFi) et l’état actuel de la batterie. Dans le coin supérieur droit, vous pouvez vérifier la distance parcourue par le propriétaire de la montre.
-
Page 11: Fonctions Principales
FONCTIONS PRINCIPALES BOUTON changez rapidement le cadran de la montre ou faites défiler MENU PRINCIPAL appuyez sur le bouton rond ou faites glisser le cadran de la montre vers la gauche. Vous trouverez ici toutes les fonctions de la montre NOMBRE D’ÉTAPES pour déplacer la montre vers le haut. -
Page 12: Appareil Photo
GALERIE > galerie ~ visualiser les photos prises, les supprimer ou les partager immédiatement sur l’application Maxcom Tracker APPLICATIONS ET CODES D’ENREGISTREMENT > appareil ~ Codes QR pour télécharger l’application et la connecter à la montre > jeu ~ plusieurs jeux installés menu ALARME >... - Page 13 Pour éviter de saisir le numéro manuellement à chaque fois, nous pouvons enregistrer les contacts sur la montre à l’aide de l’application Maxcom Tracker. Pour ce faire, dans l’application, allez dans les paramètres (engrenage), sélectionnez « Contacts » puis ajoutez un nouveau numéro de téléphone.
- Page 14 Après avoir enregistré le contact, il devrait apparaître un instant plus tard sur la montre, dans le menu « Contacts ». À partir de là, cliquez simplement sur le contact sélectionné pour l’appeler. DES MESSAGES TEXTE La montre ne prend pas directement en charge la réception de messages texte.
- Page 15 En cliquant sur « Appel vidéo » dans le menu de la montre, vous pouvez sélectionner la personne que vous souhaitez appeler (le propriétaire de l’application Maxcom Tracker). L’appel vidéo sera organisé via l’application Maxcom Tracker. La situation est similaire lors de la connexion depuis le téléphone.
- Page 16 Les messages s’affichent immédiatement sur l’écran de la montre. Vous pouvez également les lire dans Menu > Chat. Ici, le propriétaire de la montre peut répondre au message en s’enregistrant et l’envoyer à l’application Maxcom Tracker.
- Page 17 AUTRES FONCTIONS DE L’APPLICATION ZONE DE SÉCURITÉ Après avoir traversé les zones définies, une notification apparaîtra sur votre téléphone. Il est possible d’établir jusqu’à 3 zones de sécurité. Configurer: 1. Appuyez sur « + » 2. Nommer la zone 3. Choisissez le lieu 4.
- Page 18 CENTRE DE NOTIFICATION Ici, vous pouvez lire les notifications de batterie faible et les appels d’urgence émis par la montre. Ces paramètres se trouvent dans les paramètres de l’application. CAMÉRA DISTANTE Cette fonction vous permettra de prendre une photo depuis l’appareil photo de la montre et de l’envoyer à...
-
Page 19: Ne Pas Déranger
INNE FUNKCJE APLIKACJI appeler le numéro spécifié. NE PAS DÉRANGER Réglage de l’heure à laquelle la montre passera en mode mise au point. Dans ce mode, vous pouvez uniquement vérifier l’heure sur la montre et passer un appel SOS. MODE DE LOCALISATION Sélectionnez la fréquence à... -
Page 20: Autres Caractéristiques
SÉLECTION D’UN FUSEAU HORAIRE Sélectionnez le fuseau horaire de votre montre. LANGUE DE LA MONTRE Changez la langue de votre montre. AUTRES CARACTÉRISTIQUES Par exemple, désactivez la fonction de numérotation de votre montre. Sélectionnez si vous souhaitez que la montre soit positionnée à... - Page 21 PROFIL DE L’UTILISATEUR Pour modifier les données utilisateur de l’application, sur l’écran principal, appuyez sur l’icône humaine dans le coin inférieur droit. Ici, vous pouvez modifier votre photo, votre identifiant, votre mot de passe ou vérifier les appareils connectés. Vous aurez besoin du code de l’appareil pour qu’un autre soignant ait également accès au contrôle de la montre.
- Page 22 CONDITIONS D’UTILISATION ET DE SÉCURITÉ • N’allumez pas la montre si elle risque de provoquer des interférences avec d’autres appareils ! N’utilisez pas votre montre sans le kit approprié pendant la conduite. • La montre émet un champ électromagnétique qui peut avoir un impact négatif sur d’autres appareils électroniques, notamment les équipements médicaux.
- Page 23 • N’utilisez pas la montre à proximité de cartes de paiement ou de crédit - cela pourrait entraîner la perte de données sur la carte. • Pour des raisons de sécurité, veuillez ne pas parler sur la montre lorsque le chargeur est connecté. •...
- Page 24 ładowaniem urządzenia. Akumulator po kilkuset ładowniach i rozładowniach w naturalny sposób traci swoje właściwości. Jeżeli użytkownik zaobserwuje znaczną utratę wydajności, należy zwrócić się do autoryzowanego serwisu MAXCOM w celu zakupu i wymiany akumulatora. • Nie wolno trzymać zegarka w miejscach o skrajnych temperaturach.
- Page 25 Protection environnementale Remarque: Cet appareil est marqué conformément à la directive européenne 2012/19/UE et à la loi polonaise sur les déchets d’équipements électriques et électroniques avec le symbole d’une poubelle barrée. Ce marquage indique que cet équipement, après sa période d’utilisation, ne peut pas être éliminé...
- Page 26 scientifique indépendante ICNIRP et incluent une marge de sécurité pour garantir la protection de toutes les personnes, quels que soient leur âge et leur état de santé. Ces lignes directrices utilisent une unité de mesure appelée débit d’absorption spécifique (DAS). La limite DAS ICNIRP pour les appareils portables est de 2,0 W/kg.
- Page 27 1710-1785 MHz TX, 1805-1880MHz RX (DCS 1800) 2402MHz -2480MHz (komunikacji krótkiego 6.87 zasięgu) Maxcom SA déclare par la présente que le type d’appareil radio : La montre intelligente FW59 est conforme à la directive 2014/53/UE et à la directive 2011/65/UE (RoHS)
- Page 28 LTE Band 8 880-915 MHz TX 22.40 dBm 925-960 MHz RX LTE Band 20 832-862 MHz TX 24.70 dBm 791-821 MHz RX Maxcom S.A. niniejszym oświadcza, że typ urządzenia radiowego: smartwatch FW59 jest zgodny z dyrektywą 2014/53/UE, oraz dyrektywą 2011/65/UE (RoHS)
-
Page 29: Box Contents
ENGLISH BOX CONTENTS The set includes: 1. Watch with a silicone strap 2. Magnetic charging cable 3. SIM tray 4. User manual... -
Page 30: Device Description
DEVICE DESCRIPTION 1. Rotary/menu button 2. Lock/SOS button 3. SIM slot 4. Camera 5. Charging port... -
Page 31: Installing The Sim Card
SIM CARD INSTALLING THE SIM CARD 1. Prepare your Nano SIM card. The calling card package should include an Internet package and voice calls. It can be purchased from local telecommunications operators. Please refer to your operator if in doubt. 2. -
Page 32: Sim Card Installation
SIM CARD INSTALLATION 1. Pull out the SIM card tray, then insert the chipset into the tray. 2. Turn on your watch... - Page 33 Scan the QR code below with your phone and download the MAXCOM TRACKER...
- Page 34 REGISTRATION Once the application is installed, run it and register your account. After registration, you can immediately start pairing your watch.
-
Page 35: Connecting The Watch
CONNECTING THE WATCH 1. To pair your watch, turn it on by holding the lock button. Then: 2. Press the round button to go to the menu 3. Select „Device” 4. Select „Registration Code” 5. Scan the code with your phone using the app by clicking this icon 6. -
Page 36: Locating The Watch
To correctly locate the watch, make sure that the SIM card in the watch is active and has access to the Internet. In the Maxcom Tracker application, touch the map on the main screen to go to locating. Here you will find the... - Page 37 At the bottom of the screen you can check the date the watch was last located, how it was located (LBS, GPS, WiFi) and the current battery status. In the upper right corner you can check the route traveled by the owner of the watch.
-
Page 38: Main Functions
MAIN FUNCTIONS KNOB quickly change the watch face, or scroll through the menu. MAIN MENU press the round button or swipe the watch face to the left. Here you will find all the functions of the watch. STEP COUNTER swipe up the screen. DROP DOWN MENU swipe dow the screen. - Page 39 GALLERY menu > gallery ~ view the photos taken, delete or share them immediately to the Maxcom Tracker application. APPLICATION AND REGISTRATION CODES menu > device ~ QR codes to download the app and connect it to the watch GAMES menu >...
- Page 40 To avoid entering the number manually every time, we can save contacts on the watch using the Maxcom Tracker app. To do this, in the app, go to settings (gear), select „Contacts” and then add a new phone number.
-
Page 41: Text Messages
After saving the contact, it should appear a moment later on the watch, in the „Contacts” menu. From here, just click on the selected contact to call him. TEXT MESSAGES The watch does not directly support receiving text messages. However, to ensure that text messages sent to the watch are not lost (e.g. - Page 42 Instead of sending text messages to the watch, you can send your child a short message via chat. Click on the „Chat” option in the Maxcom Tracker application menu. You can choose to send a short voice message to the watch, or a text message of up to 30 characters.
- Page 43 The messages are displayed on the watch screen immediately. You can also read them in Menu > Chat. Here, the owner of the watch can reply to the message by recording himself and send it to the Maxcom Tracker application.
- Page 44 OTHER APP FUNCTIONS SAFETY ZONE After crossing the set zones, a notification will appear on your phone. It is possible to establish up to 3 security zones. To configure: 1. Press „+” 2. Name the zone 3. Choose the place 4.
- Page 45 PLAY SOUND ON DEVICE It plays a sound on the watch, it will help you find the watch under the bed or pillow :) ALLERT CENTER Here you can read notifications about low battery and emergency calls made by the watch.
-
Page 46: Tracking Frequency
OTHER APP FUNCTIONS Set the numbers the watch will call after activating the SOS function. SOUND GUARDIAN Enter the phone number on which you want to hear the sound from the watch and press OK. The watch will automatically start calling the specified number. DO NOT DISTURB Setting the time at which the watch will go into focus mode. -
Page 47: Reset Device
FAMILY MEMBERS List of guardians who are connected to the watch. CONTACTS Add or remove contacts on your watch. TIME ZONE Change the time zone of the watch. LANGUAGE Change watch language DISABLE FUNCTIONS For example, turn off your watch’s dialing feature. Select whether you want the watch to be positioned using transmitting antennas. -
Page 48: User Profile
USER PROFILE To change application user data, on the main screen, press the profile icon in the lower right corner. Here you can change your photo, login, password or check connected devices. You will need the device code so that another family member also has access to control the watch. - Page 49 SAFETY AND TERMS OF USE • Do not turn on the watch if it may cause interference with other devices! Do not use your watch without the appropriate kit while driving. • The watch emits an electromagnetic field that may have a negative impact on other electronic devices, including medical equipment.
- Page 50 The watch and its components should be kept out of the reach of children under 3 years of age. The watch must not be cleaned with chemical or corrosive substances. • Do not use the watch close to payment or credit cards - this may result in the loss of data on the card.
- Page 51 • Caution: do not keep the watch in areas of excessive heat. This can have a negative impact on the battery as well as the watch itself. DO NOT THROW BATTERIES OR ACCUMULATORS INTO FIRE! Enviromental information Caution: this appliance is marked in accordance with European Directive 2012/19/EU and the Polish Waste Electrical and Electronic Equipment Act with the symbol of the crossed-out waste container.
- Page 52 SAR information This model complies with international guidelines for the impact of radio waves. This device is a radio wave transmitter and receiver. It is designed not to exceed the limits of radio wave exposure recommended by international guidelines. These guidelines have been developed by the independent scientific organisation ICNIRP with a safety margin to guarantee protection for all people regardless of age and health.
- Page 53 Limit (W/ Highest measured SAR value in tests SAR value - device at head 0.309 W/kg 10g 2 W/kg SAR value- device at the back 0.651 W/kg 10g 2 W/kg (5 mm GAP) SAR value - device on limb 1.544 W/kg 10g 4 W/kg ( 0 mm GAP) Frequency range...
- Page 54 880-915 MHz TX 22.40 dBm 925-960 MHz RX LTE Band 20 832-862 MHz TX 24.70 dBm 791-821 MHz RX Maxcom S.A. hereby declares that the type of radio device: FW59 smartwatch is in compliance with Directive 2014/53/EU, and Directive 2011/65/EU (RoHS)
- Page 56 MAXCOM S.A. 43-100 Tychy ul Towarowa 23a POLAND tel. 32 327 70 89 fax 32 327 78 60 www.maxcom.pl office@maxcom.pl...
Need help?
Do you have a question about the FW59 kiddo and is the answer not in the manual?
Questions and answers
Bonjour comment changer l'heure de cette montre? Svp
To change the time on the Maxcom FW59 Kiddo watch, adjust the time zone setting. Go to the "ČASOVNI PAS" (time zone) option and select the correct time zone for the watch.
This answer is automatically generated