Table of Contents
Advertisement
Quick Links
E-215 GBS • E-315 GBS
REGISTER
today
Unlock barbecuing happiness: Register your gas barbecue and receive special content
to make you the ultimate backyard hero.
Registration is easy and we only ask a few quick questions. In less than two minutes,
activate your unique WEBER-ID, and unlock a lifetime of WEBER knowledge and
guidance. Stay inspired along the way.
76464
PHONE
MOBILE
EMAIL
ONLINE
120220
Keep this Owner's Manual for future reference, thoroughly read through it, and if you
have any questions please contact us today.
en - English
Advertisement
Table of Contents

Related Manuals for Weber SPIRIT E-215 GBS


Summary of Contents for Weber SPIRIT E-215 GBS
- Page 1 Registration is easy and we only ask a few quick questions. In less than two minutes, activate your unique WEBER-ID, and unlock a lifetime of WEBER knowledge and guidance. Stay inspired along the way.
-
Page 2: Important Safety Information
Important Installation and Assembly Storage and/or Nonuse DANGER: This barbecue is not intended to be WARNING: Turn off the gas supply at the gas cylinder Safety Information installed in or on recreational vehicles or boats. after use. WARNING: Do not use this barbecue unless all WARNING: LPG cylinders must be stored outdoors DANGER, WARNING, and CAUTION parts are in place and the barbecue was properly... -
Page 3: Table Of Contents
What we do promise is to be by your side, every step of the The Flame - Direct or Indirect way. By signing up for your WEBER-ID, as part of your registration, we will deliver Barbecuing Do's and Don'ts special content just for you and your barbecue to enjoy. -
Page 4: Weber's Voluntary Warranty
Owner’s Manual for additional contact information. of equal or greater value. WEBER may ask you to return parts for inspection, shipping charges to be pre-paid. This WARRANTY lapses if there are damages, deteriorations,... -
Page 5: Spirit Features
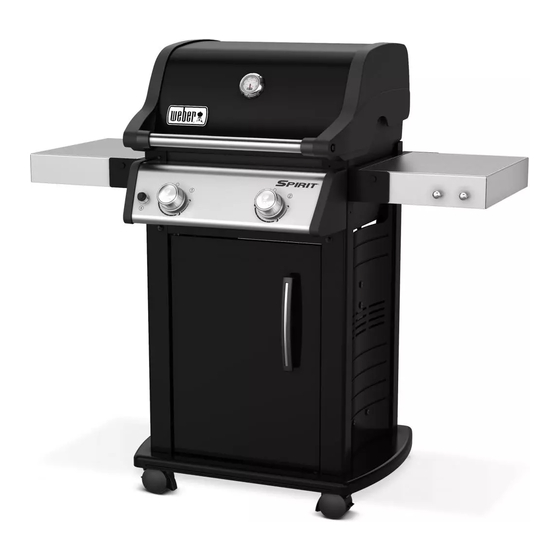
SPIRIT FEATURES A Built-In Thermometer D Side Tables with Integrated Tool Hooks Being aware of the temperature inside your barbecue Use the side tables to keep platters, seasonings, allows you to adjust the heat when needed. and tools within arm’s reach. Hang your essential barbecuing tools on the hooks for easy access and B Warming Rack organisation of your backyard workspace. -
Page 6: The Flame - Direct Or Indirect
The Flame - Direct or Indirect HIGH MEDIUM BURNER BURNER BURNER BURNER BURNER BURNER HIGH MEDIUM BURNER BURNER BURNER BURNER DIRECT HEAT INDIRECT HEAT SETUP SETUP Use the direct method for small, tender pieces of food that take less Use the indirect method for larger cuts of meat that require than 20 minutes to cook, such as: hamburgers, steaks, chops, kabobs, 20 minutes or more of barbecuing time, or for foods so delicate that boneless chicken pieces, fish fillets, shellfish, and sliced vegetables. -
Page 7: Barbecuing Do's And Don'ts
Barbecuing Do’s and Don’ts Preheat each and every time. Try not to peek. If the cooking grates aren’t hot enough, food will The lid on your barbecue is for more than just stick, and you will likely never have a chance of keeping the rain out. -
Page 8: Important Information About
9.38 kW Propane 3B/P 8.94 kW Butane 10.55 kW Butane • Replacement regulator and hose assemblies must be as specified by Weber-Stephen Products LLC. 551.8 g/h Propane 659.3 g/h Propane 639.6 g/h Butane 754.7 g/h Butane IMPORTANT: We recommend that you replace the gas hose assembly on your gas barbecue every five years. -
Page 9: Installing The Lpg Cylinder
Installing the LPG Cylinder Where Does the LPG Cylinder Go? The type and size of cylinder you purchase will determine if the cylinder can be located inside or outside the base cabinet. There are two location options: inside the cabinet within the cylinder brackets, or outside the cabinet on the ground. - Page 10 Inside Cabinet Installation You will need: cylinder brackets (A). 1) Open the barbecue cabinet. The cylinder brackets snap into the mounting holes in the bottom panel as shown in the illustration (B). Insert cylinder bracket tabs into rectangular slots. Secure brackets in place by pivoting them down to lock centre tab in place.
- Page 11 Outside Cabinet Requirements If the cylinder you have does not meet the size requirements for placement inside the cabinet, the cylinder must be placed on the ground outside and to the right of the cabinet. The maximum size requirements for cylinders installed outside the cabinet are: Cylinder Capacity: 13 kg maximum...
-
Page 12: Connecting The Lpg Cylinder & Leak Checking
Connecting the LPG Cylinder & Leak Checking Connect the Regulator to the Cylinder 1) Check that all burner control knobs are in the position. Check by pushing in and turning knobs clockwise. 2) Identify your regulator type and connect the regulator to the LPG cylinder by following the appropriate connection instructions. - Page 13 What is a Leak Check? Once the LPG cylinder is properly installed, it is necessary to perform a leak check. A leak check is a reliable way to verify that gas is not escaping after you connect the cylinder. The following fittings should be tested each time a cylinder is refilled and reinstalled: •...
-
Page 14: The Very First Time You Barbecue
Replace brush if any loose bristles are found on cooking grates or brush. WEBER recommends purchasing a new stainless steel bristle barbecue brush at the beginning of every spring. -
Page 15: Igniting The Barbecue
Igniting the Barbecue Using the CROSSOVER Ignition System to Ignite the Barbecue The CROSSOVER ignition system ignites the burner furthest to the left, burner 1, with a spark from the igniter electrode. You generate the energy for the spark by pushing the igniter button. You will hear the igniter clicking. -
Page 16: Cleaning And Maintenance
Cleaning and Maintenance Cleaning the Inside of the Barbecue Over time, the performance of your barbecue can diminish if it has not been maintained properly. Low temperatures, uneven heat, and food sticking to cooking grates are all signs that cleaning and maintenance are overdue. - Page 17 MEAL-TO-MEAL MAINTENANCE. Cleaning the Outside of the Barbecue The outside of your barbecue may include stainless steel, porcelain-enamelled, and plastic surfaces. WEBER recommends the following methods based on the surface type. Cleaning Stainless Steel Surfaces Clean stainless steel using a non-toxic, non-abrasive stainless steel cleaner or polish designed for use on outdoor products and barbecues.
-
Page 18: Replacement Parts
Components of the Electronic Ignition System”. 9) After burner 1 ignites, you can turn on burner 2 (and burner 3). Igniter Module Wire Chart REPLACEMENT PARTS To obtain replacement parts, contact the local retailer in your area or log onto weber.com. - Page 19 WARNING: Do not attempt to make any repair to gas carrying, gas burning, ignition components or structural components without contacting Weber-Stephen Products LLC, Customer Service Department. Service Representative in your area WARNING: Failure to use genuine Weber-Stephen parts for any repair or replacement will void all using the contact information warranty protection.
- Page 20 Barbecuing Guide Type Thickness/Weight Approximate Total Barbecue Time RED MEAT 19 mm thick 4 to 6 minutes direct high heat Steak: Sirloin strip, Porterhouse, rib-eye, T-bone, and beef fillet steak 25 mm thick 6 to 8 minutes direct high heat (tenderloin) 50 mm thick 14 to 18 minutes sear 6 to 8 minutes direct high heat, then 8 to 10 minutes indirect high heat...
- Page 21 SPIRIT E-215 GBS Spirit - E-215 LP - EU 070120...
- Page 22 SPIRIT E-315 GBS Spirit - E-315 LP - EU 070120 weber.com...
- Page 24 +27 11 454 2369 info@weber.co.za ICELAND SPAIN Jarn & Gler Wholesale EHF +354 58 58 900 Weber-Stephen Ibérica SRL +34 935 844 055 service-es@weber.com weber.com © 2020 Designed and engineered by Weber-Stephen Products LLC, 1415 S. Roselle Road, Palatine, Illinois 60067 USA.
Need help?
Do you have a question about the SPIRIT E-215 GBS and is the answer not in the manual?
Questions and answers