Table of Contents
Advertisement
Quick Links
Advertisement
Table of Contents

Subscribe to Our Youtube Channel
Related Manuals for PCB Piezotronics IMI SENSORS CS649A93


Summary of Contents for PCB Piezotronics IMI SENSORS CS649A93
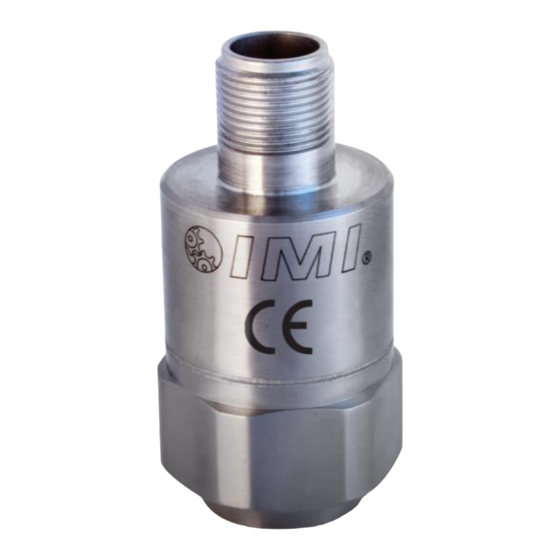
- Page 1 Model CS649A93 BEARING FAULT DETECTOR Installation and Operating Manual For assistance with the operation of this product, contact PCB Piezotronics, Inc. Toll-free: 800-959-4464 24-hour SensorLine: 716-684-0001 Fax: 716-684-3823 E-mail: imi@pcb.com Web: www.imi-sensors.com...
- Page 2 Assistance is needed to safely operate equipment PCB Piezotronics is an ISO-9001 certified company whose Damage is visible or suspected calibration services are accredited by A2LA to ISO/IEC Equipment fails or malfunctions 17025, with full traceability to SI through N.I.S.T.
- Page 3 CAUTION Refers to hazards that could damage the instrument. NOTE Indicates tips, recommendations and important information. The notes simplify processes and contain additional information on particular operating steps. The following symbols may be found on the equipment described in this manual: This symbol on the unit indicates that high voltage may be present.
- Page 4 PCB工业监视和测量设备 - 中国RoHS2公布表 PCB Industrial Monitoring and Measuring Equipment - China RoHS 2 Disclosure Table 有害物质 镉 汞 铅 (Pb) 六价铬 (Cr(VI)) 多溴联苯 (PBB) 多溴二苯醚 (PBDE) 部件名称 (Hg) (Cd) 住房 PCB板 电气连接器 压电晶体 环氧 铁氟龙 电子 厚膜基板 电线 电缆 塑料 焊接...
- Page 5 Component Name Hazardous Substances Lead (Pb) Mercury (Hg) Cadmium (Cd) Chromium VI Polybrominated Polybrominated Compounds Biphenyls (PBB) Diphenyl Ethers (Cr(VI)) (PBDE) Housing PCB Board Electrical Connectors Piezoelectric Crystals Epoxy Teflon Electronics Thick Film Substrate Wires Cables Plastic Solder Copper Alloy/Brass This table is prepared in accordance with the provisions of SJ/T 11364.
- Page 6 (CS)649AX3-Series Bearing Fault Detector PLUS (BFD+) Operating Guide with Enclosed Warranty Information 3425 Walden Avenue, Depew, New York 14043-2495 Phone (716) 684-0003 Fax (716) 684-3823 Toll Free Line 1-800-959-4IMI MANUAL NUMBER: 45611 MANUAL REVISION: ECN NUMBER: 49766...
-
Page 7: Table Of Contents
Table of Contents Introduction ..............................Page 3 General Features Operating Principles ............................Page 4 Outputs Installation ................................ Page 7 Direct Adhesive Mount Standard Stud Mount Adhesive Stud Mount Magnetic Mount Wiring ................................Page 11 Programming Software ........................... Page12 Program Installation Running the Software Programming Sections Reading and Writing Parameters... -
Page 8: Introduction
Introduction The (CS)649AX3-Series Bearing Fault Detector PLUS is a USB-programmable, loop-powered device with 4- 20mA output, all contained in typical vibration sensor housing. It is specifically designed to provide early warning of typical ball/rolling element bearing faults such as cracked races, spalling, brinelling and looseness. It has five modes of detection that are user-selectable by a simple software program through a PC’s USB port- RMS Acceleration, True Peak Acceleration, Compensated Peak Acceleration, Crest Factor and Crest Factor Plus. -
Page 9: Operating Principles
Operating Principles Figure 1 – Block Diagram A block diagram is shown above. BFD+ includes an embedded piezoelectric sensor that generates a voltage output that is proportional to the sensed vibration. The output of the sensor is passed through a band-pass filter (250 Hz to 10+ kHz) and then an amplifier. -
Page 10: Outputs
Outputs True Peak Acceleration Details: This is the highest acceleration value captured within the sampling window. The acceleration signal used for this output is high pass filtered at 250 Hz. Best Uses: This is the best and most commonly used method for early detection of bearing wear for fixed speed machinery. - Page 11 Crest Factor Plus Details: This is similar to Crest Factor, but the output has been adjusted such that the value always increases as the bearing condition gets worse. This uses a sum of Crest Factor, RMS Acceleration, and True Peak Acceleration. These are weighted differently such that the sum of the three always increases as bearing condition gets worse, even if 1 value decreases.
-
Page 12: Installation
Installation When choosing a mounting method, consider closely the advantages and disadvantages of each technique. Typical mounting types are stud, direct adhesive, adhesive mounting base and magnetic mounting base. Stud mounting is highly recommended for the BFD+ since it has a frequency response upwards of 10 kHz and most of the output signals are directly related to high frequency energy. -
Page 13: Standard Stud Mount
Standard Stud Mount Procedure This mounting technique requires smooth, flat contact surfaces for proper operation and is recommended for permanent and/or secure installations. Stud mounting is also recommended when testing at high frequencies. Note: Do not attempt mounting on curved, rough or uneven surfaces, as the potential for misalignment and limited contact surface may significantly reduce the sensor’s upper operating frequency range. -
Page 14: Adhesive Stud Mount
Adhesive Stud Mount Procedure Adhesive mounting is often used for temporary installation or when the machine surface cannot be adequately prepared for stud mounting. Adhesives like hot glue or wax work well for temporary mounts; two-part epoxies and quick-bonding gels provide a more permanent mount. Note: Adhesively mounted sensors often exhibit a reduction in high-frequency range. -
Page 15: Magnetic Mount
Magnetic Mount Procedure Magnetic mounting provides a convenient means for making portable measurements and is commonly used for machinery monitoring and other portable or trending applications. Note: The correct magnet choice and an adequately prepared mounting surface are critical for obtaining reliable measurements, especially at high frequencies. -
Page 16: Wiring
Wiring BFD+ operates from a standard 2-wire, 4-20mA loop. If using a loop powered unit, attach the positive (+) input from the power supply to Pin A on the sensor and the negative (-) input from the power supply to Pin of the sensor. -
Page 17: Programming Software
Programming Software The BFD+ can be user-programmed with either of two optional programming kits, Model 600A21 (non-ROHS compliant) or Model 600A35 (ROHS compliant). Both kits include a USB programmer cable/dongle (Model 600A21 kit includes Model 070A89 cable; Model 600A35 kit includes Model 070A103 cable), software (Model EE225) and terminal block/integral cable adapter (Model 042M17). - Page 18 Figure 12 – National Instruments Software License Agreement Figure 13 – Installation Verification Screen Figure 14 – Installation Complete Screen PAGE 13...
- Page 19 After the software completes, the USB driver installer will start automatically. The initial USB installer will look similar to the one below. Figure 15 – WinUSB Driver Installation Screen The drivers will now be properly installed and you should get the following screen. Click “Finish”. The software is now ready to use.
-
Page 20: Running The Software
Running the Software Connect the USB programmer cable to a USB port on the PC and then run the software from the Start | All Programs | PCB EE225 Software menu item. Initially the screen will appear as in Error! Reference source not found. with a yellow bar and status indicating ‘Initializing…’... - Page 21 To select a device, click on the Device Select pull down menu and select the device you’d like to program. In this case, select 649A03. Figure 19 – Device Selection Once a product is selected, the software will prompt you to confirm connection of the sensor to the PC using the USB programmer cable.
-
Page 22: Programming Sections
Programming Sections The screen has three sections: 649A03 Sensor Data – This section displays the current vibration data in g’s peak, g’s RMS and HF g’s RMS (g’s RMS with 2.5 kHz high-pass filter applied) Actual 649A03 Settings – This section shows the settings currently programmed in the sensor. ... -
Page 23: Parameter Options
Parameter Options There are several parameters that can be programmed to optimize performance of the Bearing Fault Detector Plus. At any point during the programming process, the values can be changed between imperial and metric measurements by clicking the Units dropdown in the top navigation menu and then selecting the appropriate measurement type. -
Page 24: Portable 4-20 Ma Loop Calibrator
Portable 4-20 mA Loop Calibrator The loop calibrator (Model 699A05) provides 24V loop power and displays the transmitters electrical current output. This can be used with the sensor for measuring baseline values. Visit www.pcb.com for more information on the loop calibrator. Figure 23 –... -
Page 25: Cable Ordering Information
Cable Ordering Information Listed below are some of the more popular cables for use with BFD+. For additional information on cable options, visit www.pcb.com and click on the “Cables & Connectors” tab or call IMI for assistance. IMI Part Number: 052 Cable Model Series Polyurethane, Shielded, Twisted Pair Armored Polyurethane, Shielded, Twisted Pair... -
Page 26: Esd Sensitivity
Warning 2 – ESD sensitivity This equipment is designed with user safety in mind; however, the protection provided by the equipment may be impaired if the equipment is used in a manner not specified by PCB Piezotronics, Inc. Caution 1 – ESD sensitivity Cables can kill your equipment. -
Page 27: Customer Service
Customer Service IMI, a division of PCB Piezotronics, guarantees Total Customer Satisfaction. If, at any time, for any reason, you are not completely satisfied with any IMI product, IMI will repair, replace, or exchange it at no charge. You may also choose to have your purchase price refunded. - Page 28 Model Number Revision: A BEARING FAULT DETECTOR CS649A93 ECN #: 45954 Performance ENGLISH OPTIONAL VERSIONS Output(Loop power) 4-20 mA 4-20 mA Optional versions have identical specifications and accessories as listed for the standard model except where noted below. More than one option may be used. Sampling Time 1 sec 1 sec...
- Page 29 PCB Piezotronics Inc. claims proprietary rights in REVISIONS the information disclosed hereon. Neither it nor any reproduction thereof will be disclosed to others DESCRIPTION without the written consent of PCB Piezotronics Inc. RELEASED TRO DRAFTING 43847 3.85 [97.8] RELATED DRAWING...
- Page 30 September 25, 2015 Project: Date Issued: Issued to: Industrial Monitoring Instr. (IMI) A Div. of PCB Piezotronics, Inc. 3425 Walden Ave Depew, NY 14043 Attention: Gordon Singh The products listed below are eligible to bear the CSA Mark shown with adjacent indicators 'C' and 'US' for Canada and US or with adjacent indicator 'US' for US only or without either indicator for Canada only.
- Page 31 70021428 184981 Certificate: Master Contract: 70021428 September 25, 2015 Project: Date Issued: Entity Parameters: Ui / Vmax = 30V Ii / Imax = 100mA Pi / Pmax = 1W Ci = 0nF Li = 28µH Notes: For Canadian Installations, sensor case must be bonded to ground according to Section 18-182 of the CEC, Part 1.
- Page 32 70021428 184981 Certificate: Master Contract: 70021428 September 25, 2015 Project: Date Issued: Li = 28µH Note: For Canadian Installations, sensor case must be bonded to ground according to Section 18-182 of the CEC, Part 1. CLASS2258 84 - PROCESS CONTROL EQUIPMENT - Intrinsically Safe Entity - For Hazardous Locations - CERTIFIED TO U.S.
- Page 33 70021428 184981 Certificate: Master Contract: 70021428 September 25, 2015 Project: Date Issued: CLASS2258 83 - PROCESS CONTROL EQUIPMENT - Intrinsically Safe and Non - Incendive Systems - For Hazardous Locations - CERTIFIED TO U.S. STANDARDS Class I, Zone 2, AEx ic IIC T4 Gc Class I, Division 2, Groups A, B, C, D Models CS649XYY Pressure Sensor;...
- Page 34 70021428 184981 Certificate: Master Contract: 70021428 September 25, 2015 Project: Date Issued: CAN/CSA C22.2 No. 60079-11-2014 - Explosive atmospheres - Part 11: Equipment protection by intrinsic safety ANSI/ISA-60079-11-2014 - Explosive atmospheres - Part 11: Equipment protection by intrinsic safety CAN/CSA-C22.2 No. 213-R2013 - Non-incendive electrical equipment for use in Class I, Division 2 hazardous locations ANSI/ISA-12.12.01-2013 - Non-incendive Electrical Equipment for Use in Class I and II, Division 2 and Class III, Divisions 1 and 2 Hazardous (Classified) Locations...
- Page 35 PCB Piezotronics Inc. claims proprietary rights in REVISIONS the information disclosed hereon. Neither it nor any reproduction thereof will be disclosed to others DESCRIPTION without the written consent of PCB Piezotronics Inc. RELEASED TO DRAFTING 43847 SCHEDULE DRAWING NO MODIFICATIONS PERMITTED...
- Page 36 PCB Piezotronics Inc. claims proprietary rights in REVISIONS the information disclosed hereon. Neither it nor any reproduction thereof will be disclosed to others DESCRIPTION without the written consent of PCB Piezotronics Inc. -SEE SHEET 1- SCHEDULE DRAWING NO MODIFICATIONS PERMITTED WITHOUT REFERENCE TO THE...
Need help?
Do you have a question about the IMI SENSORS CS649A93 and is the answer not in the manual?
Questions and answers