Lincoln Electric VANTAGE 400 Service Manual
Hide thumbs
Also See for VANTAGE 400:
- Service manual (166 pages) ,
- Operator's manual (80 pages) ,
- Specification sheet (168 pages)
Table of Contents
Advertisement
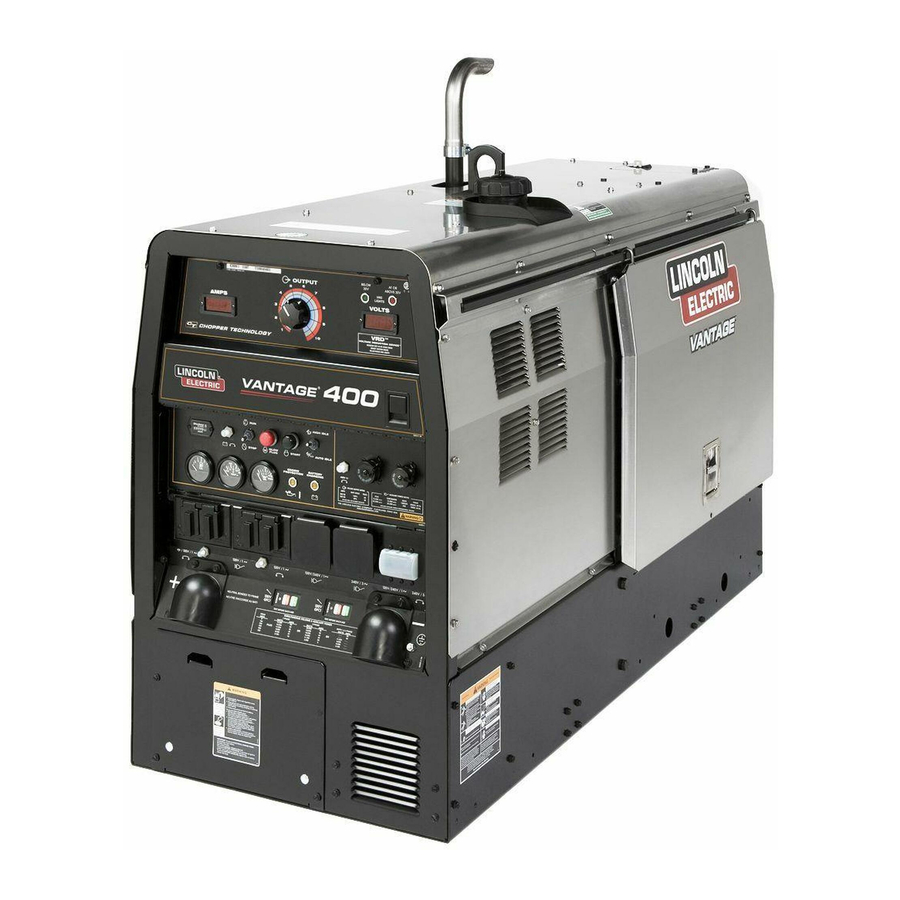
VANTAGE
400
®
For use with machines having Code Numbers:
11186, 11462, 11785, 11920, 12305,
12319, 11463, 11464, 12195, 11296,
12308, 11687, 11959, 12307, 11297,
11787, 11921, 12303, 11511, 11576,
11954, 11961, 12304, 12597, 12559
SERVICE MANUAL
L I N
C O
L N
E L
E C
T R
I C
SVM182-A
| Issue D ate 11-Apr
© Lincoln Global, Inc. All Rights Reserved.
NOTE: This manual will cover most of the troubleshooting and repair
procedures for the code numbers listed. Some variances may exist when
troubleshooting/repairing later code numbers.
Need Help? Call 1.888.935.3877
to talk to a Service Representative
Hours of Operation:
8:00 AM to 6:00 PM (ET) Mon. thru Fri.
After hours?
Use "Ask the Experts" at lincolnelectric.com
A Lincoln Service Representative will contact you
no later than the following business day.
For Service outside the USA:
Email: globalservice@lincolnelectric.com
Advertisement
Chapters
Table of Contents
Troubleshooting

Related Manuals for Lincoln Electric VANTAGE 400


Summary of Contents for Lincoln Electric VANTAGE 400
- Page 1 NOTE: This manual will cover most of the troubleshooting and repair procedures for the code numbers listed. Some variances may exist when troubleshooting/repairing later code numbers. VANTAGE ® For use with machines having Code Numbers: 11186, 11462, 11785, 11920, 12305, 12319, 11463, 11464, 12195, 11296, 12308, 11687, 11959, 12307, 11297, 11787, 11921, 12303, 11511, 11576,...
- Page 2 Service and repair should be performed by only exhaust at the arc, or both, to keep Lincoln Electric Factory Trained Personnel. Unauthorized the fumes and gases from your breathing zone and the general area. repairs performed on this equipment may result in danger...
- Page 3 American Welding Society, P.O. Box 351040, Miami, Florida 33135 MAGNETIC FIELDS MAY or CSA Standard W117.2-1974. A Free copy of “Arc Welding Safety” booklet E205 is available from the Lincoln Electric Company, 22801 BE DANGEROUS St. Clair Avenue, Cleveland, Ohio 44117-1199.
- Page 4 SAFETY ELECTRIC SHOCK ARC RAYS CAN BURN. CAN KILL. 3.a. The electrode and work (or ground) circuits are 4.a. Use a shield with the proper filter and cover electrically “hot” when the welder is on. Do plates to protect your eyes from sparks and the rays of the arc not touch these “hot”...
- Page 5 SAFETY WELDING AND CUTTING CYLINDER MAY EXPLODE IF SPARKS CAN CAUSE DAMAGED. FIRE OR EXPLOSION. 7.a. Use only compressed gas cylinders containing the correct shielding gas for the process used 6.a. Remove fire hazards from the welding area. and properly operating regulators designed for If this is not possible, cover them to prevent the gas and pressure used.
- Page 6 Electromagnetic Compatibility (EMC) Product Standard for Arc Welding equipment, in metallic conduit or equivalent. Shielding should be Equipment. It is for use with other Lincoln Electric equipment. It is electrically continuous throughout its length. The shielding should be designed for industrial and professional use.
- Page 7 See chart of TLV and PEL for Typical Electrode Ingredients, the OSHA PEL (Permissible Exposure Limit), and the recommended guideline, the ACGIH TLV (Threshold Limit Value), for many compounds found in welding fume. VANTAGE 400...
- Page 8 TLV and PEL values are as of April 2006. Always check Material Know Act of 1986 and of 40CFR 370 and 372. Safety Data Sheet (MSDS) with product or on the Lincoln Electric website at http://www.lincolnelectric.com (b) The PEL for chromium (VI) is .005 milligrams per cubic meter as an 8 hour time weighted average.
- Page 9 NOTES viii viii VANTAGE 400...
- Page 10 - MASTER TABLE OF CONTENTS FOR ALL SECTIONS - Page Safety ....................................ii-viii Installation, Operation, Accessories, Maintenance ................See Instruction Manual Theory of Operation ..............................Section E Troubleshooting and Repair ............................Section F Electrical Diagrams ..............................Section G VANTAGE® 400...
- Page 11 TABLE OF CONTENTS-THEORY OF OPERATION SECTION Theory of Operation ..............E-1 General Description .
- Page 12 THEORY OF OPERATION FIGURE E.2 — GENERAL DESCRIPTION, BATTERY, ENGINE, ROTOR, STATOR & ENGINE PROTECTION WORK TERMINAL THREE-PHASE RECTIFIER CHOPPER MODULE ELECTRODE TERMINAL IGBT 80 VDC CHOKE SHUNT STATOR VRD FEEDBACK VOLTAGE REDUCTION SIGNAL SWITCH (OFF) GLOW PLUGS WELD LIGHTS CONTROL MECHANICAL ROTOR...
- Page 13 THEORY OF OPERATION FIGURE E.3 — WELD WINDINGS, RECTIFIER, CHOPPER MODULES & FEEDBACK WORK TERMINAL THREE-PHASE RECTIFIER CHOPPER MODULE ELECTRODE TERMINAL IGBT 80 VDC CHOKE SHUNT STATOR VRD FEEDBACK VOLTAGE REDUCTION SIGNAL SWITCH (OFF) GLOW PLUGS WELD LIGHTS CONTROL MECHANICAL ROTOR BOARD ROTATION...
- Page 14 THEORY OF OPERATION FIGURE E.4 — WELD CONTROL BOARD WORK TERMINAL THREE-PHASE RECTIFIER CHOPPER MODULE ELECTRODE TERMINAL IGBT 80 VDC CHOKE SHUNT STATOR VRD FEEDBACK VOLTAGE REDUCTION SIGNAL SWITCH (OFF) GLOW PLUGS WELD LIGHTS CONTROL MECHANICAL ROTOR BOARD ROTATION ENGINE VOLTMETER STARTER SLIP...
- Page 15 THEORY OF OPERATION FIGURE E.5 – IGBT OPERATION INSULATED GATE BIPOLAR TRANSISTOR (IGBT) OPERATION An IGBT is a type of transistor. IGBTs are Drawing B shows the IGBT in an active mode. When semiconductors well suited for high frequency switching the gate signal, a positive DC voltage relative to the and high current applications. source, is applied to the gate terminal of the IGBT, it is capable of conducting current. A voltage supply Drawing A shows an IGBT in a passive mode. There connected to the drain terminal will allow the IGBT...
- Page 16 THEORY OF OPERATION FIGURE E.6 – TYPICAL IGBT OUTPUTS MINIMUM OUTPUT (Dwell or Off Time) MAXIMUM OUTPUT (Dwell or Off Time) PULSE WIDTH MODULATION The term PULSE WIDTH MODULATION is used to The positive portion of the signal represents one IGBT describe how much time is devoted to conduction group conducting for 2 microsecond. The dwell time (off in the cycle. Changing the pulse width is known as time) is 48 microseconds. Since only 2 microseconds of...
- Page 17 THEORY OF OPERATION CHOPPER TECHNOLOGY FUNDAMENTALS The new era of welding machines such as the Hence the name “Chopper.” The biggest advantage® Vantage® 500, employ a technology whereby a DC of chopper technology is the high-speed control of the source is turned on and off (chopped up) at high speed, arc, similar to the inverter machines. A block diagram then smoothed through an inductor to control an arc. for this is as follows: EXTERNAL DC SOLID STATE INDUCTOR SOURCE SWITCH...
- Page 18 NOTES VANTAGE® 400...
-
Page 19: Table Of Contents
TABLE OF CONTENTS - TROUBLESHOOTING & REPAIR Troubleshooting and Repair ............. . F-1 How to Use Troubleshooting Guide . -
Page 20: How To Use Troubleshooting Guide
HOW TO USE TROUBLESHOOTING GUIDE WARNING Service and Repair should only be performed by Lincoln Electric Factory Trained Personnel. Unauthorized repairs performed on this equipment may result in danger to the technician and machine operator and will invalidate your factory warranty. For your safety and to avoid Electrical Shock, please observe all safety notes and precautions detailed throughout this manual. -
Page 21: Pc Board Troubleshooting Procedures
TROUBLESHOOTING & REPAIR PC BOARD TROUBLESHOOTING PROCEDURES - R emove the PC board from the static-shielding bag WARNING and place it directly into the equipment. Don’t set the PC board on or near paper, plastic or cloth which ELECTRIC SHOCK could have a static charge. If the PC board can’t can kill. - Page 22 TROUBLESHOOTING & REPAIR Observe Safety Guidelines detailed in the beginning of this manual. PROBLEMS POSSIBLE AREAS OF RECOMMENDED (SYMPTOMS) MISADJUSTMENT(S) COURSE OF ACTION OUTPUT PROBLEMS Major mechanical or electrical 1. C ontact your local Lincoln 1. C ontact the Lincoln Electric damage is evident. Authorized Field Service Service Department at Facility. 1-888-935-3877. No welding output or auxiliary Check for loose or faulty Check the brushes for wear and power. The engine operates...
- Page 23 TROUBLESHOOTING & REPAIR Observe Safety Guidelines detailed in the beginning of this manual. PROBLEMS POSSIBLE AREAS OF RECOMMENDED (SYMPTOMS) MISADJUSTMENT(S) COURSE OF ACTION OUTPUT PROBLEMS No welding output in any mode. Place the Welding Terminals Check for damaged conductors The auxiliary output is normal. switch in the “WELD TERMINALS or faulty connections on the The engine operates normally. ON” If the problem is solved and heavy current carrying leads that there is a control cable, wire connect the output studs to the feeder, amptrol, or arc start switch Chopper module and to the Output connected, the fault may lie in the Rectifier. Also check the shunt above attached accessories. and the choke assemblies for damage and faulty connections. If the correct OCV is present at the weld output terminals, check the Check the Welding Terminals welding cables, connectors, work Switch and the associated leads. clamp, electrode holder, etc. For See Wiring Diagram.
- Page 24 TROUBLESHOOTING & REPAIR Observe Safety Guidelines detailed in the beginning of this manual. PROBLEMS POSSIBLE AREAS OF RECOMMENDED (SYMPTOMS) MISADJUSTMENT(S) COURSE OF ACTION OUTPUT PROBLEMS No output in PIPE MODE. Make sure VRD ON/OFF toggle Check the connections at the VRD Outputs normal in other modes. switch is in the off position. ON/OFF switch. Faulty CONTROL PC BOARD. Check the VRD on off switch for Faulty VRD display board. proper function/continuity. See VRD functional description VRD lights don’t light up. Ensure VRD ON/OFF switch is in Check connections at the VRD the “ON” position. ON/OFF switch. VRD light may be burned out, Check the VRD on off switch for replace both VRD lights. proper? Faulty VRD display P.C. Board. See VRD functional description. No auxiliary power at one or Check for loose or faulty Perform the Stator Voltage Test.
- Page 25 TROUBLESHOOTING & REPAIR Observe Safety Guidelines detailed in the beginning of this manual. PROBLEMS POSSIBLE AREAS OF RECOMMENDED (SYMPTOMS) MISADJUSTMENT(S) COURSE OF ACTION FUNCTION PROBLEMS The machine will weld but the Make sure the machine is properly The engine RPM may be too welding arc is “COLD”. The set for the electrode and process low. Perform the Engine Throttle engine runs normally and the is being used. Check electrode Adjustment Test. auxiliary power is normal. size, mode switch setting, and Connect the machine to a amps or voltage setting. If gas is resistive load bank. Connect an used make sure of correct type accurate ammeter and volt meter and gas flow. to the output of the machine. Make sure the process does not Connect a tachometer, Hz meter demand more power than the or another method to measure machine can produce.
- Page 26 TROUBLESHOOTING & REPAIR Observe Safety Guidelines detailed in the beginning of this manual. PROBLEMS POSSIBLE AREAS OF RECOMMENDED (SYMPTOMS) MISADJUSTMENT(S) COURSE OF ACTION FUNCTION PROBLEMS The machine will weld but the If the maximum weld output cannot welding arc is “COLD”. The be obtained even though the engine runs normally and the front panel displays are reading auxiliary power is normal. accurately, check for damaged (continued) conductors and lose or damaged connections the large current carrying conductor connect the stator, output rectifier, chopper modules, choke, shunt, and output terminals. See the Wiring Diagram. If all these connections are good perform the ROTOR VOLTAGE TEST, the STATOR VOLTAGE TEST, the OUTPUT RECTIFIER TEST, and the CHOPPER MODULE RESISTANCE TEST.
- Page 27 TROUBLESHOOTING & REPAIR Observe Safety Guidelines detailed in the beginning of this manual. PROBLEMS POSSIBLE AREAS OF RECOMMENDED (SYMPTOMS) MISADJUSTMENT(S) COURSE OF ACTION ENGINE PROBLEMS The machine welds but it will not There may be poor connections maintain a steady output. in the control wiring at the weld (continued) control P.C. Board, or the chopper board. Pull each plug from the weld P.C. board and thoroughly inspect the terminals in both the plugs and the P.C. Board receptacles. Make sure the connections are clean and the pins are properly seated in the plastic plug housing. Check for loose or damaged pins and faulty crimps. Check for damaged wiring and poor connections in the 13, 14, and the 23, and 25 leads, between the chopper module and weld control P.C. Board. The output control or the arc control potentiometer may be defective or grounded. The mode switch may also be faulty. Perform the POTENTIOMETER AND MODE SWITCH RESISTANCE TEST.
- Page 28 TROUBLESHOOTING & REPAIR F-10 F-10 Observe Safety Guidelines detailed in the beginning of this manual. PROBLEMS POSSIBLE AREAS OF RECOMMENDED (SYMPTOMS) MISADJUSTMENT(S) COURSE OF ACTION ENGINE PROBLEMS The weld output can not be Remote control devices completely Perform the REMOTE RECEPTACLE adjusted with the front panel disables the front output in all RESISTANCE TEST. output control knob in one or mode modes except touch start TIG The output control potentiometer weld modes. The weld output mode. Make sure there is nothing may be defective. Perform the terminals have normal OCV (open plugged into the Amphenol CONTROL POTENTIOMETER AND circuit voltage). The AC auxiliary receptacles . MODE SWITCH RESISTANCE TEST.
- Page 29 TROUBLESHOOTING & REPAIR F-11 F-11 Observe Safety Guidelines detailed in the beginning of this manual. PROBLEMS POSSIBLE AREAS OF RECOMMENDED (SYMPTOMS) MISADJUSTMENT(S) COURSE OF ACTION ENGINE PROBLEMS The machine seems to be locked Check the position of the Check that plug P-7 is fully into the “CC-stick” mode of WELD MODE selector switch. seated into the weld control P.C. operation . The switch should positively snap board socket. See Control Inner- into each mode position and Connection diagram. should not feel gritty or get stuck Check for corroded, dirty, or between positions. damaged Molex terminals in plug P-7, also check for similar problems in socket J-7 on the weld control P.C. board. Check the wiring between the control P.C. Board and the mode switch. Look for poor crimp and solder connections as well as damaged wiring or insulation. See wiring diagram.
- Page 30 TROUBLESHOOTING & REPAIR F-12 F-12 Observe Safety Guidelines detailed in the beginning of this manual. PROBLEMS POSSIBLE AREAS OF RECOMMENDED (SYMPTOMS) MISADJUSTMENT(S) COURSE OF ACTION WELDING PROBLEMS The machine welds normally in It is normal for one of the displays Both the “AMPS” and “VOLTS” all modes and the range of weld to be off when there is no load displays use the same part output seems normal, but one or across the weld output terminals. numbered display unit. If one of both of the front panel displays is In “CV” - mode only the “VOLTS” the digital displays appears to be blank, incorrect welding value, or display will be illuminated, in all functioning normally, it can be displays parts of numbers. other modes only the “AMPS” used to test the weld control P.C. display will be illuminated. Board output to the malfunctioning When welding both displays display . should be reading actual welding Swap the display board parameters.
- Page 31 TROUBLESHOOTING & REPAIR F-13 F-13 Observe Safety Guidelines detailed in the beginning of this manual. PROBLEMS POSSIBLE AREAS OF RECOMMENDED (SYMPTOMS) MISADJUSTMENT(S) COURSE OF ACTION OUTPUT PROBLEMS An Across-the-Arc type wire feeder Check that the welding Use a voltmeter to check for the does not function when connected terminals switch is in the presence of about 58 VDC open to the weld output of the machine. “WELD TERMINALS ON” position. circuit voltage (OCV) across the The Vantage® operated normally Check the that WELD MODE output studs of the machine. in the CC-STICK mode, and has switch is in the correct position for If the OCV is low, there may normal AC auxiliary output. the process being used, typically be a problem with the mode “CV-WIRE” mode. switch. Perform the CONTROL Check for poor weld cable POTENTIOMETER AND WELD MODE connections between the feeder SWITCH RESISTANCE TEST.
- Page 32 TROUBLESHOOTING & REPAIR F-14 F-14 Observe Safety Guidelines detailed in the beginning of this manual. PROBLEMS POSSIBLE AREAS OF RECOMMENDED (SYMPTOMS) MISADJUSTMENT(S) COURSE OF ACTION OUTPUT PROBLEMS The battery does not stay charged. Check for loose, corroded, or Perform the ENGINE ALTERNATOR faulty connections at the battery. TEST. Check for loose or damaged There may be a defective alternator drive belt. component or faulty wiring, The battery may be faulty. ,causing a current draw when the run/stop switch is in the “stop” position . Check the Run/Stop switch, the glow plug button, the alternator and the starter solenoid. Also check for damaged wiring and insulation. If the engine charging system is operating properly but the battery is not staying charged, the battery is defective and should be replaced .
- Page 33 TROUBLESHOOTING & REPAIR F-15 F-15 Observe Safety Guidelines detailed in the beginning of this manual. PROBLEMS POSSIBLE AREAS OF RECOMMENDED (SYMPTOMS) MISADJUSTMENT(S) COURSE OF ACTION OUTPUT PROBLEMS The engine starts but shuts down Make sure the glow plug button The shut down fuel solenoid immediately when the start button is pressed while pushing the may be faulty or not operating is released . start button, and held until the properly. Check lead #233 and engine protection light turns off #262 and perform the FUEL SHUT (5 SECONDS MAXIMUM AFTER DOWN SOLENOID TEST. See wiring THE ENGINE STARTS.). See diagram. the operator’s manual, or the The check for the presents of 12 operating section of this manual volts at the lead #233, when start for proper starting procedure.
- Page 34 TROUBLESHOOTING & REPAIR F-16 F-16 Observe Safety Guidelines detailed in the beginning of this manual. PROBLEMS POSSIBLE AREAS OF RECOMMENDED (SYMPTOMS) MISADJUSTMENT(S) COURSE OF ACTION OUTPUT PROBLEMS The engine shuts down shortly Check for poor electrical after starting. connections at the run/stop switch, and the fuel shutdown solenoid. See wiring diagram. The fuel solenoid may be faulty. Perform the FUEL SHUTDOWN SOLENOID TEST. The engine shuts down shortly Try resetting the breaker. If it trips Repeated tripping and resetting of after starting and trips the battery again do not attempt to use the the circuit breaker can damage it, circuit breaker (CB5). machine. or alter its trip point. If the breaker has been ripped and reset many Contact a Lincoln Authorized Field times, it should be replaced.
- Page 35 TROUBLESHOOTING & REPAIR F-17 F-17 Observe Safety Guidelines detailed in the beginning of this manual. PROBLEMS POSSIBLE AREAS OF RECOMMENDED (SYMPTOMS) MISADJUSTMENT(S) COURSE OF ACTION OUTPUT PROBLEMS The engine will not develop full The fuel may be old or The engine may be in need of power. contaminated. Supply the engine adjustment or repair. with clean fresh fuel. The fuel filter may be clogged, replace if necessary. The air filter may be clogged, replace if necessary. The engine will not idle down Make sure the idle switch is in Perform the IDLER SOLENOID TEST. to low RPM. The machine has the “AUTO IDLE” position. Make Check for damaged wiring or faulty normal weld and auxiliary output. sure there is no external load on connections at the idle solenoid, the weld terminals or the auxiliary the engine protection PC Board, power receptacles.
- Page 36 TROUBLESHOOTING & REPAIR F-18 F-18 Observe Safety Guidelines detailed in the beginning of this manual. PROBLEMS POSSIBLE AREAS OF RECOMMENDED (SYMPTOMS) MISADJUSTMENT(S) COURSE OF ACTION OUTPUT PROBLEMS The engine will not idle down Manually move the idle solenoid to low RPM. The machine has plunger to the idle position. If the normal weld and auxiliary output. solenoid engages and holds in the (continued) idle position, the idle pull coil may be bad. If the solenoid does not hold in the low idle position, remove plug P6 from the control PC Board and wait about 30 seconds. If the engine drops to low idle check for damage or buildup of conductive material on or around the bypass filter assembly and the output terminals. See wiring diagram. If the engine still does not drop to low idle the control PC Board is probably defective. Replace it. Check that leads #3 and #6 are properly routed through the toroidal current sensor.
- Page 37 TROUBLESHOOTING & REPAIR F-19 F-19 Observe Safety Guidelines detailed in the beginning of this manual. PROBLEMS POSSIBLE AREAS OF RECOMMENDED (SYMPTOMS) MISADJUSTMENT(S) COURSE OF ACTION OUTPUT PROBLEMS The engine will not idle down Measure the resistance of toroidal to low RPM. The machine has current sensor. Measure between normal weld and auxiliary output. #P-3 and #P-4, the resistance (continued) should be 4.1 Ohms. If the sensor is shorted or open replace it . The control board may be bad. The engine will not go to high The load on the auxiliary Check that leads #3 and #6 idle when using auxiliary power. receptacle may be too low. are properly routed through the Auxiliary power is normal when The automatic idle system will not toroidal current sensor. the idler switch is in the “HIGH”...
- Page 38 TROUBLESHOOTING & REPAIR F-20 F-20 Observe Safety Guidelines detailed in the beginning of this manual. PROBLEMS POSSIBLE AREAS OF RECOMMENDED (SYMPTOMS) MISADJUSTMENT(S) COURSE OF ACTION OUTPUT PROBLEMS The engine will not go to high idle Check that the welding cables Check the leads and connections when striking arc. The automatic are in good working condition and at the SHUNT at the Positive idle system functions normally the connections are tight. Make output stud. Check lead 204S and when using auxiliary power. sure the work clamp is attached to 206S for continuity from the shunt Welding and auxiliary outputs are clean, bare metal. to J-6 on the Weld Control Board. normal when the idle switch is in Check the pins and connections the “HIGH IDLE” position. at J-6 and J on the Weld Control Board . The weld control P.C. Board may be defective.
-
Page 39: Case Cover Removal And Replacement Procedure
TROUBLESHOOTING & REPAIR F-21 F-21 CASE COVER REMOVAL AND REPLACEMENT PROCEDURE WARNING Service and repair should be performed by only Lincoln Electric factory trained personnel. Unauthorized repairs performed on this equipment may result in danger to the technician or machine operator and will invalidate your factory warranty. For your safety and to avoid electrical shock, please observe all safety notes and precautions detailed throughout this manual. If for any reason you do not understand the test procedures or are unable to perform the test/repairs safely, contact the Lincoln Electric Service Department for electrical trouble- shooting assistance before you proceed. Call 1-888-935-3877. TEST DESCRIPTION This procedure will aid the technician in the removal and replacement of the Case Sheet Metal Covers. MATERIALS NEEDED 3/8” Wrench 1/2” Wrench VANTAGE® 400... - Page 40 TROUBLESHOOTING & REPAIR F-22 F-22 CASE COVER REMOVAL AND REPLACEMENT PROCEDURE (CONTIN- UED) FIGURE F.1 – CASE COVER REMOVAL Roof Lift Bale Seal Fuel Tank Seal Fuel Tank Cap Left Case Side Battery Drawer Right Side Service Access Door Right Case Side PROCEDURE 9. W ith the help of an assistant, carefully remove 1. Turn the engine off.
- Page 41 TROUBLESHOOTING & REPAIR F-23 F-23 CASE COVER REMOVAL AND REPLACEMENT PROCEDURE (CONTIN- UED) REASSEMBLY PROCEDURE 1. Install components in reverse order of removal. 2. Be sure components align correctly. 3. Reconnect battery and replace battery door. VANTAGE® 400...
- Page 42 NOTES F-24 F-24 VANTAGE® 400...
-
Page 43: Chopper Module Capacitor Discharge Procedure
TROUBLESHOOTING & REPAIR F-25 F-25 CHOPPER MODULE CAPACITOR DISCHARGE PROCEDURE WARNING Service and repair should be performed by only Lincoln Electric factory trained personnel. Unauthorized repairs performed on this equipment may result in danger to the technician or machine operator and will invalidate your factory warranty. For your safety and to avoid electrical shock, please observe all safety notes and precautions detailed throughout this manual. If for any reason you do not understand the test procedures or are unable to perform the test/repairs safely, contact the Lincoln Electric Service Department for electrical trouble- shooting assistance before you proceed. Call 1-888-935-3877. TEST DESCRIPTION This procedure will insure that the large Capacitors in the Chopper Module have been discharged. This procedure should be performed whenever work is to be attempted on or near the Chopper Module. MATERIALS NEEDED Miscellaneous Hand Tools Volt/Ohmmeter Resistor (25-1000 ohms and 25 watts minimum) Lincoln part #S10404-114 works well for this purpose... - Page 44 TROUBLESHOOTING & REPAIR F-26 F-26 CHOPPER MODULE CAPACITOR DISCHARGE PROCEDURE (CONTINUED) FIGURE F.2 - CHOPPER MODULE CAPACITOR TERMINAL DISCHARGE INSULATED GLOVES NEVER SHORTING STRAP WARNING DISCHARGE CAPACITORS. If the Lincoln recommended resistor, or an equivalent resistor ELECTRIC SHOCK can kill. is used, the capacitors can be discharged by •...
-
Page 45: Fuel Shutdown Solenoid Test
TROUBLESHOOTING & REPAIR F-27 F-27 FUEL SHUTDOWN SOLENOID TEST WARNING Service and repair should be performed by only Lincoln Electric factory trained personnel. Unauthorized repairs performed on this equipment may result in danger to the technician or machine operator and will invalidate your factory warranty. For your safety and to avoid electrical shock, please observe all safety notes and precautions detailed throughout this manual. If for any reason you do not understand the test procedures or are unable to perform the test/repairs safely, contact the Lincoln Electric Service Department for electrical trouble- shooting assistance before you proceed. Call 1-888-935-3877. TEST DESCRIPTION This test will determine if the Shutdown Solenoid resistance values are normal, and also determine if it will function normally when energized with 12 VDC. MATERIALS NEEDED Wiring Diagram Volt/Ohmmeter Miscellaneous Hand Tools 12 Volt D.C. Power Source, (an automotive battery works well) VANTAGE® 400... - Page 46 TROUBLESHOOTING & REPAIR F-28 F-28 FUEL SHUTDOWN SOLENOID TEST (CONTINUED) FIGURE F.3 - FUEL SHUTDOWN SOLENOID LOCATION SHUTDOWN SOLENOID IDLE SOLENOID L IN TEST PROCEDURE 1. T urn the engine off. 6. U sing an external 12VDC supply, apply voltage to the coil leads, (black-) to (white+). The 2. O pen the right side engine service access door.
-
Page 47: Engine Throttle Adjustment Test
TROUBLESHOOTING & REPAIR F-29 F-29 ENGINE THROTTLE ADJUSTMENT TEST WARNING Service and repair should be performed by only Lincoln Electric factory trained personnel. Unauthorized repairs performed on this equipment may result in danger to the technician or machine operator and will invalidate your factory warranty. For your safety and to avoid electrical shock, please observe all safety notes and precautions detailed throughout this manual. If for any reason you do not understand the test procedures or are unable to perform the test/repairs safely, contact the Lincoln Electric Service Department for electrical trouble- shooting assistance before you proceed. Call 1-888-935-3877. TEST DESCRIPTION If the machine output is low or high, this test will determine whether the Engine is operating at the correct speed (RPM) during both HIGH and LOW idle conditions. You can check RPM using a strobe-tach, a frequency counter, or a vibratach. Directions for adjusting the throttle to the correct RPM are given. MATERIALS NEEDED Miscellaneous hand tools and metric wrench set High visibility marker Strobe-tach, frequency counter, or vibratach VANTAGE® 400... - Page 48 TROUBLESHOOTING & REPAIR F-30 F-30 ENGINE THROTTLE ADJUSTMENT TEST (CONTINUED) FIGURE F.4 - STROBE MARK LOCATION STROBE TACH MARK TEST PROCEDURE Strobe-Tach Method 7. M ove the idle switch to the “AUTO IDLE” position 1. T urn the engine off and wait for the idle solenoid to energize, and 2. O pen the top and right side engine service the engine RPM to drop and stabilize at the low access doors .
- Page 49 TROUBLESHOOTING & REPAIR F-31 F-31 ENGINE THROTTLE ADJUSTMENT TEST (CONTINUED) FIGURE F.5 - SOLENOID SHUTDOWN SOLENOID IDLE SOLENOID LOW SPEED ADJ. DO NOT TOUCH FOR LOW SPEED L IN HIGH SPEED ADJ. Frequency Counter Method NOTE: A dedicated frequency counter can be used 3. M ove the idle switch to the “AUTO IDLE” position for this test, but many high quality digital and wait for the idle solenoid to energize, and multimeters also have this function, and can...
- Page 50 TROUBLESHOOTING & REPAIR F-32 F-32 ENGINE THROTTLE ADJUSTMENT TEST (CONTINUED) Vibratach Method NOTE: Low idle RPM must be set, and the adjustment nuts tightened, before the A Vibratach is used to measure the vibrations high idle RPM is adjusted. caused by the running engine. It can be positioned anywhere where the engine vibration is reasonably strong. The best results will likely be obtained Low Idle adjustment:...
-
Page 51: Idler Solenoid Test
TROUBLESHOOTING & REPAIR F-33 F-33 IDLER SOLENOID TEST WARNING Service and repair should be performed by only Lincoln Electric factory trained personnel. Unauthorized repairs performed on this equipment may result in danger to the technician or machine operator and will invalidate your factory warranty. For your safety and to avoid electrical shock, please observe all safety notes and precautions detailed throughout this manual. If for any reason you do not understand the test procedures or are unable to perform the test/repairs safely, contact the Lincoln Electric Service Department for electrical trouble- shooting assistance before you proceed. Call 1-888-935-3877. TEST DESCRIPTION This test will determine if the Idler Solenoid resistance values are normal, and also determine if it will function normally when it is energized with 12VDC. MATERIALS NEEDED M iscellaneous Hand Tools External 12VDC Supply (30 amps) (automotive battery works well) Wiring Diagram Volt/Ohmmeter VANTAGE®... - Page 52 TROUBLESHOOTING & REPAIR F-34 F-34 IDLER SOLENOID TEST (CONTINUED) FIGURE F.6 - PLUG(S) PIN LOCATION P-55 J-55 232L COMMON 12 VOLT + RUN BLACK WHITE ENGINE PROTECTION ENGINE PROTECTION HOLD PULL IDLE CONTROL P.C.B. IDLE CONTROL P.C.B. IDLE SOLENOID IDLE SOLENOID WIRING HARNESS CONNECTOR CONNECTOR...
-
Page 53: Engine Alternator Test
TROUBLESHOOTING & REPAIR F-35 F-35 ENGINE ALTERNATOR TEST WARNING Service and repair should be performed by only Lincoln Electric factory trained personnel. Unauthorized repairs performed on this equipment may result in danger to the technician or machine operator and will invalidate your factory warranty. For your safety and to avoid electrical shock, please observe all safety notes and precautions detailed throughout this manual. If for any reason you do not understand the test procedures or are unable to perform the test/repairs safely, contact the Lincoln Electric Service Department for electrical trouble- shooting assistance before you proceed. Call 1-888-935-3877. TEST DESCRIPTION This test will determine if the Engine Alternator is properly charging the battery. MATERIALS NEEDED Miscellaneous Hand Tools Volt Meter Wiring Diagram VANTAGE® 400... - Page 54 TROUBLESHOOTING & REPAIR F-36 F-36 ENGINE ALTERNATOR TEST (CONTINUED) FIGURE F.7 - LEAD LOCATIONS BACK OF ALTERNATOR TEST PROCEDURE 9. M ake sure the idle switch is still in the “high” position, start the engine, and allow it to run at 1. T urn the engine off. high idle speed for about 15 to 30 seconds. 2. O pen the engine access door and check the 10. P lace the negative meter probe on a good voltage at the battery terminals. It should be chassis ground, or the negative battery terminal.
-
Page 55: Brush And Slip Ring Service Procedure
TROUBLESHOOTING & REPAIR F-37 F-37 BRUSH AND SLIP RING SERVICE PROCEDURE WARNING Service and repair should be performed by only Lincoln Electric factory trained personnel. Unauthorized repairs performed on this equipment may result in danger to the technician or machine operator and will invalidate your factory warranty. For your safety and to avoid electrical shock, please observe all safety notes and precautions detailed throughout this manual. If for any reason you do not understand the test procedures or are unable to perform the test/repairs safely, contact the Lincoln Electric Service Department for electrical trouble- shooting assistance before you proceed. Call 1-888-935-3877. DESCRIPTION This procedure provides guidance in testing and maintaining the Brush and Slip Ring System. MATERIALS NEEDED V olt/Ohmmeter Miscellaneous Hand Tools 500 or 600 grit emery cloth 180 grit sand paper VANTAGE®... - Page 56 TROUBLESHOOTING & REPAIR F-38 F-38 BRUSH AND SLIP RING SERVICE PROCEDURE (CONTINUED) FIGURE F.8 – BRUSH & SLIP RING LOCATIONS BRUSHES SLIP RINGS #200A #200B #201 TEST PROCEDURE Cleaning slip rings: 1. P erform the Case Cover Removal Procedure. 1. I n the event that the slip rings have become dirty, discolored or mildly pitted, it will be 2. E xamine brushes and slip rings. The slip rings, necessary to clean them, using very fine, 500...
- Page 57 TROUBLESHOOTING & REPAIR F-39 F-39 ROTOR RESISTANCE AND GROUND TEST (STATIC) WARNING Service and repair should be performed by only Lincoln Electric factory trained personnel. Unauthorized repairs performed on this equipment may result in danger to the technician or machine operator and will invalidate your factory warranty. For your safety and to avoid electrical shock, please observe all safety notes and precautions detailed throughout this manual. If for any reason you do not understand the test procedures or are unable to perform the test/repairs safely, contact the Lincoln Electric Service Department for electrical trouble- shooting assistance before you proceed. Call 1-888-935-3877. TEST DESCRIPTION This test will determine if the Rotor Winding is open, shorted, or grounded. MATERIALS NEEDED Miscellaneous Hand Tools Ohmmeter Analog type meter required for dynamic resistance test.) Wiring Diagram VANTAGE® 400...
- Page 58 TROUBLESHOOTING & REPAIR F-40 F-40 ROTOR RESISTANCE AND GROUND TEST (STATIC) (CONTINUED) FIGURE F.9 - ROTOR BRUSH LEADS BRUSHES SLIP RINGS #200A #200B #201 TEST PROCEDURE 1. T urn the engine off. 5. M easure the resistance to ground. Place one meter probe on either of the slip rings. Place 2. P erform the Case Cover Removal Procedure .
-
Page 59: Rotor Resistance And Ground Test (Dynamic
TROUBLESHOOTING & REPAIR F-41 F-41 ROTOR RESISTANCE AND GROUND TEST (DYNAMIC) (Also referred to as flying resistance test) WARNING Service and repair should be performed by only Lincoln Electric factory trained personnel. Unauthorized repairs performed on this equipment may result in danger to the technician or machine operator and will invalidate your factory warranty. For your safety and to avoid electrical shock, please observe all safety notes and precautions detailed throughout this manual. If for any reason you do not understand the test procedures or are unable to perform the test/repairs safely, contact the Lincoln Electric Service Department for electrical trouble- shooting assistance before you proceed. Call 1-888-935-3877. DESCRIPTION This test checks for faults in the Rotor Winding, while these windings are being stressed by the mechanical forces encountered during normal operation. MATERIALS NEEDED Miscellaneous Hand Tools Ohmmeter (Analog type meter required for dynamic resistance test.) Wiring Diagram NOTE: T his test is best performed with a good quality analog type ohmmeter. Many digital meters will not provide stable or accurate Resistance readings while the rotor is spinning . VANTAGE®... - Page 60 TROUBLESHOOTING & REPAIR F-42 F-42 ROTOR RESISTANCE AND GROUND TEST (DYNAMIC) (CONTINUED) TEST PROCEDURE 4. S hut off engine, and move one of the ohmmeter leads to a good clean chassis ground. This test requires that the brushes and slip rings 5. R estart the engine and run it at high idle speed are clean, in good condition, and are properly (1860-1890 RPM). The resistance should be seated .
-
Page 61: Rotor Voltage Test
TROUBLESHOOTING & REPAIR F-43 F-43 ROTOR VOLTAGE TEST WARNING Service and repair should be performed by only Lincoln Electric factory trained personnel. Unauthorized repairs performed on this equipment may result in danger to the technician or machine operator and will invalidate your factory warranty. For your safety and to avoid electrical shock, please observe all safety notes and precautions detailed throughout this manual. If for any reason you do not understand the test procedures or are unable to perform the test/repairs safely, contact the Lincoln Electric Service Department for electrical trouble- shooting assistance before you proceed. Call 1-888-935-3877. TEST DESCRIPTION This test will determine if the Rotor Winding is operating at normal charge. MATERIALS NEEDED M iscellaneous Hand Tools Voltmeter Wiring Diagram VANTAGE® 400... - Page 62 TROUBLESHOOTING & REPAIR F-44 F-44 ROTOR VOLTAGE TEST (CONTINUED) FIGURE F.10 - LEAD LOCATIONS BRUSHES SLIP RINGS #200A #200B #201 TEST PROCEDURE 8. If voltage is higher than 175 VDC, the engine 1. P erform the Case Cover Removal Procedure . RPM may be too high, or there may be voltage 2. C onnect the voltmeter probes to the brush intrusion from one of the higher voltage stator terminals. See Figure F.10. See the wiring windings to the stator exciter winding. Perform...
- Page 63 TROUBLESHOOTING & REPAIR F-45 F-45 ROTOR VOLTAGE TEST (CONTINUED) 10. If the meter reading indicates battery 16. B e sure that there are no leads of any kind voltage, about 12 to 14 VDC, the rotor may across any of the stator windings, except the be open, or the brushes may be faulty or not 6A - 5H winding. Examine stator wiring for making proper contact with the slip rings.
- Page 64 NOTES F-46 F-46 VANTAGE® 400...
-
Page 65: Flashing Voltage Test
TROUBLESHOOTING & REPAIR F-47 F-47 FLASHING VOLTAGE TEST (Engine Not Running) WARNING Service and repair should be performed by only Lincoln Electric factory trained personnel. Unauthorized repairs performed on this equipment may result in danger to the technician or machine operator and will invalidate your factory warranty. For your safety and to avoid electrical shock, please observe all safety notes and precautions detailed throughout this manual. If for any reason you do not understand the test procedures or are unable to perform the test/repairs safely, contact the Lincoln Electric Service Department for electrical trouble- shooting assistance before you proceed. Call 1-888-935-3877. TEST DESCRIPTION This test checks the flashing voltage with the Engine stopped, by simulating a running condition . MATERIALS NEEDED Miscellaneous Hand Tools Voltmeter Wiring Diagram... - Page 66 TROUBLESHOOTING & REPAIR F-48 F-48 FLASHING VOLTAGE TEST (CONTINUED) TEST PROCEDURE 13. Refer to the wiring diagram, pull plug P-31 from the Idle Control board and inspect each 1. P erform the Case Cover Removal Procedure . terminal. Make sure that all terminals both on the board and in the plug are clean and in 2.
- Page 67 TROUBLESHOOTING & REPAIR F-49 F-49 FLASHING VOLTAGE TEST (CONTINUED) 17. I f battery voltage is present at leads #232 20. S et the RUN/STOP switch to the “STOP” and #232F, but not present at leads #200 position . The engine protection / idle P.C.B. board is 21. R e-connect lead #234 to the oil pressure probably defective. Replace.
- Page 68 NOTES F-50 F-50 VANTAGE® 400...
-
Page 69: Stator Voltage Tests
TROUBLESHOOTING & REPAIR F-51 F-51 STATOR VOLTAGE TESTS WARNING Service and repair should be performed by only Lincoln Electric factory trained personnel. Unauthorized repairs performed on this equipment may result in danger to the technician or machine operator and will invalidate your factory warranty. For your safety and to avoid electrical shock, please observe all safety notes and precautions detailed throughout this manual. If for any reason you do not understand the test procedures or are unable to perform the test/repairs safely, contact the Lincoln Electric Service Department for electrical trouble- shooting assistance before you proceed. Call 1-888-935-3877. TEST DESCRIPTION This test will determine if the Stator is able to produce correct voltage from of its Windings. It will only yield meaning data if the engine high idle speed is correct, (1860 to 1890 RPM), and approximately 160 VDC is present across the Rotor Slip Rings. NOTE: T he Slip Ring voltage will most likely be correct if at least one of the AC output voltages is correct. MATERIALS NEEDED Miscellaneous Hand Tools Voltmeter Test pins VANTAGE® 400... - Page 70 TROUBLESHOOTING & REPAIR F-52 F-52 STATOR VOLTAGE TESTS (CONTINUED) FIGURE F.11 RECEPTACLE LEAD LOCATIONS (TYPICAL) GROUND AMPHENOL 1 CONTACTOR CONTROL 120 VAC FOR WIRE FEEDER REMOTE 40 VAC FOR WIRE FEEDER CONTROL 21 WORK SENSE 2 TIMES THRU FERRITE LEADS 75A, 76A, & 77A TEST PROCEDURE 3. S tart the engine and run it at high idle (1860- 1890 RPM).
- Page 71 TROUBLESHOOTING & REPAIR F-53 F-53 STATOR VOLTAGE TESTS (CONTINUED) FIGURE F.12 - RECTIFIER BRIDGE DETAIL To test the 120 VAC wire feeder supply: 1. C onnect the voltmeter probes to pins “A” (lead #32) and “J” (lead #31) of the 14 pin Amphenol. NOTE: T he wire feeder AC voltage supply tests See figure #3 and wiring diagram. require that the meter probes be inserted into the Amphenol connection cavities.
- Page 72 TROUBLESHOOTING & REPAIR F-54 F-54 STATOR VOLTAGE TESTS (CONTINUED) To test the 42 VAC wire feeder winding: To test the three-phase weld winding: 1. C onnect the voltmeter probes to pins “I” 1. L ocate weld winding leads W1/W6, W2/W3, (lead 41A) and “K” (lead #42A) of the 14 pin and W4/5 where they connect to the three- phase output bridge rectifier. See Figure...
-
Page 73: Stator Short Circuit & Ground Test
TROUBLESHOOTING & REPAIR F-55 F-55 STATOR SHORT CIRCUIT & GROUND TEST WARNING Service and repair should be performed by only Lincoln Electric factory trained personnel. Unauthorized repairs performed on this equipment may result in danger to the technician or machine operator and will invalidate your factory warranty. For your safety and to avoid electrical shock, please observe all safety notes and precautions detailed throughout this manual. If for any reason you do not understand the test procedures or are unable to perform the test/repairs safely, contact the Lincoln Electric Service Department for electrical trouble- shooting assistance before you proceed. Call 1-888-935-3877. TEST DESCRIPTION This test will determine if there are undesirable electrical connections between the Stator Windings and chassis ground, or between individual Windings within the Stator. This test should be performed if flashing voltage is present at the Rotor Slip Rings, Rotor resistance, Field Bridge Rectifier, Field Capacitor and all associated wiring are proven to be good, but the Stator output voltage fails to build-up to normal levels, or is too high in one or more, but not all, of the Windings. MATERIALS NEEDED Miscellaneous Hand Tools Ohm Meter VANTAGE® 400... - Page 74 TROUBLESHOOTING & REPAIR F-56 F-56 STATOR SHORT CIRCUIT & GROUND TEST (CONTINUED) FIGURE F.13 - WELD CONTROL BOARD GROUND AMPHENOL 1 CONTACTOR CONTROL 120 VAC FOR WIRE FEEDER REMOTE 40 VAC FOR WIRE FEEDER CONTROL 21 WORK SENSE 2 TIMES THRU FERRITE LEADS 75A, 76A, &...
-
Page 75: Output Rectifier Bridge Test
TROUBLESHOOTING & REPAIR F-57 F-57 OUTPUT RECTIFIER BRIDGE TEST WARNING Service and repair should be performed by only Lincoln Electric factory trained personnel. Unauthorized repairs performed on this equipment may result in danger to the technician or machine operator and will invalidate your factory warranty. For your safety and to avoid electrical shock, please observe all safety notes and precautions detailed throughout this manual. If for any reason you do not understand the test procedures or are unable to perform the test/repairs safely, contact the Lincoln Electric Service Department for electrical trouble- shooting assistance before you proceed. Call 1-888-935-3877. TEST DESCRIPTION This test will determine if the Rectifier is grounded, or if there are any failed Diode groups. NOTE: This test will not be able to detect individual open diodes within a group. MATERIALS NEEDED M iscellaneous Hand Tools Analog Ohmmeter or Diode Tester (For testing diodes) Ohm Meter (any type for ground test) VANTAGE® 400... - Page 76 TROUBLESHOOTING & REPAIR F-58 F-58 OUTPUT RECTIFIER BRIDGE TEST (CONTINUED) FIGURE F.14 TEST PROCEDURE 6. R emove leads W4, W5, and W10 from the 1. T urn the engine off. positive terminal of the Rectifier, and remove 2 . P erform the Case Cover Removal Procedure . leads W6 and W11 from the negative terminal.
- Page 77 TROUBLESHOOTING & REPAIR F-59 F-59 OUTPUT RECTIFIER BRIDGE TEST (CONTINUED) NOTE: A digital Ohmmeter is not recommended 7. C heck for grounds by placing one of the ohm meter probes on a clean, unpainted metal for this test. A typical digital Ohmmeter surface of the machine. Touch the other does not provide enough voltage or current probe to each of the five rectifier terminals.
- Page 78 TROUBLESHOOTING & REPAIR F-60 F-60 TABLE F.1 – DIODE TEST TABLE Test Instrument Diode Bias (+) Lead (-) Lead and Expected Test Result DC(+) FORWARD BIAS (Low Resistance) DC(+) FORWARD BIAS (Low Resistance) DC(+) FORWARD BIAS (Low Resistance) DC(-) FORWARD BIAS (Low Resistance) DC(-) FORWARD BIAS (Low Resistance) DC(-) FORWARD BIAS (Low Resistance) DC(-) REVERSE BIAS...
-
Page 79: Chopper Module Function Test
TROUBLESHOOTING & REPAIR F-61 F-61 CHOPPER MODULE FUNCTION TEST WARNING Service and repair should be performed by only Lincoln Electric factory trained personnel. Unauthorized repairs performed on this equipment may result in danger to the technician or machine operator and will invalidate your factory warranty. For your safety and to avoid electrical shock, please observe all safety notes and precautions detailed throughout this manual. If for any reason you do not understand the test procedures or are unable to perform the test/repairs safely, contact the Lincoln Electric Service Department for electrical trouble- shooting assistance before you proceed. Call 1-888-935-3877. DESCRIPTION This test will help determine if the Chopper Module is functioning properly, and receiving the correct input from the Output Rectifier and Control PC Board. This test can only provide meaningful results if the machine is producing normal AC auxiliary output. MATERIALS NEEDED M iscellaneous Hand Tools Digital Multi-Meter Frequency counter or digital multi-meter with frequency counter function. - Page 80 TROUBLESHOOTING & REPAIR F-62 F-62 CHOPPER MODULE FUNCTION TEST (CONTINUED) FIGURE F.16 - CHOPPER MODULE CONNECTIONS LED1 (B1,B2,B3) LED4 Chopper Working PWM Signal HL W11 L12683-1 HL W6 LED4 LED1 LED2 LED3 HL W5 HL W4 LED2 Voltage from HL W9 HL W8 Rectifier LED3 (B4,B5,B6)
- Page 81 TROUBLESHOOTING & REPAIR F-63 F-63 CHOPPER MODULE FUNCTION TEST (CONTINUED) TEST PROCEDURE (CONTINUED) 16. I f the 20 kHz signal is present, the chopper 13. I f about 58 VDC is present at chopper module module is defective. Replace. terminals B2+ to B3-, and B5+ to B6-, but not at the output terminals, there is a problem 17. I f the 20 kHz signal is not present, perform the between the chopper module and one of Weld Control Board PWM Gate Signal Test .
- Page 82 NOTES F-64 F-64 VANTAGE® 400...
-
Page 83: Chopper Module Resistance Test
TROUBLESHOOTING & REPAIR F-65 F-65 CHOPPER MODULE RESISTANCE TEST WARNING Service and repair should be performed by only Lincoln Electric factory trained personnel. Unauthorized repairs performed on this equipment may result in danger to the technician or machine operator and will invalidate your factory warranty. For your safety and to avoid electrical shock, please observe all safety notes and precautions detailed throughout this manual. If for any reason you do not understand the test procedures or are unable to perform the test/repairs safely, contact the Lincoln Electric Service Department for electrical trouble- shooting assistance before you proceed. Call 1-888-935-3877. TEST DESCRIPTION This test will help determine if the Chopper Module is shorted. This test can only detect some problems in the “Power” section of the module. Problems in some other PC board components may not be detected. MATERIALS NEEDED M iscellaneous Hand Tools Digital Ohmmeter Wiring Diagram VANTAGE® 400... - Page 84 TROUBLESHOOTING & REPAIR F-66 F-66 CHOPPER MODULE RESISTANCE TEST (CONTINUED) TEST PROCEDURE 4. U se a digital Ohmmeter to test the module per 1. P erform the Case Cover Removal Procedure . Table F.2 . 2. P erform the Capacitor Discharge Procedure . 3. C heck that all of the leads connected to the chopper module terminals are clearly marked to facilitate reassembly. Remove all of the leads from the chopper module and position them so...
- Page 85 TROUBLESHOOTING & REPAIR F-67 F-67 CHOPPER MODULE RESISTANCE TEST (CONTINUED) FIGURE F.2 - DIODE TEST TABLE OHMMETER OHMMETER READING Diode Bias (+) Lead (-) Lead and Expected Test Result 6K to 9K 6K to 9K 200k or higher 400k or higher 200k or higher 400k or higher 6K to 9K 6K to 9K 200k or higher 400k or higher 200k or higher 400k or higher 5 .
- Page 86 NOTES F-68 F-68 VANTAGE® 400...
-
Page 87: Weld Control Board Pwm Gate Signal Test
TROUBLESHOOTING & REPAIR F-69 F-69 WELD CONTROL BOARD PWM GATE SIGNAL TEST WARNING Service and repair should be performed by only Lincoln Electric factory trained personnel. Unauthorized repairs performed on this equipment may result in danger to the technician or machine operator and will invalidate your factory warranty. For your safety and to avoid electrical shock, please observe all safety notes and precautions detailed throughout this manual. If for any reason you do not understand the test procedures or are unable to perform the test/repairs safely, contact the Lincoln Electric Service Department for electrical trouble- shooting assistance before you proceed. Call 1-888-935-3877. DESCRIPTION This test will determine if the Weld Control PC Board is able to produce the PWM (Pulse Width Modulated) gate signal needed to control the IGBTs (Insulated Gate Bipolar Transistor) on the Chopper Module. This test will also verify that the Control PC Board can turn the PWM gate signal on and off properly. MATERIALS NEEDED D igital Multi-Meter Frequency Counter or digital Multi-meter with frequency counter function Wiring Diagram Control Inner-Connection Diagram... - Page 88 TROUBLESHOOTING & REPAIR F-70 F-70 WELD CONTROL BOARD PWM GATE SIGNAL TEST (CONTINUED) TEST PROCEDURE 14. I f the 80 to 100 VDC supply voltage is present 1. P erform the Case Cover Removal Procedure . at the weld control PC board, but there is no 2. U nplug any device that may be attached PWM gate signal, check the voltage between to either the 6 pin or the 14 pin Amphenol leads #2+ (P1-4) and #4 (P1-3). See figure #1...
-
Page 89: Weld Control Feedback Test
TROUBLESHOOTING & REPAIR F-71 F-71 WELD CONTROL FEEDBACK TEST WARNING Service and repair should be performed by only Lincoln Electric factory trained personnel. Unauthorized repairs performed on this equipment may result in danger to the technician or machine operator and will invalidate your factory warranty. For your safety and to avoid electrical shock, please observe all safety notes and precautions detailed throughout this manual. If for any reason you do not understand the test procedures or are unable to perform the test/repairs safely, contact the Lincoln Electric Service Department for electrical trouble- shooting assistance before you proceed. Call 1-888-935-3877. DESCRIPTION This test will determine if the Weld Control PC Board is receiving accurate current and voltage feedback from the weld circuit. This test will only yield usable information if the machine is producing some weld output. MATERIALS NEEDED D igital Multi-meter suitable for accurate readings in both the millivolt and normal weld voltage ranges. Resistive Load Bank Ammeter, suitable for accurate readings of normal welding current. (Often built into the load bank. Wiring Diagram Control Inner-Connection Diagram VANTAGE® 400... - Page 90 TROUBLESHOOTING & REPAIR F-72 F-72 WELD CONTROL FEEDBACK TEST (CONTINUED) TEST PROCEDURE 9. I f the readings differ significantly, continue with 1. P lace the idle switch in the “HIGH IDLE” this procedure position . 10. T urn off the engine and release the load 2. P lace the mode switch in the “CC-STICK” from the weld terminals. (The load bank and position .
- Page 91 TROUBLESHOOTING & REPAIR F-73 F-73 WELD CONTROL FEEDBACK TEST (CONTINUED) 16. I f the voltage readings are different, check the 20. T o calculate the correct millivolt signal for a wiring and connections between the welding given load, you divide the number of amps terminals and the control PC board. See the displayed on the ammeter by 8.
- Page 92 NOTES F-74 F-74 VANTAGE® 400...
-
Page 93: Control Potentiometer And Mode Switch Resistance Test
TROUBLESHOOTING & REPAIR F-75 F-75 CONTROL POTENTIOMETER AND MODE SWITCH RESISTANCE TEST WARNING Service and repair should be performed by only Lincoln Electric factory trained personnel. Unauthorized repairs performed on this equipment may result in danger to the technician or machine operator and will invalidate your factory warranty. For your safety and to avoid electrical shock, please observe all safety notes and precautions detailed throughout this manual. If for any reason you do not understand the test procedures or are unable to perform the test/repairs safely, contact the Lincoln Electric Service Department for electrical trouble- shooting assistance before you proceed. Call 1-888-935-3877. DESCRIPTION This test will check the Output Control Potentiometer, Arc Control Potentiometer, Mode Switch and associated wiring for damage, proper operation, tracking and grounds. MATERIALS NEEDED D igital Ohmmeter Wiring Diagram Control Inner-Connection Diagram VANTAGE® 400... - Page 94 TROUBLESHOOTING & REPAIR F-76 F-76 CONTROL POTENTIOMETER AND MODE SWITCH RESISTANCE TEST (CONTINUED) TEST PROCEDURE 7. I f the resistance is lower than 500k Ohms, 1. T urn the engine off replace the potentiometer and mode switch plug 2. P erform the Case Cover Removal Procedure . and lead assembly, or replace the defective component within the assembly. See wiring 3. U nplug P7 from control board, see control Inner- diagram.
- Page 95 TROUBLESHOOTING & REPAIR F-77 F-77 CONTROL POTENTIOMETER AND MODE RESISTANCE TEST (CONTINUED) TABLE F.3 POT/MODE SWITCH RESISTANCE TEST MODE SWITCH OHMMETER SETTING CONNECTION CC-STICK P7-9 (#214) TO P7-14 (#218) 500K or Higher CC-STICK P7-9 (#214) TO P7-15 (#220) 500K or Higher CC-STICK P7-9 (#214) TO P7-16 (#222) 500K or Higher CC-STICK P7-14 (#218) TO P7-15 (#220) 500K or Higher CC-STICK P7-14 (#218) TO P7-16 (#222) 500K or Higher CC-STICK P7-15 (#220) TO P7-16 (#222) 500K or Higher TOUCH START TIG P7-15 (#220) TO P7-16 (#222)
- Page 96 NOTES F-78 F-78 VANTAGE® 400...
-
Page 97: Remote Receptacle Resistance Test
TROUBLESHOOTING & REPAIR F-79 F-79 REMOTE RECEPTACLE RESISTANCE TEST WARNING Service and repair should be performed by only Lincoln Electric factory trained personnel. Unauthorized repairs performed on this equipment may result in danger to the technician or machine operator and will invalidate your factory warranty. For your safety and to avoid electrical shock, please observe all safety notes and precautions detailed throughout this manual. If for any reason you do not understand the test procedures or are unable to perform the test/repairs safely, contact the Lincoln Electric Service Department for electrical trouble- shooting assistance before you proceed. Call 1-888-935-3877. DESCRIPTION This test will help determine if there is a problem with the Remote Receptacle control wiring, relating to electrical tracking between other control conductors, power conductors, or ground. This test also checks the function of the weld terminal switch. MATERIALS NEEDED O hm Meter Wiring Diagram Control Inner-Connection Diagram VANTAGE®... - Page 98 TROUBLESHOOTING & REPAIR F-80 F-80 REMOTE RECEPTACLE RESISTANCE TEST (CONTINUED) FIGURE F.17 AMPHENOL 1 TEST PROCEDURE 7. I f the resistance values are found to be too low, 1. T urn the machine off. due to contaminated electrical components in 2. P erform the Case Cover Removal Procedure. the Amphenol harness assembly. Try removing the contamination and drying the components 3. M ake sure that there are no devices of any kind completely. If the resistance values are still too plugged into either Amphenol receptacles.
- Page 99 TROUBLESHOOTING & REPAIR F-81 F-81 REMOTE RECEPTACLE RESISTANCE TEST (continued) TABLE - F.4 AMPHENOL RESISTANCE TEST OHMMETER CONNECTION OHMMETER READING WELDING TERMINAL SWITCH SETTING PIN “G” (#75B) to PIN “Å” (#32) 500K or Higher PIN “G” (#75B) to PIN “B” (GND-A) 500K or Higher PIN “G” (#75B) to PIN “C” (#2B) 500K or Higher PIN “G” (#75B) to PIN “D” (#4B) 500K or Higher PIN “G” (#75B) to PIN “E” (#77B) 500K or Higher PIN “G” (#75B) to PIN “F” (#76B) 500K or Higher PIN “G” (#75B) to PIN “H” (#21) 500K or Higher PIN “G” (#75B) to PIN “I” (#41A) 500K or Higher PIN “G” (#75B) to PIN “J” (#31) 500K or Higher PIN “G” (#75B) to PIN “K” (#42A)
- Page 100 TROUBLESHOOTING & REPAIR F-82 F-82 NORMAL OPEN CIRCUIT VOLTAGE WAVEFORM (115VAC SUPPLY) HIGH IDLE – NO LOAD 16.4 ms 0 volts 50V This is the typical auxiliary output voltage generated from a properly operating machine. Note that each vertical division represents 50 volts and that each horizontal division rep- resents 5 milliseconds in time. NOTE: Scope probes are connected at machine 120 VAC receptacle. SCOPE SETTINGS Volts/Div ....50V/Div. Horizontal Sweep .
- Page 101 TROUBLESHOOTING & REPAIR F-83 F-83 NORMAL OPEN CIRCUIT VOLTAGE WAVEFORM (115VAC SUPPLY) MAX CONTROL POT - HIGH IDLE - NO LOAD 0 volts 50V This is the typical DC open circuit out- put voltage generated from a properly operating machine. Note that each vertical division represents 50 volts and that each horizontal division rep- resents 5 milliseconds in time. NOTE: Scope probes are connected at weld output terminals. SCOPE SETTINGS Volts/Div ....50V/Div. Horizontal Sweep .
- Page 102 TROUBLESHOOTING & REPAIR F-84 F-84 NORMAL OPEN CIRCUIT VOLTAGE WAVEFORM (115VAC SUPPLY) MACHINE LOADED TO 300 AMPS AT 27 VOLTS Trig +15V 0 volts 20V This is the typical DC output voltage generated from a properly operating machine. Note that each vertical division represents 20 volts and that each horizontal division represents 1 millisecond in time. The machine was loaded with a resis- tance grid bank to 300 amps at 27 volts. NOTE: Scope probes are connected at weld output terminals. SCOPE SETTINGS Volts/Div .....20V/Div Horizontal Sweep .
- Page 103 TROUBLESHOOTING & REPAIR F-85 F-85 NORMAL OPEN CIRCUIT VOLTAGE WAVEFORM (WIRE CV TAP) MAX CONTROL POT - HIGH IDLE - NO LOAD 0 volts 50V This is the typical DC open circuit out- put voltage generated from a properly operating machine. Note that each vertical division represents 50 volts and that each horizontal division rep- resents 5 milliseconds in time. NOTE: Scope probes are connected at weld output terminals. SCOPE SETTINGS Volts/Div ....50V/Div. Horizontal Sweep .
- Page 104 TROUBLESHOOTING & REPAIR F-86 F-86 NORMAL CIRCUIT VOLTAGE WAVEFORM (WIRE CV) MACHINE LOADED TO 300 AMPS AT 28 VOLTS 0 volts 20V This is the typical DC voltage gen- erated from a properly operating machine. Note that each vertical division represents 20 volts and that each horizontal division represents 1 millisecond in time. The machine was loaded with a resis- tance grid bank to 300 amps at 28 volts. NOTE: Scope probes are connected at weld output terminals. SCOPE SETTINGS Volts/Div ....20V/Div. Horizontal Sweep .
-
Page 105: Output Rectifier Bridge And Choke Removal And Replacement
TROUBLESHOOTING & REPAIR F-87 F-87 OUTPUT RECTIFIER BRIDGE AND CHOKE REMOVAL AND REPLACEMENT WARNING Service and repair should be performed by only Lincoln Electric factory trained personnel. Unauthorized repairs performed on this equipment may result in danger to the technician or machine operator and will invalidate your factory warranty. For your safety and to avoid electrical shock, please observe all safety notes and precautions detailed throughout this manual. If for any reason you do not understand the test procedures or are unable to perform the test/repairs safely, contact the Lincoln Electric Service Department for electrical trouble- shooting assistance before you proceed. Call 1-888-935-3877. DESCRIPTION The following procedure will aid the technician in removing and replacing the Output Rectifier Bridge and the Choke in the Vantage® 400. MATERIALS NEEDED M iscellaneous Hand Tools Penetrox Heat Sink Compound (Lincoln Part T12837-1) VANTAGE®... - Page 106 TROUBLESHOOTING & REPAIR F-88 F-88 OUTPUT RECTIFIER BRIDGE AND CHOKE REMOVAL AND REPLACEMENT (CONTINUED) REMOVAL PROCEDURE Removing the Output Choke 1. R emove t he h eavy l eads f rom t he c hoke. C arefully 1. T urn the engine off. mark the leads for accurate re-connection, and 2. R emove negative battery cable.
- Page 107 TROUBLESHOOTING & REPAIR F-89 F-89 OUTPUT RECTIFIER BRIDGE AND CHOKE REMOVAL AND REPLACEMENT (CONTINUED) Replacing the Output Rectifier 1. P lace the Output Rectifier into the machine so 5. R econnect all of the leads and plugs that were that its mounting studs fit into the holes in the disconnected during the removal procedure, bracket. Place a lock washer and a nut on each and replace any cable ties that were removed.
- Page 108 NOTES F-90 F-90 VANTAGE® 400...
-
Page 109: Chopper Module Removal And Replacement
TROUBLESHOOTING & REPAIR F-91 F-91 CHOPPER MODULE REMOVAL AND REPLACEMENT WARNING Service and repair should be performed by only Lincoln Electric factory trained personnel. Unauthorized repairs performed on this equipment may result in danger to the technician or machine operator and will invalidate your factory warranty. For your safety and to avoid electrical shock, please observe all safety notes and precautions detailed throughout this manual. If for any reason you do not understand the test procedures or are unable to perform the test/repairs safely, contact the Lincoln Electric Service Department for electrical trouble- shooting assistance before you proceed. Call 1-888-935-3877. DESCRIPTION This procedure will aid the technician in the removal and replacement of the Chopper Module Assembly. NOTE: T he Chopper Module assembly is removed and replaced as a unit. It contains no serviceable parts. MATERIALS NEEDED M iscellaneous Hand Tools Penetrox Heat Sink Compound (Lincoln Part T12837-1) VANTAGE®... - Page 110 TROUBLESHOOTING & REPAIR F-92 F-92 CHOPPER MODULE REMOVAL AND REPLACEMENT (CONTINUED) FIGURE F.18 - MODULE LEAD LOCATIONS LED1 (B1,B2,B3) LED4 Chopper Working PWM Signal HL W11 L12683-1 HL W6 LED4 LED1 LED2 LED3 HL W5 HL W4 LED2 Voltage from HL W9 HL W8 Rectifier...
- Page 111 TROUBLESHOOTING & REPAIR F-93 F-93 CHOPPER MODULE REMOVAL AND REPLACEMENT (CONTINUED) REPLACEMENT 4. R eplace any cable ties cut at disassembly. 1. M ount the heat sink to the brackets on the vertical baffle with the three 3/8” screws. Mount 5. W hen procedures are complete, perform the the plastic strip with the top two screws. Case Cover Replacement Procedure . 2. C onnect leads 23 and 25 at their in-line couplers.
- Page 112 NOTES F-94 F-94 VANTAGE® 400...
-
Page 113: Stator/Rotor Removal And Replacement
TROUBLESHOOTING & REPAIR F-95 F-95 STATOR/ROTOR REMOVAL AND REPLACEMENT PROCEDURE WARNING Service and repair should be performed by only Lincoln Electric factory trained personnel. Unauthorized repairs performed on this equipment may result in danger to the technician or machine operator and will invalidate your factory warranty. For your safety and to avoid electrical shock, please observe all safety notes and precautions detailed throughout this manual. If for any reason you do not understand the test procedures or are unable to perform the test/repairs safely, contact the Lincoln Electric Service Department for electrical trouble- shooting assistance before you proceed. Call 1-888-935-3877. TEST DESCRIPTION This procedure will aid the technician in the removal and replacement of the Rotor and Stator . MATERIALS NEEDED Misc Hand Tools VANTAGE® 400... - Page 114 TROUBLESHOOTING & REPAIR F-96 F-96 STATOR/ROTOR REMOVAL AND REPLACEMENT PROCEDURE (CONTINUED) FIGURE F.19 – FUEL TANK REMOVAL LEADS #229 AND #5J PLUG FUEL LINES U-BOLTS (2) PROCEDURE 5. T urn the fuel off at the shutoff valve. Remove 1. Turn the engine off. and plug the fuel return line. See Figure F.19. 2. P erform the Case Cover Removal Procedure, 6. R emove and plug the lower fuel line. Pull it including the output panel.
- Page 115 TROUBLESHOOTING & REPAIR F-97 F-97 STATOR/ROTOR REMOVAL AND REPLACEMENT PROCEDURE (CONTINUED) FIGURE F.20 – PLUG AND LEAD REMOVAL #200 200A #201A- FILTER FIELD DIODE CAPACITOR RECTIFIER BRIDGE PROCEDURE 11. L abel and remove leads 5H, 200, 200A, 6A, 9. D isconnect plug J30 at the right front side. See 201A, 5H from the field bridge rectifier. See Figure F.20.
- Page 116 TROUBLESHOOTING & REPAIR F-98 F-98 STATOR/ROTOR REMOVAL AND REPLACEMENT PROCEDURE (CONTINUED) FIGURE F.21 – BRUSHHOLDER LEAD REMOVAL #200A #200B #201 PROCEDURE 14. U sing a 3/8” wrench, remove the brush holder 12. L abel and remove brush leads #201(-) and assembly. #200B(+) from the brush holder assembly. (The Piggy-backed leads connect closest to 15. U sing the 1/2” wrench, disconnect leads #68A the stator terminations.) See Figure F.21.
- Page 117 TROUBLESHOOTING & REPAIR F-99 F-99 STATOR/ROTOR REMOVAL AND REPLACEMENT PROCEDURE (CONTINUED) FIGURE F.22 – CONTROL & OUTPUT PANELS - REAR VIEW 50 Amp Circuit Breaker Ground Aux. Power Stud Screw (Panel Left Side) 16. U sing a 7/16” wrench, disconnect stator lead 19. D isconnect lead #5A from the auxiliary power #6 from the auxiliary power stud on the left side ground stud (left side of the control box, next...
- Page 118 TROUBLESHOOTING & REPAIR F-100 F-100 STATOR/ROTOR REMOVAL AND REPLACEMENT PROCEDURE (CONTINUED) FIGURE F.23 – LIFT FRAME REMOVAL LIFT FRAME WELDMENT CENTER PANEL FUEL TANK SUPPORTS FAN BAFFLE BASE In steps 21 - 25, the lift frame weldment, fuel tank 24. U sing a 3/4” wrench, remove the four bolts, supports, and fan baffle are removed as a unit. lock washers, and nuts from the bottom of the See Figure F.23.
- Page 119 TROUBLESHOOTING & REPAIR F-101 F-101 STATOR/ROTOR REMOVAL AND REPLACEMENT PROCEDURE (CONTINUED) FIGURE F.24 – STATOR REMOVAL STATOR / ENGINE MOUNTING BOLTS & LOCK WASHERS (8) BEARING BOLTS (4) FAN HUB FAN NUT MOUNTING PLATE STATOR REMOVAL PROCEDURE 5. U sing a 1/2” wrench, remove the two nuts, 1. U sing a 1/2” wrench, remove the four fan blade lock washers, and carriage bolts holding the mounting bolts and lock washers. See Figure...
- Page 120 TROUBLESHOOTING & REPAIR F-102 F-102 STATOR/ROTOR REMOVAL AND REPLACEMENT PROCEDURE (CONTINUED) FIGURE F.25 – ROTOR REMOVAL FLEX PLATE BLOWER SEGMENT (4) ROTOR ROTOR REMOVAL PROCEDURE REASSEMBLY NOTES 1. Support the rotor with a hoist. Reassemble the rotor and stator to the Vantage® 400 by carefully retracting the disassembly 2. U sing a 5/16” wrench, remove the flex plate procedure steps in reverse order. Keep the bolts, lock washers, and four blower segments.
- Page 121 TROUBLESHOOTING & REPAIR F-103 F-103 STATOR/ROTOR REMOVAL AND REPLACEMENT PROCEDURE (CONTINUED) FIGURE F.29 – ROTOR REMOVAL & REPLACEMENT FLEX PLATE BLOWER SEGMENT (4) ROTOR PROCEDURE 4. A ssemble the coupling disc and clamping ring 1. R emove the screws and disc clamping bars to the rotor hub. The surface of the disc with from the rotor coupling disc, and remove the the stamping burrs should be against the rotor...
-
Page 122: Retest After Repair
TROUBLESHOOTING & REPAIR F-104 F-104 RETEST AFTER REPAIR Retest a machine: • I f it is rejected under test for any reason that requires you to remove any mechanical part which could affect the machine’s electrical characteristics. OR • If you repair or replace any electrical components. ENGINE OUTPUT Mode No Load RPM Load RPM Low Idle 1300 - 1400 High Idle 1860 - 1890 1800 WELDER DC (STICK) OUTPUT (ARC control @ -10) Mode Selector Output Control Open Circuit Load Volts Load Amps... - Page 123 TABLE OF CONTENTS - DIAGRAM SECTION Electrical Diagrams ..............G-1 Wiring Diagram - Complete Machine (G5481) .
- Page 124 ELECTRICAL DIAGRAMS WIRING DIAGRAM - COMPLETE MACHINE - (G5481) VANTAGE 400 WIRING DIAGRAM ELECTRICAL SYMBOLS PER E1537 ALL CASEFRONT COMPONENTS SHOWN VIEWED FROM REAR RECTIFIER BRIDGE STATOR AUXILIARY WINDINGS AUXILIARY POWER LEADS PASS THROUGH TOROID THREE TIMES IN DIRECTION INDICATED...
-
Page 125: Electrical Diagrams
Weld Voltmeter and Ammeter W EL D AMM ETER W ELD VOLTMETER are standard on Vantage 400 Hold function displays act ual volts an d amps fo approxim ately 5 seco... -
Page 126: Schematic - Complete Machine (G5597 Page 2
TO OTHER PARTIES OR USED FOR ANY PURPOSE WITHOUT THE EXPRESS WRITTEN PERMISSION OF LINCOLN GLOBAL, INC. MANUFACTURING TOLERANCE PER E2056 DESIGN INFORMATION REFERENCE: EQUIPMENT TYPE: VANTAGE 400 (PERKINS) UNLESS OTHERWISE SPECIFIED TOLERANCE: PAGE ___ OF ___ ON 2 PLACE DECIMALS IS ± .02 DRAWN BY:... - Page 127 ELECTRICAL DIAGRAMS SCHEMATIC - WELD CONTROL PC BD. (G5506 PAGE 1 OF 5) NOTE: This diagram is for reference only. It may not be accurate for all machines covered by this manual. ® ® VANTAGE ®...
- Page 128 ELECTRICAL DIAGRAMS SCHEMATIC - WELD CONTROL PC BD. (G5506 PAGE 2 OF 5) NOTE: This diagram is for reference only. It may not be accurate for all machines covered by this manual. ® ® VANTAGE ®...
- Page 129 ELECTRICAL DIAGRAMS SCHEMATIC - WELD CONTROL PC BD. (G5506 PAGE 3 OF 5) NOTE: This diagram is for reference only. It may not be accurate for all machines covered by this manual. ® ® VANTAGE ®...
- Page 130 ELECTRICAL DIAGRAMS SCHEMATIC - WELD CONTROL PC BD. (G5506 PAGE 4 OF 5) NOTE: This diagram is for reference only. It may not be accurate for all machines covered by this manual. ® ® VANTAGE ®...
- Page 131 ELECTRICAL DIAGRAMS SCHEMATIC - WELD CONTROL PC BD. (G5506 PAGE 5 OF 5) NOTE: This diagram is for reference only. It may not be accurate for all machines covered by this manual. ® ® VANTAGE ®...
-
Page 132: Schematic - Idler Pc Board (G4828-2
G-10 G-10 ELECTRICAL DIAGRAMS SCHEMATIC - IDLER PC BD (G4828-2) NOTE: This diagram is for reference only. It may not be accurate for all machines covered by this manual. ® ® VANTAGE ®... -
Page 133: Schematic - Chopper Pc Board (L12717-1C0
G-11 G-11 ELECTRICAL DIAGRAMS SCHEMATIC - CHOPPER PC BD (L12717-1CO) NOTE: This diagram is for reference only. It may not be accurate for all machines covered by this manual. ® ® VANTAGE ®... -
Page 134: Schematic - Ocv Indicator Pc Board (G4406-2D0
G-12 G-12 ELECTRICAL DIAGRAMS SCHEMATIC -OCV INDICATOR PC BD (G4406-2D0) NOTE: This diagram is for reference only. It may not be accurate for all machines covered by this manual. ® ® VANTAGE ®... -
Page 135: Schematic - By Pass / Stabilizer Pc Board (S22530-3D0)
G-13 G-13 ELECTRICAL DIAGRAMS SCHEMATIC - BY PASS / STABILIZER PC BOARD (S22530-3D0) NOTE: This diagram is for reference only. It may not be accurate for all machines covered by this manual. ® ® VANTAGE ®... -
Page 136: Pc Board Assembly - By Pass / Stabilizer Pc Board (L10121-3
Lincoln Electric discourages board level troubleshooting and repair since it may compromise the quality of the design and may result in danger to the Machine Operator or Technician. - Page 137 ELECTRICAL DIAGRAMS WIRING DIAGRAM - COMPLETE MACHINE - (G5481) VANTAGE 400 WIRING DIAGRAM ELECTRICAL SYMBOLS PER E1537 ALL CASEFRONT COMPONENTS SHOWN VIEWED FROM REAR RECTIFIER BRIDGE AUXILIARY POWER LEADS PASS THROUGH STATOR AUXILIARY WINDINGS TOROID THREE TIMES IN DIRECTION INDICATED...
-
Page 138: Wiring Diagram Complete Machine - G7138 Codes 11785, 11920
Lincoln Electric discourages board level troubleshooting and repair since it may compromise the quality of the design and may result in danger to the Machine Operator or Technician. -
Page 139: Schematic Complete Machine - G6379 Codes 11785, 11920
Lincoln Electric discourages board level troubleshooting and repair since it may compromise the quality of the design and may result in danger to the Machine Operator or Technician. - Page 140 Lincoln Electric discourages board level troubleshooting and repair since it may compromise the quality of the design and may result in danger to the Machine Operator or Technician.
Need help?
Do you have a question about the VANTAGE 400 and is the answer not in the manual?
Questions and answers