Table of Contents
Advertisement
Quick Links
Back Cover
Ideal for alteration rooms, tailors, clothing rentals, dry cleaners,
department stores, dressmakers and home use
APPLICATIONS
Perfect for sewing all weights of materials including synthetics, woolens,
cottons, fabrics and knits
1 to 1 non-skip stitches, typical operations include felling edge tapes, bottoms
of trousers, cuffs, wigging in sleeves, facings to canvas and knit goods,
turned-up bottoms of fully lined coats, padding collars and lapels, and
reinforcing trouser seats
2 to 1 skip stitch for hemming dresses, skirts, slacks, trousers, sportswear,
ladies coats, draperies, blouses and other articles
Suitable for felling operations requiring a skip stitch to simulate hand-stitching
2 to 1 skip stitch is recommended for synthetics and other lightweight materials
and 1 to 1 for heavier cotton, woolen and linen goods
SPECIFICATIONS
Speed, Max. (S.P.M.)
Stitch Length, Max.
Needle Style
Looper
Cylinder Diameter
Work Space (Needle to Arm) 4" (100 mm)
Stitch Type
* Speed depends on materials, operation and thread
Specifications subject to change without notice.
All photographs in this manual are additionally ©2015 - Ron Greenfield / Forest Litho Printing Co.
75T
MODEL
1000 *
1
3 / s.p.i. (7mm)
2
LWX 6T
471
5
1 / " (40 mm)
8
103
©2015 Consew USA -0815
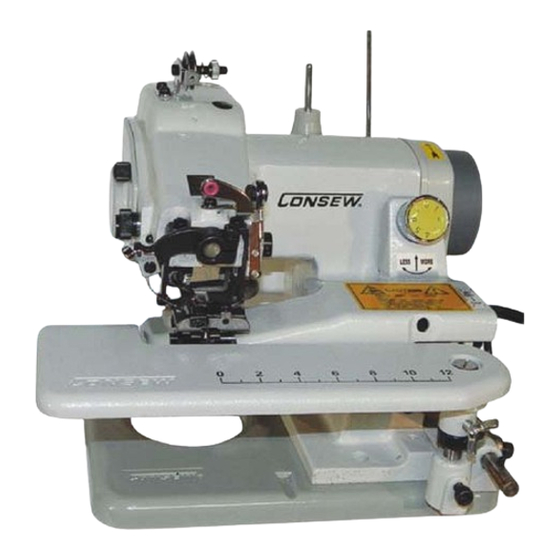
ALL PURPOSE, PORTABLE, SINGLE THREAD, CHAINSTITCH, BLINDSTITCH MACHINE
SETUP and OPERATING
INSTRUCTION
MANUAL
PARTS
MANUAL
Specifications subject to change without notice.
Front Cover
75T
MODEL
©2015 Consew USA -0815
Advertisement
Table of Contents

Related Manuals for Consew 75T


Summary of Contents for Consew 75T
- Page 1 Work Space (Needle to Arm) 4" (100 mm) Stitch Type * Speed depends on materials, operation and thread ©2015 Consew USA -0815 Specifications subject to change without notice. All photographs in this manual are additionally ©2015 - Ron Greenfield / Forest Litho Printing Co.
-
Page 2: Table Of Contents
Hand Wheel Section Page Number Number Section Description Overview Diagram of 75T ... Needle Needle Table of Contents ..(This Page) Penetration Setting up Machine for Work . - Page 3 C. Connecting the Motor Controller Pedal (Figs.4-5) 1.Setting Up the 75T Machine for Work Insert three-hole plug on controller wiring into terminal block at right side of machine Unpack machine from its shipping box, making certain that you and insert standard plug into wall outlet. Place controller on floor and regulate speed remove from box all component parts and accessories.
-
Page 4: Lubrication
2. Lubrication (Fig.7) E. Optional Clear Acrylic Shield MODEL 75T Lubrication is important for the trouble-free operation and long service life of the (provided with machine - Fig Shield1 machine. Therefore, after setting-up machine as per instructions, you should lubricate it before using. -
Page 5: Threading Machine
3.Threading the Consew 75T (Figs.9-12) Threading the machine (continued) Fig. 9 shows the path of thread from the overhead thread guide Take the thread through the vertical guide pole and pull it to the rear of the thread tension through the tension nut, through the front guides and to the needle. -
Page 6: Needles And Thread
4. Needles and Thread 6. Inserting the work piece and Starting to Sew (Figs.13-14) The recommended needle is system LW x 6T (or style 29-43) Blindstitch Machine Needle. Size range from No.3 to No.4. Depress knee lifter. This causes the cylinder bed of the machine to To assure satisfactory operation needles, thread and fabric swing downward and creates a gap between the presser foot and must be matched as suggested in the table below:... -
Page 7: Adjustment Of Thread Tension
Safety Warning: Pull out the AC power plug before working inside machine! 7. Adjustment of Thread Tension 8. Regulating Stitch Length (Fig.17) Different kinds and weights of material and the various sizes of thread require respective thread tensions. Thread tension is regulated by turning the tension Open side/back cover by just loosening the rear thumb screw and removing nut located at the top of the machine arm. -
Page 8: Adjustment Of Needle Penetration
9. Adjustment of Needle Penetration (Fig.18) 10. Removal of the Work from the Machine (Fig.19) The depth of needle penetration into the cloth can be adjusted by turning the Stop machine by taking your foot off the controller pedal. Turn handwheel (1a) needle depth regualtor knob located on front of the machine (Fig.18). -
Page 9: Skip Stitch Device
The black Skip-Stitch Lever in on the right side of the machine (fig.20). When it is Consew recommends having your machine professionally serviced by a qualified sewing in the forward position, the machine will sew in "No Skip" mode as indicated on the machine mechanic on a regular basis. -
Page 10: Back Cover (Notes On Lubrication)
13. Removal of Rear Cover Fig.19 Safety Warning: Pull out the AC power plug before working inside machine! MODEL 75T Unscrew the two screws shown PARTS BOOK (Fig.19) Back Cover then lifts off easily. Fig.20 (The thread holder base is attached to it) Pg.20 - Parts Drawing - External... - Page 11 © Consew 2015...
- Page 14 These parts come already attached to the machine now. Notes: There are now five sizes of Allen wrenches that come with machine 4, 5, 6 + 9 & 10...
Need help?
Do you have a question about the 75T and is the answer not in the manual?
Questions and answers