Whynter BWR-18SD, BWR-33SD - Wine Refrigerator Manual
- Instruction manual (15 pages) ,
- Instruction manual (15 pages) ,
- Instruction manual (15 pages)
Advertisement
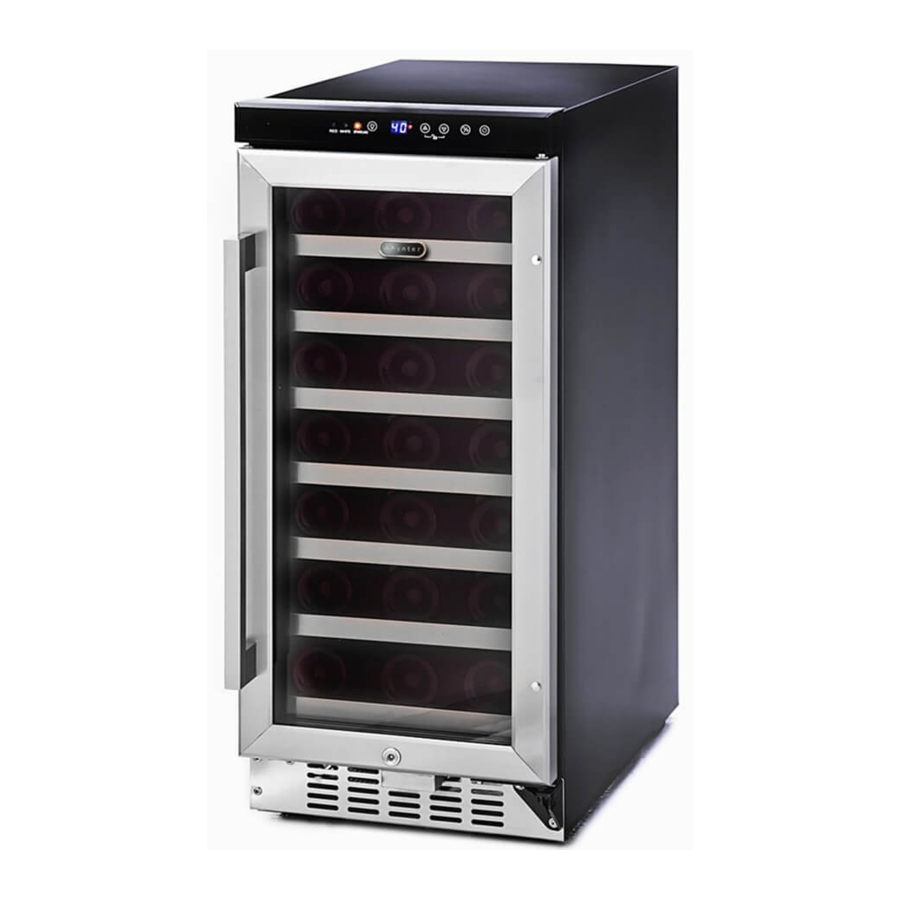
PARTS & FEATURES

INSTALLATION INSTRUCTIONS
BEFORE USING YOUR APPLIANCE
- Remove the exterior and interior packing.
- Before connecting the appliance to the power source, let it stand upright for approximately 2 hours. This will reduce the possibility of a malfunction in the cooling system from handling during transportation.
- Clean the interior surface with lukewarm water using a soft cloth.
- BWR-18SD: Make sure the drip tray is placed on top of the compressor with the water hose directed to the drip tray.
- BWR-33SD: Make sure the drip tray is placed next to the compressor with the water hose directed to the drip tray.
- Install the handle on the door.
INSTALLATION OF YOUR APPLIANCE
- The appliance is designed for built-in, recessed or freestanding installation.
![]()
Do not store or install the appliance outdoors.![]()
This appliance is designed for storing and cooling wines. Do not store perishable food, medicine or other medical products.- Place your appliance on a hard and level floor that is strong enough to support it when it is fully loaded.
- We do not recommend installing the appliance on carpet.
- To level your appliance, adjust the leveling legs at the bottom of the appliance if needed.
- For freestanding installation, 5 inches (127mm) of space between the back and sides of the appliance are suggested, which allows the proper air circulation to cool the compressor and condenser. Even for built-in installation, it is a must to keep a ¼" (6.35mm) space on each side and at the top. And the air vent at the front of the appliance must never be covered or blocked in any way.
- NOTE: Do NOT install the appliance near an oven or other heating source. Direct sunlight may affect the acrylic coating and heat sources may increase electrical consumption. For best performance, do not install the appliance behind a cabinet door or block the base grille.
- Avoid locating the appliance in area that may be exposed to excessive moisture.
- Plug in the appliance into an exclusive, grounded wall power outlet. Do not under any circumstances cut or remove the third (ground) prong from the power cord. Any questions concerning power and/or grounding should be directed toward a qualified electrician or an authorized service center.
BUILT-IN CABINET INSTRUCTIONS
These appliances are designed for both built-in or free standing installation. For built-in installation, ensure proper service access and ventilation, allow at least ¼" (6.35mm) space on each side and at the top.
| Cabinet Opening Dimensions (min) | ||
| BWR-18SD | BWR-33SD | |
| Width | 12" / 30 cm | 15" / 38 cm |
| Depth | 23 1/4" / 59 cm | 23 1/4" / 59 cm |
| Height | 34 3/4" / 88cm | 34 3/4" / 88cm |
ELECTRICAL CONNECTION

Improper use of the grounded plug can result in the risk of electrical shock. If the power cord is damaged, have it replaced by a qualified electrician or an authorized service center.
This appliance requires a standard 115/120 Volt AC ~/60Hz electrical ground outlet with three-prong. Have the wall outlet and circuit checked by a qualified electrician to make sure the outlet is properly grounded. The cord should be secured behind the appliance and not left exposed or dangling to prevent accidental injury.

The appliance should always be plugged into its own individual electrical outlet which has a voltage rating that matches the rating label on the appliance. This provides the best performance and also prevent overloading house wiring circuits that could cause a fire hazard from overheated. Never unplug the appliance by pulling the power cord. Always grip the plug firmly and pull straight out from the receptacle. Repair or replace immediately all power cords that have become frayed or otherwise damaged. Do not use a cord that shows cracks or abrasion damage along its length or at either end. When moving the appliance, be careful not to damage the power cord.
EXTENSION CORD
Because of potential safety hazards, it is strongly recommended that you do not use an extension cord with this appliance. However, if you must use an extension cord, it is absolutely necessary that it be a UL/CUL-Listed, 3-wire grounding type appliance extension cord having a grounding type plug and outlet and that the electrical rating of the cord be 115 volts and at least 10 amperes.
REVERSING THE DOOR SWING OF YOUR UNIT
This appliance has the capability of the door opening from either the left or right side. The appliance is delivered to you with the door opening from the left side. Should you desire to reverse the opening direction, please follow the following reversal instructions.
Note: All parts removed must be saved for proper reinstallation of the door.
Model BWR-18SD 18 bottle wine refrigerator.
- Open the glass door and remove the two screws under the right bottom corner of the glass door that are used to hold the right lower hinge to the door shaft assembly. Be careful to support the glass door firmly to prevent it dropping after removing the screws.
![]()
- Lock Screws
- Right Lower Hinge
- Door Shaft Assembly
- Right Top Hinge
- Pull down to remove the glass door and place it on a padded surface to prevent scratching it. (Figure 1)
- Remove the right top hinge and right lower hinge. (Figure 2). Remove the lft top hinge and left lower hinge from the plastic bag that holds the instructions manual then install them at the left side of cabinet. (Figure 3)

- Left Lower Hinge
- Left Top Hinge
- Reinstall the glass door in reverse.


Model BWR-33SD 33 bottle wine refrigerator.
- Open the glass door and remove the two lock screws holding the door shaft assembly to the glass door. Be careful to hold the glass door firmly after removing the screws. (Fig 1)
![]()
- Lock Screws
- Right Lower Hinge
- Door Shaft Assembly
- Pull down to remove the glass door and place it on a padded surface to prevent scratching it.
- Remove the two screws from the door bottom at left side and install them to the door bottom at right side. (Fig. 3)
![]()
- Remove the lower door hinge and turn around 90° then install it at the left side. And install the door shaft assembly accordingly. (Fig. 2)
![]()
- Lock Screws


- Door Shaft Assembly
- Remove the door axle from the right upper hinge then install and tighten it in the left upper hinge. (Fig. 4)
![]()
- Right Top Handle
- Set the glass door to the designated position and install the two lock screws to connect the door shaft assembly with the glass door and tighten them before the door is leveled. (Fig. 5)
![]()
- Right Lower Hinge
- Remove the handle from the left side of the door and install it on the right side.


INSTALLING STAINLESS STEEL HANDLE
This appliance includes a stainless steel handle that is not required to operate this appliance. To install the handle please follow the below instructions:

- Remove the door gasket on the side you wish to install the handle - you can see two designated holes for handle installation. The gasket is easily displaced by hand, no tools are necessary.
- Install the handle tightly as shown with two screws, lock washers and flat washers provided. (DO NOT over tighten as this will cause damage to the handle and stainless steel door frame).
- Replace the door gasket to its original position.
OPERATING YOUR APPLIANCE
It is recommended you install the appliance in a place where the ambient temperature is between 72º-78ºF / 23º-26ºC. If the ambient temperature is above or below recommended temperatures, the performance of the wine refrigerator may be affected. For example, placing your appliance in extreme cold or hot conditions may cause interior temperatures to fluctuate.
RECOMMENDED TEMPERATURE SETTINGS
| Conservation | 10 ~ 14ºC | 49 ~ 57ºF |
| Red Wines | 15 ~ 22ºC | 58 ~ 72ºF |
| Dry/White Wines | 9 ~ 14ºC | 48 ~ 57ºF |
| Rose Wines | 10 ~ 11ºC | 49 ~ 51ºF |
| Sparkling Wines | 5 ~ 8ºC | 40 ~ 47ºF |
CONTROLS

Model BWR-18SD 18 bottle wine refrigerator
- POWER
![]()
To turn the appliance on/off. To turn OFF the appliance, touch the![]() button and hold 5 seconds.
button and hold 5 seconds. - LIGHT
![]()
To turn on/off the interior light.
To change the displayed temperature from Fahrenheit to Celsius or Celsius to Fahrenheit, press the![]() button for 5 seconds.
button for 5 seconds. - UP
![]()
To raise the set temperature by 1°C/1ºF. - DOWN
![]()
To lower the set temperature by 1°C/1ºF.


SETTING A TEMPERATURE
- You can set the internal temperature as desired by touching the UP and DOWN buttons. When touch the two buttons for the first time, the LED readout will show the original temperature set previously (the factory preset temperature is 54ºF/12ºC)
- The set temperature will increase 1ºF/1ºC when the UP button is pressed once. The set temperature will decrease by 1ºF/1ºC when the DOWN button is pressed once.
- To view the "set" temperature at any time, press the UP or DOWN key, the "set" temperature will temporarily "flash" in the LED display for 5 seconds.
- The internal temperature will appear in blue color in the temperature display window.

Model BWR-33SD 33 bottle wine refrigerator
- POWER
![]()
To turn the appliance on/off. To turn OFF the appliance, touch the![]() button and hold 5 seconds.
button and hold 5 seconds. - LIGHT
![]()
To turn on/off the interior light. - UP
![]()
To raise the set temperature by 1°C/1ºF. - DOWN
![]()
To lower the set temperature by 1°C/1ºF. - ºF/ºC Selector
![]()
Choose to display temperature setting in Fahrenheit or Celsius.

KEY LOCK 
If in 2 minutes without touching any key, the controls will be locked automatically. To release the lkock, touch the  and
and  buttons at the same time for at least 5 seconds.
SETTING A TEMPERATURE
- You can set the internal temperature as desired by touching the UP and DOWN buttons. When touch the two buttons for the first time, the LED readout will show the original temperature set previously (the factory preset temperature is 54ºF/12ºC)
- The set temperature will increase 1ºF/1ºC when the UP button is pressed once. The set temperature will decrease by 1ºF/1ºC when the DOWN button is pressed once.
- When storing mostly red wines, the temperature is recommended to be set at 58º - 72ºF / 15º - 22ºC and the LED light for RED will be lit red.
- When storing mostly white wines, the temperature is recommended to be set at 48º - 57ºF / 9º - 14ºC and the LED light for WHITE will be lit green.
- When storing mostly sparkling wines, the temperature is recommended to be set at 40º - 47ºF / 5º - 8ºC and the LED light for SPARKLING will be lit amber.
- The internal temperature will appear in blue color in the temperature display window.
NOTE:
- If the appliance is unplugged, encounter power lost, or turned off, you must wait 3 to 5 minutes before restarting the appliance. If appliance to restart before this time delay, the appliance will not start.
- When the appliance is used for the first time or restarted after having been shut off for a long time, there could be a few degrees variance between the temperature you select and the one indicated on the display. This is normal and it is due to the length of the inactivation time.
STORAGE
Wine bottles may differ in size and dimensions so the actual number of bottles can be stored may vary. The 18 or 33 bottle capacities are approximate maximums when storing traditional. Bordeaux 750 ML bottles and includes bulk storage.
NOTE: Wine bottles on bottom shelf cannot be longer than 12 inches.
DOOR LOCK
The appliance is provided with a lock and key combination
The keys are located inside the plastic bag that holds the Owner's Manual. Insert the key into the lock and turn it counterlockwise to unlock the door. To lock the door do the reverse operation making sure metal pin is engaged completely. Remove the key and place it in a secure place.
WINE SHELVES
To prevent damaging the door gasket, make sure to have the door all the way opened when pulling the shelves out of the rail compartment.
- For easy acces to the storage content, you must pull the shelf approximately 1/3 out of the rail compartment, however this appliance is designed with a plastic post on each sides of the shelf track to prevent the shelves and the bottles from completely sliding out or falling.

- When removing the shelves out of the inner rail, make sure to remove all items first. Then move the shelf to the position where the notch of shelf is exactly under the plastic post and lift the shelf. In order to replace the shelves, repeat steps described above in reverse.

HUMIDITY CONTROL
- This appliance is equipped with a system for maintaining the correct level of humidity. Fill the small plastic reservoir (humidity box) to about 3/4 full with water, then place it onto the runners found on the top shelf and refill as necessary.
![]()
- Please ensure the reservoir is positioned correctly on the runners on the top shelf to avoid the possibility of water spillage.

ACTIVE CHARCOAL FILTER

Replace the active charcoal filter with new one once a year. It can be purchased from the retailer or Whynter's Service Department.
To change the filter,
- Turn the filter cover 90° clockwise or anti-clockwise. And then remove the filter.
- Insert the new filter in the vertical position.
- Turn the filter cover 90° clockwise or anti-clockwise until it click into position.
CARE AND MAINTENANCE
CLEANING YOUR APPLIANCE
- Turn off the power, unplug the appliance, and remove all items including shelves.
- Wipe the interior with a warm water and baking soda solution. The solution should be about 2 tablespoons of baking soda to one quart of water.
- Wipe the shelves with a mild detergent solution.
- Wipe the outside cabinet with warm water and mild liquid detergent.
- Do not use steel wool or steel brush on the stainless steel. These will erode the stainless steel and rusting may occur.

Failure to unplug the appliance could result in electric shock or personal injury
PREMISES POWER FAILURE
- Most power failures are corrected within a few hours and should not affect the temperature of your appliance if you minimize the number of times the door is opened. If the power is going to be off for a longer period of time, you need to take the proper steps to protect your contents.
VACATION TIME
- Short vacations: Leave the appliance operating during vacations of less than two days
- Long vacations: If the appliance will not be used for an extended period, remove all items and turn off the appliance. Clean and dry the interior thoroughly.
MOVING YOUR APPLIANCE
- Remove all items inside the appliance.
- Securely tape down (we recommend using painter's tape) all loose items (shelves) inside your appliance.
- Turn the adjustable leg up to the base to avoid damage.
- Tape (we recommend using painter's tape) the door shut.
- Be sure the appliance stays secure in the upright position during transportation and protect the exterior of appliance with a blanket, or similar item.
ENERGY SAVING TIPS
- The appliance should be located in the coolest area of the room, away from heat producing appliances, and out of any direct sunlight.
- Ensure that the appliance is adequately ventilated. Never obstruct the air vents.
- Close the door tightly and do not open the appliance too frequently or for a long period of time.
Troubleshooting
| PROBLEM | POSSIBLE CAUSE | SOLUTIONS |
The appliance does not operate | There is a power failure The appliance is not plugged in | Ensure the appliance is plugged in and the power outlet has power |
| A house fuse has blown or the circuit breaker is tripped | Replace the broken fuse or reset the breaker | |
The appliance is not cold enough | The set temperature too high The appliance is placed too close to a heat source | Adjust the set temperature Keep the appliance away from sunshine or other heat sources |
| The door is opened too often The door is not closed completely | Close the door tightly and do not open the door too frequently or for a long period of time | |
| The door gasket does not seal properly | Ensure the door gasket is not loose. | |
| The front bottom grille does not have sufficient ventillation. | The front bottom grille must be completely unobstructed | |
The appliance turns on and off frequently | The ambient (room) temperature is too low or high | Decrease or increase the ambient (room) temperature |
| A large amount of contents has been added to the appliance | To minimize internal temperature fluctuation, do not add large amount of contents at once | |
| The door is opened too often The door is not closed completely | Close the door tightly and do not open the door too frequently or for a long period of time | |
| The door gasket does not seal properly | Ensure the door gasket is not loose | |
The appliance makes too much noise | The noise may come from the flow of the refrigerant/ | It is normal that as each cooling cycle ends, you may hear rattling or gurgling sounds caused by the flow of refrigerant in the appliance. |
| Contraction and expansion of the inside walls may cause popping and crackling noises | Some popping or cracking noises are normal. They are caused by expansion and contraction of the inside walls due to temperature changes | |
| The appliance is not level | Make sure the unit is on a hard and level surface. Do not place the appliance on carpet | |
The door does not close properly | The appliance is not level The door was reversed and not properly installed | Make sure the wine refrigerator is on a hard and level surface. Avoid placing the appliance on a carpeted or soft surface |
| The shelves are out of position | Correctly install the shelves |
APPLIANCE SAFETY
Your safety and the safety of others are very important to us.


To reduce the risk of fire, electrical shock, or injury when using your appliance, follow these basic precautions
 This is the Safety Alert Symbol. This symbol alerts you to potential hazards that may result in serious injury. All safety messages will follow the Safety Alert Symbol and either the words" DANGER" or "WARNING".

Danger means that failure to heed this safety statement may result in severe injury or death.

Warning means that failure to heed this safety statement may result in extensive product damage, serious injury, or death.

Caution means that failure to heed this safety statement may result in minor or moderate injury, or property or equipment damage.
All safety messages will alert you to know what the potential hazard is, tell you how to reduce the chance of injury, and let you know what can happen if the instructions are not followed.
IMPORTANT SAFEGUIDES
Before the appliance is used, it must be properly positioned and installed as described in this manual, please read the manual carefully. To reduce the risk of fire, electrical shock or injury when using the appliance, follow basic precaution, including the following:
- Plug into a grounded 3-prong outlet, do not remove grounding prong, do not use an adapter, and do not use an extension cord.
- Do not use if the power supply cord is damaged. If damaged, it must be replaced by a qualified electrician.
- It is recommended that a separate circuit, serving only your appliance be provided. Use receptacles that cannot be turned off by a switch or pull chain.
![]()
Never clean appliance parts with flammable fluids or harsh chemicals. These fumes can create a fire hazard or explosion.- Do not store or use gasoline or other flammable vapors and liquids in the vicinity of the appliance or any other appliance.
- Before proceeding with cleaning and maintenance operations, make sure to unplug the appliance.
- Do not connect or disconnect the electric plug with wet hands.
- Do not attempt to repair or replace any part of your appliance unless it is specifically recommended in this manual. All other servicing should be referred to a qualified technician.
- This appliance is CFC- and HFC-free and contains small quantities of Isobutane (R600a) which is environmentally friendly, but flammable. It does not damage the ozone layer, nor does it increase the greenhouse effect. Care must be taken during transportation and setting up of the appliance that no parts of the cooling system are damaged. Leaking coolant can ignite and may damage the eyes.
In the event of leakage:
- Avoid open flames and anything which creates a spark
- Disconnect from the mains
- Air the room in which the appliance is located for several minutes and contact the Service Department for advice
FOLLOW WARNING CALL OUTS BELOW ONLY WHEN APPLICABLE TO YOUR MODEL
- Use two or more people to move and install the appliance. Failure to do so can result in injury.
- To ensure proper ventilation for your appliance, the front of the appliance must be completely unobstructed. Choose a well-ventilated area with temperatures above 60°F (16°C) and below 90°F (32°C). This appliance must be installed in an area protected from the element, such as wind, rain, water spray or drips.
- The appliance should not be located next to ovens, grills or other sources of high heat.
- The appliance must be installed with all electrical connections in accordance with state and local codes.
- The fuse (or circuit breaker) size should be 15 amperes.
- It is important for the appliance to be leveled in order to work properly. For a stable installation, make sure the appliance is placed on a flat, level and solid surface.
- Ensure that the surface on which the appliance is placed is strong enough to hold the appliance and the items stored inside.
- This appliance is not intended for use by young children or physically-challenged persons without supervision/assistance. Young children must be supervised to ensure safety around this or any appliance.
- Do not use solvent-based cleaning agents of abrasives on the interior. These cleaners may damage or discolor the interior.
- Keep fingers out of the "pinch point" areas. Clearance between the doors and between the doors and cabinet are necessarily small. Be careful closing doors when children are in the area.
- This wine refrigerator is designed to store wine bottles. If food is stored inside, ensure that there is sufficient airflow between items. Please note that the temperature range for this wine refrigerator is optimized for wine and beverage storage. Perishable food items may require a different storage environment.
- Do not place hot food or beverages into the appliance.
- Close the wine refrigerator door immediately after putting in any items to keep the internal temperature relatively constant.
- Avoid placing any objects on top of the appliance.
![shock hazard]() The appliance is an electrical appliance. To avoid injury from electrical shock do not operate the unit with wet hands, while standing on a wet surface or while standing in water. Do not use outdoors or in wet conditions.
The appliance is an electrical appliance. To avoid injury from electrical shock do not operate the unit with wet hands, while standing on a wet surface or while standing in water. Do not use outdoors or in wet conditions.- When positioning or moving the appliance, ensure that it is not turned up side down or unleveled greater than 45° or more off level.
- Never pull the power cord to disconnect it from the outlet. Grasp the plug and pull it from the outlet.
- Never lift, carry or drag the appliance by the power cord.
- This appliance is designed for household, non-commercial use only. Any other use will void the warranty.
- Do not plug into the power outlet before set up is completed.
- Do not move this appliance without emptying it and securing the door in a closed position.
IMPORTANT SAFETY INSTRUCTIONS
To reduce the risk of fire, electrical shock, or injury when using your appliance, follow these basic precautions:
- Read all instructions before using the appliance.
![]()
DANGER or WARNING: An empty wine refrigerator can be a hazardous for children or small pets. If disposing of the wine refrigerator, remove gasket seals, latches, lids or the entire door from your unused appliance, or take other action to ensure the wine refrigerator is harmless.
- Never allow children to operate, play with, or crawl inside the appliance.
![]()
Never clean appliance parts with flammable fluids or harsh chemicals. The fumes can create a fire hazard or explosion.![]()
Do not store or use gasoline or any other flammable vapors and liquids in the vicinity of this or any other appliance. The fumes can create a fire hazard or explosion.
ONE YEAR LIMITED WARRANTY
To register your warranty, please visit www.whynter.com and fill out the online Warranty Registration form. Please be sure to include a copy of your purchase invoice.
To obtain service or information, contact Whynter LLC via email at support@whynter.com or call 866-WHYNTER (866-949-6837).
www.whynter.com
Documents / Resources
References
Download manual
Here you can download full pdf version of manual, it may contain additional safety instructions, warranty information, FCC rules, etc.
Download Whynter BWR-18SD, BWR-33SD - Wine Refrigerator Manual
Advertisement


Need help?
Do you have a question about the BWR-18SD and is the answer not in the manual?
Questions and answers