Whynter BOR-53024-SSW - Outdoor Refrigerator Manual
- Instruction manual (16 pages) ,
- Instruction manual (16 pages)
Advertisement
- 1 Parts
- 2 Product Features
- 3 Installation
-
4
Operation and Controls
- 4.1 POWER
- 4.2 SETTING THE TEMPERATURE
- 4.3 FAST COOL MODE (FF)
- 4.4 DOOR ALARM
- 4.5 REFRIGERATOR ALARM
- 4.6 ºC and ºF SELECTOR
- 4.7 INTERIOR LIGHT
- 4.8 LEVELING THE APPLIANCE
- 4.9 INSTALLING CASTER WHEELS
- 4.10 LOCKING THE CASTER WHEELS
- 4.11 INSTALLING STAINLESS STEEL HANDLE
- 4.12 WIRE SHELVES
- 4.13 NORMAL SOUNDS
- 4.14 CONTENT STORAGE
- 5 Care and Maintenance
- 6 Troubleshooting
- 7 SERVICE and WARRANTY
- 8 Safety Precautions
- 9 Documents / Resources
Parts

- Internal Fan
- Control Panel
- Refrigerator Door
- Wire Shelves (3)
- Leveling Legs (4)
- Door Lock Latch
- Door Light Switch
- Front Vent
- Door Handle
- Door Lock
- Front Caster Wheels with lock (2)
Rear Caster Wheels (2) (optional accessory, installation not required) - Door Keys
Product Features
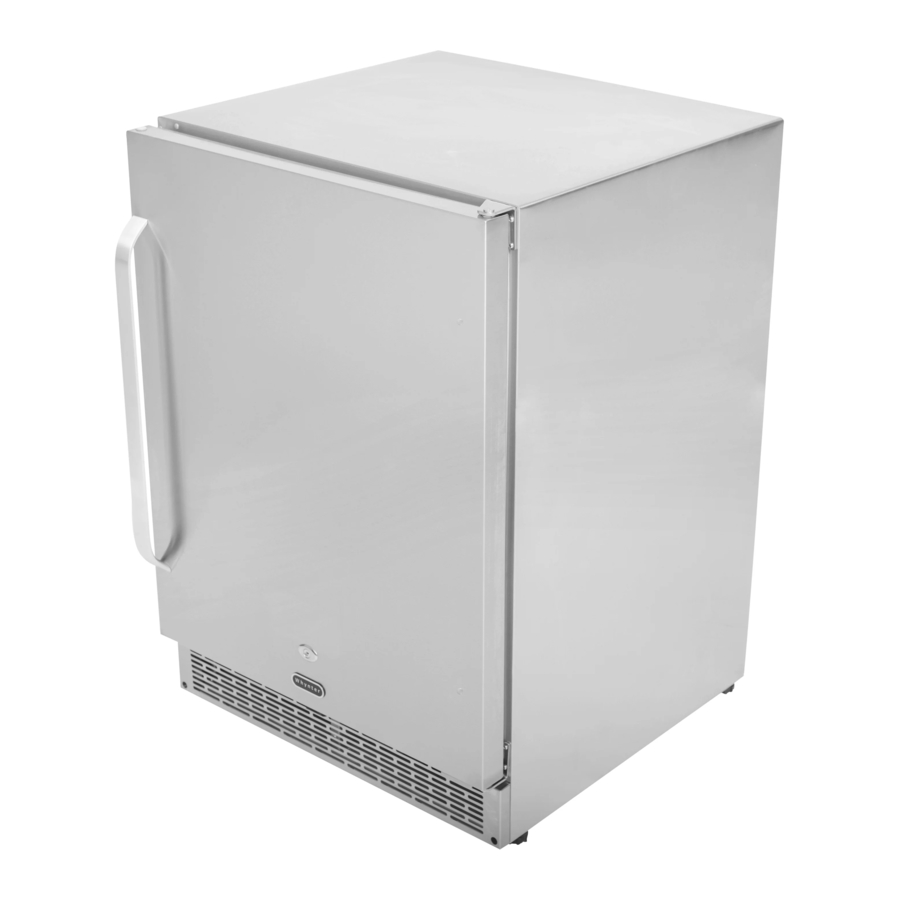
Ideal for your outdoor kitchen or a patio bar, this Whynter Built-in Outdoor 5.3 cu. ft. Beverage Refrigerator Cooler can just as easily be the featured in your indoor entertainment space.
Manufactured with premium components and materials, this well-appointed refrigeration unit enhances any setting and is built to maintain temperature requirements under a wider range of ambient conditions. The full stainless steel exterior provides both high end appeal and superior temperature control.
The unit features a front venting design for either freestanding or built-in usage, reversible door hinges for easier installation options and adjustable shelving to accommodate beverage cans and bottles. In addition, a key feature of this outdoor refrigerator is its optional portable wheeled design which lets you easily transport or move your refrigerator whenever the need arises.
- Full stainless steel body
- Built-In Installation / Freestanding
- Indoor / Outdoor use
- Luxurious curved handlebar
- Soft interior lighting
- Powerful fan-circulated compressor cooling ensures precise temperature distribution
- Refrigerant: R134A
- 3 removable and adjustable shelves
- Reversible door swing
- Optional caster wheels for mobility two of which lock for secure stationary use
- ETL certified
TECHNICAL DATA
| MODEL: | BOR-53024-SSW |
| Capacity | 175 standard 12oz. cans |
| Total Storage Volume | 5.3 cu. ft. |
| Voltage | 115V/60Hz |
| Power Consumption | 160 Watts / 1.8A |
| Temperature Control Range | 32°F - 64°F / 0°C - 18°C |
| Estimated Yearly Electricity Use | 308 kWh |
| Net Weight | 92 lbs |
| Gross Weight | 103 lbs |
| Unit Dimensions | 34" H x 24 W x 24" D (25.25" in depth with handle installed 36.5" in height with casters installed) |
| Packaging Dimensions | 26" W x 28" D x 36" H |
| Refrigerant | R134a |
| UPC | 852749006351 |
Installation
IMPORTANT SAFETY INSTRUCTIONS

To reduce the risk of fire, electrical shock, or injury when using your appliance, follow these basic precautions:
- Read all instructions before using the appliance.
- DANGER or WARNING: An empty appliance can be a hazardous for children or small pets. If disposing of the appliance, remove gasket seals, latches, lids or the entire door to ensure the appliance is harmless.
- Never allow children to operate, play with, or crawl inside the appliance.
- Never clean appliance parts with flammable fluids or harsh chemicals. The fumes can create a fire hazard or explosion.
- Do not store or use gasoline or any other flammable vapors and liquids in the vicinity of this or any other appliance. The fumes can create a fire hazard or explosion.
INSTALLATION INSTRUCTIONS
BEFORE USING YOUR APPLIANCE
- Remove the exterior and interior packing.
- Before connecting the appliance to the power source, let it stand upright for approximately 4 hours. This will reduce the possibility of a malfunction in the cooling system from handling during transportation.
- Clean the interior surface with lukewarm water using a soft cloth.
- Install the handle on the door.
INSTALLATION OF YOUR APPLIANCE
- The appliance is designed for built-in, recessed or freestanding installation.
![]()
This appliance is designed for storing and cooling beverages. Do not store perishable food, medicine or other medical products.- Place your appliance on a hard and level floor that is strong enough to support it when it is fully loaded.
- We do not recommend installing the appliance on carpet.
- To level your appliance, adjust the leveling legs at the bottom of the appliance if needed.
- For freestanding installation, 5 inches (127mm) of space between the back and sides of the appliance are suggested, which allows the proper air circulation to cool the compressor and condenser. Even for built-in installation, it is a must to keep a ¼" (6.35mm) space on each side and at the top. And the air vent at the front of the appliance must never be covered or blocked in any way.
![warning]() NOTE: Do NOT install the appliance near an oven or other heating source. Direct sunlight may affect the acrylic coating and heat sources may increase electrical consumption. For best performance, do not install the appliance behind a cabinet door or block the base grille.
NOTE: Do NOT install the appliance near an oven or other heating source. Direct sunlight may affect the acrylic coating and heat sources may increase electrical consumption. For best performance, do not install the appliance behind a cabinet door or block the base grille.- Avoid locating the appliance in area that may be exposed to excessive moisture.
- In a rainy or snowy environment, a waterproof covering is recommended.
- Never climb onto the unit. The unit could tip over or fall and cause material damage or personal injury.
- Plug in the appliance into an exclusive, grounded wall power outlet. Do not under any circumstances cut or remove the third (ground) prong from the power cord. Any questions concerning power and/or grounding should be directed toward a qualified electrician or an authorized service center.
BUILT-IN CABINET INSTRUCTIONS
These appliances are designed for both built-in or freestanding installation. For built-in installation, ensure proper service access and ventilation, allow at least ¼" space on each side and at the top.
| CABINET OPENING DIMENSIONS (minimum) | |
| Width | 24¼" |
| Depth | 26 ¼" |
| Height | 34 ¼" |

Improper use of the grounded plug can result in the risk of electrical shock. If the power cord is damaged, have it replaced by a qualified electrician or contact Whynter Service Department
ELECTRICAL CONNECTION
This appliance requires a standard 115/120 Volt AC ~/60Hz electrical ground outlet with three-prong. Have the wall outlet and circuit checked by a qualified electrician to make sure the outlet is properly grounded. The cord should be secured behind the appliance and not left exposed or dangling to prevent accidental injury.
The appliance should always be plugged into its own individual electrical outlet which has a voltage rating that matches the rating label on the appliance. This provides the best performance and also prevent overloading house wiring circuits that could cause a fire hazard from overheated. Never unplug the appliance by pulling the power cord. Always grip the plug firmly and pull straight out from the receptacle. Repair or replace immediately all power cords that have become frayed or otherwise damaged. Do not use a cord that shows cracks or abrasion damage along its length or at either end. When moving the appliance, be careful not to damage the power cord.
If installation in a damp location is unavoidable, have an electrician install a ground fault circuit interrupter (GFCI) electrical outlet. If no GFCI is installed, electrical shock could result.
EXTENSION CORD
Because of potential safety hazards, it is strongly recommended that you do not use an extension cord with this appliance. However, if you must use an extension cord, it is absolutely necessary that it be a UL/CULListed, 3-wire grounding type appliance extension cord having a grounding type plug and outlet and that the electrical rating of the cord be 115 volts and at least 10 amperes.
REVERSING THE DOOR SWING OF YOUR BEVERAGE OUTDOOR REFRIGERATOR
Tools needed: Flathead screwdriver, Phillips screwdriver

Before you begin, unplug the refrigerator or disconnect power.
To remove door from hinges:
- Using a flathead screwdriver, separate the hinge axis from hinge #1. Set aside.
- Open the door about 20° around the axis of bottom hinge #2, then lift the door off bottom hinge #2 and set door aside.
To replace door on hinges:

- Using a flathead screwdriver, remove the plug buttons from the screw holes opposite the door hinges, top and bottom. Set aside.
- Replace the axis on the hinge #1 and tighten it firmly. Remove hinge #1 and place it on the opposite bottom side.
- Remove hinge #2 and place it on the opposite top side. Separate the axis from hinge #2 and set it aside.
- Using a Philips screwdriver, move the door limit under the door to the other side. The door limit should be fixed near the hinge side to limit the door hitting the cabinet.
- Align the door on bottom hinge #1 and replace axis on hinge #2. Tighten it firmly. Place the handle on the side of the door away from the hinge side.
- Push the plug buttons into the original screw holes.
- Swap the door handle.
REVERSING THE DOOR HANDLE OF YOUR BEVERAGE OUTDOOR REFRIGERATOR
Using a Phillips screwdriver, remove the two screws pre-installed on the left side of the door. The door has two screw holes on the right side allowing you to install the handle. Align the handle with the screw holes and attach with the two screws. Tighten screws firmly but do not over tighten.

Operation and Controls
It is recommended you install the appliance in a place where the ambient temperature is between 60°F - 90°F / 16°C - 32°C. If the ambient temperature is above or below recommended temperatures, the performance of the beverage refrigerator may be affected. For example, placing your appliance in extreme cold or hot conditions may cause interior temperatures to fluctuate.

POWER
To turn on or off the beverage refrigerator, press the Power ![]() button.
button.
SETTING THE TEMPERATURE
The temperature controls are locked automatically by default. To change, unlock the temperature setting by pressing the SET ![]() button. Press the Up
button. Press the Up ![]() button to raise the set temperature or Down
button to raise the set temperature or Down ![]() button to lower the set temperature. Temperature controls are automatically locked after 5 seconds.
button to lower the set temperature. Temperature controls are automatically locked after 5 seconds.
To view the set temperature at any time, press the SET ![]() button. The "set" temperature will temporary flash for 5 seconds and will revert back to current internal temperature.
button. The "set" temperature will temporary flash for 5 seconds and will revert back to current internal temperature.
 NOTE:
NOTE:
- The temperature inside the beverage refrigerator is dependent on the ambient temperature.
- The RUN light is illuminated when the cooling cycle unit is in operation. Once the unit reaches the set temperature, the RUN light will shut off.
- The factory preset temperature is 40°F / 4°C.
FAST COOL MODE (FF)
When you set the outdoor refrigerator in Fast Cool mode, the refrigerator will rapidly cool the unit to 28°F/-2°C.
Once the temperature reaches 28°F/-2°C, the compressor will turn off and the Fast Cool mode will be disabled. Once the internal temperature reaches 5°F/2°C degrees higher than the current set temperature, the compressor will turn on and cool to reach the previous set temperature.
To activate the Fast Cool mode when the unit is on, press and hold the SET ![]() and LIGHT
and LIGHT ![]() buttons for 5 seconds. The temperature display window will display "C1" when unit Fast Cool mode is activated. To cancel, press the SET
buttons for 5 seconds. The temperature display window will display "C1" when unit Fast Cool mode is activated. To cancel, press the SET ![]() and LIGHT
and LIGHT ![]() buttons for 5 seconds. The temperature display window will display "C0" when unit Fast Cool mode is deactivated.
buttons for 5 seconds. The temperature display window will display "C0" when unit Fast Cool mode is deactivated.
DOOR ALARM
If the door has been left open for more than 1 minute, the alarm will sound. The alarm will stop by closing the door.
REFRIGERATOR ALARM
This outdoor refrigerator has an alarm system feature that activates when the unit detects any malfunction in the refrigerator system. If the temperature display window displays "LI", "EI", or "HI", please proceed to the Troubleshooting section of this user manual.
ºC and ºF SELECTOR
To change temperature ![]() conversions, press the button to switch between temperature conversions.
conversions, press the button to switch between temperature conversions.
INTERIOR LIGHT
You can turn on and off the interior light by pressing the Light ![]() button on the control panel.
button on the control panel.
LEVELING THE APPLIANCE
It is important for your appliance to be leveled in order to work properly. It can be raised or lowered by rotating each of the feet on the bottom of the machine. If you find that the surface is not level, rotate the feet until the appliance becomes level. You may need to make several adjustments to level it. We recommend using a carpenter's level to check the machine.
NOTE: The Whynter BOR-53024-SSW has 4 leveling legs.
- Place a carpenter's level on top of the product to see if the appliance is level from front to back and side to side.
- Adjust the height of the feet as follows: Turn the leveling feet to the right to lower that side of the refrigerator. Turn the leveling feet to the left to raise that side of the refrigerator.
![]()

INSTALLING CASTER WHEELS
This refrigerator comes with optional wheel casters for mobility
- Carefully place the refrigerator on its side on a flat surface.
- Unscrew the all leveling legs from the bottom section of the refrigerator.
- Install the two wheel casters with brakes at the bottom front side of the refrigerator. Tighten the wheel casters with the provided screws.
![]()
- Install the other two wheel casters at the bottom rear side of the refrigerator. Tighten the wheel casters with the provided screws.

LOCKING THE CASTER WHEELS
This refrigerator is provided with two (2) caster wheels with lock function for stability.

- To lock the refrigerator in place, step and push the pedals all the way down until the wheels are secured.
- To release, lift from the under side of the pedals.
INSTALLING STAINLESS STEEL HANDLE
This appliance includes a stainless steel handle that is not required to operate this appliance. To install the handle, please follow the below instructions:
- The gaskets are easily displaced by hand, no tools are necessary.
- Use a flat-head screwdriver to remove the two pre-installed decorative plugs from the back of door.
- Install the handle tightly as shown with two screws, lock washers and flat washers provided. (DO NOT over tighten as this will cause damage to the handle and stainless steel door frame).
- Replace the door gasket to its original position.
WIRE SHELVES
NOTE: Do not cover any part of the wire shelves with aluminum foil or any other material that will prevent adequate air circulation within the cabinet.
This appliance is equipped with 3 slide-out removable shelves. To prevent damage to the door gasket, make sure the door is opened completely before pulling the shelves out.

- For easy access, shelves must be pulled approximately ⅓ out of the railing.
- The shelves are designed with an emergency stop to prevent them being removed too far when loaded.
- When removing the shelves out of the railing, make sure to remove all items first.
To remove the shelves, pull the shelf forward until the notch aligns with the plastic post. Lift the shelf and continue to pull the shelf forward until it is completely removed from the internal compartment.
NORMAL SOUNDS
The unit is cooled by a compressor. The compressor pumps coolant through the cooling system, producing operating noise. Even when the compressor cuts out, noises caused by changes in temperature and pressure are unavoidable. Operating noise will be most audible immediately after the compressor comes on. It becomes quieter as the operating period continues.
The following noises are normal and occur from time to time:
- Gurgling sound, caused by the refrigerant flowing through the appliance's coils,
- Humming noise made by the compressor. This noise can get louder for brief periods when the motor is switching on.
- Cracking/popping sounds, resulting from the materials contraction and expansion due to temperature variations,
- Fan operating sound, to circulate the air within the beverage cabinet.
- Unusual noise is normally the result of improper installation.
- Where the unit is installed in open-plan kitchen or in partition walls, the level of operating noise will be heard more acutely. However, this is due to the surrounding architecture and not to the unit.
NOTE: An individual's perception of noise is directly linked to the environment in which the unit is located, as well the specific type of models. Our appliances are in line with international standards for such appliance and in line with the latest technical developments. Please remember that the noise of the compressor and the coolant circulating in the system is unavoidable.
CONTENT STORAGE
FRONT VIEW

Care and Maintenance
CLEANING YOUR APPLIANCE
- Turn off the power, unplug the appliance, and remove all contents from the appliance and store them in a suitable place.
- Clean the inside, the door seal and the inside of the glass with a clean, damp cloth.
- Never use detergents or other substances that emit odors.
- Always keep the door closed when cleaning the outside of the appliance. Make sure no detergent odors penetrate into the appliance.
- Clean the side panels and door surfaces with a clean and soft cloth. If necessary, use a moist cloth. Alternatively, use a microfiber cloth.
- The humidity tray should be hand-washed with water and detergent. After cleaning, always make sure the tray is thoroughly rinsed with clean water before replacing.
PREMISES POWER FAILURE
- In the event of a power interruption, temperature settings automatically defaults to factory settings once power is restored.
- Factory default temperature setting is 40ºF. To set a different desired temperature, refer to the "SETTING THE TEMPERATURE" and "ºC and ºF SELECTOR" section.
- Most power failures are corrected within a few hours and should not affect the temperature of your appliance if you minimize the number of times the door is opened. If the power is going to be off for a longer period of time, you need to take the proper steps to protect your contents.
VACATION TIME
- Short vacations: Leave the appliance operating during vacations of less than two days.
- Long vacations: If the appliance will not be used for an extended period, remove all items and turn off the appliance. Clean and dry the interior thoroughly.
MOVING YOUR APPLIANCE
- Remove all items inside the appliance.
- Securely tape down (we recommend using painter's tape) all loose items (shelves) inside your appliance.
- Turn the adjustable legs up to the base to avoid damage.
- Remove all wheel casters.
- Tape (we recommend using painter's tape) the door shut.
- Be sure the appliance stays secure in the upright position during transportation and protect the exterior of appliance with a blanket, or similar item.
PREPARING FOR STORAGE
If the beverage refrigerator will not be used for a long time, or is to be moved to another place, it will be necessary to defrost the unit and dry the interior.
- Disconnect the beverage refrigerator from the power supply by removing the power plug from the wall socket.
- Leave the door open to allow for air circulation and to prevent mold, mildew and unpleasant smells.
![]()
Store the unit out of the reach of children. If you have children, you may want to take additional precautions such as removing the door to prevent a child from being trapped inside the beverage refrigerator
NOTE:
- If the beverage refrigerator is unplugged, encounter power lost, or turned off; you must wait 3 to 5 minutes before restarting the beverage refrigerator.
- When the beverage refrigerator is used for the first time or restarted after having been shut off for a long time, there could be a few degrees variance between the temperature you select and the one indicated on the display. This is normal and it is due to the length of the inactivation time.
ENERGY SAVING TIPS
- The appliance should be located in the coolest area of the room or outside location, away from heat producing appliances, and out of any direct sunlight.
- Ensure that the appliance is adequately ventilated. Never obstruct the air vents.
- Close the door tightly and do not open the appliance too frequently or for a long period of time.
- Store the content in an organized way.
- Do not over load the appliance to allow air to circulate.
TRANSPORT OF THE BEVERAGE REFRIGERATOR
The ideal packaging for the beverage refrigerator is its original packaging. Please keep the original packaging handy and repack the beverage refrigerator if you need to transport the unit.
DEFROSTING
Under most ambient conditions, the beverage refrigerator does not need to be defrosted. In cold ambient temperatures and/or high humidity, some frost may build up. To defrost, remove all items, unplug the beverage refrigerator and leave the door open. Never use a knife or other metal instrument to scrape ice/frost. After defrosting, plug in the beverage refrigerator and set the desired temperature.
Troubleshooting
| Problem | Possible Causes | Solutions |
| The appliance does not operate |
|
|
| The appliance is not reaching the desired temperature |
|
|
| Frost forming inside the appliance |
|
|
| Condensation builds up on the door. |
|
|
| The appliance turns itself on and off frequently |
|
|
| The appliance makes too much noise |
|
|
| The door does not close properly |
|
|
| Displays "LI", "EI", or "HI" code |
|
|
SERVICE and WARRANTY
The warranty, product contents and specifications are subject to change at any time without notice; please refer to www.whynter.com for the most current information.
To register your warranty, please visit www.whynter.com and fill out the online Warranty Registration form. Please be sure to include a copy of your purchase invoice.
To obtain service or information, contact Whynter LLC via email at
support@whynter.com
or call 866-WHYNTER (866-949-6837).
www.whynter.com
Safety Precautions
APPLIANCE SAFETY
Your safety and the safety of others are very important to us.
To reduce the risk of fire, electrical shock, or injury when using your appliance, follow these basic precautions
This is the Safety Alert Symbol. This symbol alerts you to potential hazards that may result in serious injury. All safety messages will follow the Safety Alert Symbol and either the words" DANGER" or "WARNING".

Danger means that failure to heed this safety statement may result in severe injury or death.
Warning means that failure to heed this safety statement may result in extensive product dam-age, serious injury, or death.

Caution means that failure to heed this safety statement may result in minor or moderate injury, or property or equipment damage.
All safety messages will alert you to know what the potential hazard is, tell you how to reduce the chance of injury, and let you know what can happen if the instructions are not followed.
IMPORTANT SAFEGUIDES
Before the appliance is used, it must be properly positioned and installed as described in this manual, please read the manual carefully. To reduce the risk of fire, electrical shock or injury when using the appliance, follow basic precaution, including the following:
- Plug into a grounded 3-prong outlet, do not remove grounding prong, do not use an adapter, and do not use an extension cord.
- Do not use if the power supply cord is damaged. If damaged, it must be replaced by a qualified electrician.
- It is recommended that a separate circuit, serving only your appliance be provided. Use receptacles that cannot be turned off by a switch or pull chain.
- Never clean appliance parts with flammable fluids or harsh chemicals. These fumes can create a fire hazard or explosion.
- Do not store or use gasoline or other flammable vapors and liquids in the vicinity of the appliance or any other appliance.
- Before proceeding with cleaning and maintenance operations, make sure to unplug the appliance.
- Do not connect or disconnect the electric plug with wet hands.
- Do not attempt to repair or replace any part of your appliance unless it is specifically recommended in this manual. All other servicing should be referred to a qualified technician.
- This appliance is CFC- and HFC-free and contains small quantities of Isobutane (R134A) which is environmentally friendly, but flammable. It does not damage the ozone layer, nor does it increase the greenhouse effect. Care must be taken during transportation and setting up of the appliance that no parts of the cooling system are damaged. Leaking coolant can ignite and may damage the eyes.
- In the event of leakage:
- Avoid open flames and anything which creates a spark
- Disconnect from the mains
- Air the room in which the appliance is located for several minutes and contact the Service Department for advice
- Use two or more people to move and install the appliance. Failure to do so can result in injury.
- All repairs, disassembly and modifications should be performed only by qualified technicians. Attempting to perform this yourself could result in fire, malfunction or injury.
- Never splash water directly onto the product or wash it with water without unplugging, as a short circuit could result.
- Never put flammable or volatile substances into the unit as explosion and fire could result.
- To ensure proper ventilation for your appliance, the front of the appliance must be completely unobstructed. Choose a well-ventilated area with temperatures above 60°F (16°C) and below 90°F (32°C). This appliance must be installed in an area protected from the element, such as wind, rain, water spray or drips.
- The appliance should not be located next to ovens, grills or other sources of high heat.
- The appliance must be installed with all electrical connections in accordance with state and local codes.
- The fuse (or circuit breaker) size should be 15 amperes.
- Use a dedicated wall outlet. Do not use an extension cord or multiple-outlet adapter as this could result in electrical shock, overheating and fire.
- It is important for the appliance to be leveled in order to work properly. For a stable installation, make sure the appliance is placed on a flat, level and solid surface.
- Ensure that the surface on which the appliance is placed is strong enough to hold the appliance and the items stored inside.
- This appliance is not intended for use by young children or physically-challenged persons without supervision/assistance. Young children must be supervised to ensure safety around this or any appliance.
- Do not use solvent-based cleaning agents of abrasives on the interior. These cleaners may damage or discolor the interior.
- Keep fingers out of the "pinch point" areas. Clearance between the door and cabinet are necessarily small. Be careful closing the door when children are in the area.
- This appliance is designed for storing and cooling beverages. If food is stored inside, ensure that there is sufficient airflow between items. Please note that the temperature range for this appliance is optimized for beverage storage. Perishable food items may require a different storage environment.
- Do not place hot food or beverages into the appliance.
- Close the beverage refrigerator door immediately after putting in any items to keep the internal temperature relatively constant.
- Avoid placing any objects on top of the appliance.
- This is an electrical appliance, to avoid injury from electrical shock do not operate the unit with wet hands, while standing on a wet surface or while standing in water.
- When positioning or moving the appliance, ensure that it is not turned up side down or unleveled greater than 45°
- Never pull the power cord to disconnect it from the outlet. Grasp the plug and pull it from the outlet.
- Never lift, carry or drag the appliance by the power cord.
- This appliance is designed for household, non-commercial use only. Any other use will void the warranty.
- Do not move this appliance without emptying it and securing the door in a closed position.
- Do not plug into the power outlet before set up is completed.
- Do not damage, modify, excessively bend, strain, twist or bundle the power cord. Also, placing heavy objects on the power cord or binding it could damage the cord, possibly resulting in electrical shock or fire.
- Repair or replace any cord that is frayed. Do not use a cord that shows cracks or abrasions along its length.
Documents / Resources
References
Download manual
Here you can download full pdf version of manual, it may contain additional safety instructions, warranty information, FCC rules, etc.
Download Whynter BOR-53024-SSW - Outdoor Refrigerator Manual
Advertisement


Need help?
Do you have a question about the BOR-53024-SSW and is the answer not in the manual?
Questions and answers