Table of Contents
Advertisement
Advertisement
Table of Contents

Related Manuals for Smeg ST663-1


Summary of Contents for Smeg ST663-1
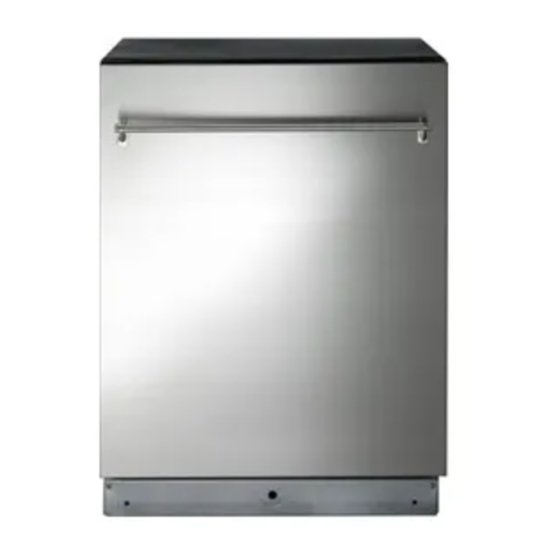
- Page 1 INSTRUCTION MANUAL DISHWASHER...
-
Page 2: Table Of Contents
Cleaning and maintenance _______________________________ 26 Troubleshooting _______________________________________ 30 Thank you for choosing this product. We advise you to carefully read all the instructions contained in this manual, in order to understand how to operate your dishwasher safely and correctly. The manual is divided into paragraphs, which provide a step by step description of the dishwasher functions, with clear instructions accompanied by detailed illustrations. -
Page 3: Safety And Operating Instructions
THE NAME PLATE FEATURING THE TECHNICAL DATA, SERIAL NUMBER AND MARKINGS IS VISIBLY POSITIONED ON THE INNER EDGE OF THE DOOR. THE NAME PLATE ON THE INNER EDGE OF THE DOOR MUST NEVER BE REMOVED. DO NOT LEAVE THE DISCARDED PACKAGING MATERIALS UNSUPERVISED WITHIN THE HOME. -
Page 4: Safety Instructions
DO NOT INTRODUCE SOLVENTS SUCH AS ALCOHOL OR TURPENTINE WHICH MAY CAUSE AN EXPLOSION. DO NOT LOAD DISHES THAT ARE SOILED WITH ASH, WAX OR PAINTS. LEANING OR SITTING ON THE DISHWASHER DOOR WHEN OPEN MAY CAUSE THE APPLIANCE TO OVERTURN, PUTING PEOPLE AT RISK. - Page 5 WARRANTY, AS WELL AS POSING A POTENTIAL HAZARD TO THE USER. The manufacturer declines all responsibility for damage to persons or property resulting from failure to observe the above precautions, from tampering with even a single component of the appliance, or from the use of non original spare parts.
-
Page 6: Installation And Hook-Up
Make sure to tighten the locking ring-nut once the pipes have been placed in the direction required. A hole at least 8 cm in diameter is required to allow the power supply cable and pipes to pass. -
Page 7: Installation Instructions
The free end should be positioned at a height of between 30 and 100 cm, and should never be submerged in water. If a horizontal drain extension hose is used (for a maximum of 3 m) the drain hose can be placed at a maximum height of 85 cm from the ground. -
Page 8: Description Of The Controls
Illumination of the light indicates selection of the HALF-LOAD function. SETTING THE WASHING PROGRAM AND SWITCHING ON To select the most suitable program for the dishes to be washed refer to the table below, which indicates the most appropriate program according... -
Page 9: User Instructions
PROGRAM SELECTION button (3) until the indicator light corresponding to the desired program illuminates; • close the door; after about 2" the program will start. While it is in progress, the relative LIGHT will flash (indicating that the program is being executed). - Page 10 Amount of detergent and 20g into the dispenser Rinse aid setting The door can be opened at the end of the cycle approximately 50 mm for improved drying performance. AS/NZS 2007 cycle test conditions: The upper basket must be set in the low position.
- Page 11 User instructions In the front there are one or two supports (depending on the models) for small plates (B). To use them, they have to be turned towards the front of the dishwasher.
- Page 12 A cutlery basket can be placed in the upper basket, while the lower basket must be left empty. CAUTION: there is no point in loading dishes and cutlery in the...
- Page 13 After approximately 1 minute the dishwasher will advance to the end of cycle. CHANGING THE PROGRAM To change the program in progress, simply open the door and select a new program. When the door is closed the dishwasher will automatically select the new program.
- Page 14 60°C. • When possible, disable the drying cycle and leave the door open at the end of the washing cycle: the residual air and heat will dry the dishes perfectly. TO CUT DOWN ON DETERGENT CONSUMPTION! … AND PROTECT THE ENVIRONMENT The phosphates contained in dishwasher detergents are harmful to the environment.
-
Page 15: Operating Instructions
• Replace the cover and turn it in a clockwise direction. • Use a cloth to remove any spillage of rinse aid which might lead to the formation of excess foam. - Page 16 The amount of rinse aid must be increased if the washed dishes appear dull or feature circular stains. • If, on the other hand, the dishes are sticky or have white streaks, it is necessary to reduce the rinse aid setting. ADDING THE DETERGENT To open the detergent dispenser cap, lightly press the button P.
- Page 17 If performance problems (e.g. a white coating on the tank or dishes, poor drying, dirt on dishes at the end of the wash) are noted, users are advised to return to conventional products (granular salt, powder detergent and liquid rinse aid).
- Page 18 User instructions 4.2 General warnings and recommendations Before using the dishwasher for the first time, it is advisable to read the following recommendations concerning dish types to be washed and their loading. There are generally no constraints on the washing of domestic dishes, but in certain cases it is necessary to take their characteristics into account.
- Page 19 If in doubt as to the fastness of the colours, it is advisable to wash just a few items at a time for approximately one month.
- Page 20 The rear of the basket is fitted with a rack to take large plates (A). To use it, simply lift it until it locks in place.
- Page 21 The cutlery should be arranged in an orderly manner inside the basket, with the handles pointing downwards. Take care during loading to avoid injury from the knife blades. The basket is suitable for all types of cutlery, except those long enough to interfere with the upper spray arm. Ladles, wooden spoons and cooking knives can be placed in the upper basket, making sure that the knife blades do not protrude from the basket.
- Page 22 It is recommended to load the upper basket with small- or medium-sized items such as glasses, small plates, tea or coffee cups, shallow bowls and light objects made from heat resistant plastic. If the upper basket is used in the lowermost position, it can also be loaded with serving dishes, provided they are only slightly soiled.
- Page 23 Load the dishes with the top side facing forwards; cups and concave containers should always be loaded with the opening facing down. The left side of the basket can be loaded with cups and glasses on two levels. In the centre section, plates and saucers can be loaded vertically into the supports provided.
- Page 24 • push the guide to free the wheels • fit the upper or lower pair of wheels into the guide, depending on the setting required • return the stop to its original position Push-button version: •...
-
Page 25: Cleaning And Maintenance
CLEANING THE WATER INTAKE FILTER The water intake filter A located at the outlet of the water supply tap needs to be cleaned periodically. After having closed the water supply tap, unscrew the end of the water intake hose, remove the filter A and clean it delicately under running water. - Page 26 CLEANING THE FILTER UNIT • It is advisable to periodically inspect the centre filter C and, if necessary, to clean it. To remove the filter, grip the tabs, turn them anticlockwise and lift upwards; • push the centre filter D from the underside to remove it from the micro-filter: •...
- Page 27 DISUSE: • Check that there are no deposits of sludge or rust inside the water pipe: if there are, allow the water to run from the water supply tap for a few minutes. • Plug the power cord back into the socket.
- Page 28 If there are visible traces of rust inside the tank: • the tank is made of steel, and therefore any rust marks are due to external elements (fragments of rust from the water pipes, pots, cutlery, etc.). Special products are commercially available to remove such marks;...
-
Page 29: Troubleshooting
User instructions 6. Troubleshooting The dishwasher is capable of signalling a number of faults through the simultaneous illumination of several indicator lights, with the following meanings: FAULT DESCRIPTION Acquastop failure The anti-flooding system has been activated (for the relevant models only). The system is tripped in case of water leaks. - Page 30 To “reset” an alarm is necessary: • Open and close the door, or turn off and on the machine. At this point is possible to program the dishwasher again. If the malfunction persists, contact your authorised Service Centre.
- Page 31 Free standing from 850 mm to 870 mm Height Semi-integrated from 820 mm to 870 mm Capacity 14 Standard place settings Water supply pressure min. 0,05 - max. 0,9 MPa (min. 0.5 – max. 9 bar) Electrical characteristics See rating plate...
- Page 32 één van de twee onderstaand afgebeelde inrichtingen NOTA: Sólo algunos modelos están equipados con uno de los dos dispositivos que se ilustran a continuación. NOTA: Só alguns modelos estão equipados com ou dos dois dispositivos ilustrados abaixo 1/2”...
Need help?
Do you have a question about the ST663-1 and is the answer not in the manual?
Questions and answers