Advertisement
Quick Links
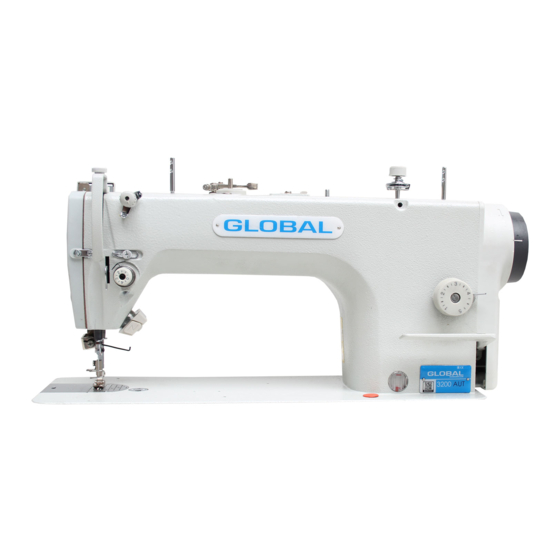
GLGBAL
3200 SERIES
3200 / AUT
SINGLE NEEDLE DIRECT DRIVE
STRAIGHT LOCKSTITCH MACHINE
WITH THREADTRIMMER
INSTRUCTION MANUAL
SPARE PARTS LIST
Global International BV
H. Figeeweg 4
2031 BJ Haarlem
tel: 023-5319584
fax: 023-5311022
e-mail: global@imca.net
Global Parts bv
H. Figeeweg 4B
2031 BJ Haarlem
tel: 023-5425312
fax: 023-5423422
e-mail: globalparts@planet.nl
3200 H / AUT
Advertisement

Related Manuals for Global 3200 Series


Summary of Contents for Global 3200 Series
- Page 1 GLGBAL 3200 SERIES 3200 / AUT 3200 H / AUT SINGLE NEEDLE DIRECT DRIVE STRAIGHT LOCKSTITCH MACHINE WITH THREADTRIMMER INSTRUCTION MANUAL SPARE PARTS LIST Global International BV H. Figeeweg 4 2031 BJ Haarlem tel: 023-5319584 fax: 023-5311022 e-mail: global@imca.net Global Parts bv H.
- Page 2 Thank you much for buying our company· s sewing machine. Before using your new machine, please read the safety instruetions below and the explanations given in the instruction manual. Wi th i nd ustrial sewing machines, it is normal to carry out work while positioned directly in front of moving parts such as the needle and thread tak e - up lever, and consequentiy there is always a danger of injury that can be caused by these parts.
- Page 3 2. Notes on safety ,A.DANGER Wait at least 5 minutes after turning off the power switch and disconnecting the power cord from the wall outlet before opening the face plate of the control box. Touching areas where high voltages are present can result in severe injury. A_CAUTION Environmental requirements The ambient temperature should be within the range of...
- Page 5 3. Warning labels. The following warning labels appear on the sewing machine. Please follow the instructions on the labels at all times when using the machine. If the labels have been removed or are difficult to read, please contact your nearest dealer. CAUTION &...
- Page 6 1. NAMES OF MAJOR PARTS 2. Thread wiper 1. Bobbin winder 4. Quick reverse(Actuatorl 3. Lifting le� 6. Control box 5. Presser foot 8. Power switch 7. Knee lifter assembly 1 O. Reverse lever 9. Oil gauge window 12. Machine pulley 11 .
- Page 9 3. Power switch ( 1 l Power switch. (2)Screws 12 pcs) Operator 4. Oil pan ( 1 l Head cushions ( left 12 pcs (2)Head cushions (rightl 12 pcs (3) Oil pan. 5. Rubber cushions I1lRubber cushionsl2 pcsl (2) Nails l4pcsl 6.
- Page 10 7 Mac hine head (; I Hinges l 2 pcs I ( 2) Machine head (31 Hea d rest NOTE: (3) securely into the ta bi hole. If the head T a p the head rest • 3 ) i s not pushed ,n a far as it will go, the machine •...
- Page 11 11. Knee lifter plate ( 1 ) Knee lifter plate jllDIO I (2) Bolt Loosen the bolt ( 3) and move the knee lifter plate ( 1 ) to a position where it is easy to use. <Knee lifter adjustment> '-.../ 1.
- Page 12 ,--- - -------- - ------------ --- CAUTiON t<::"\ Do not connect the power cord until lubrication has been completed, otherw·se the machine may operate if the treadle \Y is depressed by mistake , which could result in injury. Be sure to wear protective goggles and gloves when handing the lubricating oil and grease, so that they do not get into your eyes or onto your skin, otherwise inflammation can result.
- Page 13 2 -4 Test operation (Operating the treadle) A_CAUTION Do not touch any of the moving parts or press any objects against the machine while sewing . as this may result in personal injury or damage to the machine. <Turning on the power> Press the ON power switch ( 1 ) The power indicatod2lwill illuminate.
- Page 14 3. PREPARATION BEFORE SEWING 1 3 -1. Installing the needle A cAUTION Tum off the power switch before installing the needle. The machine may operate if the treadle is depressed by mistake, which could result in injury . 1. turn the machine pulley to move the needle bar to its highest position.
- Page 19 j 4 -3. Sewing condensed stitches • If you press the actuator ( 1 ) or the reverse lever ( 2) while sewing is in progress, you can stitches ( forward SfM/ direction ) with small stitch lengths. •Before carrying out sewing, set the stitch length for condensed stitches as follows.
- Page 21 5 -2. Adjusting the pr�sser foot pressure Correct stitches Upper thr ea d Skipped stitches occur :x=:x == =:x=:x:=== Increase the pressure. Uneven stitch length = = ==== = == = == I� J � 1: ' ';:x:;:: . I c he _ s ea _ s e _ th _ e _ p r ke _...
- Page 25 1 6 -2. Applying grease 4\pplying grease> Use our company specified grease. 6720 Tum the machine pulley to lower the needle bar until the hole is visible. 1. Turn the power switch to �OFF� 2. Remove the screws and the set screws. 3.
- Page 26 7. ADJUSTING THE ROTARY HOOK LUBRICATION AMOUNT A_C.AUTION -- --------------- -- --1 Be careful not to touch your fingers or the lubrication amount check sheet against moving parts such as the rotary hook l.::!JA or the feed mechanism when.checking the amount of oil suppl i ed to the rotary hook, Dtherwise injury rhay result. Use the following procedure to check the amount of oil being supplied to the rotary hook when replacing the rotary hook or when changing the sewing speed.
- Page 27 8. TROUBLESHOOTING • Please check the following points before calling for repa irs or service. • If the following remedies do not ftX the problem, tum off the power switch and consult a qualified technician or the place of p u r chase. DANGER &, Wait at least 5 minutes after turning off the power switch and disconnecting the power cord from the wall outlet before...
- Page 28 Problem Possible cause 5. Skipped stitches at sewing start • Is the thread take - up spring tension too strong? Thread unravelling at sewing start Reduce the tension of tha thread take -up spring. • Is the thread take - up spring operating range too large? Lower the position of the thread take - up spring.
- Page 31 1. MACHINE BODY I • • � 1 1-- 2- � ! -13...
- Page 33 2. NEEDLE BAR AND THREAD TAKE -UP MECHANISM 33-- � �12...
- Page 34 2. NEED IE BAR AND THRE AD TAKE -UP MEC HANI SM Note Description Ref.No. Upper shaft assy 8XF9994009 Set screw M6x6 8X87459009 · Bobbin winder driving wheel BXF9980009 Set screw M6x6 BXB7459009 Screw MB BXB5875009 Set screw M6X10 8)(85874009 Upper shaft 217100012 Needle bar crank...
- Page 35 2. NEEDLE BAR AND THREAD TAKE -UP MECHANISM 4-3-• -1 1 • 33-- � � 12 • -1 4 -1 2 8-1 o. ] r-==-- 1.? - , � 21 -0 --��1-- 27 �- - --. v :::. - -- •...
- Page 36 2 NEE DIE BAR AND THREAD TAKE-UP MECHANISM Note Descripti'.Jn Ref.No. Joi n t unit BXF9960009 BXB7459009 Set screw M6x6 20- 1 Tuni n g pulley,U 2 0-2 BXF8850009 Flange 20- 3 BX72398009 2 0-4 BX72397900 Screw M4x35 20-5 B048607598 Spri n g washer 4 20-6 S8A3103011...
- Page 38 3 PRESSER FOOT MECHANISM Ref.No. Description Note BXF993909 Presser bar BXF9937009 Presser bar BXF8915009 Presser bar bush Presser adjusting screw M14 BXF993600 B969802089 Spring guide B96938200 Presser bar spring B960603009 Washer 02276 Presser foot assy 153720000 Presser foot assy 022700015 Screw SM3.57-40x11 BXF993400 Presser bar lifter lever assy...
- Page 40 4 FEED MECHANISM Description Note Ref.No. Stitch length dial assy BXF9800009 Screw SM4.76 BX895969 ORing 124510003 Feed regulating supporter B96836408 Screw bar 217100008 1--4 Dial for stitch length regulator BX79091009 1- 5 Positioning pin BX50012009 Spring B900782009 Feed regulator assy BXF980800 Feed regulator 8--1...
- Page 41 4· FEED MECHANISM '-77...
- Page 42 4 FEED MECHANISM Note Description Ref.No. ScrewM5x14 6048509694 Feed regulator shaft L BXF988400 Rubber cap 15.5 B906661009 Feed regulator support shaft BXF9883009 Rubber cap 14.5 BXF9882009 8098040574 Set screw M6x5 Set screw M6xB S150225001 Set screw M6x6 6)(87459009 Rubber cap label 001C00010 Rubber cap 13.5 BX7675B909...
- Page 43 5. QUICK REVERSE MECHANISM 1--2 4-- .
- Page 45 6. TENSION RELEASE MECHANISM 3--&,, 5--.,...
- Page 47 7. ROTARY HOOK M ECHANISM 2- 1 ---, �• � 2-1 _-4 _2 - 1- _3 _ I � I 1 - - 15...
- Page 48 7 ROTARY HOOk MECHANI S M Description Ref.No. Note Rotary hook shaft assy BXF9839009 8)(85716009 Screw M5-0.8 1-1-1 Felt 1-1-2 8965359009 BXF9838 909 Rotary hook shaft 1-1-3 2 - 1 Pump bush unit BXF8369009 2-1- 1 Pump bush BXF9835909 Oil seal NOK AC015BA 2-1-2 001506003 2 -1-3...
- Page 53 9. THREADIN G MECHANISM 1 3. � <e:: · :C,Z � - � - � I e - 1 -s 1 - 2 1 -4 J-11 14-2...
- Page 54 g THREADING MECHANISM Note Description Ref.No. B927732009 Pre-tension a ssv B BX08499009 Thread guide 1 -1 BX0849800 Thread guide tension stud 1- 3 B966506009 Thread guide disc Pre-tension spring B 8956548009 B098500574 Set screw M5x 5 BXF9751009 Spool pin BX09691000 Tension release pin BXF9881909 Set screw M6x6...
- Page 55 10. BOBBIN WINDER MECHANISM � r - 1-1s- 1-20---,!, 1-21 1---1 1-11--® 1-9-3� 1-1-• 1-9-1 ---- ---- -...
- Page 56 1 O BOBBIN WINDER MECHANISM Note Description Ref.No. Bobbin winder unit BXF9139909 Retaining ting E4 B062060768 1- 1 B-winder shaft support assy BXF9135009 Copper bush 1 -2-1 BXF9117009 BXF9134009 B-winder shaft support 1-2-2 BXF9132009 Bobbin winder shaft B029001030 0 ring P9 1 - 5 B085040974 Washer plain S6...
- Page 57 11. THREAD TRIMMER MECHANISM t-- - 30 42-5 1 - 4 9 � l - 60 � � �...
- Page 58 11 THREAD TRIMMER MECHANISM Note Description Ref.No. Thread trimmer cam BXOOm089 Spacer5.3 165400001 Set screw SM 6.35 B096339088 Fixed knife BX08473009 Screw SM 3.57 B908267006 Lower thread finger BX08467009 WasherM 4 B084060874 Screw M4x6 B04860049 Thread trimmer holder assy BXF8096809 Holder M-knife BX8568600 Thread trimmer connecting rod...
- Page 59 12. THREAD WIPER MECHANISM '- - 1 1-19 1-11 28 1-18 1-16 1-14 ------ 1-17 � 1-23...
- Page 60 Note Ref.No. Description Thread wiper device assy BXF9736809 BXF9714009 Thread wiper solenoid assv BX698040 Thread wiper spring BX69B050 Washer BX85661889 Solenoid setting plate S8A3101005 ScrewM3x6 Cord holder B900463909 S8A3101005 ScrewM3x6 S8A3101005 ScrewM3x6 BXF9734009 Thread wiper base B0486004 1-10 ScrewM4x6 1-11 8084060874 Washer4 BX774909B9...
- Page 61 13. CONTROL BOX AND MOTOR MECHANISM P101 P102 P103 � • --106...
- Page 63 14. QUICK REVERSE SWITCH MECHANISM � 1-5-3 2--@l>-, '-- - ------ -----...
- Page 64 14 QUICK REVERSE SWITCH MECHANISM Ref.No. Description Not e BXF9721009 A-actuator assy BXF9724009 A-switch support 1- 1 BX78107000 Reverse switch bracket BX78106000 Actuator BX78105000 switch restoratn spring 1--4 1 -5 - 1 036830004 A-switch 036832001 1 -5-2 Down-lead 036911002 1 -5-3 Terminal pin, male B60300612 ScrewM3x6...
- Page 65 15. PRESSER FOOT LIFTING SET MECHANISM 1-13 1 � �I _ _ _J...
- Page 66 15 PRESSER FOOT LIFTING SET MECHANISM Ref.No. Description Note BXF9169009 Solenoid P-foot lifter assy P-foot lifter solenoid assy BXF9168009 Rubber stopper BX94485050 Solenoid base R BXF9775009 BX94481959 Solenoid stopper B092349272 Bolt SM5.95X18 BXF9774009 Solenoid base L 1 -7 BXF9150009 Rear plate 1-7-1 BXF8814009 NutM20...
- Page 68 16 ACCESSORIES 1 Note Description Ref.No. Screw-driver W050102051 3 -1 Screw-driver W050102068 3 -2 3 - 3 Screw-driver W050102050 Wrench 8x9 4 -1 B900223009 Wrench 10x12 W050102052 4 -2 Hexagonal wrench 2 W050102034 4 -3 W050 102035 Hexagonal wrench 3 W050102040 Hexagonal wrench 2.5 Needle...
- Page 69 17. ACCESSORIES 2 (KNEE LIFTER MECHANISM) �- � i ® ,� -· 3-�- °""" • : -ij" � � 1 5-1 15-5 15-4 � I �� 15-3 � 15-7 15-6 15-8...
- Page 70 3200/ AUT 3200H/ AUT Machine, s main technial date 5, 000 rp m Max. sewing speed 4500 rp m ::;tart ng anti continuous .,.,,..,,. 220-3000rpm 1, 800rpm End backtacking speed Max. stitch length Lifting lever Presser foot height Knee lifter 16mm Feed dog height 0.8mm...
Need help?
Do you have a question about the 3200 Series and is the answer not in the manual?
Questions and answers