Table of Contents
Advertisement
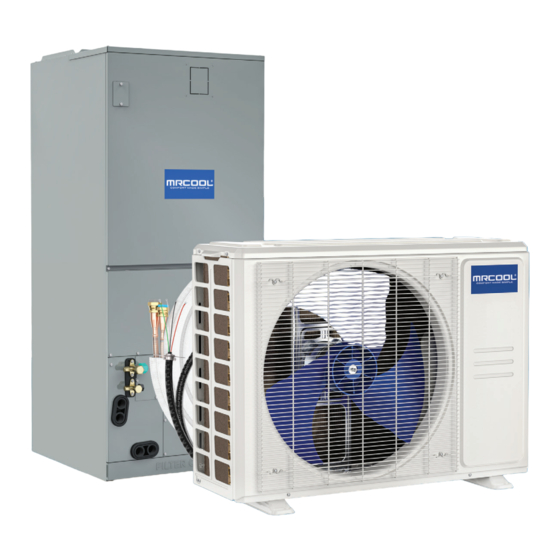
Versa Pro
Central Ducted
36-60K
Installation &
Owner's Manual
MODELS:
CONDENSER:
MVP-36-HP-C-230-00
MVP-48-HP-C-230-00
MVP-60-HP-C-230-00
COMPLETE SYSTEM:
MVP-36-HP-230-00
MVP-48-HP-230-00
MVP-60-HP-230-00
Read this manual carefully before installation and keep it where
the operator can easily find it for future reference.
Due to updates and constantly improving performance, the
information and instructions within this manual are subject to
change without notice.
Version Date: 04/30/2024
Please visit www.mrcool.com/documentation
to ensure you have the latest version of this manual.
AIR HANDLER:
MVP-36-HP-MUAH-230-00
MVP-48-HP-MUAH-230-00
MVP-60-HP-MUAH-230-00
Advertisement
Table of Contents

Related Manuals for MrCool Versa Pro MVP-36-HP-C-230-00


Summary of Contents for MrCool Versa Pro MVP-36-HP-C-230-00
- Page 1 Due to updates and constantly improving performance, the information and instructions within this manual are subject to change without notice. Version Date: 04/30/2024 Please visit www.mrcool.com/documentation to ensure you have the latest version of this manual.
-
Page 2: Table Of Contents
8.6 DIP Switch Definition .......................38 SPECIFICATIONS ..........................44 AIR EVACUATION ...........................45 10.1 Air Evacuation Preparation and Precautions ..............45 10.2 Evacuation Instructions ....................45 ADDING REFRIGERANT .........................46 TEST RUN ............................47 12.1 Before Test Run .......................47 12.2 Test Run Instructions .....................47 12.3 24V Signal Chart ......................48 mrcool.com... - Page 3 Refrigerant Line Set Connection Options, Requirements, and Stipulations 18K/24K/30K Capacity Units - Are designed to use the MRCOOL® Quick Connect® Pre-Charged Line Set as the preferred type of refrigerant piping. If this method is used, you DO NOT have to retain the services of professional HVAC installer for this step.
-
Page 4: Safety
7. For detailed information of how to install the indoor and outdoor units to their respective supports, please refer to the indoor unit installation and outdoor unit installation sections of this manual. 8. Excessive Weight Hazard: Use two or more people when moving and installing the unit. Failure to do this could result in personal injury. mrcool.com... - Page 5 Call your local dealer, or MRCOOL® tech support at (270) 366-0457, for further assistance. 2. If the air conditioner is used together with burners or other heating devices, thoroughly ventilate the room in order to avoid an oxygen deficiency.
- Page 6 NOTE: The maximum functional total external static pressure cannot exceed 0.80 in WC (200 Pa). The airflow reduces significantly with pressures above and beyond 0.80 in WC (200 Pa). The system design should allow for the increased resistance of filters as they become dirty. mrcool.com...
-
Page 7: Accessories
Remote Control Manual Batteries Wired Thermostat Thermostat Manual Cable Ties Foam Insulator Braze to Flare Adapter (Optional) Included Optional Accessories: PART LOOKS LIKE QUANTITY Drain Fitting (In Outdoor Packaging) Seal (In Outdoor Packaging) Flare Nut (In Indoor Packaging) mrcool.com... -
Page 8: Indoor Unit Installation
• Rooms with high humidity, such as bathrooms or appliance (ex: water heater), or carbon laundry rooms. monoxide-producing device (ex: wood fireplace) • Areas where the air inlet and outlet may be is installed. obstructed. mrcool.com... -
Page 9: Dimensions & Clearance Requirements
Vertical Installations Plenum Clearances Outlet side pipe length: 59 in. (1.5m) Mounting instructions: When installed vertically (upflow or downflow), the lower end of the air outlet needs to be connected to the L-shaped metal air duct and fastened by screws. mrcool.com... - Page 10 The air outlet grille cannot be removed without tools. 15.75 in 19.3 in 22.8 in Length of D (400 mm) (490 mm) (580 mm) 10.25 in 10.25 in 10.25 in Length of E (260 mm) (260 mm) (260 mm) mrcool.com...
- Page 11 NOTE: A secondary drain pan is required for horizontal installations. • This unit is not designed for non-ducted (free-blow) applications. Electric heat kit elements and/or blower is easily accessible without ductwork and creates a safety hazard that could result it electric shock and/or personal injury. mrcool.com...
-
Page 12: Installation Mounting Positions
The unit can be installed in a Vertical (downflow or upflow) or a Horizontal (right or left) configuration. Notice • Vertical Up and Horizontal Left installation does not need to change the direction of the evaporator. 3.6 Airflow Directions mrcool.com... -
Page 13: Wire And Piping Connections
The steps below detail the installation of a horizontal left or vertical upflow indoor unit once it has been securely mounted in place. 1. Remove the filter 2. Remove the upper 3. Remove evaporator door, then remove the cover assembly. cover plate. filter. 4. Identify the position of the evaporator’s temperature sensor. 18-24K Model 30-48K Model 60K Model mrcool.com... - Page 14 T2A: Evaporator Input Sensor Plug T2B: Evaporator Output Sensor Plug 6. Remove T1 and T2 Sensor wire ties. 8. Adjust the mounting parts positioning according to the direction of the unit. NOTE This unit model does not have T2A, T2B, or EEV mrcool.com...
- Page 15 (EEV) and tie up the sensor wires. The evaporator is now assembled in place. NOTE The wire body needs to pass through the wire groove from the drain pan and attach to the hook on the drain pan. mrcool.com...
- Page 16 If installed above a finished living space, a secondary drain pan (as required by many building codes) must be installed under the entire unit and its condensate drain line must be routed where the excess drainage is not in view. mrcool.com...
-
Page 17: Upflow And Horizontal Left Configurations
Incorrect installation could cause water to flow back into the unit and flood. CAUTION • The drainpipe outlet should be at least 1.9 in (5 cm) above the ground. • If it touches the ground, the unit may become blocked and malfunction. mrcool.com... -
Page 18: Refrigerant Piping Connection
Quantity Φ6.35 (1/4in) Parts must be purchased Liquid Φ9.52 (3/8in) separately. Side Consult your Φ12.7 (1/2in) dealer or Connecting Pipe technician Assembly about the Φ16 (5/8in) proper pipe size for the Φ19 (3/4in) Side unit you purchased. Φ22 (7/8in) mrcool.com... -
Page 19: Connecting Refrigerant Piping
Make sure that the pipe is cut at a perfect 90° • angle. Hold the pipe at a downward angle to prevent • burrs from falling into the pipe. Using a reamer or deburring tool, remove all burrs • from the cut section of the pipe. mrcool.com... - Page 20 Tighten the flare nut snugly by hand. • Using a wrench, grip the nut on the unit tubing. • While firmly gripping the nut, use a torque wrench • to tighten the flare nut according to the torque valves in the table above. mrcool.com...
- Page 21 (refer to Air Evacuation section of this Minimum Bend Radius manual). Carefully bend the tubing in the middle according to the diagram below. DO NOT bend the tubing more than 90° or more than 3 times. mrcool.com...
- Page 22 REFRIGERANT PIPING CONNECTION mrcool.com...
-
Page 23: Electric Heat Kit Installation
Step 2: Only use compatible modules certified for use with Use tools to remove the knock-out holes the model. Refer to the Electric Auxiliary Heat Model of the upper cover. specification for additional details to ensure proper selection and installation. mrcool.com... - Page 24 Install the upper cover and the silicone breaker cover. Step 8: After installing the electric auxiliary heat module, apply the circuit breaker label near the silicone breaker cover previously installed. mrcool.com...
-
Page 25: Confirmation Of Indoor Unit
Amps Amps Amps CENTRALHK05 Ckt Bkr 18.0/20.0 23.0/27.0 25.0/30.0 CENTRALHK08 Ckt Bkr 28.8/32.0 37.0/42.0 40.0/45.0 CENTRALHK10 Ckt Bkr 36.0/40.0 46.0/53.0 50.0/60.0 CENTRALHK15 Ckt Bkr 18.0/20.0 23.0/27.0 25.0/30.0 36.0/40.0 46.0/53.0 50.0/60.0 CENTRALHK20 Ckt Bkr 36.0/40.0 46.0/53.0 50.0/60.0 36.0/40.0 46.0/53.0 50.0/60.0 mrcool.com... -
Page 26: Electrical Auxiliary Heating Wiring Diagrams
CONFIRMATION OF INDOOR UNIT 6.4 Electric Auxiliary Heating Wiring Diagrams mrcool.com... - Page 27 CONFIRMATION OF INDOOR UNIT mrcool.com...
-
Page 28: Outdoor Unit Installation
If needed, build a barrier in front of the unit to protect it from extremely heavy winds. See figures below. If the unit is frequently exposed to heavy rain or snow, build a shelter above the unit to protect it from the rain or snow. Be careful not to obstruct air flow around the unit. mrcool.com... -
Page 29: Drain Fitting Installation
IN COLD CLIMATES In cold climates, make sure that the drain hose is as vertical as possible to ensure swift water drainage. If water drains too slowly, it can freeze inside the hose and flood the unit. mrcool.com... -
Page 30: Anchor Outdoor Unit
Rows of Series Installation The relations between H, A, and L are as follows: L ≤ 1/2H 25cm / 9-13/16in or more L ≤ H 1/2H < L ≤ H 30cm / 11-13/16in or more L > H Cannot be installed mrcool.com... - Page 31 RECOMMENDED AT ALL TIMES. CAUTION Make sure the wall is made of solid brick, concrete, or of similarly strong material. The wall must be able to support at least four times the weight of the unit. mrcool.com...
-
Page 32: Electrical Connections
• Connect the outdoor wires before connecting the indoor wires. 8.2 Wiring Overview (purchased separately) (purchased separately) (purchased separately) (purchased separately) The diagrams are for explanation purpose only. Individual units may be slightly different. The actual diagram shall prevail. mrcool.com... -
Page 33: Outdoor Unit Wiring
If there is no cover on the outdoor unit, take off the COMMUNICATION LEADS. bolts from the maintenance board and remove the protection board. Step 3: 1. Match the wire colors/labels with the labels on the terminal block. Firmly screw the u-lug of each wire to its corresponding terminal. mrcool.com... -
Page 34: Indoor Unit Wiring
Connection Method A: Refer to the wiring method of internal and external machine communication and wired controller as follows: WARNING ISOLATE POWER SUPPLY LEADS AND COMMUNICATION LEADS BY THE STRAIN RELIEF AND KEEP POWER SUPPLY AWAY FROM COMMUNICATION LEADS. mrcool.com... - Page 35 ELECTRICAL CONNECTIONS Connection Method B: The following wiring diagrams are suitable for the AHU and ODU with 24V thermostat. Non-communication scheme wiring reference • Wiring for 4H and 2C thermostat mrcool.com...
- Page 36 ELECTRICAL CONNECTIONS mrcool.com...
- Page 37 The unit will accommodate a remote condensate overflow switch. To enable, remove jumper J1 and connect the installer-provided condensate overflow device to CN5 per below. When an overflow condition is present, the device should open connection signaling the unit to turn off the system. mrcool.com...
- Page 38 G mode (LED Display FC). Press KEY1 again to shut and C ports. down. Keep pressing KEY1 under forced cooling mode • (LED Display FC) for five seconds to enter forced defrost mode. mrcool.com...
-
Page 39: Dip Switch Definition
ELECTRICAL CONNECTIONS 8.6 DIP Switch Definitions mrcool.com... - Page 40 S3 DIP switch, 2) The compressor cannot be 2) The c compressor can be operated when the outdoor operated when the outdoor temperature is lower than the temperature is ≥S3 DIP S3 DIP switch temperature. switch temperature +35.6°F (2°C). mrcool.com...
- Page 41 Default ON [Default] For single stage For dual stage supplemental supplemental heat, W1 and W2 heat, W1 and W2 are are connected controlled independently. S4-2 DH function selection [Default] Dehumidification Dehumidification feature control not available is enabled through the thermostat mrcool.com...
- Page 42 01 (corresponding to the dial code of the 5.1K resistor connected to the hardware is turned on), the network address value is the value of S2 plus 16; When S2 is 11 (all dialing codes are on), the network address value is the value of S2 plus 48. mrcool.com...
- Page 43 ELECTRICAL CONNECTIONS Air Volume Table mrcool.com...
- Page 44 ELECTRICAL CONNECTIONS Air Volume Table The constant airflow volume motor is applied. Therefore, the airflow volume is constant at all ESP within the stated range. mrcool.com...
-
Page 45: Specifications
SPECIFICATIONS 9-Specifications Cooling and Heating Power Specifications NOTICE Line Diameter Sizing per NFPA 70 (2020), Table 310.5 (B) (16) Based on type NM-B Romex wire. Other sizing options are possible. Consult NFPA 70 or Licensed Electrician for alternate sizing. mrcool.com... -
Page 46: Air Evacuation
12. Using a hexagonal wrench, fully open both the high pressure and low pressure valves. 13. Tighten valve caps on all three valves (service port, high pressure, and low pressure) by hand. Tighten it further using a torque wrench if needed. mrcool.com... -
Page 47: Adding Refrigerant
For example, in North America, the standard pipe length is 7.5m (25’). In other areas, the standard pipe length is 5m (16‘). The refrigerant should be charged from the service port on the outdoor unit’s low pressure valve. The additional refrigerant to be charged can be calculated using the following formula: mrcool.com... -
Page 48: Test Run
Ensure the manual buttons on the indoor unit work properly. c. Check to see that the drainage system is unimpeded and draining smoothly. d. Ensure there is no vibration or abnormal noise during operation. mrcool.com... -
Page 49: Signal Chart
TEST RUN 12.3 24V Signal Chart Note: 1: 24V signal 0: No 24V signal *: 1 or 0 The AUU will turn off if the 24V input cannot meet the table. mrcool.com... - Page 50 Versa Pro Central Ducted 36K-60K The design and specifications of this product and/or manual are subject to change without prior notice. Consult with the sales agency or manufacturer for details.
Need help?
Do you have a question about the Versa Pro MVP-36-HP-C-230-00 and is the answer not in the manual?
Questions and answers