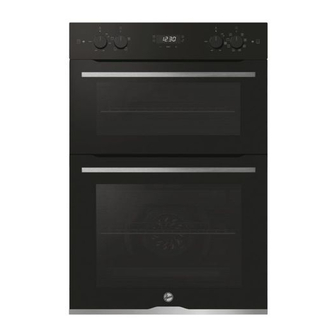
Hoover H-OVEN 300 User Instructions
Hide thumbs
Also See for H-OVEN 300:
- User manual ,
- User instructions (83 pages) ,
- User instruction (17 pages)
Subscribe to Our Youtube Channel
Summary of Contents for Hoover H-OVEN 300
- Page 1 User Instructions DOUBLE OVENS CANDY HOOVER GROUP Via Comolli 16 Brugherio – Italy...
-
Page 2: Table Of Contents
Summary Important safety indications Product description Control panel Use of the appliance General notes on cleaning Glass door cleaning Troubleshooting Installation EN 2... -
Page 3: Important Safety Indications
Important safety indications • During cooking, moisture may condense inside the oven cavity or on the glass of the door. This is a normal condition. To reduce this effect, wait 10-15 minutes after turning on the power be- fore putting food inside the oven. ln any case, the condensation disappears when the oven reaches the cooking temperature. - Page 4 • Cleaning and maintenance should not be carried out by unsu- pervised children. • Do not use rough or abrasive materials or sharp metal scrapers to clean the oven door glasses, as they can scratch the surface and cause the glass to shatter. •...
- Page 5 ance with the wiring rules IF THE OVEN IS PROVIDED BY THE MANUFACTURER WITH POLARIZED PLUG IT IS INTENDED FOR CONNECTION TO POLARIZED SOCKET OUTLETS ONLY • IF THE OVEN IS PROVIDED BY THE MANUFACTURER WITH PLUG: The socket must be suitable for the load indicated on the tag and must have ground contact connected and in operation.
- Page 6 • Failure to comply with the above can compromise the safety of the appliance and invalidate the guarantee. • Any excess of spilled material should be removed before clean- ing. • A long power supply failure during an occurring cooking phase may cause a malfunction of the monitor.
- Page 7 General Instructions We thank you for choosing one of our products. For the best results with your oven, you should read this manual carefully and retain it for future reference. Before installing the oven, take note of the serial number so that you can give it to customer service staff if any repairs are required. Having removed the oven from its packaging, check that it has not been damaged during trans- portation.
- Page 8 The grounding wire connected to the oven’s earth terminal must be connected to the earth ter- minal of the power supply. WARNING Before connecting the oven to the power supply, ask a qualified electrician to check the conti- nuity of the power supply’s earth terminal. The manufacturer accepts no responsibility for any accidents or other problems caused by failure to connect the oven to the earth terminal or by an earth connection that has defective continuity.
-
Page 9: Product Description
Product description 1. Control panel 2. Shelf positions (lateral wire grid if included) 3. Grids 4. Trays 5. Fan (if present) 6. Oven door 7. Lateral wire grids (if present: only for flat cavity) 8. Serial number Write here your serial number for future reference. ACCESSORIES Drip tray Metal grid... - Page 10 Softclose (only if present) Removal and cleaning of the side racks Hinges which ensure an automatic soft and smooth movement during the closing phase of the oven door. Telescopic guides (only if present) 1. Remove the wire racks by pulling them in the direction of the arrows (see below) 2.
-
Page 11: Control Panel
Control panel Minute Minder Cooking time Cooking Cooking Cooking Cooking Settings Key Lock timer functions timer functions Set the clock PRESS TIME 1 TIME BLINKING Adjust the clock PRESS PRESS 4 TIMES TIME 1 TIME Set cooking temperature PROGRAM TEMPERATURE EN 11... - Page 12 Minute Minder PRESS BLINK 1 TIMES TIME & BEEP Cooking time SET PROGRAM PRESS 2 TIME TIME End of Cooking SET PROGRAM PRESS 2 TIMES TIME Key Lock ON / OFF PRESS (+) 7 SEC EN 12...
- Page 13 Before using the appliance Changing the bulb (depending on the oven model) EN 13...
-
Page 14: Use Of The Appliance
Use of the appliance COOKING MODES * T °C T °C Symbol Function range fault LAMP: Turns on the oven light. DEFROST: When the dial is set to this position. The fan circulates air at room temperature around the frozen food so that it defrosts in a few min- utes without the protein content of the food being changed or altered. -
Page 15: General Notes On Cleaning
General notes on cleaning The lifecycle of the appliance can be extended ACCESSORIES through regular cleaning. Wait for the oven to Clean accessories with a wet, soapy sponge cool before carrying out manual cleaning op- before rinsing and drying them: avoid using erations. -
Page 16: Glass Door Cleaning
Glass door cleaning EN 16... -
Page 17: Troubleshooting
Troubleshooting Problem Possible cause Solution the oven does not heat up The clock is not set Set the clock A cooking function and tempera- Ensure that the necessary settings The oven does not heat up ture has not been set are correct Clean with a microfiber cloth the No reaction of the touch... - Page 18 For Equepped With Fixing Squares B: 720 OVEN FITTED BETWEEN FURNITURES B: 720 INSTALLATION 18...
- Page 19 Installation A: 875 - 878 B: 705 - 708 550 min. A: 885 B: 720 * mandatory for all types of installations 4x3.5x25 Note: be sure to consult the cooktop manufacturer’s installation guide to ensure adequate clearances. INSTALLATION 19...
- Page 20 70029399...


Need help?
Do you have a question about the H-OVEN 300 and is the answer not in the manual?
Questions and answers