Table of Contents
Advertisement
Quick Links
Advertisement
Table of Contents
Troubleshooting

Related Manuals for Royal Vendors Merlin IV Plus 768


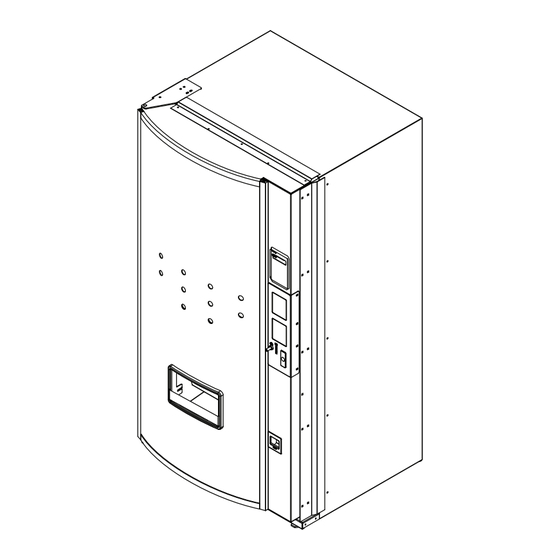
Summary of Contents for Royal Vendors Merlin IV Plus 768
- Page 1 Royal Vendors, Inc. Merlin IV Plus Operation and Service Manual Manufactured by Royal Vendors, Inc. • 426 Industrial Boulevard • Kearneysville WV 25430-2776 • USA Telephone +1 304 728 7056 • Fax +1 304 725 4016 • technicalinquiry@royalvendors.com • parts@royalvendors.com • www.royalvendors.com...
- Page 2 Royal Vendors, Inc. • 426 Industrial Boulevard • Kearneysville WV 25430-2776 • USA Customer Service: +1 304 728 7056 • Fax +1 304 725 4016 E-mail: technicalinquiry@royalvendors.com parts@royalvendors.com Website: www.royalvendors.com...
-
Page 3: Table Of Contents
Table of Contents Safety Information ........................5 SECTION 1. General Information and Setup ................. 7 Introduction ..........................7 Unpacking the Vender and Installing It On Location ..............7 Specifications ........................... 7 Voltage Requirements and Vender’s Power Cord ..............8 Vender Identification ........................ 8 SECTION 2. - Page 4 Table of Contents (continued) Password Preview Mode (PAS) .................... 29 Language Selection Mode (LAnG) ..................29 Return to Sales (rtn) ......................29 External Menu ........................29 Sales Counters (SALE) ......................29 Error Codes (Eror) ......................29 Return to Sales (rtn) ......................29 SECTION 4.
-
Page 5: Safety Information
Safety · Turn off or disconnect power cord from power source before servicing. Royal Vendors is committed to safety with all of our · Only fully trained service technicians should service product designs. We are committed to notifying the user vender when vender has power. - Page 6 Safety Information Section II: Electrical Hazards A. Servicing with Power Off For maximum safety, unplug the power cord from the wall outlet before opening the vender door. This will remove power from the equipment and avoid electrical hazards. Service personnel should remain aware of possible hazards from hot components although electrical power is off.
-
Page 7: Section 1. General Information And Setup
Make sure all leveling legs are in contact with the floor. This manual contains installation, operation, and service instructions for the Royal Vendors Merlin IV Plus Vender. Program the Vender This manual also contains a parts catalog and electrical All programming of the vender is done in the Service Mode. -
Page 8: Voltage Requirements And Vender's Power Cord
Section 1. General Information and Setup Voltage Requirements and Vender Identification Vender’s Power Cord Vender Serial Plate The vender’s main serial plate (shown in Figure 1.2) is The vender is designed to operate at a voltage of 115 volts located on the exterior left side of the vender’s main door AC, 60 Hertz. -
Page 9: Section 2. Vender Component Explanation
Section 2. Vender Component Explanation Vender Component CONTROL BOARD PINOUTS: The Merlin IV control board has several electrical pinouts, a setup mode button, a delivery sensor adjustment trimpot, a delivery sensor Explanation adjustment indicator lamp, and various other electronic components (all of which have designated position codes). The following section outlines all the control board’s Vender Control Board pinouts. - Page 10 Section 2. Vender Component Explanation Merlin IV Control Board SELECTION SWITCHES (Position P7): The wiring harness connecting to this pinout carries a logic level DISPLAY (Position P1): The four-wire harness connecting (ground) signal from pin 11 of the control board to the to this pinout travels from the vender’s LED to the control common position of each select switch.
- Page 11 Section 2. Vender Component Explanation OPTIONS (Position P9): The wiring harness connecting to HHC 2 (Position P11): The three-wire harness connecting this pinout travels from the vender’s door switch through the to this pinout comes from the external Hand Held Computer bottom of the vender’s main door and to the control board.
-
Page 12: Low Voltage Transformer
Section 2. Vender Component Explanation Low Voltage Transformer ENV CONTROLS (Position P14): The wiring harness connecting this pinout powers the refrigeration relay (to power the refrigeration unit). It is also responsible for The Merlin IV Vender uses a low voltage transformer which powering any optional relays, such as the heater relay, reduces 115 volts AC (conventional voltage) to 24 volts AC, evaporator fan relay, light relay, and a 24-volt DC counter. -
Page 13: Delivery Chute Sensor
Section 2. Vender Component Explanation Refrigeration System Located in the bottom of each column is a single 12-volt DC vend motor. This motor is attached to a rotor, on which the product rests when in a normal ready position. When The vender’s refrigeration system is responsible for the the control board sends power to the vend motor, the rotor cooling of the cabinet and the products loaded within it. - Page 14 Section 2. Vender Component Explanation Condenser Fan and Motor - The condenser fan and motor, Accumulator - The accumulator is located in the refrigerant located beneath the cooling department, are a forced-air line between the evaporator coil and the compressor. The device using outside ambient air to cool the surface of the accumulator traps any liquid refrigerant which did not condenser coil.
-
Page 15: Ballast
Section 2. Vender Component Explanation Ballast Refrigeration Cycle 1. The rising temperature in the cooling compartment is reported to the control board through the temperature The ballast acts as a transformer to convert conventional sensor. voltage (115 VAC) to a higher voltage required to energize 2. -
Page 16: Section 3. Vender Programming
Section 3. Vender Programming Vender Programming Button Schemes The following illustrations show the button schemes for all Introduction to Programming Merlin IV Plus venders. Live Display (RVDVE-650-10) It is very important that your vender is programmed properly. All programming of the vender options is done Buttons are counted from right to left, top to bottom, as in the Service Mode. -
Page 17: Menu System
Section 3. Vender Programming Menu System All other Merlin IV Plus models On all other Merlin IV Plus models, buttons are counted from left to right, top to bottom, as shown below. (Note: When programming, you must first use the programming Some models may have more or fewer buttons than this buttons listed above to maneuver through menus and sub- illustration.) -
Page 18: Sale Counter Display Mode (Sale)
Section 3. Vender Programming SALE COUNTER DISPLAY TOKEN COUNTER DISPLAY SALE to4n MODE MODE If <enter> is pressed at the “SALE” prompt, If <enter> is pressed at the “toKn” prompt, the controller will enter the non-resettable vend count the controller will enter the Token Counter Mode. The display mode by displaying “SALE”... -
Page 19: Error Code Display Mode Eror
Section 3. Vender Programming If <enter> is pressed at the “SALE” prompt, the controller TEST VEND MODES tESt will enter the non-resettable free vend count display mode This mode will test the control board’s by showing “SALE” / “XXXX” / “XXXX,” where the X’s ability to distribute 24 volts DC to the will represent the total number of all free vends over the proper vend motor upon command. -
Page 20: Space-To-Sales Programming Mode (Sts)
Section 3. Vender Programming SPACE-TO-SALES CStS (Custom Space-to-sales) StOS If <enter> is pressed at the “CStS” prompt, the controller PROGRAMMING MODE will enter the custom space-to-sales option. Upon entry into The space-to-sales mode is used to this routine, the display will show “SLXX,” followed by the determine which column(s) will vend for each selection. -
Page 21: Selection Depth Setting Mode (Sdep)
Section 3. Vender Programming SELECTION DEPTH SETTING CONFIGURATIONS MODE SdEP If <enter> is pressed at the “Con” prompt, MODE the controller will enter the configurations If <enter> is pressed at the “SdEP” prompt, mode by displaying “Cn X,” where “n” is the configuration the controller will enter the by-selection column-depth number and “X”... - Page 22 Section 3. Vender Programming • C4 - Open-door totals • C7 - Bill acceptance This option is used to turn on the display of the total This option is used to allow higher order bills to be machine sales and total machine cash values in the accepted without the risk of cheating the customer.
- Page 23 Section 3. Vender Programming • C10 - Bill escrow The features of ENERGY STAR Tier 2-compliant This option will allow escrowing of bills. If enabled, venders are: and the current bill value inserted takes the accumulated credit over the maximum price, the bill will be held in •...
-
Page 24: Return To Sales (Rtn)
Section 3. Vender Programming RETURN TO SALES RECYCLER PAY OUT MODE If <enter> is pressed at the “rtn” prompt, If <enter> is pressed at the “rPO” prompt, the controller will return to the open-door the controller will enter the bill payout mode. -
Page 25: Differential Cash Counter Mode (Difc)
Section 3. Vender Programming DIFFERENTIAL CASH SET TIMER CONTROL MODE diFC StCL This mode is used to choose which COUNTER MODE selections to turn off by either using the This mode is comparable to the Cash built-in timer or with the optional key switch kit. This mode Counter Display Mode. - Page 26 Section 3. Vender Programming • yEAr • dAy If <enter> is pressed at the “YEAr” prompt, the current If <enter> is pressed at the “dAY” prompt, the controller year is displayed and will be flashing. Pressing <up> will enter the time range programming function to or <down>...
-
Page 27: Refrigeration Control Mode (Frig)
Section 3. Vender Programming At this point, <up> or <down> will cycle through all REFRIGERATION CONTROL FriG timer setting modes listed previously. From this level, MODE pressing <exit> will return the display to the day of the If <enter> is pressed at the “FriG” prompt, week. - Page 28 Section 3. Vender Programming • StoP • Stor If <enter> is pressed at the “StoP” prompt, the controller If <enter> is pressed at the “Stor” prompt, the controller will enter the stop energy conservation time setting will display the current storage (for energy conservation routine.
-
Page 29: Password Preview Mode (Pas)
Section 3. Vender Programming External Menu PASSWORD PREVIEW MODE On the Merlin IV Plus vender, the total historical and individual sales counts can be Access the External Menu by entering your 4-digit password accessed externally, as well as the error mode, by entering when the main door is closed (see “PAS”... -
Page 30: Section 4. Vend Cycle
Section 4. Vend Cycle Vend Cycle Note: The control board will go through a Learning Mode. It will be reset either on power down / up or a door opening / closing. This allows the vender’s controller to decide Stand-By Condition which is the front or rear product. -
Page 31: Section 5. Vender Maintenance
Section 5. Vender Maintenance Vender Maintenance Preventive Maintenance Vender Leveling: Make sure that the vender is level when What to Clean placed on site. If the vender is not properly leveled it can begin to accumulate standing water, which over a period of time may begin to freeze and will eventually freeze WARNING: Electrical and electronic the evaporator. -
Page 32: Section 6. Vender Troubleshooting
Section 6. Vender Troubleshooting Vender Troubleshooting Using the Vender’s Error Code System The Merlin IV Plus has a built-in error code diagnostic system that will help in troubleshooting and solving problems. This system is best used in conjunction with the following section, Troubleshooting. These errors are not a replacement for knowledge of the vender or its operation, but they will lead in the general direction of the problem. -
Page 33: Troubleshooting
(coin or bill), vending, or refrigeration. Listed below are the problems that are most likely to be encountered. If the Merlin IV Plus displays a problem not listed here, please contact a Royal Vendors service representative. TROUBLE... - Page 34 Section 6. Vender Troubleshooting TROUBLE POSSIBLE CAUSE CORRECTIVE PROCEDURE BILL ACCEPTANCE Validator will not pull Make sure that the validator harnessing is Replace defective or wrong validator in a bill correct for the style of validator being used harness. and that it is plugged in properly. Acceptance disabled by coin mechanism Make sure changer is plugged in (accepts or bad harnessing (validator status light is...
- Page 35 Section 6. Vender Troubleshooting TROUBLE POSSIBLE CAUSE CORRECTIVE PROCEDURE Wrong product Misloaded vender Ensure all products within each column vending upon are the same. selection Space-to-sales not properly set Enter space-to-sales. Make sure the columns are set correctly according to the buttons.
- Page 36 Section 6. Vender Troubleshooting TROUBLE POSSIBLE CAUSE CORRECTIVE PROCEDURE REFRIGERATION PROBLEMS Refrigeration unit runs Cut-out temperature not properly set Check cut-out setting in the “FriG” mode. constantly Correct if necessary. Temperature sensor not reading correctly Test the temperature sensor by setting the temperature to be displayed on the LED and measuring the actual inside cabinet temperature with a thermometer...
- Page 37 Section 6. Vender Troubleshooting TROUBLE POSSIBLE CAUSE CORRECTIVE PROCEDURE MISCELLANEOUS PROBLEMS LED not working No power to control board Check for 24 VAC at control board’s main power connection, coming from the transformer. If no power, replace transformer. LED harness Check the LED harness for pinches, cuts, or backed out wires.
-
Page 38: Section 7. Training Guide
Section 7. Training Guide Training Guide Component Highlights Control board • “Brains” of vender Troubleshooting Technique • Controls all vending operations • See Chapter 2: Vender Component Explanation for full explanations of control board pinouts and functions. Objective: Understand sequence of operation, identify what vender is doing, and compare to what it should be doing. - Page 39 Section 7. Training Guide LED Harness (See Figure 7.2) Chute Sensor (See Figure 7.4) • Supplies 5 VDC to LED • Position P4 on control board • Check for 5 VDC across position P1, pins 1 and 4 • Low-voltage (5 mV @ 500 µSeconds) impact sensor •...
- Page 40 Section 7. Training Guide Select Switch Harness (See Figure 7.5) Door Switch / Options Harness (See Figure 7.7) • Supplies 5 VDC to select switches from position P7, • Supplies 5 VDC from position P9 to door switch (pins pin 11 1 and 6) and to options harnesses (free-vend switch, no- •...
- Page 41 Section 7. Training Guide DEX / UCS Harness (See Figure 7.8) Environmental Control (Refrigeration) Harness (See • Located at positions P10 (Internal) and P11 (External) Figure 7.10) • Computer access point • Supplies 24 VDC to refrigeration relay from position •...
-
Page 42: Section 8. Parts Catalogue
Section 8. Parts Catalogue Control Board and Wiring L.E.D. DISPLAY TO COIN CHANGER, VALIDATOR, etc. TO VEND MOTORS & DOOR SWITCH TO IN-LINE FILTER Merlin IV Plus Operation and Service Manual... - Page 43 Section 8. Parts Catalogue Control Board and Wiring ITEM NO. DESCRIPTION PART NO. Control Board ..........................836182 LED Display Harness ........................842081 - LED Harness, Dr. Pepper ......................842326 Serial Changer Harness ......................842079 Delivery Sensor (includes harness), Piezo ................. 210121 Select Switch Harness, Pepsi Cola 10 Select ................
- Page 44 Section 8. Parts Catalogue Cold Drink / Dr Pepper Door Assemblies, Front Merlin IV Plus Operation and Service Manual...
- Page 45 Section 8. Parts Catalogue Cold Drink / Dr Pepper Door Assemblies, Front ITEM NO. DESCRIPTION PART NO. Port Spacer ..........................815248 Sign Assembly ............See exploded view elsewhere in Parts Catalogue Trim, All, Wide Vender, 72” ......................013580 - Wide Vender, 79” ........................012597 - Narrow Vender, 72”...
- Page 46 Section 8. Parts Catalogue Cold Drink Door Assembly, Rear Merlin IV Plus Operation and Service Manual...
- Page 47 Section 8. Parts Catalogue Cold Drink Door Assembly, Rear ITEM NO. DESCRIPTION PART NO. Door Weld Assembly, Cold Drink, Wide Vender, 72” ..............385510 - Wide Vender, 79” ........................386510 - Narrow Vender, 72” ........................387510 Security Plate Assembly ......................385540 Rain Guard, Wide Vender ......................
- Page 48 Section 8. Parts Catalogue Dr Pepper Door Assembly, Rear Merlin IV Plus Operation and Service Manual...
- Page 49 Section 8. Parts Catalogue Dr Pepper Door Assembly, Rear ITEM NO. DESCRIPTION PART NO. Door Weld Assembly, Dr Pepper, Wide Vender, 72” ..............374510 - Wide Vender, 79” ........................375510 - Narrow Vender, 72” ........................376510 Security Plate Assembly, Dr Pepper ................... 374530 Rain Guard, Wide Vender ......................
- Page 50 Section 8. Parts Catalogue Live Display Door Assembly, Front Merlin IV Plus Operation and Service Manual...
- Page 51 Coin Cup Weld Assembly ......................385590 Screw, #8-32 x 3/8” ........................E901011 Display Plate Assembly ....................... 385560 Display Plate Gasket ........................829065 Note: Please call Royal Vendors’ Service Parts Department for all sign part numbers. Merlin IV Plus Operation and Service Manual...
- Page 52 Section 8. Parts Catalogue Live Display Door Assembly, Rear Merlin IV Plus Operation and Service Manual...
- Page 53 Section 8. Parts Catalogue Live Display Door Assembly, Rear ITEM NO. DESCRIPTION PART NO. Changer Door Assembly ......................385570 Coin Box Housing Panel Assembly ..................... 385591 Coin Box Housing ........................273503 Bottom Inner Door Hinge ......................010543 Display Back ..........................278505 Selection Panel Strap Weld Assembly ..................
- Page 54 Ballast ..................838053 • Harness, Lower Lamp ...............842754 - Upper Lamp ................842755 Note: Fluorescent tubes are not available for purchase from Royal Vendors. COLD DRINK / DR PEPPER ADA MODEL 542 ITEM NO. DESCRIPTION PART NO. Lamp Panel, Narrow, Cold Drink ..........380501 - Dr Pepper .................376505...
- Page 55 Bottom Lamp Panel, Dr Pepper ..........374517 Ballast ..................838053 • Harness, Lower Lamp ...............842754 - Upper Lamp ................842755 Note: Fluorescent tubes are not available for purchase from Royal Vendors. LIVE DISPLAY MODELS ITEM NO. DESCRIPTION PART NO. Lamp Panel, Top ........278506 Lamp Panel, Bottom ......
- Page 56 Section 8. Parts Catalogue Port Assembly, Cold Drink / Dr Pepper Door ITEM NO. DESCRIPTION PART NO. Port Body Weld Assembly ......................378540 Port Brace, Wide Vender, Cold Drink ..................369524 - Wide Vender, Dr Pepper ......................374508 - Narrow Vender, Cold Drink ....................... 380508 - Narrow Vender, Dr Pepper ......................
- Page 57 Section 8. Parts Catalogue Port Assembly, Live Display ITEM NO. DESCRIPTION PART NO. Delivery Port Weld Assembly ...................... 384520 Port Brace, Wide Vender ......................369524 Latch Roller Bracket ........................010516 Anti-theft Plate ..........................384505 Port Bottom Plate ........................384507 Bottle Stop ..........................384506 Sems Screw, #8-32 x 1/2”...
- Page 58 Section 8. Parts Catalogue Security Plate Assembly, Cold Drink / Live Display 385540 Merlin IV Plus Operation and Service Manual...
- Page 59 Section 8. Parts Catalogue Security Plate Assembly, Cold Drink / Live Display 385540 ITEM NO. DESCRIPTION PART NO. Security Plate Weld Assembly ....................385530 T-handle Assembly ........................812428 Coin Return Bushing ........................803059 Coin Return Button ........................803031 T-bolt, 1/4”-20 x 1” ........................E901037 Keps Nut, 1/4”-20 ........................
- Page 60 Section 8. Parts Catalogue Security Plate Assembly, Dr Pepper 374530 ITEM NO. DESCRIPTION PART NO. Security Plate Weld Assembly, Dr Pepper .................. 374520 T-handle Assembly, Dr Pepper ....................812440 Coin Chute Assembly, Dr Pepper ....................374540 Coin Return Bushing ........................803059 Coin Return Button ........................
- Page 61 Selection Button (includes items 3, 4, and 5) ................816152 Switch Retainer, Front ......................... 357513 Switch Retainer, Rear ......................... 357512 Selection Switch .......................... 835001 Keps Nut, #8-32 ........................E905001 Note: Please call Royal Vendors’ Service Parts Department for all sign part numbers. Merlin IV Plus Operation and Service Manual...
- Page 62 Section 8. Parts Catalogue Inner Door Assembly Merlin IV Plus Operation and Service Manual...
- Page 63 Section 8. Parts Catalogue Inner Door Assembly ITEM NO. DESCRIPTION ROYAL NO. Inner Door Assembly, Wide Vender, Cold Drink / Live Display, 72” ............378610 - Wide Vender, Dr Pepper, 72” ........................374610 - Wide Vender, Cold Drink / Live Display, 79” ...................379610 - Wide Vender, Dr Pepper, 79”...
- Page 64 Section 8. Parts Catalogue Cabinet Assembly Merlin IV Plus Operation and Service Manual...
- Page 65 Section 8. Parts Catalogue Cabinet Assembly ITEM NO. DESCRIPTION PART NO. Cabinet Weld Assembly ......................257260 Right Column Wall ........................257350 Vend Mechanism Support ......................058001 Product Chute Tie Bracket ......................010017 Product Chute Assembly ......................256070 Harness Splash Shield ........................ 385002 Left Vandal Panel, 72”...
- Page 66 Section 8. Parts Catalogue Vend Mechanism Assembly Merlin IV Plus Operation and Service Manual...
- Page 67 Section 8. Parts Catalogue Vend Mechanism Assembly ITEM NO. DESCRIPTION ROYAL NO. Vend Mechanism Assembly, 72” Vender, 12 column ..............385710 - 79” Vender, 12 column .......................386710 - 72” Vender, 10 column .......................387710 Backspacer Assembly, Airflow, 79” Vender ..................261720 - 72” Vender ..........................262750 Backplate, Airflow Stack, 79”...
- Page 68 Section 8. Parts Catalogue Refrigeration Assembly OPTIONAL Merlin IV Plus Operation and Service Manual...
- Page 69 Section 8. Parts Catalogue Refrigeration Assembly ITEM NO. DESCRIPTION ROYAL NO. Heat Exchange ..........................210425 Dryer ............................824005 Condenser ...........................820007 Condenser Fan Motor .........................839010 Condenser Fan blade ........................810014 Condenser Fan Motor Bracket .....................810006 Screw, #8-32x1/2” ........................901006 1/3+ H.P. Capacitor Start Compressor ..................819028 Compressor Relay 1/3+ H.P.
-
Page 70: Section 9. Wiring Diagram
Section 9. Wiring Diagram BLUE LAMP WHT/ORG WHT/YEL WHT/RED LAMP LAMP BROWN ORANGE YELLOW BLUE LAMP -NOTES- SOME MODELS MAY HAVE THE 10-C MECHANISM CONFIGURATION. THE WIR PLUG CAP COLORS SHOWN NEXT TO THE MOTORS BLACK BLUE BLUE THE LEAD WIRES. WHITE BLACK IS ALWAYS THE COMMON WIRE. - Page 71 Section 9. Wiring Diagram WHT/ORG WHT/YEL WHT/RED WHT/GRN BLUE REAR FRONT COLUMNS COLUMNS BROWN ORANGE YELLOW GREEN -NOTES- SOME MODELS MAY HAVE THE 10-COLUMN MECHANISM CONFIGURATION. THE WIRE COLORS SHOWN NEXT TO THE MOTORS REPRESENT THE LEAD WIRES. HITE BLACK IS ALWAYS THE COMMON WIRE. BLACK BLACK BLACK...
-
Page 72: Section 10. Programming Flowchart
Section 10. Programming Flowchart Merlin IV Plus Operation and Service Manual... - Page 73 Merlin IV Plus Operation and Service Manual...
-
Page 74: Credit And Replacement Policy
Credits or replacements will be issued on warranty items if the proper procedures are followed: 1. ROYAL VENDORS will pay shipping charges on all parts covered under this warranty when transportation has been made the most economical way. (Example: within the continental USA, regular ground UPS).
Need help?
Do you have a question about the Merlin IV Plus 768 and is the answer not in the manual?
Questions and answers