Table of Contents
Advertisement
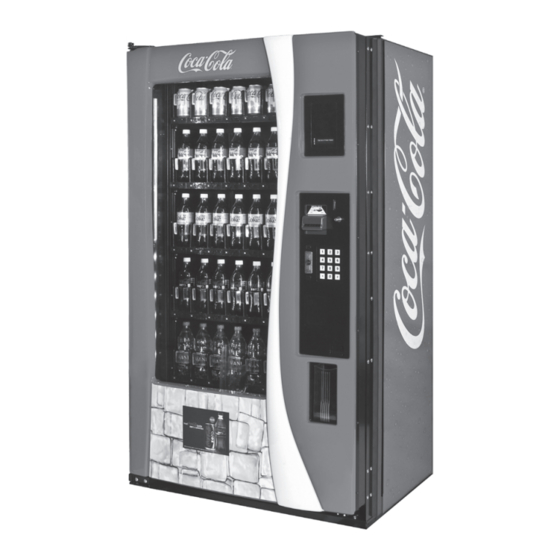
Royal Vendors, Inc.
RVV Gen II
RVV Generation II with KO Programming
Operation and Service Manual
Manufactured by
Royal Vendors, Inc. • 426 Industrial Boulevard • Kearneysville WV 25430-2776 • USA
Telephone +1 304 728 7056 • Fax +1 304 725 4016 • technicalinquiry@royalvendors.com • parts@royalvendors.com • www.royalvendors.com
R
Advertisement
Table of Contents
Troubleshooting

Related Manuals for Royal Vendors RVV Gen II


Summary of Contents for Royal Vendors RVV Gen II
- Page 1 RVV Generation II with KO Programming Operation and Service Manual Manufactured by Royal Vendors, Inc. • 426 Industrial Boulevard • Kearneysville WV 25430-2776 • USA Telephone +1 304 728 7056 • Fax +1 304 725 4016 • technicalinquiry@royalvendors.com • parts@royalvendors.com • www.royalvendors.com...
- Page 2 Royal Vendors, Inc. • 426 Industrial Boulevard • Kearneysville WV 25430-2776 • USA Customer Service: +1 (304) 728-7056 or Toll Free 1 (800) 931-9214 • Fax +1 (304) 725-4016 E-mail: technicalinquiry@royalvendors.com parts@royalvendors.com Website: www.royalvendors.com RVV Gen II KO Service and Parts Manual...
-
Page 3: Table Of Contents
Free Vend Accounting ..............25 Price Program ................26 StS Programming ...............26 Config Switches ................27 Correct Change ................29 Preview Password ..............29 Language Select ................29 Time Programming ..............30 Lighting Control ................31 Refrigeration ................32 Select Block 1/2 ................34 RVV Gen II KO Service and Parts Manual... - Page 4 Troubleshooting by Error Codes ...........42 Troubleshooting by Symptom ............45 Test Diagnostics Routines Troubleshooting .........48 SECTION 6: Parts Catalog ............64 Programming Flowchart ..............85 RVV NG Wiring Schematic ............86 CREDIT AND REPLACEMENT POLICY .......Back Cover RVV Gen II KO Service and Parts Manual...
-
Page 5: Safety Segment
SAFETY REGULATIONS SAFETY · Read the safety segment before installation or service. Royal Vendors is committed to safety with all of our · Test for proper grounding before installing to reduce the risk of electrical shock and fire. product designs. We are committed to notifying the user of a possible danger involving the improper handling ·... - Page 6 SUGGESTED CLEANING METHODS. IF WATER CONTAMINATION OF ELECTRICAL COMPONENTS IS SUSPECTED, USE QUALIFIED ELECTRICAL TESTING EQUIPMENT AND TEST METHODS TO ASSURE THAT VENDER IS NOT A HAZARD BEFORE APPLYING POWER FOR ANY REASON. RVV Gen II KO Service and Parts Manual...
-
Page 7: Section 1: General Information And Setup
Royal Vision Vender Generation II, PLACING THE VENDER ON LOCATION by Royal Vendors, Inc. This manual also contains a parts When placing the vender on location, allow for a minimum catalog and electrical schematic for the RVV Gen II. -
Page 8: Voltage Requirements And Vender's Power Cord
2. Continue in same manner until selection is full. 3. Make sure packages do not extend past tray front (see Figure 1, above). RVV Gen II KO Service and Parts Manual... -
Page 9: Specifications
• Refrigeration design pressures Configuration .......40 selections (5 shelves) The vender’s model code contains useful information: the machine type, such as RVRVV (Royal Vendors Royal Vision Vender); the model number, such as 500; and the IMPORTANT NOTE ON number 40, which designates that the vender has forty cells. -
Page 10: Section 2: Vender Component Explanation
IDENTIFICATION: The RVV Gen II’s VMC can be three (3) wire harnesses leading to internal and external easily identified by a Royal Vendors part number decal on jacks. The Hand Held Computer (HHC) plugs into these the capacitor of the VMC board. - Page 11 VIOLET GROUND Sold Out LEDS (Position P4) and Ready To Vend Indicators (Position P4A): These pinouts may be available in the future, but at the time of this printing they are not available. RVV Gen II KO Service and Parts Manual...
- Page 12 (Position P15): These pinouts are not currently used. WIRE FUNCTION NUMBER COLOR TEMP. SENSOR +5 VDC WHITE TEMP. SENSOR SIGNAL BLACK TEMP. SENSOR GROUND HEALTH SENSOR +5 VDC WHITE HEALTH SENSOR SIGNAL BLACK HEALTH SENSOR GROUND RVV Gen II KO Service and Parts Manual...
-
Page 13: Delivery Mechanism Controller
X-AXIS ENCODER CHANNEL B WHITE 24 VDC GROUND BROWN RETURN BROWN X-AXIS PHASE B- YELLOW X-AXIS PHASE B+ BLACK RECEIVE NOT USED TRANSMIT NOT USED GREEN COMMON GREEN X-AXIS PHASE A- WHITE X-AXIS PHASE A+ RVV Gen II KO Service and Parts Manual... -
Page 14: Touch Pad
Remove the power supply from the door. is located above the validator. All information to the Replace it with a new electronic power supply. programmer and to the customer is conveyed on the VFD. RVV Gen II KO Service and Parts Manual... -
Page 15: Refrigeration System
30-minute timer will begin. At the end of this 30 minutes, the vender will stay in normal The RVV Gen II controller software includes the following operating mode as long as the temperature remains 41°F refrigeration modes and features: (5°C) or below. - Page 16 Legend COMPRESSOR vapor from the evaporator coil, Direction of compressing it, and forcing it into Refrigerant Figure 2.1 the condenser. The condenser, Flow aided by the condenser fan Refrigeration System Flow RVV Gen II KO Service and Parts Manual...
-
Page 17: Ballast
When plugging the refrigeration unit directly into a wall outlet or other external electrical source, the refrigeration unit MUST remain in the vender for proper grounding. If the unit is removed from the vender, an electrocution hazard exists. RVV Gen II KO Service and Parts Manual... -
Page 18: Section 3: Vender Programming
SECTION 3: Vender Programming Vender Programming TOUCH PAD PROGRAMMING It is very important that the RVV Gen II is programmed properly. All programming of the vender options is done PRECAUTIONS TO TAKE WHEN in the Service Mode. To enter the Service Mode, open the... -
Page 19: Internal (Service) Menu
“Inlet Sense,” indicating the machine’s coin inlet sensor has been blocked for more than a minute (note: this is an optional component not installed on all venders); or RVV Gen II KO Service and Parts Manual... - Page 20 Satellite Device (i.e., the DMC) is no longer online; “Delivery Port Sense,” indicating that the DMC is reporting a port sense error; or “Delivery Port Door,” indicating that the DMC is reporting a port door error. RVV Gen II KO Service and Parts Manual...
-
Page 21: Coin Pay Out
MIS manual dispense mode counters. Pressing<exit> while a bill value is displayed will return the controller to the “Recycler Pay Out” prompt. Use <up> to proceed to the next prompt, “Test Modes.” RVV Gen II KO Service and Parts Manual... - Page 22 When installed in the RVV Gen II, the controller should always be set to “Gen II.” If set Pressing <enter> at the “Port X” prompt will cause incorrectly, press <up>...
- Page 23 Pressing <exit> will terminate the test, home the motors, and return the display to “Motor / Encoder Test.” Note: The motor / encoder test can be performed with the door OPEN or CLOSED. RVV Gen II KO Service and Parts Manual...
- Page 24 Pressing <exit> will terminate the test and return the display to “Multiple Home Test.” Note: The production test will only start if the door is CLOSED. RVV Gen II KO Service and Parts Manual...
-
Page 25: Password Entry
“N” will represent the selection number. The individual counts are resettable. If <exit> is pressed anytime during this operation, the controller will return to the “Card Counters” prompt. Press <up> to continue to the next prompt, “Token Counters.” RVV Gen II KO Service and Parts Manual... -
Page 26: Price Program
<up> or <down> at the “Price Sel N” prompt will cycle assignments. through all available selection numbers. Press <exit> to return to the “Price Program” prompt. From the “Price Program” prompt, press <up> to continue to the next prompt, “StS Programming.” RVV Gen II KO Service and Parts Manual... -
Page 27: Config Switches
“Vend Evenly X” prompt. Pressing <exit> at the If X = 1, the Optional Features Menu will appear. “Vend Evenly X” prompt will take you back to the “StS Programming” prompt. RVV Gen II KO Service and Parts Manual... - Page 28 If X = 0, MDB Level 2 is disabled for cashless devices (no card revaluing). If X = 1, MDB Level 2 is enabled for cashless devices (i.e., card revaluing is enabled). RVV Gen II KO Service and Parts Manual...
-
Page 29: Correct Change
The vender should not accept any amount of currency (bill or coin) larger than the value set in “Uncond Accept” unless the changer can pay out the equivalent of that amount. RVV Gen II KO Service and Parts Manual... -
Page 30: Time Programming
Set back 1 hour at 2:00AM on last pressed, the currently displayed date is saved and the Sunday in October controller will return to the “Day” prompt. Use <up> to proceed to the next prompt, “Hour.” RVV Gen II KO Service and Parts Manual... -
Page 31: Lighting Control
<enter> again will save the displayed setting and return you to the “Stop Hour” prompt. Pressing <exit> while in editing mode will return you to the “Stop Hour” prompt without saving changes. RVV Gen II KO Service and Parts Manual... -
Page 32: Refrigeration
<down> will toggle “X” between “1” (enabled) and “0” (disabled). Pressing <enter> again will save the displayed setting and return you to the non-flashing “YY X” prompt. Pressing <exit> will return to the “Start Day” prompt. RVV Gen II KO Service and Parts Manual... - Page 33 <enter> will save the storage temperature and return you to the “Storage” prompt. Pressing <exit> will return you to the “Storage” prompt without saving changes. From “Storage,” press <up> to proceed to the next prompt, “Display.” RVV Gen II KO Service and Parts Manual...
-
Page 34: Select Block 1/2
<down> will toggle “X” between “1” (enabled) and “0” (disabled). Pressing <enter> again will save the displayed setting and return you to the non-flashing “YY X” prompt. Pressing <exit> will return to the “Start Day” prompt. RVV Gen II KO Service and Parts Manual... -
Page 35: Select Discount
<down> will toggle “X” between “1” (enabled) and “0” (disabled). Pressing <enter> again will save the displayed setting and return you to the non-flashing “YY X” prompt. Pressing <exit> will return to the “Start Day” prompt. RVV Gen II KO Service and Parts Manual... - Page 36 From the “Less Amount” prompt, use <exit> to return to the “Select Discount” prompt. (Note: If the discount amount is greater than the sales price for a given selection, the selection will free-vend.) RVV Gen II KO Service and Parts Manual...
-
Page 37: Over-Ride Switch
If X = 1, free vend will be enabled when the key Note: “Sales Block” is used in conjunction with switch is activated. “Select Block X” programming menus. Note: All free vends will increase free vend MIS counters (VA3). RVV Gen II KO Service and Parts Manual... -
Page 38: Return To Sales
If X = 0, lighting control will be disabled when the key switch is activated. If X = 1, lighting control will be enabled when the key switch is activated. RVV Gen II KO Service and Parts Manual... -
Page 39: External Menu
For further details on reading error codes, see “Error Codes” in the “Internal [Service] Menu” section. Return to Sales If <enter> is pressed at the “Return to Sales” prompt, the controller will return to the sales mode. RVV Gen II KO Service and Parts Manual... -
Page 40: Section 4: Vender Maintenance
Product Cup: The cup floor should be kept clean and free of syrup. RVV Gen II KO Service and Parts Manual... -
Page 41: Rvv Ng Product Cup Manual Calibration
GAP BETWEEN DOOR FACE AND CUP TRIP ARM TO BE APPROXIMATELY 1/32" (1 mm). GAP BETWEEN OUTERMOST FACE OF CUP AND EDGE OF PORT HOOK TO BE APPROXIMATELY 1/32" (1 mm). Figure 4.2 RVV Gen II KO Service and Parts Manual... -
Page 42: Section 5: Troubleshooting
- Indicates that one of Make connections to the changer harness. Make sure the credit peripherals has harness or replace the changer is plugged up and introduced an incompatible changer. working. scaling factor. RVV Gen II KO Service and Parts Manual... - Page 43 If no obstructions are Bill Sensor - Indicates a bill Check bill acceptor for apparent, replace the bill sensor error. obstruction or dirt. acceptor. RVV Gen II KO Service and Parts Manual...
- Page 44 (continued on 2. Open the main door to see 1. Check the temperature next page) if the unit cuts off. sensor’s reading. RVV Gen II KO Service and Parts Manual...
-
Page 45: Troubleshooting By Symptom
Check to make sure the case holder is Make sure there are no obstructions Door cannot close completely. folded and placed correctly, and remove holding the door open. any obstructions. RVV Gen II KO Service and Parts Manual... - Page 46 X-belt. Make sure there are no binds and the cup drives on next page) smoothly all the way from the far right to the far left. Check the calibration. Refer to Section 4: Vender Maintenance for calibration instructions. RVV Gen II KO Service and Parts Manual...
- Page 47 Check the shelf for proper seating. cup. b. Check the Hall Effect sensor on the drive motor. c. Check for 5 VDC on the red and black wires at position P5 on the cup logic board. RVV Gen II KO Service and Parts Manual...
-
Page 48: Test Diagnostics Routines Troubleshooting
A. Cup attempts to do a delivery test three times, never completes test, then stops short of delivery door or bangs against side wall and shows OUT OF SERVICE on the display B. Cup opens delivery port door, but the cup will not tilt to deliver product RVV Gen II KO Service and Parts Manual... - Page 49 The trip bracket is a hook located above the port door. Cup trip arm The cup trip arm should engage the trip bracket. If it does not, adjust the trip arm by bending it slightly. RVV Gen II KO Service and Parts Manual...
- Page 50 Make sure the harness at the connection on the logic board is tight, with no wires loose, backed out, etc. Position P3 FIGURE 5.6. View of inside of cup from above Cup logic board Plunger motor Driver motor RVV Gen II KO Service and Parts Manual...
- Page 51 Make sure the harness at the connection on the logic board is tight, with no wires loose, backed out, etc. Position P2 FIGURE 5.8. Gears inside cup Ensure that the gears are seated properly in their correct positions. RVV Gen II KO Service and Parts Manual...
- Page 52 Using an ohmmeter, check for continuity on all wires in the harnessing from the DMC to the cup logic board. If any wire fails, replace the harness. If all wires pass, replace the cup logic board. If the problem persists, replace the Hall Effect sensor. RVV Gen II KO Service and Parts Manual...
- Page 53 Check for 5 VDC on the black and red wires (pins 6 and 7) at position P1 on the DMC board. If all the above is good, replace the Y-home switch. If this does not fix the issue, replace the DMC board. RVV Gen II KO Service and Parts Manual...
- Page 54 Using an ohmmeter, check for continuity on all wires in the harnessing from the DMC to the cup logic board. If any wire fails, replace the harness. If all wires pass, replace the cup logic board. If the problem persists, replace the cup emitter and detector. RVV Gen II KO Service and Parts Manual...
- Page 55 Locations of position P6 and P7 on logic board Make sure the harnesses at the connections on the logic board are tight, with no wires loose, backed out, etc. Position P6 Position P7 RVV Gen II KO Service and Parts Manual...
- Page 56 Port slide springs (two springs, shaded in black in this illustration) FIGURE 5.16. Port security latch Make sure this latch is not stuck. It should move up and down freely. RVV Gen II KO Service and Parts Manual...
- Page 57 Make sure this latch is not stuck. It should move up and down freely. FIGURE 5.20. White port bushings Make sure these bushings are not broken. (Note: Port box housing shown with product bin removed for clarity.) RVV Gen II KO Service and Parts Manual...
- Page 58 Locations of metal tabs Check to make sure the two metal tabs on the emitter board’s metal mounting plate are inserted properly. Metal tab (one on each side of port box housing) RVV Gen II KO Service and Parts Manual...
- Page 59 If all wires pass, replace the X-encoder. If the problem persists, replace the DMC. FIGURE 5.24. X-motor encoder cap Remove this cap and check for condensation (moisture) under it. RVV Gen II KO Service and Parts Manual...
- Page 60 To tighten the tension of the belts, turn the tension screw clockwise. Security screw, left side Y-belt tension screw, left side The security screw for the right side is located behind this plastic piece. Y-belt tension screw, right side RVV Gen II KO Service and Parts Manual...
- Page 61 Check the pulley on the X-motor to make sure it is not loose or slipping, and check the X-axis belt for proper tension. No slippage should be heard when the X-belt is properly adjusted. RVV Gen II KO Service and Parts Manual...
- Page 62 (Refer to Figure 5.29.) FIGURE 5.29. X-home magnet Check to make sure the magnet bracket is flush (even) with the front edge of the bottom shelf. X-home magnet bracket RVV Gen II KO Service and Parts Manual...
- Page 63 Elevator arm (darker lines) FIGURE 5.31. Locations of position P4 and the Hall Effect sensor Position P4 on cup logic board Hall Effect sensor RVV Gen II KO Service and Parts Manual...
-
Page 64: Section 6: Parts Catalog
Temperature Sensor RVV NG ........................ 842558 Health Sensor RVV NG (Optional) ......................842564 Electronic Door Lock Harness, Door Side RVV NG (Optional) .............. 842554 Electronic Door Lock Harness, Cabinet Side RVV NG (Optional) ............842465 RVV Gen II KO Service and Parts Manual... - Page 65 X-axis Harness Assembly RVV NG, DMC to Cup, Board Side .............. 842630 - DMC to Motor / Encoder, Board Side ....................842631 - Large Cable Chain to Cup and Motor / Encoder.................. 842632 RVV Gen II KO Service and Parts Manual...
- Page 66 SECTION 6: Parts Catalog RVV Gen II Door Assembly, Rear RVV Gen II KO Service and Parts Manual...
- Page 67 Fuseholder ........842531 Mounting Plate, LED Power Lower Door Brace ....... 394544 Supply ......... 356652 Enclosed Coin Cup W/A, Rear ..394529 LED Power Supply ...... 838046 Upper Door Bracket ....394524 RVV Gen II KO Service and Parts Manual...
- Page 68 SECTION 6: Parts Catalog Elevator / Cup Assembly 394700 RVV Gen II KO Service and Parts Manual...
- Page 69 Belt Clamp ............................. 815661 Screw, #8-32 x 5/8” Flat Head ........................901101 - Keps Nut, #8-32 ..........................E905001 Foam Pad Bracket ..........................356833 Foam Pad .............................. 826054 • Split Harness Connector Mount ......................356854 RVV Gen II KO Service and Parts Manual...
- Page 70 SECTION 6: Parts Catalog Product Cup Assembly 394701 RVV Gen II KO Service and Parts Manual...
- Page 71 Pulley, Guide RVV NG ........................... 815578 - Screw-drive, Type U, #7 x 1/2” (secures Pulley, Guide) ..............902038 Harness, Elevator Cup Assembly ......................842635 Cup Extender ............................356938 Screw, #12-1/4” x 1/2” ..........................902039 RVV Gen II KO Service and Parts Manual...
- Page 72 SECTION 6: Parts Catalog Elevator Assembly 394702 RVV Gen II KO Service and Parts Manual...
- Page 73 Motor Mount Quick Remove RVV NG ....................815681 Traveler, Left RVV NG ........................... 812404 Guide Rail RVV NG ..........................813038 Elevator Rail Stiffener RVV NG ......................356657 NOTE: Please call Royal Vendors’ Customer Service Department for this part number. RVV Gen II KO Service and Parts Manual...
- Page 74 Door Vandal Panel ..........................394556 Sign Retainer, Left / Right ........................394564 Enclosed Coin Cup Assembly ........................ 394530 Port Assembly ............................394525 Bottom Hinge Weld Assembly ........................ 337599 Fascia .........................Contact RV Customer Service Glass Panel............................849552 RVV Gen II KO Service and Parts Manual...
- Page 75 Washer, Flat Nylon, 0.252” ID x 0.472” OD x 0.062” thick ..............E904035 Serrated Flange Nut, #8-32 ......................... E905035 Bushing, Coin Return ..........................803030 Coin Return Assembly RVV Gen II ......................394539 Nut, Hex Jam, 9/16”-18 ........................E905019 Button, Coin Return Lever ........................803031 Coin Plate RVV Gen II ...........................
- Page 76 Vacuum Fluorescent Display Plate ......................394913 Display Window RVV ..........................815515 Display Cover, VFD ..........................394912 Nylon Washer ............................E904029 Nylon Spacer ............................816184 Serial Display ............................836162 Stop Nut, Elastic, #6-32 ........................E905006 RVV Gen II KO Service and Parts Manual...
- Page 77 Spring Hinge ............................912438 Steel Pop Rivet, 1/8” dia. x 0.256” lg ....................E908009 Changer Latch ............................394549 Lockout Bushing ..........................E916150 Stop Nut, Elastic, #8-32 ........................E905004 Screw, #8-32 ............................E901103 RVV Gen II KO Service and Parts Manual...
- Page 78 SECTION 6: Parts Catalog Port Door & Slide Assembly RVV Gen II 393545 ITEM NO. DESCRIPTION PART NUMBER Port Door Slide............................393547 Port Door Assembly ..........................393546 Extension Spring, Port Door ........................914051 Bushing, Delivery Door RVV ........................803092 Spring Cover, Left ..........................393548 Spring Cover Top ...........................
- Page 79 Keps Nut, #8-32 ........................... E905001 Steel Pop Rivet, 1/8” dia. x 0.256” lg ....................E908009 Port Bottom Filler, Rear.......................... 356566 Port Bottom Filler, Front ......................... 394543 Port Side Filler ............................356647 Keps Nut, #6-32 ........................... E905018 RVV Gen II KO Service and Parts Manual...
- Page 80 Sems Screw, #6-32 x 3/8” Pan Head with Flat Washer ............... E901068 Optic Board Cover ..........................337906 Rivet, Aluminum, 1/8” ........................... E908004 Spacer..............................E904038 Stop Nut, Elastic, #6-32 ........................E905006 • Emitter-Detector Harness ........................842602 RVV Gen II KO Service and Parts Manual...
- Page 81 Selection Decals (not part of assembly) ....................931674 • Pusher Retaining Rod (rod across rear of Cell / Shelf Assembly) ............815657 • Retaining Ring, 1/4”, Stainless Steel (secures Pusher Retaining Rod) ..........E906013 RVV Gen II KO Service and Parts Manual...
- Page 82 SECTION 6: Parts Catalog RVV Gen II Cabinet RVV Gen II KO Service and Parts Manual...
- Page 83 • Screw, 1/4”-20 x 1” (used to mount Evaporator Fan Cover) ..............901003 • Spacer, 0.50” (used when mounting Evaporator Fan Cover)..............915181 • Spring, Main Door Harness to Cabinet ....................E914031 RVV Gen II KO Service and Parts Manual...
- Page 84 Evaporator Fan Housing ........................393006 Fanport, Side ............................356004 Fanport, Top ............................393008 Baffle Wall .............................. 356041 Inner Wall Bracket ..........................356006 Evaporator Slide ............................ 393007 Air Duct, Top ............................356015 Sensor Bracket ............................810085 RVV Gen II KO Service and Parts Manual...
-
Page 85: Programming Flowchart
Programming Flowchart RVV Gen II KO Service and Parts Manual... -
Page 86: Rvv Ng Wiring Schematic
HALL EFFECT SENSOR (TACHOMETER) DELIVERY D00R SWITCH / DETECTOR R117 DROP SENSOR ADJUSTMENT TRIMPOT BOARD / PORT POWER (VMC-P11) XMTR BOARD DEX PHONE JACK VMC MDB (P9) / BILL VALIDATOR RCVR BOARD RVV Gen II KO Service and Parts Manual... - Page 87 WHITE BROWN INTERNAL BLACK DEX JACK BLACK WHITE VISION VENDER BLACK EXTERNAL BROWN WHITE BLACK DEX JACK J1 DEX REMOTE MODE WIRING DIAGRAM SWITCH 115 VAC 60 Hz DOOR SIDE CABINET SIDE RVV Gen II KO Service and Parts Manual...
-
Page 88: Credit And Replacement Policy
Credits or replacements will be issued on warranty items if the proper procedures are followed: 1. ROYAL VENDORS will pay shipping charges on all parts covered under this warranty when transportation has been made the most economical way. (Example: Within the continental USA, regular ground UPS).
Need help?
Do you have a question about the RVV Gen II and is the answer not in the manual?
Questions and answers