Advertisement
Quick Links
Advertisement

Related Manuals for PowerGistics FLEX20


Summary of Contents for PowerGistics FLEX20
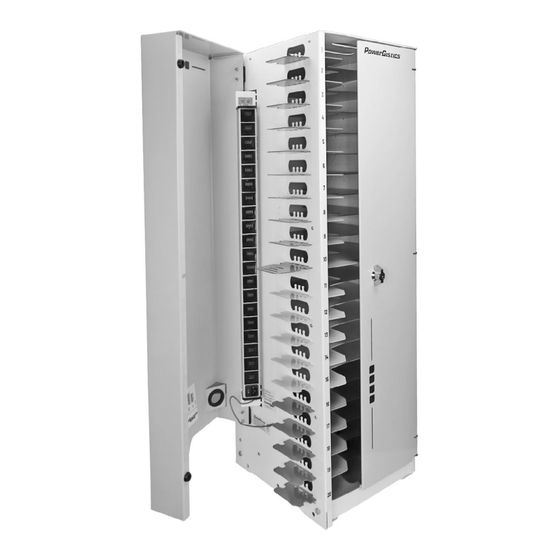
- Page 1 FLEX20 for FLEX20USB or FLEX20BOLT INSTALLATION GUIDE REV B FLEX20USB FLEX20BOLT...
- Page 2 Failure to read these warnings or to follow the instructions below could result in personal injury or damage to your product that could void its warranty. • DO NOT PLUG POWERGISTICS TOWERS INTO OTHER TOWERS. MUST BE PLUGGED DIRECTLY INTO THE WALL OUTLET.
- Page 3 FLEX20USB or FLEX20BOLT Parts list Side Front Door Door Keys x2 Drywall Concrete 5/16th hammer 3/16th drill bit drill bit x20 USB-A to C Cables x1 Power Cord x20 USB-C to C Cables Wall Roller Mounted Attachment (844) 205-1217 | www.PowerGistics .com...
- Page 4 FLEX20 TechPosts TechPosts (Pre-installed) FLEX20 comes with TechPosts (pre- installed) positioned for devices up to 12.00" on the longest side. 12.00" TechPosts (pre-installed) for 12.00" TechPosts (pre-installed) in rear holes...
- Page 5 FLEX20 TechPosts TechPost removal FLEX20 TechPosts are to be removed for devices up to 13.50" on the longest side. 13.50" TechPost Plate Remove screws with Phillips screwdriver and take out metal plate. (844) 205-1217 | www.PowerGistics .com...
- Page 6 Remove TechPosts Re-insert the screws and metal plate.
- Page 7 FLEX20 TechPosts TechPost removal and repositioning FLEX20 TechPosts removal and repositioning for devices up to 10.00" on the longest side. 10.00" Remove screws with Phillips screwdriver and take out the metal plate. Remove the TechPosts from the rear holes. (844) 205-1217 | www.PowerGistics .com...
- Page 8 FLEX20 TechPosts TechPost removal and repositioning Re-insert TechPosts into front holes. Re-insert screws and metal plate.
- Page 9 FLEX20 Mounting to Wall Wall Mounting to concrete or drywall Flex20 is intended to stand on the floor while mounted to the wall. (844) 205-1217 | www.PowerGistics .com...
- Page 10 FLEX20 Mounting to Wall STEP 1 Place mounting plate onto back of FLEX20. Secure mounting plate to back of FLEX20 with screw (provided) using an 8" long Phillips head screwdriver (not provided).
- Page 11 FLEX20 Mounting to Wall STEP 2 Position FLEX20 with mounting bracket secured against wall. Mark out each hole location on wall using pencil or marker. Be sure to mark hole at top. (844) 205-1217 | www.PowerGistics .com...
- Page 12 FLEX20 Mounting to Wall STEP 3 Move FLEX away from wall and remove mounting plate.
- Page 13 FLEX20 Mounting to Wall STEP 4 Use drill with 5/16 or 3/16 bit to create holes for either Concrete Drywall concrete or drywall mounting 5/16 3/16 anchors. hammer drill bit drill bit Screw in concrete or drywall anchors. Mounting plate top 44"...
- Page 14 FLEX20 Mounting to Wall STEP 5 Insert screws into anchors on top and bottom hole positions. Screws should be put halfway into anchors. Place mounting plate on to wall. Insert middle screw hole screws. Tighten all screws using Phillips head screwdriver or drill.
- Page 15 FLEX20 Mounting to Wall STEP 6 Place FLEX20 on the secured wall mounting plate. (844) 205-1217 | www.PowerGistics .com...
- Page 16 FLEX20 Mounting to Wall STEP 7 Secure FLEX20 to mounting plate with screw using an 8" long Phillips head screwdriver. Plug power cord into wall socket and then into power strip.
- Page 17 FLEX20 Cable Management STEP 1 Plug cord into device and feed through pinch points to secure at just the right length. (844) 205-1217 | www.PowerGistics .com...
- Page 18 FLEX20 Cable Management STEP 2 Wrap cord around tabs and then plug into the power strip.
- Page 19 FLEX20 Attaching Roller Roller Attachment 1/2” socket needed to tighten bolts (844) 205-1217 | www.PowerGistics .com...
- Page 20 FLEX20 Attaching Roller Bolt each roller into the base at hole locations.
- Page 21 FLEX20 Attaching Handle Bolt the handle into the base unit using one bolt per side. (844) 205-1217 | www.PowerGistics .com...
- Page 22 FLEX20 Attaching Cord Wrap (Installation of cord wrap could be easier with a second set of hands.)
- Page 23 FLEX20 Attaching Cord Wrap STEP 1 Use a flathead screwdriver to bend tabs up. (844) 205-1217 | www.PowerGistics .com...
- Page 24 FLEX20 Attaching Cord Wrap STEP 2 Place cord wrap hooks on tabs and insert bolts.
- Page 25 FLEX20 Attaching Cord Wrap STEP 3 Use socket wrench with extension to place nut on other side of bolt, reaching through shelves. 18” socket wrench extension with 7/16” socket (844) 205-1217 | www.PowerGistics .com...
- Page 26 FLEX20 Attaching Cord Wrap STEP 4 Use hex key (5/32") and socket wrench to tighten bolts.
- Page 27 FLEX20 Attaching Cord Wrap STEP 5 Plug in power cord, feed through hole and wrap around hooks. (844) 205-1217 | www.PowerGistics .com...
- Page 28 For questions go to PowerGistics support at: https://powergistics.com/support/ 100 Continental Drive, Columbus, Wisconsin 53925 USA (844) 205-1217 | www.PowerGistics .com PWRG 1091 FLEX Series INSTALL GUIDE Mar 2024 Rev B...
Need help?
Do you have a question about the FLEX20 and is the answer not in the manual?
Questions and answers