Table of Contents
Advertisement
Available languages
Available languages
en-us_main.book.book Page 1 Thursday, January 18, 2024 5:23 PM
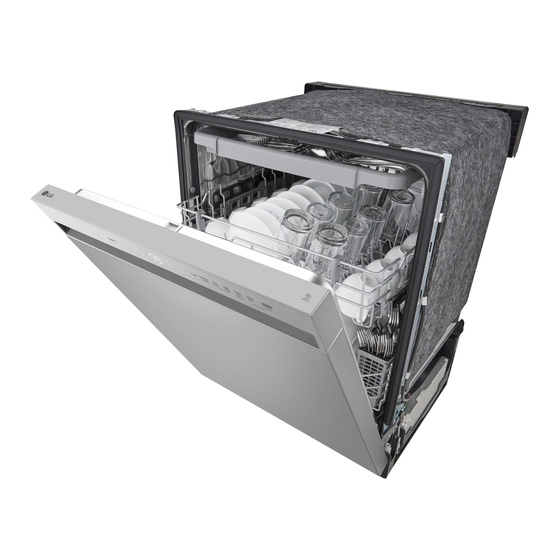
OWNER'S MANUAL
DISHWASHER
Read this owner's manual thoroughly before operating the appliance
and keep it handy for reference at all times. This abridged owner's
manual addresses user safety, precautions, and installation
information.
To view the complete owner's manual, you may:
1. Online manual: Visit the LG website at: http://gscs-manual.lge.com/
Total/HQ/GatewayPage/main.html or scan the QR code above; or
2. Printable PDF manual: Visit lg.com and search for your model
number; or
3. Call or write to customer service as provided in your Limited
Warranty.
ENGLISH
LDFC353**
MFL69261753
Rev.00_011824
Copyright © 2024 LG Electronics Inc. All Rights Reserved.
Scan to see the online manual.
www.lg.com
Advertisement
Table of Contents

Related Manuals for LG LDFC353 Series


Summary of Contents for LG LDFC353 Series
- Page 1 1. Online manual: Visit the LG website at: http://gscs-manual.lge.com/ Total/HQ/GatewayPage/main.html or scan the QR code above; or 2. Printable PDF manual: Visit lg.com and search for your model number; or 3. Call or write to customer service as provided in your Limited Warranty.
-
Page 2: Table Of Contents
Loading the Dishwasher Loading the Silverware Basket Loading the Lower Rack Loading the Upper Rack Loading the Cutlery Rack Adding Cleaning Products 31 SMART FUNCTIONS LG ThinQ Application 32 MAINTENANCE Cleaning and Care 36 TROUBLESHOOTING Before Calling for Service 38 LIMITED WARRANTY... -
Page 3: Important Safety Instructions
en-us_main.book.book Page 3 Thursday, January 18, 2024 5:23 PM IMPORTANT SAFETY INSTRUCTIONS IMPORTANT SAFETY INSTRUCTIONS READ ALL INSTRUCTIONS BEFORE USE Safety Messages Your safety and the safety of others are very important. We have provided many important safety messages in this manual and on your appliance. Always read and follow all safety messages. - Page 4 • Do not grasp the power supply line or touch the appliance controls with wet hands. • Do not modify or extend the power cable. • If the product has been submerged, contact an LG Electronics customer information center for instructions before resuming use.
- Page 5 en-us_main.book.book Page 5 Thursday, January 18, 2024 5:23 PM IMPORTANT SAFETY INSTRUCTIONS • Fix the drain hose securely in place. • Use only detergents or wetting agents recommended for use in a dishwasher and keep them out of the reach of children. •...
-
Page 6: Caution Statements
1 1/2" (38.1 mm) plastic or rubber wire grommets can be purchased online or at a local hardware store for this purpose. For further details, call an LG Electronics Customer Information Center at 1-800-243-0000 (U.S.A.) or 1-888-542-2623 (Canada). - Page 7 en-us_main.book.book Page 7 Thursday, January 18, 2024 5:23 PM IMPORTANT SAFETY INSTRUCTIONS Operation • Do not place objects on top of the appliance. • Turn off the water faucets and unplug the appliance if the appliance is to be left for an extended period of time, such as during vacations.
-
Page 8: Product Overview
• Do not remove the safety cover at any time. • To ensure reliability, each LG dishwasher goes through thorough quality control before it leaves the factory. • You may find water droplets or water spots from this process inside your new dishwasher. - Page 9 en-us_main.book.book Page 9 Thursday, January 18, 2024 5:23 PM PRODUCT OVERVIEW Model LDFC353** NOTE • The silverware basket ships installed at the back Net Weight 74 lbs. (33.5 kg) of the bottom rack. For best performance, install it along the right side. •...
-
Page 10: Installation
• DISCLAIMER - This Guide is strictly confidential name : D-PC1) and shall not be copied, disclosed, distributed, disseminated, publicized or reproduced, in • Inlet hose installation kit is available on LG.com, whole or in part, without the prior written part number AEM75698902. authorization of LG Electronics. - Page 11 en-us_main.book.book Page 11 Thursday, January 18, 2024 5:23 PM INSTALLATION Preparing Dishwasher Sliding Dishwasher into Cabinet Opening Connecting Water Supply Line and Power Connecting the Drain Hose Leveling Dishwasher Securing Dishwasher in Cabinet Opening Final Installation Check Product Dimensions Back View 23 / "...
-
Page 12: Preparing Cabinet Opening
The old hose could leak or burst causing flooding and To allow for proper clearance of plumbing property damage. Contact an LG Customer and electrical, use the template included with Information Center for assistance in buying a the literature to determine the clearance on new hose. - Page 13 en-us_main.book.book Page 13 Thursday, January 18, 2024 5:23 PM INSTALLATION - Operate this appliance with the correct voltage • As shown in the bottom view below, channel as shown in this manual and on the rating is for the water supply line, and channel is for plate.
-
Page 14: Preparing Dishwasher
en-us_main.book.book Page 14 Thursday, January 18, 2024 5:23 PM 14 INSTALLATION Preparing Dishwasher WARNING • Do not remove safety cover . Removal can result in fire, electric shock or death. Remove the lower cover. If there is insulation padding behind the lower cover, remove it. -
Page 15: Sliding Dishwasher Into Cabinet Opening
en-us_main.book.book Page 15 Thursday, January 18, 2024 5:23 PM INSTALLATION • Do not push the door of the dishwasher with knees when sliding the dishwasher into position. Doing so can damage the front cover. Bend the tabs on the brackets to secure them to the frame using a pair of needle nose pliers. -
Page 16: Connecting Water Supply Line And Power
en-us_main.book.book Page 16 Thursday, January 18, 2024 5:23 PM 16 INSTALLATION pulling the drain hose farther into the Smooth out or pad the edges of the hole cabinet. drilled for the water supply to avoid damaging the drain hose. Make sure the drain hose is straight before feeding the end of it through the hole for the Remove the tape from the water supply line water supply. - Page 17 en-us_main.book.book Page 17 Thursday, January 18, 2024 5:23 PM INSTALLATION Use a Phillips screwdriver to remove 2 screws Slide the water supply line back through the channel, pulling gently from inside the cabinet to make sure the line is not kinked, pinched, stressed or crushed.
-
Page 18: Connecting The Drain Hose
en-us_main.book.book Page 18 Thursday, January 18, 2024 5:23 PM 18 INSTALLATION Fold the connected wires back into the junction box and screw on the junction box cover. WARNING • Verify that the black wire is hot (120 V). If not, or if you are unsure of the power supply, have it checked by a licensed electrician. - Page 19 en-us_main.book.book Page 19 Thursday, January 18, 2024 5:23 PM INSTALLATION Height of the Drain Hose The height of the drain hose end must be at least 12" (305 mm) and within 40" (1016 mm) from the base of the dishwasher to avoid water being siphoned from the tub.
-
Page 20: Leveling Dishwasher
en-us_main.book.book Page 20 Thursday, January 18, 2024 5:23 PM 20 INSTALLATION should be near the center of both tub lower Connect the end of the drain hose to the air indentations at the front. with the hose clamp provided. Move the clamp into position and tighten it with a flat-blade screwdriver. -
Page 21: Securing Dishwasher In Cabinet Opening
en-us_main.book.book Page 21 Thursday, January 18, 2024 5:23 PM INSTALLATION • Turn the front leveling feet clockwise to raise the can safely be drilled into, secure the dishwasher to front of the tub and counterclockwise to lower it. the countertop with the provided brackets. If the countertop is granite, marble, or a material that cannot be drilled into, secure the dishwasher to the cabinet frame with the provided wood screws. -
Page 22: Final Installation Check
en-us_main.book.book Page 22 Thursday, January 18, 2024 5:23 PM 22 INSTALLATION from the dishwasher. Tighten all water Drive a wood screw through the mounting connections and run another cycle. Repeat bracket and into the cabinet frame. until no leaks are detected. Replace the lower cover. - Page 23 en-us_main.book.book Page 23 Thursday, January 18, 2024 5:23 PM INSTALLATION Error Code Possible Cause and Solution Water supply line is kinked under dishwasher. • Feed the drain and water supply hoses through the hole under the sink. Then gradually slide the dishwasher into the cabinet while pulling on the hoses under the sink to take up any slack.
-
Page 24: Operation
en-us_main.book.book Page 24 Thursday, January 18, 2024 5:23 PM 24 OPERATION OPERATION Before Using WARNING • To reduce the risk of fire, electric shock, or injury to persons, read the SAFETY INSTRUCTIONS before operating this appliance. NOTE • Connect to the hot water supply only. The water supply temperature should be a minimum of 120 °F (49 °C) for better washing performance and shorter cycle time. -
Page 25: Control Panel
en-us_main.book.book Page 25 Thursday, January 18, 2024 5:23 PM OPERATION Control Panel Control Panel Features POWER On/Off Button • Press this button to turn the washer on or off. • If there is a power surge, power outage, or disruption of any kind, power is automatically turned off for safety. -
Page 26: Wash Cycles
en-us_main.book.book Page 26 Thursday, January 18, 2024 5:23 PM 26 OPERATION Chime On/Off Button • To activate or deactivate the button sounds, press and hold Cycles and Machine Clean simultaneously for three seconds. The error alert sound cannot be turned off. Cancel Button •... -
Page 27: Loading The Dishwasher
en-us_main.book.book Page 27 Thursday, January 18, 2024 5:23 PM OPERATION Delay Start Mode Description This feature delays the start of a selected cycle. Small loads & heavy soil & light/sensitive Each time the Delay Start button is pressed, the dishes delay time increases by an hour. -
Page 28: Loading The Silverware Basket
en-us_main.book.book Page 28 Thursday, January 18, 2024 5:23 PM 28 OPERATION prevent water droplets from falling on your CAUTION silverware from the upper rack. • Waterproof or long-lasting lipstick smudges on glasses may not be removed during the wash. WARNING •... -
Page 29: Loading The Upper Rack
en-us_main.book.book Page 29 Thursday, January 18, 2024 5:23 PM OPERATION Loading the Upper Rack WARNING • Before adjusting, ensure the rack is empty of all Loading Dishes into the Upper Rack dishes. Otherwise dishes may get damaged or you may get injured. Loading 10 Place Settings Loading the Cutlery Rack The cutlery rack is best suited for flatware. -
Page 30: Adding Cleaning Products
en-us_main.book.book Page 30 Thursday, January 18, 2024 5:23 PM 30 OPERATION Removing the Cutlery Rack Adding Rinse Aid to the Dispenser The entire cutlery rack can be removed if more The Rinse Aid icon appears in the display when space is needed on the upper rack for larger items. more rinse aid is needed. -
Page 31: Smart Functions
For additional information, refer to the online owner's manual. Installing the LG ThinQ Application Search for the LG ThinQ application from the Google Play Store or Apple App Store on a smartphone. Follow instructions to download and install the application. -
Page 32: Maintenance
en-us_main.book.book Page 32 Thursday, January 18, 2024 5:23 PM 32 MAINTENANCE MAINTENANCE To maintain performance and prevent trouble, it is important to check the outside and inside of the dishwasher, including filters and spray arms, at regular intervals. WARNING • When cleaning the outside and inside of the dishwasher, do not use benzene or thinner. Otherwise, it may cause fire or explosion. - Page 33 en-us_main.book.book Page 33 Thursday, January 18, 2024 5:23 PM MAINTENANCE NOTE CAUTION • The drain air gap and disposal are external • Remove food residue caught in filters to prevent plumbing devices that are not part of the the buildup of odor-causing bacteria and dishwasher.
- Page 34 en-us_main.book.book Page 34 Thursday, January 18, 2024 5:23 PM 34 MAINTENANCE Cleaning the Spray Arm and secure them by turning the inner filter clockwise until it clicks into place. If the spray arm holes are blocked by any food residue, dishes may not be cleaned well due to improper water spray.
- Page 35 en-us_main.book.book Page 35 Thursday, January 18, 2024 5:23 PM MAINTENANCE turn off the circuit breaker. Clean the filter, tub and dispenser to prevent odor. • If you will be absent for an extended period of time during colder months and there is a possibility of freezing temperatures, winterize the water supply lines and the dishwasher itself.
-
Page 36: Troubleshooting
User Support Videos For further assistance, there are videos and tutorials available through the LG.com website. On the www.lg.com home page, click on the Support menu tab to bring up the menu selections. Select Video Tutorials. Select a product category and then pick a topic or search a keyword. - Page 37 • Make sure that the appliance is properly leveled. Water leakage • Turn off the water supply to the dishwasher and call an LG Electronics Customer Information Center at 1-800-243-0000 (U.S.A.) or 1-888-542-2623 (Canada). • The dishwasher makes an alert sound for 10 seconds, and runs the drain pump intermittently.
-
Page 38: Limited Warranty
Should your LG Dishwasher (“Product”) fail due to a defect in materials or workmanship under normal and proper use, during the warranty period set forth below, LG will, at its option, repair or replace the Product. This limited warranty is valid only to the original retail purchaser of the Product (“You”) and applies only when purchased lawfully and used within the United States including U.S. - Page 39 Or by mail: LG Electronics Customer Service P.O. Box 240007 Huntsville, AL 35813 ATTN: CIC PROCEDURE FOR RESOLVING DISPUTES: ALL DISPUTES BETWEEN YOU AND LG ARISING OUT OF OR RELATING IN ANY WAY TO THIS LIMITED WARRANTY OR THE PRODUCT SHALL BE RESOLVED EXCLUSIVELY THROUGH BINDING ARBITRATION, AND NOT IN A COURT OF GENERAL JURISDICTION.
- Page 40 Notice of Dispute. In the event you intend to commence an arbitration proceeding, you must first notify LG in writing at least 30 days in advance of initiating the arbitration by sending a letter to LG at LG Electronics, USA, Inc. Attn: Legal Department- Arbitration 111 Sylvan Avenue, Englewood Cliffs, NJ 07632.
- Page 41 LIMITED WARRANTY Opt Out. You may opt out of this dispute resolution procedure. If you opt out, neither you nor LG can require the other to participate in an arbitration proceeding. To opt out, you must send notice to LG no later than 30 calendar days from the date of the first consumer purchaser’s purchase of the product by...
- Page 42 en-us_main.book.book Page 42 Thursday, January 18, 2024 5:23 PM 42 LIMITED WARRANTY The disposal or air gap is blocked by debris. Clean the disposal or the air gap. OE error Inlet valve and drain hose connection problem caused by Reinstall the hose. improper installation.
- Page 43 en-us_main.book.book Page 43 Thursday, January 18, 2024 5:23 PM Memo...
- Page 44 en-us_main.book.book Page 44 Thursday, January 18, 2024 5:23 PM 44 Memo...
- Page 45 Para ver el manual del propietario completo, puede 1. Manual en línea: visite el sitio web de LG en: http://gscs-manual.lge. com/Total/HQ/GatewayPage/main.html o escanee el código QR que se encuentra en la parte superior; o 2.
- Page 46 Carga en el cesto para cubiertos Carga en la bandeja inferior Carga en la bandeja superior Carga del estante de cubiertos Agregado de productos de limpieza 33 FUNCIONES INTELIGENTES Aplicación LG ThinQ 34 MANTENIMIENTO Limpieza y cuidado 38 SOLUCIÓN DE PROBLEMAS...
- Page 47 es-us_main.book.book Page 3 Thursday, January 18, 2024 5:32 PM INSTRUCCIONES IMPORTANTES DE SEGURIDAD INSTRUCCIONES IMPORTANTES DE SEGURIDAD LEA TODAS LAS INSTRUCCIONES ANTES DE UTILIZAR Mensajes de seguridad Su seguridad y la de los demás son muy importantes. Tanto en este manual como en el equipo, hemos proporcionado muchos mensajes de seguridad importantes.
- Page 48 • Si detecta un sonido extraño, olor a quemado o a químico, o humo provenientes del artefacto, desconéctelo de inmediato y contáctese con un Centro de Información al Cliente de LG Electronics. • Nunca desconecte el artefacto tirando de la línea de alimentación.
- Page 49 es-us_main.book.book Page 5 Thursday, January 18, 2024 5:32 PM INSTRUCCIONES IMPORTANTES DE SEGURIDAD minutos antes de usar el artefacto. Esto eliminará el gas hidrógeno acumulado. Dado que el gas hidrógeno es inflamable, no fume ni use ninguna llama abierta durante este proceso. •...
- Page 50 es-us_main.book.book Page 6 Thursday, January 18, 2024 5:32 PM INSTRUCCIONES IMPORTANTES DE SEGURIDAD Instrucciones de conexión a tierra • Para conectar el lavavajillas de modo permanente: Este artefacto debe estar conectado a un sistema permanente de cableado de metal con descarga a tierra, o bien debe instalarse un conductor de puesta a tierra del equipo con los conductores de circuito y conectarse a un terminal de puesta a tierra del equipo o a un extremo del dispositivo.
- Page 51 1 1/2" (38.1 mm) en Internet o en una tienda de bricolaje local. Para más detalles, llame a un Centro de Información al Cliente de LG Electronics al 1-800- 243-0000 (EE.UU.) o al 1-888-542-2623 (Canadá).
- Page 52 es-us_main.book.book Page 8 Thursday, January 18, 2024 5:32 PM DESCRIPCIÓN GENERAL DEL PRODUCTO DESCRIPCIÓN GENERAL DEL PRODUCTO Características del producto Las ilustraciones en esta guía pueden diferir de los componentes y accesorios reales, los cuales están sujetos a cambios sin previo aviso por parte del fabricante a fin de introducir mejoras en el producto. NOTA •...
- Page 53 es-us_main.book.book Page 9 Thursday, January 18, 2024 5:32 PM DESCRIPCIÓN GENERAL DEL PRODUCTO Modelo LDFC353** NOTA • El cesto para cubiertos se envía instalado en la Dimensiones 23 3/4” X 24 5/8” X 33 5/8” parte posterior de la bandeja del fondo. Para (Ancho X (603 mm X 625 mm X 854 obtener un mejor desempeño, instálelo a lo...
- Page 54 CT20100059-20152463332979 NOTA ADVERTENCIA • El kit de instalación del cable de alimentación está disponible en LG.com, número de pieza • AVISO LEGAL - Esta Guía es estrictamente AEM75698901 (nombre de modelo: D-PC1) confidencial y no debe copiarse, divulgarse, distribuirse, difundirse, publicarse ni •...
- Page 55 es-us_main.book.book Page 11 Thursday, January 18, 2024 5:32 PM INSTALACIÓN Descripción general de la instalación Lea las siguientes instrucciones de instalación inmediatamente después de adquirir el lavavajillas o transportarlo a otra ubicación. Preparación de la abertura para el gabinete Preparación de las conexiones eléctricas y de agua Preparación del lavavajillas Deslizamiento del lavavajillas en la abertura del...
- Page 56 es-us_main.book.book Page 12 Thursday, January 18, 2024 5:32 PM 12 INSTALACIÓN Elección de la ubicación adecuada desagüe y el cable eléctrico deben pasar a través de esta área. Seleccione una ubicación tan cercana al 24 / " (625 mm) fregadero como sea posible para facilitar la conexión de la línea de suministro de agua, la manguera de desagüe y la conexión eléctrica.
- Page 57 Hay 2 canales en la base del lavavajillas para pasar en contacto con un Centro de información al la conexión de agua y la conexión eléctrica. cliente de LG para obtener ayuda en la compra • Como se muestra en la vista inferior debajo, el de una nueva manguera.
- Page 58 es-us_main.book.book Page 14 Thursday, January 18, 2024 5:32 PM 14 INSTALACIÓN Para soltar la manguera de del lado izquierdo de la abertura y fíjela con cinta adhesiva delante de la abertura. desagüe Retire la atadura que sujeta la manguera de desagüe a la parte posterior de la abrazadera de Pase el cable eléctrico a lo largo del piso a...
- Page 59 es-us_main.book.book Page 15 Thursday, January 18, 2024 5:32 PM INSTALACIÓN Reserve las piezas hasta que se complete la instalación. Retiro de los materiales de empaque del interior Retire todos los materiales de empaque del interior del lavavajillas antes de instalarlo. Deslizamiento del Colocación de los soportes de lavavajillas en la abertura...
- Page 60 es-us_main.book.book Page 16 Thursday, January 18, 2024 5:32 PM 16 INSTALACIÓN NOTA • Abra la puerta y sujete el bastidor del cuerpo del lavavajillas y la abertura superior frontal de la cuba para mover o levantar el lavavajillas. Gradualmente, deslice el lavavajillas en la abertura, asegurándose de que la línea de suministro de agua y el cable eléctrico pasan libremente por los canales y no quedan...
- Page 61 es-us_main.book.book Page 17 Thursday, January 18, 2024 5:32 PM INSTALACIÓN Conexión de la línea de lavavajillas, a no más de 4 pies (1220 mm) del lado del artefacto, nunca detrás del mismo. suministro de agua y energía eléctrica PRECAUCIÓN • No coloque el lavavajillas boca abajo para conectar la línea de suministro de agua o el suministro eléctrico.
- Page 62 es-us_main.book.book Page 18 Thursday, January 18, 2024 5:32 PM 18 INSTALACIÓN Haga coincidir los cables blanco, negro y Inserte un aliviador de tensión de 3/8” a verde con los cables de los colores través del orificio de la caja de empalmes. correspondientes del lavavajillas.
- Page 63 es-us_main.book.book Page 19 Thursday, January 18, 2024 5:32 PM INSTALACIÓN Altura de la manguera de desagüe PRECAUCIÓN La altura del extremo de la manguera de desagüe • No deje expuesto ningún cable pelado. Recorte debe ser, como mínimo, de 12" (305 mm) y no el cable pelado para que quepa completamente debe superar las 40"...
- Page 64 es-us_main.book.book Page 20 Thursday, January 18, 2024 5:32 PM 20 INSTALACIÓN Conexión al triturador o a la pieza en T para desechos con trampa de aire Extraiga el tapón ciego con un martillo y un destornillador. Conexión a la pieza en T para Conecte el extremo de la manguera de desechos sin trampa de aire desagüe...
- Page 65 es-us_main.book.book Page 21 Thursday, January 18, 2024 5:32 PM INSTALACIÓN Cómo comprobar que el lavavajillas Ajuste de las patas de nivelación delanteras esté nivelado Use un destornillador de punta plana para girar las Para verificar que la cuba esté nivelada de patas de nivelación delanteras y ajustar la parte adelante hacia atrás, retire la bandeja inferior y frontal de la cuba.
- Page 66 es-us_main.book.book Page 22 Thursday, January 18, 2024 5:32 PM 22 INSTALACIÓN Sujeción del lavavajillas al bastidor del NOTA gabinete • Para evitar producir daños en el tornillo, no Si se desea, el lavavajillas también puede utilice un destornillador eléctrico. asegurarse al marco del gabinete. Para ello, siga las instrucciones a continuación.
- Page 67 es-us_main.book.book Page 23 Thursday, January 18, 2024 5:32 PM INSTALACIÓN Códigos de error de verificación de • Si la puerta no cierra, compruebe que la bandeja esté nivelada. instalación Consulte la siguiente tabla antes de solicitar servicio técnico. Código de Causa posible y solución error La manguera de desagüe está...
- Page 68 es-us_main.book.book Page 24 Thursday, January 18, 2024 5:32 PM 24 FUNCIONAMIENTO FUNCIONAMIENTO Antes de usar ADVERTENCIA • Para reducir el riesgo de incendios, descargas eléctricas o lesiones a las personas, lea las INSTRUCCIONES DE SEGURIDAD antes de operar este artefacto. NOTA •...
- Page 69 es-us_main.book.book Page 25 Thursday, January 18, 2024 5:32 PM FUNCIONAMIENTO Panel de control Funciones del panel de control Botón de POWER (Encendido) • Presione este botón para encender o apagar la lavadora. • Si se produce una sobrecarga eléctrica, un apagón o una interrupción del suministro eléctrico de cualquier clase, la energía se apaga de manera automática por cuestiones de seguridad.
- Page 70 es-us_main.book.book Page 26 Thursday, January 18, 2024 5:32 PM 26 FUNCIONAMIENTO - Si la opción High Temp. (Alta temperatura) se agrega a un ciclo, el ícono Machine Clean (Limpieza de la máquina) permanece encendido al final del ciclo si el enjuague caliente alcanzó la temperatura adecuada.
- Page 71 es-us_main.book.book Page 27 Thursday, January 18, 2024 5:32 PM FUNCIONAMIENTO Uso de Zona flexible Extra Dry (Extra Seco) Esta opción ajusta la intensidad del lavado para Seleccione la opción Extra Dry (Extra Seco) para abordar diferentes zonas dentro del lavavajillas. un mejor desempeño de secado.
- Page 72 es-us_main.book.book Page 28 Thursday, January 18, 2024 5:32 PM 28 FUNCIONAMIENTO Carga de cubiertos en el cesto • Las piezas con comida quemada deben remojarse antes de ser cargados en el lavavajillas. Carga de 10 posiciones • Los platos o recipientes profundos deben colocarse invertidos.
- Page 73 es-us_main.book.book Page 29 Thursday, January 18, 2024 5:32 PM FUNCIONAMIENTO Carga en la bandeja inferior Carga en la bandeja superior Carga de platos en la bandeja Carga de platos en la bandeja inferior superior Carga de 10 posiciones Carga de 10 posiciones Carga de 12 posiciones Carga de 12 posiciones Sugerencias de carga para la...
- Page 74 es-us_main.book.book Page 30 Thursday, January 18, 2024 5:32 PM 30 FUNCIONAMIENTO Bandeja superior con altura Carga de cubertería en la bandeja ajustable para cubiertos Para acomodar objetos más grandes, la rejilla Carga de 10 posiciones superior puede ajustarse hacia arriba o hacia abajo utilizando los botones de los lados izquierdo y derecho.
- Page 75 es-us_main.book.book Page 31 Thursday, January 18, 2024 5:32 PM FUNCIONAMIENTO Agregado de productos de Se recomienda utilizar abrillantador para evitar que queden marcas de agua en la vajilla y para limpieza mejorar el rendimiento del secado. Para obtener más información, consulte el manual Cómo agregar detergente en el del propietario disponible en línea.
- Page 76 es-us_main.book.book Page 32 Thursday, January 18, 2024 5:32 PM 32 FUNCIONAMIENTO • El icono Rinse Aid parpadea cuando es necesaria más asistencia de enjuague, a menos que el ajuste del dispensador de asistencia de enjuague esté configurado en L0.
- Page 77 Instalación de la aplicación LG ThinQ Busque la aplicación LG ThinQ en la tienda Google Play o App Store desde su teléfono inteligente. Siga las instrucciones para descargar e instalar la aplicación.
- Page 78 es-us_main.book.book Page 34 Thursday, January 18, 2024 5:32 PM 34 MANTENIMIENTO MANTENIMIENTO Para mantener el rendimiento y evitar problemas, es importante verificar el exterior y el interior del lavavajillas, incluidos los filtros y los brazos rociadores, a intervalos regulares. ADVERTENCIA •...
- Page 79 es-us_main.book.book Page 35 Thursday, January 18, 2024 5:32 PM MANTENIMIENTO Machine Clean (Limpieza de la máquina) sin detergente. Cuando el ciclo haya finalizado, limpie el interior y el exterior del lavavajillas siguiendo las instrucciones de la sección MANTENIMIENTO. Trampa de aire del desagüe o Limpieza de los filtros triturador del fregadero obstruidos Verifique la trampa de aire del desagüe o el...
- Page 80 es-us_main.book.book Page 36 Thursday, January 18, 2024 5:32 PM 36 MANTENIMIENTO Programa de limpieza del filtro Limpie los filtros con un cepillo de cerdas recomendada suaves bajo el chorro de agua. Ensamble de nuevo los filtros antes de volver a instalarlos. Si quita los Cantidad de Si lava la...
- Page 81 es-us_main.book.book Page 37 Thursday, January 18, 2024 5:32 PM MANTENIMIENTO Enjuague o sacuda el brazo rociador para quitar las partículas de alimentos. Después de limpiar el brazo aspersor inferior, vuelva a colocarlo empujándolo hacia abajo hasta que encaje en su sitio. Asegúrese de que el brazo aspersor pueda girar libremente.
- Page 82 Selecciona una categoría de producto y luego elija un tema o busque una palabra clave. NOTA • Escanee este código QR para accesar rápidamente a la página búsqueda de video en el sitio web de LG. Mensajes de error Problemas Causas posibles y solución...
- Page 83 Si se apaga el artefacto, este vuelve a encenderse automáticamente hasta que se resuelve el error AE. Excesiva cantidad de agua. • Comuníquese con un centro de información al cliente de LG Electronics llamando al: 1-800- 243-0000 (EE. UU.) 1-888-542-2623 (Canadá). Fallas en el circuito de calentamiento.
- Page 84 POR FAVOR, VEA A CONTINUACIÓN LA SECCIÓN “PROCEDIMIENTO PARA RESOLVER CONFLICTOS”. En caso de que su Lavavajillas LG (“Producto”) presente alguna falla por defectos de materiales o de fabricación bajo uso apropiado y normal durante el período de garantía establecido más abajo, será...
- Page 85 PARA OBTENER SERVICIO EN GARANTÍA E INFORMACIÓN ADICIONAL Llame al 1-800-243-0000 y seleccione la opción apropiada desde el menú. O visite nuestro sitio web en http://www.lg.com. O por correo: LG Electronics Customer Service P.O. Box 240007 Huntsville, AL 35813 ATTN: CIC...
- Page 86 Aviso de disputa. En caso de que usted desee iniciar un procedimiento de arbitraje, primero debe notificar a LG por escrito al menos 30 días antes de iniciar el arbitraje enviando una carta a LG a LG Electronics, USA, Inc. Atención: Legal Department- Arbitration 111 Sylvan Avenue, Englewood Cliffs, NJ 07632.
- Page 87 LG pueden solicitar al otro que participe en un procedimiento de arbitraje. Para excluirse usted debe enviar una notificación a LG, en un lapso de hasta 30 días continuos, contados a partir de la fecha de la primera compra del consumidor del producto, ya sea por: (i) el envío de un correo electrónico a optout@lge.com con el siguiente Asunto: “Exclusión del arbitraje”...
- Page 88 es-us_main.book.book Page 44 Thursday, January 18, 2024 5:32 PM 44 GARANTÍA LIMITADA No hay suministro de agua, porque la manguera de entrada Vuelva a instalar la manguera de está plegada. entrada. Error IE No hay desagüe porque la manguera de desagüe está Vuelva a instalar la manguera de plegada.
- Page 89 es-us_main.book.book Page 45 Thursday, January 18, 2024 5:32 PM Memorándum...
- Page 90 es-us_main.book.book Page 46 Thursday, January 18, 2024 5:32 PM 46 Memorándum...
- Page 91 es-us_main.book.book Page 47 Thursday, January 18, 2024 5:32 PM Memorándum...
- Page 92 Page 52 Thursday, January 18, 2024 5:32 PM LG Customer Information Center For inquiries or comments, visit www.lg.com or call: U.S.A. 1-800-243-0000 1-888-542-2623 CANADA Register your product Online! www.lg.com...
Need help?
Do you have a question about the LDFC353 Series and is the answer not in the manual?
Questions and answers