Advertisement

Quick Links

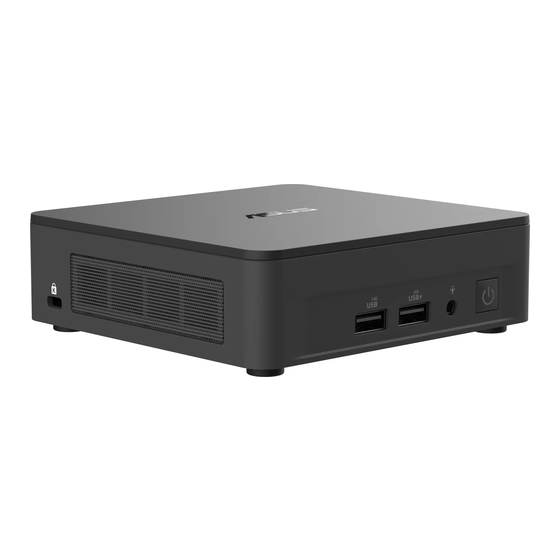
ASUS NUC 13 Pro Kit NUC13L5Kv7
ASUS NUC 13 Pro Kit NUC13L5Kv5
ASUS NUC 13 Pro Kit NUC13L5Ki5
ASUS NUC 13 Pro Kit NUC13L5Ki3
ASUS NUC 13 Pro Kit NUC13L3Kv7
ASUS NUC 13 Pro Kit NUC13L3Ki7
ASUS NUC 13 Pro Kit NUC13L3Kv5
ASUS NUC 13 Pro Kit NUC13L3Ki5
ASUS NUC 13 Pro Kit NUC13L3Ki3

User Guide

November 2023
NUC13L3 / NUC13L5
User Guide – November
2023
1

Advertisement

Table of Contents
loading

Summary of Contents for Asus NUC 13 Pro Kit

  • Page 1: User Guide

    ASUS NUC 13 Pro Kit NUC13L5Kv7 ASUS NUC 13 Pro Kit NUC13L5Kv5 ASUS NUC 13 Pro Kit NUC13L5Ki5 ASUS NUC 13 Pro Kit NUC13L5Ki3 ASUS NUC 13 Pro Kit NUC13L3Kv7 ASUS NUC 13 Pro Kit NUC13L3Ki7 ASUS NUC 13 Pro Kit NUC13L3Kv5...
  • Page 2 Circumstances may arise where because of a default on ASUS’ part or other liability, you are entitled to recover damages from ASUS. In each such instance, regardless of the basis on which you are entitled to claim damages from ASUS, ASUS is liable for no more than damages for bodily injury (including death) and damage to real property and tangible personal property;...
  • Page 3: Table Of Contents

    Contents User Guide ................................1 Introduction ...................... 5 Before You Begin ....................5 Installation Precautions ..................7 Observe Safety and Regulatory Requirements ............7 Open the Chassis ....................8 Install and Remove System Memory ..............9 Install SO-DIMMs .................... 10 Remove SO-DIMMs ..................
  • Page 4 Revision History Date Revision Description March 2023 Initial release. May 2023 Added NUC13LC products. November 2023 Updated branding, links, and steps Added TW SKU’s NUC13L3 / NUC13L5 User Guide – November 2023...
  • Page 5: Introduction

    Introduction This User Guide provides step-by-step installation instructions for these products: • ASUS NUC 13 Pro Kit NUC13L5Kv7 • ASUS NUC 13 Pro Kit NUC13L5Kv5 • ASUS NUC 13 Pro Kit NUC13L5Ki5 • ASUS NUC 13 Pro Kit NUC13L5Ki3 •...
  • Page 6 Follow these guidelines before you begin: • Always follow the steps in each procedure in the correct order. • Create a log to record information about your computer, such as model, serial numbers, installed options, and configuration • Electrostatic discharge (ESD) can damage components. Perform the procedures described in this chapter only at an ESD workstation using an antistatic wrist strap and a conductive foam pad.
  • Page 7: Installation Precautions

    Installation Precautions When you install and test the ASUS NUC, observe all warnings and cautions in the installation instructions. To avoid injury, be careful of: • Sharp pins on connectors • Sharp pins on circuit boards • Rough edges and sharp corners on the chassis •...
  • Page 8: Open The Chassis

    Open the Chassis Unscrew the four corner screws on the bottom of the chassis and lift the cover. NUC13LC User Guide – November 2023...
  • Page 9: Install And Remove System Memory

    Install and Remove System Memory ASUS NUC 13 Pro Kit NUC13L3 / NUC13L5 has two 260-pin DDR4 SO-DIMM memory slots Memory requirements: • 1.2V low voltage memory • 2400/2666/3200 MHz SO-DIMMs • Non-ECC • Up to 64GB of system memory supported with 2 SO-DIMMs...
  • Page 10: Install So-Dimms

    Install SO-DIMMs If you plan to install just one SO-DIMM, install it in the lower memory socket. To install the SO-DIMMs, follow these steps: 1. Observe the precautions in "Before You Begin" in Section 1.1. 2. Turn off all peripheral devices connected to the computer. Turn off the computer and disconnect the AC power cord.
  • Page 11: Remove So-Dimms

    3. Align the small notch at the bottom edge of the SO-DIMM with the key in the socket. 4. Insert the bottom edge of the SO-DIMM into the socket. 5. When the SO-DIMM is inserted, push down on the outer edge of the SO-DIMM until the retaining clips snap into place.
  • Page 12: Install An M.2 Ssd

    Install an M.2 SSD ASUS NUC 13 Pro Kit NUC13L3 / NUC13L5 contains • one 80mm connector supporting NVMe and • one 42mm connector supporting SATA SSD Find compatible M.2 SSDs at the ASUS Product Compatibility Tool: • https://www.asus.com/support/ If you’re installing an 80mm M.2 SSD: 1.
  • Page 13 If you’re installing a 42mm M.2 SATA SSD: 1. Remove the small silver screw from the metal standoff on the motherboard (A). 2. Move the standoff (B) from the 80mm position to the 42mm position (C). 3. Align the small notch at the bottom edge of the M.2 card with the key in the connector.
  • Page 14: Close The Chassis

    Close the Chassis After all components have been installed, close the ASUS NUC chassis. ASUS recommends this be done by hand with a screwdriver to avoid over-tightening and possibly damaging the screws. NUC13LC User Guide – November 2023...
  • Page 15: Connect Power

    Connect Power Each ASUS NUC model includes either a region-specific AC power cord or no AC power cord (only the power adapter). Product codes Power cord type RNUC13L5KV70000 No power cord included. An AC power cord RNUC13L5KV50000 needs to be purchased separately. Power...
  • Page 16 RNUC13L3KV70002 EU power cord included. RNUC13L3KI70002 RNUC13L3KV50002 RNUC13L3KI50002 RNUC13L3KI30002 RNUC13L3KV70003 UK power cord included. RNUC13L3KI70003 RNUC13L3KV50003 RNUC13L3KI50003 RNUC13L3KI30003 RNUC13L3Hv50009 TW power cord included. RNUC13L3Hv70009 NUC13LC User Guide – November 2023...
  • Page 17: Install An Operating System

    Install an Operating System Supported Operating Systems for a list of ASUS-validated operating systems. Refer to Operating System Installation for system requirements and installation steps. NUC13LC User Guide – November 2023...
  • Page 18: Install The Latest Device Drivers And Software

    Install the Latest Device Drivers and Software Here are the options for keeping device drivers current: • Manually download drivers, BIOS, and software from Download Center: https://www.asus.com/support/ NUC13LC User Guide – November 2023...
  • Page 19: Use The Vesa Bracket (Optional)

    Use the VESA Bracket (Optional) Follow these instructions to attach and use the VESA mount bracket: 1. Using the four small black screws that were included in the box, attach the VESA bracket to the back of the monitor or TV. NUC13LC User Guide –...
  • Page 20 2. Attach the two slightly larger black screws to the bottom chassis cover of the ASUS NUC. NUC13LC User Guide – November 2023...
  • Page 21 3. Slide the ASUS NUC onto the VESA mount bracket. NUC13LC User Guide – November 2023...

Table of Contents