
Subscribe to Our Youtube Channel
Related Manuals for SCIEX N19A26


Summary of Contents for SCIEX N19A26
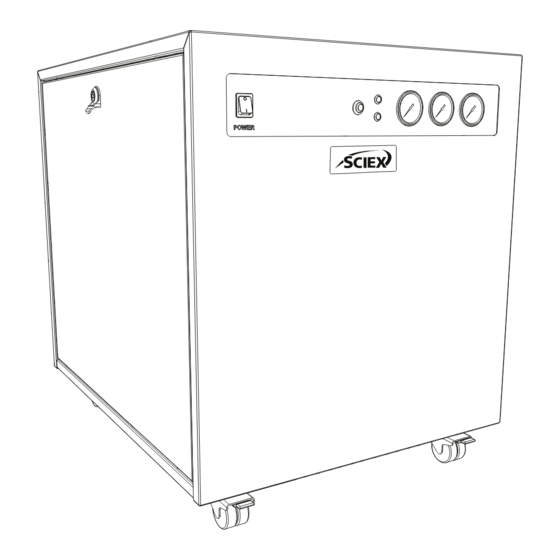
- Page 1 SCIEX Gas Generator N19A26 Installation Guide SCIEX Gas Generator N19A26 Installation Guide RUO-IDV-05-13920-B December 2022...
-
Page 2: Change History
Users can refer to the contents page to find the relevant information. Review each of the following sections carefully. Thank you for selecting SCIEX to meet your gas generation needs, and should you require any further assistance or support do not hesitate to contact SCIEX. -
Page 3: Safety Notices
If the user employs an operating procedure, item of equipment or a method of working which is not specifically recommended by SCIEX, the user must ensure that the equipment will not be damaged or become hazardous to persons or property. -
Page 4: Fittings Kit
¼” - 6mm Push Fit Fitting 02-4600 6mm OD x 4mm ID PE 00-1282 ×1 ×1 1×3m EU Mains Cable C19 04-1026 5/16” Compression Fitting 5/16” PTFE Tubing 3303537 3303538 Page 4 / 20 SCIEX Gas Generator N19A26 Installation Guide RUO-IDV-05-13920-B... - Page 5 These can be accessed by removing the generator side panels. Starting with the left hand side panel, use the 8mm Hex Key 00-0007, and turn the lock 90° to the right. Page 5 / 20 SCIEX Gas Generator N19A26 Installation Guide RUO-IDV-05-13920-B...
- Page 6 ‘Remove before use’. To remove the transit bracket, remove the four screws as indicated, then slide the bracket out from underneath the compressor. Retain the bracket and screws for future transportation. Page 6 / 20 SCIEX Gas Generator N19A26 Installation Guide RUO-IDV-05-13920-B...
- Page 7 Follow the same process to remove the right hand side panel. Repeat step 4 to remove the right hand side transit bracket. Page 7 / 20 SCIEX Gas Generator N19A26 Installation Guide RUO-IDV-05-13920-B...
- Page 8 WARNING: The container used MUST be a plastic material and MUST NOT be glass for safety reasons. The container MUST NOT have an airtight seal as water and air will be expelled periodically under slight pressure. Page 8 / 20 SCIEX Gas Generator N19A26 Installation Guide RUO-IDV-05-13920-B...
- Page 9 230VAC 50/60Hz 230VAC 50/60Hz Plug the mains cable into the corresponding 230VAC 50/60Hz single phase power supply. CAUTION: Ensure the correct cable has been selected for your electrical supply. Page 9 / 20 SCIEX Gas Generator N19A26 Installation Guide RUO-IDV-05-13920-B...
- Page 10 Note the displayed voltage. If the voltage is 219V or less, we would highly recommend fitting a transformer. This can be ordered from SCIEX: 06-3200 Dual Tap Transformer 200-230V. Page 10 / 20...
- Page 11 Switch the generator OFF using the switch on the front panel. CAUTION Remove the mains cable completely from the power supply. Page 11 / 20 SCIEX Gas Generator N19A26 Installation Guide RUO-IDV-05-13920-B...
- Page 12 Re-attach both side panels to the generator, ensuring the earth leads are re- connected and the locks are secured. CAUTION With the side panels securely re-attached, the mains power supply can be re- connected. Page 12 / 20 SCIEX Gas Generator N19A26 Installation Guide RUO-IDV-05-13920-B...
- Page 13 Again, switch the generator power ON using the switch on the front panel. minutes Leave the generator switched on for a period of 30 minutes to purge the system. Page 13 / 20 SCIEX Gas Generator N19A26 Installation Guide RUO-IDV-05-13920-B...
- Page 14 The purge is now complete. Once the pressure gauges on the front of the generator read 0, the silencer fittings can be removed from the Curtain, Source & Exhaust ports. Page 14 / 20 SCIEX Gas Generator N19A26 Installation Guide RUO-IDV-05-13920-B...
- Page 15 & EXHAUST ports. 00-1266 00-1266 Attach the ¼” PTFE tubing 00-1266 to the fittings attached to the CURTAIN, SOURCE & EXHAUST and connect to the corresponding gas inlets of your instrument. Page 15 / 20 SCIEX Gas Generator N19A26 Installation Guide RUO-IDV-05-13920-B...
- Page 16 Switch the generator power ON using the switch on the front panel. The pressure gauges will again gradually increase to the factory set pressures. Page 16 / 20 SCIEX Gas Generator N19A26 Installation Guide RUO-IDV-05-13920-B...
- Page 17 CONGRATULATIONS Your SCIEX gas generator is now fully installed. operational and ready to supply gas on demand to your instrument. Page 17 / 20 SCIEX Gas Generator N19A26 Installation Guide RUO-IDV-05-13920-B...
-
Page 18: General Notes
Operator Guide. Familiarise yourself with the full Operator Guide available at: sciex.com/customer-documents. This includes all other technical specifications, operating instructions, service requirements, contact details and trouble shooting. Page 18 / 20 SCIEX Gas Generator N19A26 Installation Guide RUO-IDV-05-13920-B... - Page 19 SCIEX and its representatives maintain a staff of fully-trained service and technical specialists located throughout the world. They can answer questions about the system or any technical issues that might arise. For more information, visit the SCIEX website at sciex.com or contact us in one of the following ways: •...
- Page 20 SCIEX warranties are limited to those express warranties provided at the time of sale or license of its products and are the sole and exclusive representations, warranties, and obligations of SCIEX. SCIEX...
Need help?
Do you have a question about the N19A26 and is the answer not in the manual?
Questions and answers