Advertisement
Quick Links
Advertisement

Related Manuals for Matko SSD Series


Summary of Contents for Matko SSD Series
- Page 1 SSD Series Manual Scan for Current Matko Manuals...
- Page 2 Section 1 Physical Dimensions Section 2 Wiring Con guration Section 3 Quick Set up Procedure Section 4 Option Summary Section 5 Option Details 10–16 Section 6 Stoplight Instructions 17-19 Section 7 Wireless Instructions 20-23 Section 8 Troubleshooting Section 9 ASCII Table Section 10 Replacement Parts Section 11...
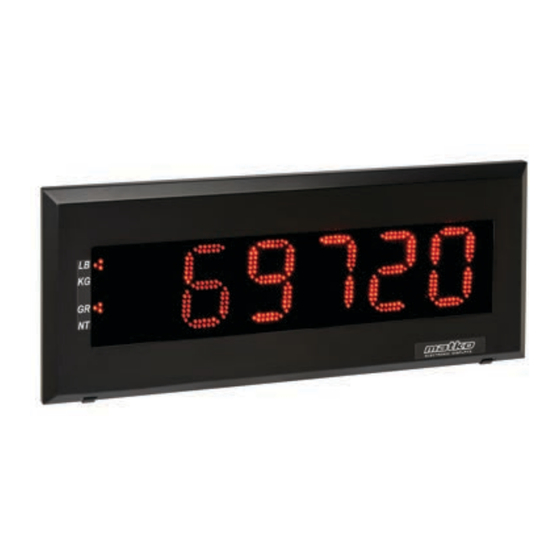
- Page 3 Section 1: Physical Dimensions Model Figure 1.1: Front Pro le Figure 1.2: Side Pro le Model SSD-2 3‘ 3.75 SSD-2SG 3‘ 3.75 SSD-5 13.5 3.75 14.5 SSD-5SG 13.5 3.75 14.5 38.5 SSD-8 45.25 15.5 14.5 3.75 SSD-8SG 50.75 15.5 14.5 3.75 Chart 1.1: Display Sizes (Inches) Section 1: Physical Dimensions...
- Page 4 Section 1: Physical Dimensions Model Minimum Optimum Maximum SSD-2 5-35 SSD-2SG 5-35 SSD-5 25-125 SSD-5SG 25-125 SSD-8 65-250 SSD-8SG 65-250 Chart 1.2: Viewing Distances (Feet) Section 1: Physical Dimensions...
- Page 5 Section 2: Wiring Con guration Connect the Scale indicator using the appropriate diagram to the BLACK terminal block on the Input Card (See Figure 2.2). Indicator Display +20mA RX CL (+) Indicators with –20mA RX CL (–) Active 20 mA Output +20mA Indicators with...
- Page 6 Section 2: Wiring Con guration Data Input Card RESET NoData Echo CL(-) Echo CL(+) GROUND Echo 232 232 RXD Data Input Data Output RX CL(-) GROUND RX CL(+) TXD 232 RX 422A TX 422A RX 422B TX 422B Figure 2.2: Input Card-SSD Figure 2.3: L2-SSD with installed cards SSD 2in Option Menu...
- Page 7 Section 2: Wiring Con guration Figure 2.4: L5-SSD-L with installed Cards MIDDLE RIGHT Factory Default Option Menu Option Option Number Value Save Input Card Wireless Card SG Card RIGHT (+) LEARN LEFT (-) RESET Receiving Data Input Card Wireless Signal RESET NoData Echo CL(-)
- Page 8 (On 7 segment displays “lo” is displayed) Select the desired intensity and press LEARN to save changes Factory default is “low” *Intensity may also be adjusted using Option 6 (See Sections 4/5) SSD Series Specs Interface Protocol RS 232 8 Data bits No Parity...
- Page 9 At any time pressing the Option Menu/Save button will resume normal operation To restore to factory default, press the Factory Default button. The display should brie y display “Default” then count down. Option training videos may be found at www.matko.com/SSDVideos Name Description for "ON"...
- Page 10 Section 5: Option Details Restore Factory Defaults Option 0 resets the display to factory default. It erases all data stored in memory including shift amount, baud rate, end character, and sets all options to o . Addressable Option 1 will set the display to be addressable. The display will ignore any characters until the addressable character is received, then display the data immediately following it.
- Page 11 No Data Option 5 sets the display to do one of three things after a data stream time out. The default is to display "NoData". The other two options are "Clear" (blank the display) and "Hold" (keep the last weight sent). The time out length can be speci ed with Option 3. Option Menu/Save selects the displayed option and returns the standard Option Menu showing the option number and option Value.
- Page 12 Fairbanks Addressable Set option 12 only if the Fairbanks indicator is sending out multiple streams, ie. gross and tare weights or multiple scales. Set the option according to the chart. Value Addressable for Value Addressable for 1 Scale 1 40 with 7 data bits odd parity 11 Scale 3 42 with 8 data bits no parity 2 Scale 2...
- Page 13 Hardware Test Option 16 will set the unit into a hardware test mode. This mode is used to test the serial ports. Remove all data connections from the indicator or PC and jumper one the desired data input according to the chart below. If the ports are working the display will toggle between “GOOD 0” and “GOOD 1”.
- Page 14 No Zero Suppression Option 21 will disable the display’s ability to suppress leading "0"s with spaces. The default (0) will display a space for all leading "0"s up to the nal two in the 1s and 10s column or up to a "0" immediately in front of a decimal point.
- Page 15 (IE when testing with a simple ground wire, the display will update when the wire disconnects). Siemens Option 28 enables the remote display to use a Siemens Milltronics BW500 Integrator and will direct the remote into a Siemens Sub Menu. Siemens Sub Menu Options may be downloaded at www.matko.com/siemens Section 5: Option Details...
- Page 16 Blank Out Character 1 Option 29 sets a character in the data stream to look for to blank the display. For example if you want the display to blank when over capacity and the indicator sends an "O", set option 18 to 79. Blank Out Character 2 Option 30 sets a character in the data stream to look for to blank the display.
- Page 17 Section 6: Stoplight Options 7, 8, and 9 select how the stoplight is controlled. 6.1 Individual Control 3 Line TTL Control Connect The Red/Green/Amber Terminal Blocks to either a switch toggling a Ground Loop, or to a 5 volt DC TTL device, referencing a common Ground.
- Page 18 Stoplight 6.4 Minimum and Maximum Weight Control Option 7 = 6 Lights are controlled based on the Minimum (Option 10) and Maximum (Option 11) Weight Options When Weight is under the Minimum Weight, Light is GREEN When Weight is between the Minimum and Maximum Weights, Light is AMBER When Weight is over the Maximum Weight, Light is RED 6.5 ASCII Control Option 7 = Any ASCII character from 07(BEL) to 127(DEL) for the Red light.
- Page 19 Stoplight Axle System Programming There are three types of programs to select from to control tra c to receive axle weights and totals. • A simple Axle Scale • An Inbound Truck Scale (driving on) • An Outbound Truck Scale (driving o ) The general rule for all systems is a green light means the remote is ready to accept the next axle.
- Page 20 Section 7: Wireless Wiring Diagram For a typical scale applications, Connect one XTP Module as the transmitter (using BLACK Terminal Block) to the indicator and the second unit as the receiver (using the GREEN Terminal Block) to the Remote Display, or use a built in XTP Receiver. XTP as Transmitter (Indicator side) (Black Terminal Block) Indicator...
- Page 21 Only IOs 0-7 are sent using IDs 0-5 and 12-15 (to maintain backwards compatibility with older XT Series models. If 8 IOs are required use IDs 6-11 The XTP Built in Receiver has IO 1-3 tied into the stoplight controls on SSD series displays. IO 1 controls the red line...
- Page 22 Wireless ID +1 IO 1-4 Board Layout 1200 ID +2 2400 Receiving ID +4 4800 Wireless 9600 ID +8 Signal 19200 Test Mode BAUD CONFIG RESET IO 5-8 Con g Step Con g Figure 7.2: XTP Module Receiving Wireless Signal 1200 2400 4800...
- Page 23 Wireless Product Comparison XT100 XT300 XT400 Legacy Legacy Legacy Line of Sight Distance Up to 1 mile Up to 1 mile Up to 1 mile Up to 2 Miles Baud Rate ▲ ▲ ▲ 1200 ▲ ▲ ▲ 2400 ▲ ▲...
- Page 24 Section 8: Troubleshooting General Purpose Solution: Set the transmitting device to 1200 BAUD; 8 data bits; no parity. Make sure the data stream contains 6 weight characters followed by a carriage return, line feed or end of text. Set the display to factory default and re-learn the display.
- Page 25 Section 9: ASCII Table Char Char Char Char null Space start of heading - 0x01 start of text - 0x02 " end of text - 0x03 end of transmission enquiry acknowledge & bell backspace horizontal tab line feed - 0x0A vertical tab form feed, new page carriage return - 0x0D...
- Page 26 Section 10: Section 10: Replacement Parts Replacement Parts Part Number Description INPUT-CARD-SSD Serial Data Input Card L2-SSD SSD-2 LED Board LED-KIT-SSD5 Kit with all 6 Digits for SSD-5 Displays L5-SSD-L SSD-5 Left LED digit Board (100,000s and 10,000s digits) SSD-5 Center LED digit Board (1,000s and 100s digits) L5-SSD-C SSD-5 Right LED digit Board (10s and 1s digits) L5-SSD-R...
- Page 27 Section 11 Manual Revision History Revision Descriptions Added Option 27 (Counter Option) and minor xes Initial SSD Manual Release Section 11: Manual Revision History...
- Page 28 Do a favor for the next tech that works on this remote (It might be you!) Make note of any special settings or issues you encountered to get this system working properly and keep this page inside the remote display Display Notes: RS232 / Current Loop / RS422 ______Baud ______Databits _____Parity...
Need help?
Do you have a question about the SSD Series and is the answer not in the manual?
Questions and answers