Advertisement
Quick Links
THIS INSTRUCTION BOOKLET CONTAINS IMPORTANT SAFETY INFORMATION. PLEASE READ AND KEEP FOR FUTURE REFERENCE.
Please give us a chance to make it right and do better!
Contact our friendly customer service department for help first.
Replacements for missing or damaged parts will be shipped ASAP!
Follow Costway
Visit us: www.costway.com
www.costway.com
USER'S MANUAL
Coffee Table
HW61337
FLOOR AREA
1MX1M
ASSEMBLED BY 1 ADULT
Advertisement

Related Manuals for Costway HW61337


Summary of Contents for Costway HW61337
- Page 1 Please give us a chance to make it right and do better! FLOOR AREA 1MX1M Contact our friendly customer service department for help first. Replacements for missing or damaged parts will be shipped ASAP! Follow Costway Visit us: www.costway.com ASSEMBLED BY 1 ADULT...
-
Page 2: Board Identification
BOARD IDENTIFICATION Do NOT return this item. Contact our friendly customer service department for help first. E-mail US: cs.us@costway.com UK: cs.uk@costway.com Before You Start Read each step carefully before starting. It is very important to ensure each step followed in correct order, otherwise assembly difficulties may occur. -
Page 3: Hardware List
STEP HARDWARE LIST 6 X 30mm 6 X 35mm 15 X 10mm X 24 X 30 X 30 Screw the screws on the No. 8 legs and No. 9 legs. 12 X 17mm 4 X 40mm 4X 14mm... - Page 4 STEP STEP Assemble one No. 8 leg with No. 2 panel. Then assemble one No. 9 leg with it on the basis of step 2.
- Page 5 STEP STEP Assemble one No. 8 leg with No. 3 panel. Then assemble one No. 9 leg with it on the basis of previous step.
- Page 6 STEP STEP Screw 4 screws on No. 2 panel, then install Screw 4 screws on No. 3 panel, then install foot studs on the bottom of No. 8 leg and No. 9 leg. foot studs on the bottom of No. 8 and No. 9 leg.
- Page 7 STEP STEP EN: Assemble No. 5 panel with No. 6 panel Assemble No. 5 panel with another N0. 6 panel...
- Page 8 STEP STEP 4 X 40mm Assemble No. 7 panel with two No. 6 panel with Screw E and Dowels C. Screw a screw on each No. 4 panel.
- Page 9 STEP STEP Assemble No. 4 panel on the left and right sides of No. 5 panel. Assemble No. 2 side panel with the cabinet installed in previous steps.
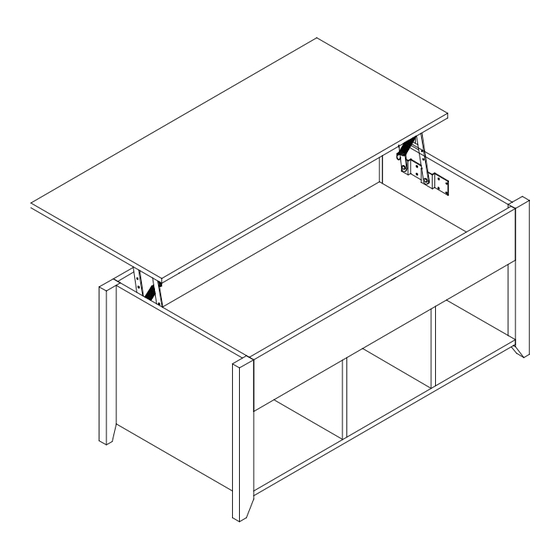
- Page 10 STEP STEP Assemble No. 3 panel with the cabinet installed EN: Assemble the springs and the raise handles together in G and H. in previous steps.
- Page 11 STEP STEP Finally, assemble the raise handles on No. 1 panel with the upper side panels. Assemble the installed G and H with No. 1 panel with Screw D. D D D D D D D D D...
-
Page 12: Care And Maintenance
STEP Care and Maintenance Use a soft, clean cloth that will not scratch the surface when dusting. Use of furniture polish is not necessary. Should you choose to use polish, test first in an inconspicuous area. Using solvents of any kind on your furniture may damage the finish.
Need help?
Do you have a question about the HW61337 and is the answer not in the manual?
Questions and answers