Table of Contents
Advertisement
Available languages
Available languages
Quick Links
THIS INSTRUCTION BOOKLET CONTAINS IMPORTANT SAFETY INFORMATION. PLEASE READ AND KEEP FOR FUTURE REFERENCE.
Please give us a chance to make it right and do better!
Contact our friendly customer service department for help first.
Replacements for missing or damaged parts will be shipped ASAP!
Follow Costway
Visit us: www.costway.com
www.costway.com
USER'S MANUAL
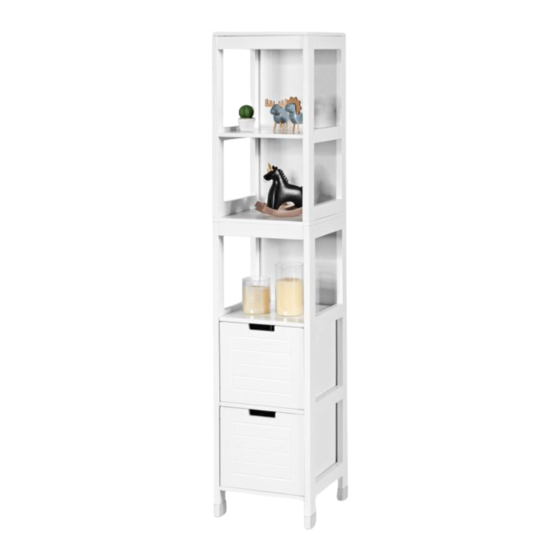
Bathroom Tower Cabinet
HW61185
FLOOR AREA
2MX2M
ASSEMBLED BY 2 ADULTS
EN
DE
FR
ES
IT
PL
Advertisement
Table of Contents

Related Manuals for Costway HW61185


Summary of Contents for Costway HW61185
- Page 1 Please give us a chance to make it right and do better! FLOOR AREA 2MX2M Contact our friendly customer service department for help first. Replacements for missing or damaged parts will be shipped ASAP! Follow Costway Visit us: www.costway.com ASSEMBLED BY 2 ADULTS...
-
Page 2: Before You Start
Contact Us! Do NOT return this item. Contact our friendly customer service department for help first. E-mail US: cs.us@costway.com UK: cs.uk@costway.com Before You Start Read each step carefully before starting. It is very important to ensure each step followed in correct order, otherwise assembly difficulties may occur. - Page 3 www.costway.com...
- Page 4 www.costway.com...
- Page 5 www.costway.com...
- Page 6 www.costway.com...
- Page 7 Bathroom Tower Cabinet Bathroom Tower Cabinet Bathroom Tower Cabinet...
-
Page 8: Care And Maintenance
Should you choose to use polish, test first in an inconspicuous area. Great products so far. Fast delivery, easy setup, and working without any issues. With your inspiring rating, COSTWAY will be more consistent to offer you Using solvents of any kind on your furniture may damage the finish. -
Page 9: Vor Dem Beginnen
Senden Sie diesen Artikel NICHT zurück. Wenden Sie sich zunächst an unseren freundlichen Kundendienst. E-mail DE: cs.de@costway.com Vor dem Beginnen Lesen Sie jeden Schritt sorgfältig durch, bevor Sie beginnen. Es ist sehr wichtig, dass jeder Schritt in der richtigen Reihenfolge ausgeführt wird. - Page 10 BEREICH DES FUSSBODENS Tipps, bevor Sie anfangen 1. Bitte prüfen Sie, ob alle Teile vorhanden sind, bevor Sie mit der Montage Ihrer Möbel beginnen. 2. Um den Zusammenbau zu vereinfachen und zu beschleunigen, empfehlen wir, dass Sie vor jedem Schritt des UNGEFÄHRE MONTAGEZEIT...
- Page 11 HARDWARE-LISTE Schnellkupplung Schnellkupplung Schraube Holzdübel Schraube Wandanker Schubladenstopper Schulter Platte Platte Schraube Nockensperre Schraube Wandgurt Keil Ziehen Sie den Schnellverschluss fest, bis die Schulter mit der Platte fertig ist. Nicht zu fest anziehen oder zu fest anziehen. TEILELISTE...
- Page 12 SCHRITT 1 SCHRITT 3 SCHUBLADEN Setzen Sie die Nockenschlösser (H) in Befestigen Sie die Seitenverkleidung die Verkleidung 3 ein. 10 mit den Schrauben (D) an den Stecken Sie die Steckschrauben (A) in Verkleidungen 9 und 11 (siehe die Platten 13 und 14.
- Page 13 SCHRITT 5 SCHRITT 7 Setzen Sie die Schieben Sie die Platte 15 in die Nuten zwischen den Platten 13 und 14. Nockenschlösser (H) und die Schnellbefestigungsschraube Setzen Sie die Nockenschlösser (H) in die Platten 13 und 14 ein.
- Page 14 SCHRITT 10 SCHRITT 9 Für zusätzliche Stabilität wird empfohlen, den Lagerschrank wie abgebildet mit Befestigen Sie die Keile (K) wie abgebildet mit den Schrauben (L) an der den zusätzlichen Beschlägen (B und E) an der Wand zu befestigen.
-
Page 15: Pflege Und Wartung
Pflege und Wartung Anleitung zur Wandmontage HINWEIS: Die mitgelieferten Dübel sind nur zur Verwendung in Mauerwerkswänden geeignet. Wenn Sie Zweifel daran haben, den richtigen Stecker für Ihre Wand zu verwenden, wenden Sie sich bitte an einen Fachmann. Verwenden Sie ein weiches, sauberes Tuch, das beim Abstauben die Das Versagen des Produkts aufgrund falscher Befestigungen liegt in der Verantwortung des Installateurs. -
Page 16: Manuel De L'utilisateur
Ihre Vorschläge und Kommentare für COSTWAY sind wirklich wich�g für uns! Wir bitten Sie aufrichtig, in unsere Geschäft zurückzukehren und durch nur einen Klick eine gute Bewertung zu hinterlassen. Es wäre sehr ermutigend, wenn Sie das so tun könnten:... -
Page 17: Avant De Commencer
MONTAGE PAR 2 PERSONNES ESPACE DE MONTAGE NÉCESSAIRE OUTILS DE MONTAGE NÉCESSAIRES E-mail FR : cs.fr@costway.com TOURNEVIS CRUCIFORME Avant de Commencer Lisez attentivement chaque étape avant de commencer. Il est très important d’assurer chaque étape suivie dans le bon ordre, sinon des difficultés d’assemblage pourraient se produire. - Page 18 Vis à fixation rapide Conseils avant de commencer : 1. Veuillez vérifier que toutes les pièces sont présentes avant de commencer l’assemblage de votre meuble. 2. Pour faciliter et accélérer le montage, nous vous recommandons, avant de commencer chaque étape de l’assem- blage, d’identifier toutes les pièces nécessaires à...
-
Page 19: Liste Du Matériel
LISTE DU MATÉRIEL ÉTAPE 1 Tiroir Fixez le panneau latéral 10 aux panneaux 9 et 11 à l’aide des vis (D), comme illustré. Vis à fixation rapide Cheville en bois Cheville murale Butée de tiroir Glissez le panneau 12 dans les rainures entre les panneaux 9 et 11. - Page 20 ÉTAPE 3 ÉTAPE 5 Insérez les verrous à came (H) sur le panneau 3. Glissez le panneau 15 dans les rainures entre les panneaux 13 et 14. Insérez les vis à fixation rapide (A) sur Insérez les verrous à came (H) dans les panneaux 13 et 14.
- Page 21 ÉTAPE 7 ÉTAPE 9 Insérez les serrures à came Fixez les cales (K) à l’arrière de l’unité assemblée à l’aide des vis (L), comme (H) et les vis à fixation rapide illustré. (A) sur les panneaux 4 et 5.
- Page 22 ÉTAPE 10 GUIDE DE FIXATION MURALE Pour plus de stabilité, il est recommandé de fixer votre meuble colonne au mur REMARQUE : Les chevilles fournies ne conviennent que pour les murs en maçonnerie. à l’aide de la quincaillerie additionnelle (B et E), comme illustré.
-
Page 23: Soin Et Maintenance
Excellents produits jusqu’à présent. Livraison rapide et l’installation facile. Et le fonctionnnement sans problème. Si vous choisissez d'utiliser l’agent à polier, testez-le d'abord dans un Avec votre évaluation inspirante, COSTWAY sera plus professionnel pour vous offrir une endroit peu visible. L'utilisation de solvants de tous types sur vos BONNE EXPÉRIENCE D’ACHATS, de BONS PRODUITS et un SERCIVE EFFICACE ! -
Page 24: Antes De Empezar
Pueden rayar o dañar las piezas. Armario Alto para Baño HW61185 ESTE MANUAL DE INSTRUCCIONES CONTIENE IMPORTANTES INFORMACIONES DE SEGURIDAD, POR FAVOR LO LEA Y GUARDE PARA REFERENCIAS FUTURAS. ¡Por favor dénos la oportunidad de hacerlo bien y mejorar! - Page 25 SUPERFICIE DEL PISO hora Consejos antes de comenzar: 1. Verifique que todas las partes estén presentes antes de comenzar el montaje de sus muebles. 2. Para facilitar y agilizar la ensamblea, le recomendamos que antes de comenzar cada paso del montaje, identifique...
- Page 26 LISTA DE ACCESORIO Tornillo de ajuste rápido Tornillo de Ajuste Rápido Tornillo Taco de Madera Tornillo Enchufe de Pared Tapón de Cajón Hombro Panel Panel Tornillo Bloqueo de Leva Tornillo Correa de Pared Cuña Apriete el tornillo de ajuste rápido hasta que el hombro quede al ras del panel. No apriete demasiado.
- Page 27 PASO 1 PASO 3 CAJONES Inserte los bloqueos de levas (H) en el Fije el panel lateral 10 a los paneles 9 y panel 3. 11 con los tornillos (D), como se Inserte los tornillos de ajuste rápido muestra.
- Page 28 PASO 7 PASO 5 Inserte el bloqueo de la leva (H) y los tornillos de ajuste Deslice el panel 15 en las ranuras entre los paneles 13 y 14. rápido (A) en los paneles 4 y 5. Inserte el bloqueo de la leva (H) en los paneles 13 y 14.
- Page 29 PASO 9 PASO 10 Para mayor estabilidad, se recomienda que fije el armario de su baño a la Fije las cuñas (K) en la parte posterior de la unidad ensamblada con los pared utilizando el accesorio adicional (B y E), como se muestra.
-
Page 30: Cuidado Y Mantenimiento
Cuidado y Mantenimiento GUÍA DE FIJACIÓN DE PARED NOTA: Los enchufes de pared suministrados solo son adecuados para su uso en paredes de mampostería. Si tiene alguna duda sobre el uso del enchufe correcto para su pared, solicite asesoramiento profesional. - Page 31 ¡Bienvenido a visitar nuestro si�o web y comprar nuestros productos de alta calidad! ¡Sus sugerencias y comentarios para COSTWAY son muy importantes para nosotros! Le solicitamos sinceramente que vuelva a nuestra tienda y deje una buena calificación con solo un clic.
- Page 32 Per prima cosa contatta il nostro servizio di assistenza clienti. STRUMENTI DI ASSEMBLAGGIO RICHIESTI E-mail CACCIAVITE A STELLA IT: cs.it@costway.com Prima di iniziare Legge attentamente ogni passaggio prima di iniziare. È molto importante garantire che ogni passaggio sia seguito nell'ordine corretto, altrimenti potrebbero verificarsi problemi di assemblaggio.
- Page 33 VITI A FISSAGGIO RAPIDO Suggerimenti prima di iniziare: 1. Verificare che tutte le parti siano presenti prima di iniziare il montaggio dei mobili. 2. Per facilità e velocità di assemblaggio, si consiglia di prima di iniziare ogni fase dell'assemblaggio, di identificare tutte le parti necessarie per quella fase.
- Page 34 ELENCO DI HARDWARE Passo 1 Cassetto Fissare il pannello laterale 10 ai pannelli 9 e 11 con le viti (D) come mostrato. Vite a fissaggio rapido Vite Tassello di legno Vite Presa a muro Tappo del cassetto Far scorrere il pannello 12 nelle scanalature tra i pannelli 9 e 11.
- Page 35 Passo 3 Passo 5 Inserire i blocchi a camme (H) sul pannello 3. Far scorrere il pannello 15 nelle scanalature tra i pannelli 13 e 14. Inserire le viti di fissaggio rapido (A) Inserire i blocchi a camme (H) nei pannelli 13 e 14.
- Page 36 Passo 7 Passo 9 Inserire i blocchi a camma (H) e le viti a fissaggio rapido (A) Fissare i cunei (K) sul retro dell'unità assemblata usando le viti (L) come sui pannelli 4 e 5. mostrato. Inserire i tasselli di legno (C) sul Montare i tappi del cassetto (F) su entrambi i ripiani.
- Page 37 Passo 10 GUIDA DI MONTAGGIO A PARETE Per una maggiore stabilità, si consiglia di fissare il mobile alto da bagno al NOTA: I tasselli forniti sono adatti solo per l'uso in pareti in muratura. muro utilizzando l'hardware aggiuntivo (B ed E) come mostrato.
-
Page 38: Cura E Manutenzione
Utilizzare un panno morbido e pulito che non graffi la superficie I tuoi suggerimenti e commenti per COSTWAY sono davvero importanti per noi! quando si spolvera. Ti chiediamo sinceramente di tornare al nostro negozio e lasciare un buono commento con un semplice clic. -
Page 39: Zanim Zaczniesz
PRZESTRZEŃ ROBOCZA W razie kłopotów skontaktuj się z nami! 2mX2m Jeśli potrzebujesz pomocy skontaktuj się z naszym przyjaznym działem obsługi klienta. Ewentualne braki elementów zostaną uzupełnione najszybciej jak to możliwe! Śledź Costway Odwiedź nas: www.costway.pl MONTAŻ WYMAGA UDZIAŁU 2 DOROSŁYCH OSÓB... - Page 40 Potrzebna przestrzeń robocza godz Wskazówki przed rozpoczęciem: 1. Przed rozpoczęciem montażu mebli sprawdź, czy wszystkie części są obecne. Do montażu potrzebne są 2. Ze względu na łatwość i szybkość montażu zalecamy, aby przed rozpoczęciem każdego etapu montażu zidentyfi- Przybliżony czas montażu...
-
Page 41: Lista Elementów
LISTA ELEMENTÓW MONTAŻOWYCH SZYBKA ŚRUBA REGULACYJNA Szybkozłącze Śruba 4x35mm Drewniany kołek Śruba Wtyczka ścienna Ogranicznik szuflady Ramię Panel Panel Śruba Zamek blokujący Śruba Listwa ścienna Klin Dokręcaj szybkozłącze do chwili, gdy jego ramię znajdzie się na poziomie panelu. Nie dokręcaj zbyt mocno. - Page 42 Krok 1 Krok 3 SZUFLADY Włóż zamek blokujący (H) do panelu Przymocuj panel boczny 10 do paneli 9 i 11 za pomocą śrub (D), jak pokazano Włóż szybkozłącza (A) do paneli 13 i na ilustracji. Włóż drewniane kołki (C) do panelu 2.
- Page 43 Krok 7 Krok 5 Włóż zamki blokujące (H) i szybkozłącze (A) do paneli 4 i Wsuń panel 15 w rowki między panelami 13 i 14. Włóż zamki blokujące (H) do paneli 13 i 14. Włóż drewniane kołki (C) do Zamontuj panel 1 na zmontowanym produkcie.
- Page 44 Krok 9 Krok 10 Aby uzyskać dodatkową stabilność, zaleca się przymocowanie szafki Zamocuj kliny (K) z tyłu zmontowanego produktu za pomocą śrub (L), jak łazienkowej do ściany za pomocą dodatkowego sprzętu (B i E), jak pokazano pokazano. na ilustracji.
-
Page 45: Czyszczenie I Pielęgnacja
Czyszczenie i Pielęgnacja PRZEWODNIK MOCOWANIA NA ŚCIANIE UWAGA: Dostarczone kołki ścienne nadają się tylko do stosowania w ścianach murowanych. Do czyszczenia używaj czystej, miękkiej szmatki, która nie porysuje Jeśli masz wątpliwości co do używania odpowiedniego sprzętu podczas mocowania produktu do ściany, zwróć... - Page 46 Byłoby nam miło, gdyby twoja ocena wyglądała jak poniżej: Świetne produkty 24 luty 2018 Świetne produkty. Szybka dostawa, łatwa konfiguracja i wysoka jakość wykonania. Twoja ocena nas inspiruje! Dzięki niej COSTWAY będzie dążył do zaoferowania ci WYDAJNEJ OBSŁUGI, DOBRYCH PRODUKTÓW I BEZPROBLEMOWYCH ZAKUPÓW! PL office: Gdańsk punkty lojalnościowe doskonała obsługa klienta...
Need help?
Do you have a question about the HW61185 and is the answer not in the manual?
Questions and answers