Advertisement
Quick Links
Advertisement

Related Manuals for Case Strata


Summary of Contents for Case Strata
- Page 1 Strata Low Shelving...
- Page 2 Con gurations The vertical panels can be varied to your choosing, this page highlights how the back panels can be varied. Have fun and try out different variations to nd what you like best.
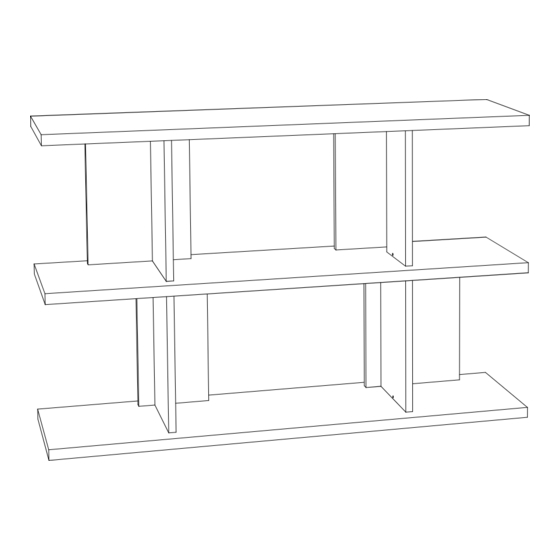
- Page 3 Assembly Instructions Identify the top, 3rd and bottom shelves. The bottom panel will have 4 feet inserted into its underside - the 3rd shelf will have an extra 2 holes at each end on its underside and the top will have no holes on its upper surface.
- Page 4 Insert the upright partitions into the bottom shelf. There is a small and a large for each shelf. The small upright can be rotated to either run ush with the back panel or spaced away from it depending on what you prefer. Use 8x dowel A and push into position. Fasten into position using key D turning clockwise until secure, ensuring that the holes face inwards towards each other.
- Page 5 The small vertical ns can be rotated to run ush, or leave a gap against the back panels. Objects can be stored in this gap, or it can be left clear to allow for cable management. Two units can be joined together to create further storage space.
-
Page 6: Care Instructions
Care Instructions Strata Low Shelving – designed by Matthew Hilton To prolong the life of the product and retain its appearance and functionality, we would like to give you some relevant information and care advice: This unit is manufactured using oak or walnut veneered panels.
Need help?
Do you have a question about the Strata and is the answer not in the manual?
Questions and answers