
Related Manuals for Whitewood Furniture OT-20C2


Summary of Contents for Whitewood Furniture OT-20C2
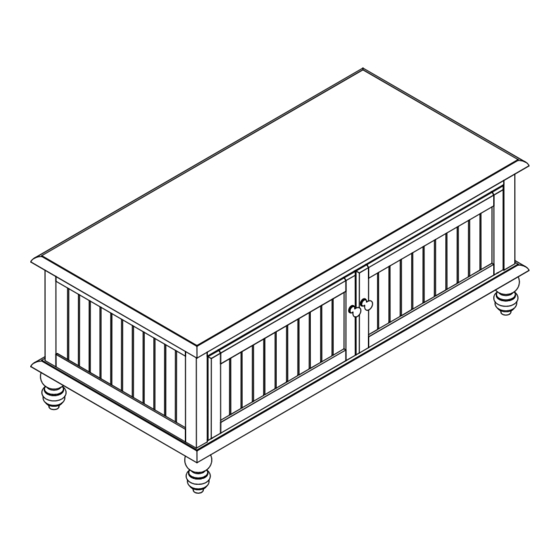
- Page 1 ASSEMBLY INSTRUCTIONS Description : COTTAGE COFFEE TABLE W/DOORS Item No. : OT-20C2 ITEM NO.: OT-20C2 Printed in Vietnam REVISED AUG 04, 2022 - 1 -...
-
Page 2: Before Assembly
Protect the surface of the product with cloth if you are using any product with rubber feet or base. ASSEMBLY TOOLS REQUIRED NOT INCLUDED ITEM NO.: OT-20C2 Printed in Vietnam REVISED AUG 04, 2022 - 2 -... -
Page 3: Part List
When unpacking, please be careful not to discard any parts with the packaging. Before continuing, please make sure you have the following parts: Description Sketch Description Sketch Back panel Side panel Door (L-R) (L-R) Bottom frame ITEM NO.: OT-20C2 Printed in Vietnam REVISED AUG 04, 2022 - 3 -... -
Page 4: Hardware List
*Wooden knob: (M4x25mm) (M4 x 35mm) Door pin Pan head screw (5.2/13x1.2mm) *Metal knob: (M4x22mm) (7x10mm) Allen Key Bolt (M4 x 30mm x 110mm) (M6 x 35mm) ITEM NO.: OT-20C2 Printed in Vietnam REVISED AUG 04, 2022 - 4 -... - Page 5 Attach back panel (B) and side panels (C) to top (A) with bolts (3), and washers (4) and (5) as shown below. Tighten with Allen key (8). STEP 2 Attach back panel (B) to top (A) with screws (6) as shown below. Tighten with a screwdriver. ITEM NO.: OT-20C2 Printed in Vietnam REVISED AUG 04, 2022 - 5 -...
- Page 6 Tighten with Allen key (8). STEP 3 STEP 4 Attach legs (F) to the unit by screwing them into bottom frame (E), as shown below. ITEM NO.: OT-20C2 Printed in Vietnam REVISED AUG 04, 2022 - 6 -...
- Page 7 Attach knobs (1) to doors (D) with pan head screws (2) as shown below. Tighten with a screwdriver. Adjust the levelers to the appropriate height to level the unit. STEP ITEM NO.: OT-20C2 Printed in Vietnam REVISED AUG 04, 2022...
Need help?
Do you have a question about the OT-20C2 and is the answer not in the manual?
Questions and answers