Table of Contents
Advertisement
Advertisement
Table of Contents

Subscribe to Our Youtube Channel
Related Manuals for Spedal CL876

Summary of Contents for Spedal CL876
- Page 1 User Manual CL876 033C4315-EN...
-
Page 2: Table Of Contents
Catalogue 1. Safety Guidelines .......... 01 4. Features and Settings ........11 1.1 Warnings ..............01 4.1 Home Screen .............. 11 1.2 Notice ................01 4.2 Apple CarPlay ............12 4.3 Android Auto ............. 15 2. Packaging & Product ........02 4.4 DVR ................ -
Page 3: Safety Guidelines
● Install, use, or store this product in a location inaccessible to children under the age of 16. Scan the QR code, select the corresponding model, and view the "User Manual". https://spedal.cc/html/support/download/navicam.html For any questions please contact support@spedaltech.com... -
Page 4: Packaging & Product
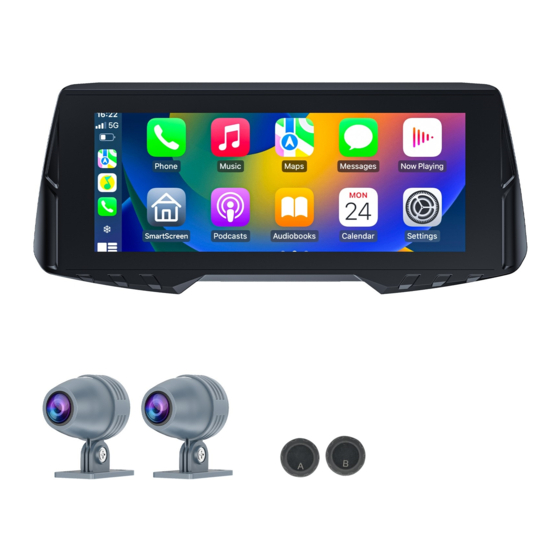
● IInstallation Tools ● Camera (Optional) 2. Packaging & Product 2.1 Packing List ● Main Unit ● Bracket ● Tire Pressure Sensor (Optional) ● Power Cable ● Wired Remote ※ Do not use non-original cables and accessories. Gifts and accessories are not covered under warranty. The packaging content of this product may change without prior notice. -
Page 5: Product Illustration
2.2 Product Illustration 3. Installation 3.1 Bracket Installation ① Align the screw holes of the elliptical metal plate on the bracket Screen with the screw holes on the back of the main unit. Tighten the screws. TF Card Slot Black interface Front Camera Interface Blue interface Rear Camera Interface... - Page 6 ② Secure the bracket onto the motorcycle handlebar and tighten the ③ Adjust the angle of the main unit screen to a suitable position and screws. tighten the screws. S c a n t h e Q R ※ Ensure that the installation of the main unit, bracket, and code to view other components does not block the driver's line of sight, t h e s p e c i fi...
-
Page 7: Main Unit Installation
3.2 Main Unit Installation Connect to the constant power supply of Yellow wire the power box. ① Connect the power cable to the motorcycle's power output inter- Connect to ACC power (only powered when Red wire face (be careful not to reverse the polarity). the ignition switch is turned on). -
Page 8: Wired Remote Installation
3.3 Wired Remote Installation ② Fix the remote control to the outer side of the longer end of the L-shaped metal plate (with the wire end of the remote control facing the corner of the L-shaped metal plate). Tighten the ①... - Page 9 ③ Secure the inner side of the shorter end of the L-shaped metal ④ Connect the orange end of the remote's extension cable to the plate onto the A-shaped metal plate. Adjust it to a comfortable orange wired remote Interface of the main unit. Tighten the nut operating angle and tighten the screw.
-
Page 10: Audio Cable Installation
3.4 Audio Cable Installation ⑤ Button description Button A Button B ① Insert one end of the audio cable into the AUX port of the speak- er, and then connect the other end to the AUX interface of the Short press Take a photo. -
Page 11: Camera Installation
3.5 Camera Installation ② Connect the front and rear cameras to the main unit. ① Use screws to securely mount the cameras onto the front and rear of the motorcycle. Black interface Front camera. Blue interface Connect to the camera extension cable, and then connect the rear camera to it. -
Page 12: Tire Pressure Sensor Installation
3.6 Tire pressure sensor Installation ② Click on the Zone C of the main unit interface to enter the tire pressure settings menu and bind the tire pressure sensors. ① Inflate the tires to the appropriate tire pressure. Attach the tire pressure sensors onto the valve stems of both the front and rear motorcycle tires, and tighten them securely. -
Page 13: Tf Card Installation
3.7 TF Card Installation 4. Features and Settings Open the bottom cover of the main unit and insert the TF card into the TF card slot. Close the bottom cover and tighten the screws. 4.1 Home Screen 12:00 Apple CarPlay Android Auto Playback Audio Out Setting... -
Page 14: Apple Carplay
2.Only iPhone phones are supported. 2.Pair your iPhone to SmartScreen using 3.After successful connection, Bluetooth Enter Android Auto mode Enter Audio Output mode Bluetooth: Spedal-****** will be disconnected automatically 3.When iPhone prompt ”Use CarPlay with Enter DVR mode Enter Settings mode... - Page 15 ① Go to the "Settings" menu on your iPhone and enable Bluetooth ② Go to the "Bluetooth" menu and under the "OTHER DEVICES" list, and Wi-Fi. select the Bluetooth named "Spedal-******". Settings Bluetooth < Settings Bluetooth Sign in to your iPhone Now discoverable as “X6”.
- Page 16 ③ Wait for about 20-30 seconds, and your iPhone will display a ④ Your iPhone will then prompt you with a "Use CarPlay with "Bluetooth Pairing Request" window. Select "Pair". 'SmartScreen'?" window. Select "Use CarPlay". Use Carplay with Bluetooth Pairing Request “SmartScreen”...
-
Page 17: Android Auto
Bluetooth and Wi-Fi on your iPhone and disconnect from 1.Click Android Auto widget on 1.Requires an Android phone running Apple CarPlay mode. SmartScreen Android 11 or higher and 5GHz Wi-Fi 2.Pair your phone to SmartScreen using 2.Please download the latest Android Auto Bluetooth: Spedal-****** application on your phone... - Page 18 ① Go to the "Settings" menu on your phone and enable Bluetooth ② Tap on the "Bluetooth" menu to access the Bluetooth search and Wi-Fi. page. ③ Click on "Pair new device". Settings Connected devices Search settings Network and Internet + Pair new device Mobile, Wi-Fi, hotspot Connected devices...
- Page 19 ④ From the list of Available devices, select the Bluetooth named ⑤ Wait for about 20 seconds, and your phone will display a "Pair "Spedal-******". with Spedal-******" window. Select "Pair". Pair new device Device name Pixel 5 Pair with Spedal-******?
-
Page 20: Dvr
4.4 DVR ⑥ Wait for a moment, and you will enter Android Auto mode. Click on on the main screen to enter the DVR mode. ※ Note: ● Please make sure your phone is running on Android 11 or 01: 30 above and supports 5GHz Wi-Fi and Google Play services. -
Page 21: Playback
4.5 Playback Zone B Click on on the main screen to enter the Playback mode. Sort videos from newest to oldest Sort videos from oldest to newest 12:00 View locked videos xxxx-xxxxx.TS View photos xxxx-xxxxx_SOS.TS xxxx-xxxxx.JPG xxxx-xxxxx.TS Video files xxxx-xxxxx_SOS.TS Lock video files 00:00:00/00:00:00 xxxx-xxxxx.JPG... -
Page 22: Audio Output
4.6 Audio Output ④ In the pop-up prompt, click on "Connect" and wait for the pairing process between the main unit and the Bluetooth headset to complete. Click on on the main screen to enter the audio output mode. ⑤ The Bluetooth headset name will display "Connected" indicating a successful connection. -
Page 23: Aux Connection
4.7 Setting 4.6.2 AUX Connection Click on on the main screen to enter the setting mode. ① Insert one end of the audio cable into the AUX port of the speak- er, and then connect the other end to the AUX interface of the main unit. - Page 24 Split time Date & time To set the duration for each recorded video segment, you To set the date and time and the time display format. can choose between the following options: 1 minute, 3 min- utes, or 5 minutes. Format The default duration is 3 minutes.
-
Page 25: Tire Pressure Monitoring Settings
4.8 Tire Pressure Monitoring Settings ● TPMS 1 Display the front tire pressure value. Click on Zone C on the main screen to enter the Tire Pressure Moni- toring Settings mode. ● TPMS 2 Display the rear tire pressure value. 12:00 ●... -
Page 26: Firmware Upgrade
Apple CarPlay Android Auto Playback Audio Out Setting ④ Open the computer and visit the Spedal official website's down- load page at https://spedal.cc/html/support/download/navi- cam.html. Download the latest firmware according to the model. ⑤ Copy the downloaded firmware onto the TF card. -
Page 27: Burn Tf Card Upgrade
② Insert the TF card into the computer using the card reader. ● TF card burning Clean Help Update Version Close ① Open the computer and visit the Spedal official website's down- load page at https://spedal.cc/html/support/download/navi- cam.html. Download the latest firmware according to the model. - Page 28 ● TF card restore ③ Click on Zone A "Image" and select the downloaded latest firm- ware. ① Run the "PhoenixCard.exe" program. ④ Choose Zone B "Product" in the "Work Type" selection. ② Click on Zone A "Image" and select the downloaded latest firm- ⑤...
- Page 29 English Download manuals in other languages from our official website. Deutsch Laden Sie Handbücher in anderen Sprachen von unserer offiziellen Website herunter. Français Téléchargez des manuels dans d'autres langues depuis notre site web officiel.
Need help?
Do you have a question about the CL876 and is the answer not in the manual?
Questions and answers