Table of Contents
Advertisement
Available languages
Available languages
Quick Links
Advertisement
Table of Contents

Subscribe to Our Youtube Channel
Related Manuals for EAS Electric EMC2000SW1


Summary of Contents for EAS Electric EMC2000SW1
- Page 1 í FRIGOR FICO COMBINADO MANUAL DE INSTRUCCIONES EMC2000SW1 EMC2000SX1...
- Page 2 ADVERTENCIAS DE SEGURIDAD ..................1 INSTALACIÓN ........................3 Ubicación ........................3 el sen do de apertura de la puerta ............... 3 Requisitos de espacio para la puerta ................. 5 Nivelación del electrodomé ................5 Limpieza antes de su uso ................... 5 Antes de u izar el electrodomé...
- Page 3 Advertencia: riesgo de incendio / materiales inflamables ESTE aparato está diseñado para ser utilizado en aplicaciones domésticas y similares, como áreas de cocina para el personal en tiendas, oficinas y otros entornos de trabajo; casas de campo y por clientes en hoteles, moteles y otros entornos de tipo residencial; entornos de tipo alojamiento y desayuno;...
- Page 4 PARA Advertencia: Advertencia: ¡PARA Prevenir!
- Page 5 2. INSTALACIÓN Ubicación A la hora de instalar el electrodomés co, seleccione una ubicación bien ven lada y donde el suelo sea llano y me. No instale el electrodomés co cerca de una fuente de calor, como por ejemplo una cocina, una caldera o un radiador. Evite también ubicarlo a la luz solar directa, ya que ello podría hacer aumentar el consumo eléctrico.
- Page 6 3) Retire la puerta de la cámara de 6) Coloque el conjunto de bisagras con un refrigeración. destornillador. Coloque el conjunto de bisagra inferior en el lado izquierdo del electrodoméstico con un destornillador. 4) Quite la bisagra central con un destornillador.
- Page 8 por encima de los cajones de frutas y verduras y manténgalo en esta posición. Para quitarlo, re de él hacia adelante hasta que se pueda girar hacia arriba o hacia abajo y re rarse. Haga lo mismo a la inversa para insertar el estante a una altura diferente. Para aprovechar al máximo el espacio del compar mento de almacenamiento de alimentos frescos y el de almacenamiento de alimentos congelados, el usuario puede re rar uno o varios estantes o cajones del electrodomés co, según con el uso diario que realice de los mismos.
- Page 9 *La posición de cajones, caja de alimentos y estantes es la más adecuada para el ahorro de energía, por favor consulte las figura. enfriamiento rápido Integrado...
- Page 11 Descripción del compartimento frío: la temperatura del compartimento frío es -2 ≤ tcc ≤ 3, el tcc máximo debe estar lo más cerca posible de + 3 ℃ que, sin embargo, no debe excederse. El compartimento no es adecuado para almacenar determinadas verduras y frutas frescas (que son sensibles a las bajas temperaturas).
- Page 12 El polvo detrás del refrigerador y en el suelo deben limpiarse oportunamente para mejorar el efecto de enfriamiento y el ahorro de energía. Revise la junta de la puerta con regularidad para asegurarse de que no haya residuos. Limpie la junta de la puerta con un paño suave humedecido con agua jabonosa o detergente diluido. El interior del refrigerador debe limpiarse regularmente para evitar el mal olor.
- Page 15 contacto con su ayuntamiento. Cuando deseche un refrigerador antiguo, retire cualquier tipo de cierre y las puertas como medida de seguridad. Eliminación correcta de este electrodoméstico En base a la directiva europea 2012/19/UE de residuos de aparatos eléctricos y electrónicos (RAEE), los electrodomésticos no pueden ser arrojados en los contenedores municipales habituales;...
- Page 16 CONDICIONES DE LA GARANTÍA COMERCIAL EN ELECTRODOMÉSTICOS Este aparato tiene una garantía de reparación de dos años, a partir de la fecha de venta, contra todo defecto de funcionamiento proveniente de la fabricación, incluyendo mano de obra y piezas de recambio. Para justificar la fecha de compra será obligatorio presentar la factura o ticket de compra.
- Page 17 Defectos o averías producidas como consecuencia de arreglos, reparaciones, modificaciones, o desarme de la instalación del aparato por un técnico no autorizado por el fabricante, o como resultado del incumplimiento manifiesto de las instrucciones de uso y mantenimiento del fabricante. Durante el periodo de garantía es imprescindible conservar todos los manuales junto con el equipo.
- Page 18 EAS ELECTRIC Smart technology:...
- Page 19 Instruction Manual REFRIGERATOR FREEZER EMC2000SW1 EMC2000SX1...
-
Page 20: Table Of Contents
Contents SAFETY WARNINGS ......................1 INSTALLTION ........................3 Location ........................3 Reversing the Door Swing ..................3 Door Space Requirements ..................S Levelling the Unit ....................... 5 Cleaning Befare Use ....................5 Befare Using Your Unit ....................5 2. 7 Interior Accessories .................... -
Page 23: Installtion
2. INSTALLTION 2.1 Location When selecting a position for your unit you should make sure the floor is flat and firm, and the room is well ventilated. Avoid locating your unit near a heat source, e.g. cooker, boiler or radiator. Also avoid direct sunlight as it may increase the electrical consumption. - Page 24 5) Take off the door of freezing chamber 8) Assemble middle hinge assembly to left side of the cabinet 6) Take off hinge assembly with a screw driver , Assemble lower hinge assembly to left side of the cabinet with a screw driver. Fix the removed medium beam screw and 9) Assemble the door of refrigerating screw cap to the right screw hole position.
-
Page 25: Door Space Requirements
Door Space Requirements The unit's door must be able to open fully as shown. W D 990 1025mm Levelling the Unit To do this adjust the two levelling feet at the front of the unit. If the unit is not level, the door and magnetic seal alignments will not be covered properly. -
Page 26: Interior Accessories
. Do not store or place dry ice in the refrigerator. Before Plugging in You must check that you have a socket which is compatible with the plug supplied with the unit. Before Turning On! Do not turn on until two hours after moving the unit. 2.7 Interior Accessories Various glass or plastic storage shelves are included with your appliance - different models have different combinations. -
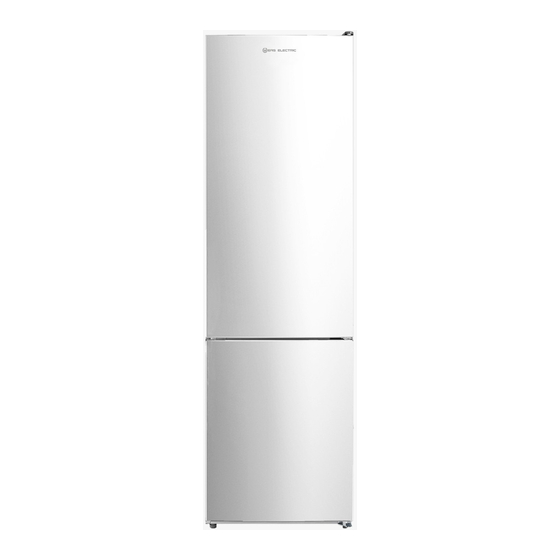
Page 27: Product Overview
3. PRODUCT OVERVIEW *Do ed line represents the posi on of air outlet and return air inlet. *All images in this instruc on manual are for indica on only; please refer to your individual unit for details. *Drawers, food box and shelves are the most energy-saving ,please refer to the above pictures. 4. - Page 28 A.SET: gear setting key Display screen Gear 1 Gear 2 Gear 3 Gear 4 Gear 5 Display For the first power-on, the display screen (including the key light) will be displayed in full for 3s, and then the gear in the middle displays the state of running Display of normal running On the occurrence of a failure, the corresponding LED light will give a combined display of failure code (loop display);...
-
Page 29: Noise Lnside The Unit
prevail. 4.2 Noise Inside the Unit! You may notice that your unit makes some unusual noises. Most of these are perfectly normal, but you should be aware of them! These noises are caused by the circulation of the refrigerant liquid in the cooling system. It has become more pronounced since the introduction of CFC free gases. -
Page 30: Cleaning Tips
baking soda and a quart of warm water. Then rinse with water and wipe clean. After cleaning, open the door and let it dry naturally before turning on the power. For areas that are difficult to clean in the refrigerator (such as narrow sandwiches, gaps or corners), it is recommended to wipe them regularly with a soft rag, soft brush, etc. -
Page 31: Trouble Shooting
7. Trouble shooting The following simple issues can be handled by the user. Please call the after-sale service department if the issues are not settled. Whether the freezer is plugged and connected to power; Inoperation Low voltage; Failure power or tripping circuit Odorous foods should closely wrapped;... -
Page 32: Disposal
If it is the outer condenser, the rear wall should be always clean free of dust or any impurities. The appliance should be located in the coolest area of the room, away from heat producing appliances or heating ducts, and out of the direct sunlight. Let hot foods cool to room temperature before placing in the appliance. - Page 33 CONDITIONS OF THE COMMERCIAL GUARANTEE ON ELECTRICAL APPLIANCES This device has a two-year repair warranty, from the date of sale, against all malfunctions arising from manufacture, including labour and spare parts. To justify the date of purchase, the invoice or receipt must be presented.
- Page 34 EAS ELECTRIC Smart technology:...
Need help?
Do you have a question about the EMC2000SW1 and is the answer not in the manual?
Questions and answers