Table of Contents
Advertisement
Available languages
Available languages
Quick Links
Advertisement
Table of Contents

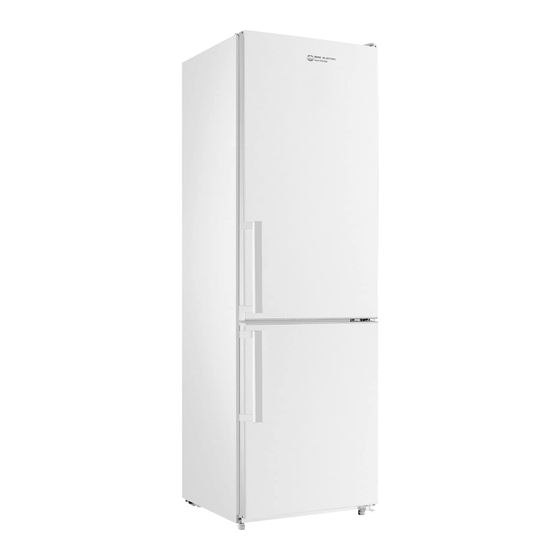
Related Manuals for EAS Electric EMC1880AW


Summary of Contents for EAS Electric EMC1880AW
- Page 1 EMC1880AW EMC1880AX EMC1880SX EMC1880SW EMC2010SW EMC2010SX...
-
Page 2: Table Of Contents
ÍNDICE PRECAUCIONES DE SEGURIDAD ................... 4 INSTALACIÓN ........................5 Ubicación ........................5 Instalación del tirador de la puerta (opcional)..............5 Invertir el sentido de apertura de la puerta ..............7 Requisitos de espacio para la puerta ................9 2.5 Nivelación del electrodoméstico ................... 9 2.6 Limpieza antes de su uso ..................... - Page 3 4.OPERATION ..........................32 4.1 Operation Instructions ......................32 4.2 Noise inside the unit ......................35 4.3 Tips for keeping food in the unit ..................35 Change the light bulb ....................35 5.CLEANING..........................36 Defrosting ........................36 Cleaning the interior and the exterior of the unit............36 Cleanings tips .......................
-
Page 4: Precauciones De Seguridad
1. PRECAUCIONES DE SEGURIDAD Mantenga sin obstrucciones las aberturas de ventilación del aparato o de la estructura en la que está integrado. No utilice dispositivos mecánicos u otros medios para acelerar el proceso de descongelación que no sean los recomendados por el fabricante. Asegúrese de no dañar el circuito del líquido refrigerante. -
Page 5: Instalación
Es peligroso que personas que no sean técnicos especializados realicen tareas de reparación que impliquen retirar alguna cubierta protectora. Para evitar el riesgo de electrocución, no intente realizar reparaciones usted mismo. 2. INSTALACIÓN 2.1 Ubicación A la hora de instalar el electrodoméstico, seleccione una ubicación bien ventilada y donde el suelo sea llano y firme. - Page 6 5)Retire los tornillos y 3)Coloque los tapones de la baje los tiradores hacia rosca de los tornillos encima abajo. del tirador. 6)Tape las tapas de los 4) Retire los tapones de la tornillos en los agujeros ro sca de los orificios de del tirador de la puerta de los to rnillos del tirador.
-
Page 7: Invertir El Sentido De Apertura De La Puerta
7)Instale los tiradores en los orificios de la puerta de la otra parte, acuerdo instrucciones de instalación del tirador. 2.3 Invertir el sentido de apertura de la puerta 1) Retire el protector de la bisagra. 2) Quite la bisagra superior. - Page 8 3) Retire la puerta de 6) Coloque el conjunto de la cámara de bisagras con un destornillador. refrigeración. Coloque el conjunto de bisagra inferior en el lado izquierdo del electrodoméstico con un destornillador. 4) Quite la bisagra central con un destornillador.
-
Page 9: Requisitos De Espacio Para La Puerta
10)Retire el protector de 9)Coloque la puerta del frigorífico. la bisagra 2.4 Requisitos de espacio para la puerta La puerta del frigorífico debe poder abrirse tal como se indica. Ancho x fondo > 990x1025 mm 2.5 Nivelación del electrodoméstico Nivele el electrodoméstico con las dos patas niveladoras de la parte delantera del frigorífico. -
Page 10: Antes De Utilizar El Electrodoméstico
escurrido. Lave los estantes y el cajón de la verdura con agua tibia y jabón; séquelos completamente antes de volver a colocarlos en el frigorífico. Limpie el exterior del electrodoméstico con un paño húmedo. Para más información, consulte el apartado específico sobre su limpieza. -
Page 11: Accesorios Interiores
◆ Antes de enchufar el frigorífico Compruebe que sus tomas de corriente son compatibles con el enchufe original del frigorífico. ◆ Antes de poner en marcha el frigorífico No ponga en marcha el frigorífico hasta dos horas después de haberlo transportado. 2.8 Accesorios interiores Con este frigorífico se incluyen varios estantes de vidrio o de plástico para almacenamiento;... -
Page 12: Vista Del Producto
Todas las imágenes de este manual de instrucciones se muestran sólo a título indicativo; por favor, compruebe su electrodoméstico específico para los detalles exactos. 4. FUNCIONAMIENTO 4.1 Instrucciones de funcionamiento Control de temperatura Control de temperatura del compartimento de alimentos frescos EMC1880AW EMC1880AX DISPLAY INTERIOR MODELOS Super Cooling Temperatura Enfriamiento rápido... - Page 13 DISPLAY EXTERIOR MODELOS EMC1880SW EMC1880SX EMC2010SX ⑤ ④ ③ ② ① Display exterior Leyenda SET. Tecla de selección del modo de funcionamiento. Pantalla del display Posición 1 -----2ºC Posición 2 -----3ºC Posición 3 -----4ºC Posición 4 -----6ºC Posición 5 -----8ºC Pantalla de visualización Para el primer encendido, la pantalla de visualización (incluyendo la luz de la...
- Page 14 tecla) se mostrará en su totalidad por 3s, y luego se muestra en el centro de la pantalla el estado de funcionamiento. Funcionamiento normal En caso de error, la luz LED correspondiente se iluminará y mostrará el código de error (imagen de lazo); Donde no hay error, la luz LED mostrará...
-
Page 15: Ruido En El Interior Del Frigorífico
La temperatura de congelación es relativamente baja en la posición <COLDER>, mientras que la temperatura de congelación es relativamente alta en la posición <COLD>, por lo que se suele utilizar la posición <NORMAL>. Cuando la temperatura ambiente sea alta en verano, la temperatura se establecerá... -
Page 16: Consejos Para Conservar Los Alimentos En El Frigorífico
4.3 Consejos para conservar los alimentos en el frigorífico La carne y el pescado cocinados deben situarse • siempre en un estante superior al de la carne y el pescado para evitar transferencia bacterias. Almacene carne pescado crudo en recipientes lo suficientemente grandes como para que puedan recoger sus líquidos y puedan taparse adecuadamente. -
Page 17: Sustitución De La Bombilla Inferior
4.4 Sustitución de la bombilla inferior La bombilla interior deberá ser cambiada únicamente por profesionales. 5. LIMPIEZA 5.1 Descongelación Este frigorífico incorpora la función <Auto-defrost> para mantenerlo sin escarcha. 5.2 Limpieza del interior y del exterior del frigorífico Retire todos los estantes y el cajón de las verduras. •... -
Page 18: Mantenimiento
6. MANTENIMIENTO 6.1 Sustitución de la bombilla inferior La bombilla interior debe estar cambiada únicamente por profesionales. 6.2 Precauciones a la hora de transportar o mover el frigorífico. Sujete el frigorífico por los lados o por su base a la hora de transportarlo. -
Page 19: Resolución De Problemas
7. RESOLUCION DE PROBLEMAS Los siguientes problemas sencillos pueden ser resueltos por el propio usuario. Póngase en contacto con el servicio posventa si los problemas persisten. Compruebe que el frigorífico esté enchufado a la corriente. Bajo voltaje. El frigorífico no funciona. Fallo de alimentación o activación de la interrupción de alimentación. -
Page 20: Consideraciones Sobre El Calor Emitido
7.1 Consideraciones sobre el calor emitido El mueble en el que esté situado el frigorífico • puede estar caliente, especialmente en verano. Este calor se produce por la irradiación de calor del condensador y es un fenómeno totalmente normal. Condensación: puede detectarse condensación en •... - Page 21 • Cuando vaya a descongelar cualquier alimento congelado, hágalo colocándolo en el compartimento del frigorífico. La baja temperatura alimentos congelados ayudará a enfriar el compartimento del refrigerador mientras estén descongelando. Siendo así, frigorífico trabajará menos para enfriarse y por lo tanto se ahorrará...
-
Page 22: Eliminación
9.ELIMINACIÓN viejos frigoríficos pueden conservar cierto valor residual. método ecológico eliminación es asegurarse de que las materias primas de valor pueden ser recuperadas y utilizadas de nuevo. El refrigerante utilizado en su unidad y los materiales de aislamiento térmico requieren procedimientos especiales de eliminación. -
Page 23: Garantía Comercial
10. GARANTÍA COMERCIAL CONDICIONES DE LA GARANTIA COMERCIAL Este aparato tiene una garantía de reparación de dos años, a partir de la fecha de venta, contra todo de defecto de funcionamiento proveniente de la fabricación, incluyendo mano de obra y piezas de recambio. Para justificar la fecha de compra será... -
Page 24: Safety Warnings
ENGLISH 1. SAFETY WARNINGS Keep ventilation openings, in the appliance enclosure or in the built-in structure, clear of obstruction. Do not use mechanical devices or other means to accelerate the defrosting process, other than those recommended by the manufacturer. Do not damage the refrigerant circuit. Do not use electrical appliances inside the food storage compartments of the appliance, unless they are of the type recommended by the manufacturer. -
Page 25: Installation
IT IS HAZARDOUS FOR ANYONE OTHER THAN AUTHORISED SERVICE PERSONNEL TO CARRY OUT SERVICING OF REPAIRS WHICH INVOLVE THE REMOVAL OF COVERS. TO AVOID THE RISK OF AN ELECTRICAL SHOCK DO NOT ATTEMPT REPAIRS YOURSELF. 1. INSTALLATION 2.1 Location When selecting a position for your unit you should make sure the floor is flat and firm, and the room is well ventilated. - Page 26 3)Cap the screw caps on the 5) Remove the screws and take the handles down. handle screws 4)Take out the screw caps from 6) Cap the screw caps on the door handle holes again screw holes.
-
Page 27: Reversing The Door Swing
7) Install the handles into the door handle holes of the other side in accordance with the handle installation instructions. 2.3 Reversing the door swing 1) Take off knuckle guard. 2) Take off top hinge. - Page 28 7) Assemble the door of 3) Take off the door of refrigerating chamber. freezer chamber on the lower hinge. 8) Assemble middle hinge 4) Take off middle hinge with a assembly to left side of the screw driver. cabinet. 9) Assemble the door 5) Take off the door of of refrigerating.
-
Page 29: Door Space Requirements
6) Take off hinge assembly with a screw 10) Take on knuckle guard. driver. Assemble lower hinge assembly to left side of the cabinet with a screw driver. 2.4 Door space requirements The unit's door must be able to open fully as shown. W×D≥990×1025mm 2.5 Levelling the unit To do this adjust the two levelling... -
Page 30: Before Using Your Unit
2.7 Before using your unit • The refrigerator adopts 220-240V/50Hz AC power, voltage fluctuations over the range of 187-264V will cause malfunction or even damage. • Do not damage the power cord under any condition so as to ensure safety use, do not use when the power cord is damaged or the plug is worn. -
Page 31: Interior Accessories
2.8 Interior Accessories Various glass or plastic storage shelves are included with your appliance- different models have different combinations. You should always slide on of the full size glass storage shelves into the lowest set of guides, above the fruit and vegetable containers, and keep it in this position. -
Page 32: Product Overview
*All images in this instruction manual are for indication only; please refer to your individual unit for details. 4.OPERATION 4.1 Operation Instructions Temperature control Temperature control of fresh food storage compartment. INDOOR DISPLAY MODELS EMC1880AW EMC1880AX Temperature Super cooling selection... - Page 33 EXTERNAL DISPLAY EMC1880SW EMC1880SX MODELS EMC2010SX Super cooling Temperature selection A.SET: gear setting key. Display screen 1. Gear 1 2. Gear 2 3. Gear 3 4. Gear 4 5. Gear 5...
- Page 34 Display For the first power-on, the display screen (including the key light) will be displayed in full for 3s, and then the gear in the middle displays the state of running. Display of normal running. On the occurrence of a failure, the corresponding LED light will give a combined display of failure code (loop display);...
-
Page 35: Noise Inside The Unit
4.2 Noise inside the unit You may notice that your unit makes some unusual noises. Most of these are perfectly normal, but you should be aware of them! These noises are caused by the circulation of the refrigerant liquid in the cooling system. It has become more pronounced since the introduction of CFC free gases. -
Page 36: Cleaning
5.CLEANING 5.1 Defrosting Auto-defrost for frost-free refrigerator. 5.2 Cleaning the interior and the exterior of the unit. Remove all the shelves and the salad bin. To remove • the salad bin first remove the lower door shelf. Wipe the inside of the unit with a weak solution of •... -
Page 37: Mantenimiento
6. MANTENANCE 6.1 Changing the internal light Lamp replacement by professionals. 6.2 Care when handling/ Moving your unit Hold the unit around its sides or base when moving it. Under no circumstances should it be lifted by holding the edges of the top surface. 6.3 Servicing The unit should be serviced by an authorized engineer and only genuine spare parts should be used. -
Page 38: Troubleshooting
7. TROUBLESHOOTING The following simple issues can be handled by the user. Please call the after-sale service department if the issues are not settled. Whether the freezer is plugged and connected to power; Low voltage; Inoperation Failure power or tripping circuit Odorous foods should closely wrapped;... -
Page 39: Advice To Save Energy
8. ADVICE TO SAVE ENERGY • Place the appliance in a cool, well-ventilated room, but do expose directly into sunlight leave near sources of heat (such as radiators, stoves and others). Otherwise, use an insulating board. • Check from time to time that the refrigerator ventilation is adequate (sufficient air circulation in the back of the appliance). -
Page 40: Disposal
• Ice and frost layers increase energy consumption, so it is recommended to clean the appliance when the thickness of these layers is between 3 and 5mm. If it occurs in the outdoor condenser, check that the rear wall is free of dust and impurities. -
Page 41: Comercial Warranty
10. COMERCIAL WARRANTY CONDITIONS OF COMMERCIAL WARRANTY This appliance has a repair warranty of two years from the date of sale, against any malfunction from the manufacture, including labor and spare parts. To justify the purchase date will be required to submit the invoice or receipt.
Need help?
Do you have a question about the EMC1880AW and is the answer not in the manual?
Questions and answers
Televisión no da imagen