Sapphire Audio 3 Series Operator's Manual
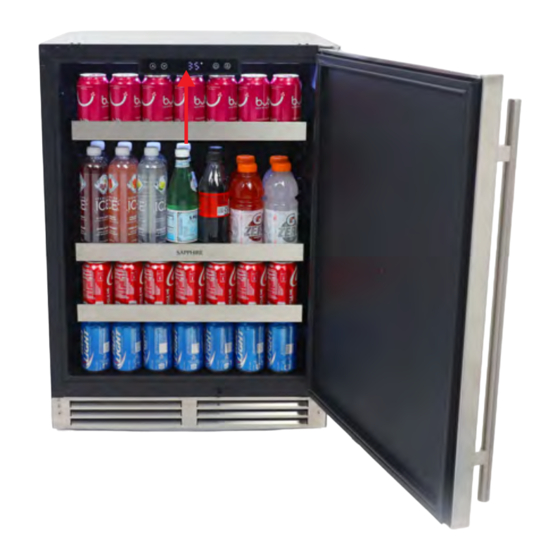
Solid door refrigerator
Hide thumbs
Also See for 3 Series:
- Operator's manual (28 pages) ,
- Operator's manual (32 pages) ,
- User manual
Table of Contents
Advertisement
Quick Links
Adapting to Your Environment
Ice Makers
Wine
Refrigerators
Beverage Centers
•
•
•
Sapphire Series 3
24" Solid Door Refrigerator
24" Beverage Center
24" Wine Cellar
Operator's Manual
SR243SS Indoor & Outdoor Model
SBCR243SS Indoor & Outdoor Model
SW243SZSS Indoor & Outdoor Model
SapphireAppliances.com | 866.754.6672
Advertisement
Table of Contents

Subscribe to Our Youtube Channel
Related Manuals for Sapphire Audio 3 Series


Summary of Contents for Sapphire Audio 3 Series
- Page 1 Adapting to Your Environment Ice Makers Wine Refrigerators Beverage Centers • • • Sapphire Series 3 24" Solid Door Refrigerator 24" Beverage Center 24" Wine Cellar Operator’s Manual SR243SS Indoor & Outdoor Model SBCR243SS Indoor & Outdoor Model SW243SZSS Indoor & Outdoor Model SapphireAppliances.com | 866.754.6672...
- Page 2 WARNING California Proposition 65 Certain components in this product and its related accessories contain chemicals known to the state of California to cause cancer, birth defects or other reproductive harm. PRODUCT REGISTRATION INFORMATION Please record your model’s information. You will need to know this information whenever you call to request information or ser- vice.
-
Page 3: Table Of Contents
TABLE OF CONTENTS SAFTEY ............................... 3 SAFETY DEFINITIONS ........................3 SAFETY PRECAUTIONS ........................3 SPECIFICATIONS ..........................6 SAPPHIRE SERIES 3 24-INCH INDOOR/OUTDOOR REFRIGERATOR ........... 6 SAPPHIRE SERIES 3 24-INCH INDOOR/OUTDOOR BEVERAGE CENTER/REFRIGERATOR ..7 SAPPHIRE SERIES 3 24-INCH INDOOR/OUTDOOR WINE REFRIGERATOR ........ 8 INSTALLING THE UNIT ........................ - Page 4 TABLE OF CONTENTS Screen Lock..........................19 Lighting Control..........................20 Sabbath Mode ..........................20 Door Open Alert..........................20 Sensor Error Alert.......................... 20 High Temperature Error Alert......................21 Low Temperature Alert........................21 Firmware Version Display....................... 21 EXPECTING NORMAL SOUNDS ...................... 22 DEALING WITH POWER FAILURE ....................
-
Page 5: Saftey
SAFETY SAFETY DEFINITIONS The words DANGER, WARNING, CAUTION and NOTICE are used throughout this manual to highlight important information. Be certain that the meanings of these alerts are known to all who operate and install the appliance. DANGER Indicates a hazardous situation that, if not avoided, will result in death or serious injury. WARNING Indicates a hazardous situation that, if not avoided, could result in death or serious injury. - Page 6 SAFETY INSTALLING PRECAUTIONS • Keep ventilation openings, in the appliance enclosure or in the built-in structure, clear of obstruction. • To avoid a hazard due to instability of the appliance, the appliance must be installed in accordance with the instructions. MOVING PRECAUTIONS •...
- Page 7 SAFETY • Do not use mechanical devices or other means to accelerate the defrosting process, other than those recommended by the manufacturer. • Do not damage the refrigerant circuit. THE MANUFACTURER DISCLAIMS ANY RESPONSIBILITY IF THE ABOVE INSTRUCTIONS ARE NOT FOLLOWED.
-
Page 8: Specifications
SPECIFICATIONS SAPPHIRE SERIES 3 24-INCH INDOOR/OUTDOOR PREMIUM REFRIGERATOR 24-INCH INDOOR/OUTDOOR FEATURES REFRIGERATOR Electrical Requirement 115V/60Hz Maximum Amp Fuse 15 amp Net Capacity 5.5 cu-ft (156 L) Temperature Setting 34°- 65°F (1°- 18°C) SAPPHIRE Beverage Center Operator’s Manual © 2021 SAPPHIRE... -
Page 9: Sapphire Series 3 24-Inch Indoor/Outdoor Beverage Center/Refrigerator
SPECIFICATIONS SAPPHIRE SERIES 3 24-INCH INDOOR/OUTDOOR PREMIUM BEVERAGE CENTER/REFRIGERATOR 24-INCH INDOOR/OUTDOOR FEATURES BEVERAGE CENTER/REFRIGERATOR Electrical Requirement 115V/60Hz Maximum Amp Fuse 15 amp Net Capacity 5.5 cu-ft (156 L) Temperature Setting 34°- 65°F (1°- 18°C) SAPPHIRE Beverage Center Operator’s Manual © 2021 SAPPHIRE... -
Page 10: Sapphire Series 3 24-Inch Indoor/Outdoor Wine Refrigerator
SPECIFICATIONS SAPPHIRE SERIES 3 24-INCH INDOOR/OUTDOOR PREMIUM SINGLE ZONE WINE REFRIGERATOR 24-INCH INDOOR/OUTDOOR SINGLE FEATURES ZONE WINE REFRIGERATOR Electrical Requirement 115V/60Hz Maximum Amp Fuse 15 amp Net Capacity 5.5 cu-ft (156 L) Temperature Setting 38°- 65°F (3°- 18°C) SAPPHIRE Beverage Center Operator’s Manual ©... -
Page 11: Installing The Unit
INSTALLING THE UNIT WARNING Fire/Explosion Hazard DO NOT install in spaces containing gasoline engines, fuel tanks or fuel line fi ttings. This device does not meet federal requirement for ignition protection. IMPORTANT: Electrical Tips • This appliance must be installed with all electrical connections in accordance with state and local codes. •... - Page 12 INSTALLING THE UNIT Factors affecting the Unit • Never keep the appliance next to ovens, grills or other high-heat resources. • Keep the appliance on a hard, level surface that can support the unit when the unit is full. Keep the appliance level to help ensure it works properly.
-
Page 13: Required Cabinet Opening
INSTALLING THE UNIT REQUIRED CABINET OPENING WARNING Fire/Explosion Hazard DO NOT install in spaces containing gasoline engines, fuel tanks or fuel line fi ttings. This device does not meet federal requirement for ignition protection. Failure to comply could result in injury or death. A built-in installation will allow you to install the appliance under a counter or in a kitchen cabinet if you respect the required clearance space around the appliance. -
Page 14: Electrical Connection
INSTALLING THE UNIT ELECTRICAL CONNECTION Do not, under any circumstance, cut or remove the third (ground) prong from the power cord. For personal safety, you must properly ground this appliance. The power cord of this appliance features a three-prong grounding plug that mates with a standard three-prong grounding wall outlet to minimize the possibility of electric shock hazard from the appliance. -
Page 15: Leveling The Unit
INSTALLING THE UNIT LEVELING THE UNIT The appliance requires leveling before it can work properly. If necessary, raise or lower the unit by turning the four leveling feet on the bottom. The manufacturer recommends using a carpenter’s level to check the appliance. NOTICE It is extremely important that the appliance is level for optimum performance. -
Page 16: Reversing The Door
INSTALLING THE UNIT REVERSING THE DOOR This appliance has the capability of the door opening from either the left or right side. The appliance is delivered to you with the door opening from the left side. Follow these instructions should you desire to reverse the opening direction: 1. -
Page 17: Anti-Tip System
INSTALLING THE UNIT Unscrew the door limiter from 9. Rotate the door, install the 10. Insert the door to the bottom the bottom of the door limiter to the bottom (used to be hinge top) Recover the top hinge Accessories: door close assist 12. -
Page 18: Operating The Unit
INSTALLING THE UNIT OPERATING THE UNIT USING THE CONTROLS The control panel is located at the top of the appliance. NOTE: You have 10 seconds to make a control change before the display reverts to the default screen. power on/off light on/off Control Details - Buttons/Display to scroll menu options... -
Page 19: Turning The Unit On
OPERATING THE UNIT TURNING THE UNIT ON Press the ON/OFF button Press the power button once TURNING THE UNIT OFF Press and hold the ON/OFF button for 3 seconds Press the power button and hold for 3 seconds SETTING THE TEMPERATURE Press the UP or DOWN arrow and the temperature will start flashing, then press the UP or DOWN arrow again to increase or decrease the temperature setting. -
Page 20: Changing Temperature Units
OPERATING THE UNIT CHANGING TEMPERATURE UNITS Press and hold the UP or DOWN arrows for at least 3 seconds to change the displaying temperature units between Fahrenheit and Celsius. When the temperature units convert, the Celsius and Fahrenheit indicator will switch accordinglly. -
Page 21: Lighting Control
OPERATING THE UNIT LIGHTING CONTROL Press the LIGHT button to switch the light on/off when the door is open. Press and hold the LIGHT button for over 6 seconds to start the LIGHT ON mode. Press the LIGHT button again to end the LIGHT ON function. In LIGHT ON mode, the light will keep lit for 6 hours, with or without door open. -
Page 22: Lighting Control
OPERATING THE UNIT SABBATH MODE Press and hold the UP arrow and POWER button for at least 6 seconds to enter and also to exit SABBATH MODE. This will shut off the screen display, the operating sounds, and the light will remain off while the unit still running automaticly according to the previous setting. -
Page 23: High Temperature Error Alert
OPERATING THE UNIT HIGH TEMPERATURE ALERT When the actual temperature is higher than the setting temperature, for a certain value over a fixed time, the alarm will sound and display the HI error code. The system will continue running in this stage. Press any button or close the door to stop the alarm. -
Page 24: Expecting Normal Sounds
OPERATING THE UNIT EXPECTING NORMAL SOUNDS Your new appliance may make sounds that are not familiar to you. Hard surfaces like the floor and walls can make the sounds seem louder than they actually are. The following describes the kinds of sounds that might be new to you and the source of those sounds: •... -
Page 25: Care And Maintenance
CARE AND MAINTENANCE WARNING Electrical Shock Hazard Always disconnect power at the source before working on the unit. Failure to unplug the appliance could result in electrical shock or personal injury. • Do not touch the power plug when your hands are wet. •... -
Page 26: Winterizing
CARE AND MAINTENANCE EXTENDED PERIODS OF NON-USE WARNING Electrical Shock Hazard Always disconnect power at the source before working on the unit. Winterizing If the outdoor refrigerator will be exposed to temperatures of 38°F (3.3°C) or less, perform below steps to winterize your refrigerator that will keep it in good condition while facing the winter elements. -
Page 27: Cleaning The Condenser
CARE AND MAINTENANCE CLEANING THE CONDENSER WARNING Electrical Shock Hazard Always disconnect the power at the source before working on the unit. CAUTION Sharp Object Hazard DO NOT touch the condenser surface. The condenser has sharp edges and can be easily damaged. A dirty or clogged condenser prevents proper air flow and causes higher-than-recommended operating temperatures that may lead to component failure. -
Page 28: Troubleshooting
TROUBLESHOOTING PROBLEM POSSIBLE CAUSES SOLUTIONS • The appliance does not operate. • Power failure. • Plug in the appliance. • Appliance not plugged in. • Replace blown fuse or reset circuit breaker. • House fuse blown or circuit breaker tripped. •... -
Page 29: Disposing The Unit
DISPOSING THE UNIT This symbol on the product or its packaging indicates that you cannot treat this product as normal domestic trash; you must hand it in to a collection point for recycling electric and electronic appliances. Your contribution to the correct disposal of this product protects the environment. Contact your local municipal authority if you need more information about recycling this product. -
Page 30: Warranty
WARRANTY LIMITED WARRANTY COVERAGE The Legacy Companies, warrants to the original purchaser of its SAPPHIRE products that they will be free from defects in materials and workmanship for the following time periods from the date of purchase shown on the sales receipt: Two (2) year Parts &... - Page 31 WARRANTY CONSUMABLES: This warranty does not include consumable parts such as water fi lters and light bulbs. ADJUSTMENTS & CALIBRATIONS: Adjustments including calibrations, leveling, tightening of fasteners, or utility connections normally associated with the original installation are the responsibility of the dealer, installer or the end user and not the responsibility of SAPPHIRE or The Legacy Companies and will not be considered warranty issues for this Limited Warranty.
- Page 32 “Sapphie” The Beautiful & Adaptable Sapphire-bellied Hummingbird Lepidopyga lilliae SapphireAppliances.com | 866.754.6672 SAPPHIRE Appliances | The Legacy Companies 3355 Enterprise Avenue, Suite 160, Weston, FL 33331 Rev 4 041723 © 2021 BP/N BCS3REF 4-23...
Need help?
Do you have a question about the 3 Series and is the answer not in the manual?
Questions and answers