Advertisement
Quick Links
Advertisement

Summary of Contents for HUGO&BORG W1830
- Page 1 CABINET INSTALLATION GUIDE...
- Page 2 IMPORTANT NOTICE! FOR YOUR SAFETY AND THE LONGEVITY OF YOUR NEW HUGO&BORG PRO CABINETS, PLEASE FOLLOW THE INSTRUCTIONS BELOW: CABINETS SHOULD ALWAYS BE MOVED BY TWO PEOPLE. REMOVE ALL DOORS, DRAWERS AND ADJUSTABLE SHELVES PRIOR TO MOVING ANY CABINET. CABINETS NEED TO BE COMPLETELY INSTALLED TO THE WOOD STUDS BEFORE PUTTING ANY ITEMS INSIDE THE CABINETS.
-
Page 3: Table Of Contents
TABLE OF CONTENTS 1. SAFETY AND LIABILITY ........................3 2. LIMITED LIFETIME WARRANTY ............................4 3. TOOLS AND SUPPLIES ........................4 4. INSTALLATION PROCESS ......................... 4 4.1 Getting started ........................ 5 4.2 Fillers ..........................10 4.3 General installation information ................10 4.4 Appliances ......................... -
Page 4: Limited Lifetime Warranty
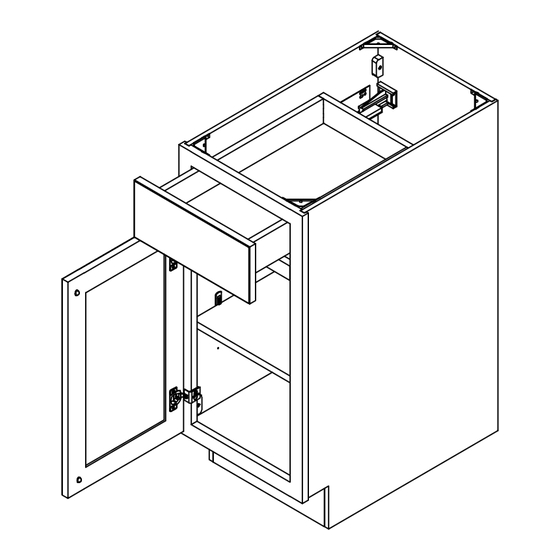
Drill and bits, compressor, pin nailer and nails. 4. INSTALLATION PROCESS UNDERSTANDING OUR CABINET CODES - EXAMPLES: CODE DESCRIPTION W1830 Wall cabinet 18" wide and 30" high. Hinging can be left or right. WA2430 Wall diagonal corner cabinet 24" wide x 30"... -
Page 5: Getting Started
4.1 GETTING STARTED • Check to make sure the cabinets and accessories that you have received are what you ordered. If anything is not on site, then do not start your project until you have everything required. • Double-check that you have all the required tools. •... - Page 6 All dimensions are taken with the finished floor installed Follow the next steps for the correct installation of your cabinets. Verify that walls are square and level. Before beginning installation, you must Walls that are not square or level will first find the highest point of your floor make installation more difficult.
- Page 7 Filler Wall corner 5. Starting with the corner wall cabinet, 6. If you do not have a corner, start with install (x4) 2 1/2" cabinet screws through the end closest to a wall, making sure to the fastening strips on the cabinet into leave room for the required filler, as per the wall studs.
- Page 8 Step 9 Step 10: toe kick Set the next cabinet tight to the first cabinet and use clamps to hold it place while you level it and make sure that the front edges are flush. Attach the two cabinets together using 1 1/4" screws.
- Page 9 11. When installing tall cabinets, make sure they are level and plumb. Attach to studs, using 2 1/2" screws into all studs at the top, middle and bottom, screwing through the hanging rails. If the tall cabinet is against other cabinets, use your clamps to hold in place and make sure the front edges are flush.
-
Page 10: Fillers
Sink/Cooktop Installation Transfer the location of the supply and drain lines to the back or bottom of the cabinet. A top-mount sink or cooktop should be dropped into place, resting on the countertop. An undermount sink should be glued and clamped to secure into place with clips for undermount sinks. -
Page 11: Appliances
4.4 APPLIANCES Today’s appliances are available in all shapes and sizes. Because of this, you must confirm opening sizes against the spec sheet provided with your paperwork, as well as the manufacturer's specifications. ◊ Standard dishwasher openings are to be 24" wide (unless otherwise specified). ◊... - Page 12 DRAWER FRONT ADJUSTMENT If you need to adjust your drawer front/back, up/down or left/right, please follow the below instructions.. Front/Back Adjustment Up/Down Adjustment Left/Right Adjustment...
- Page 13 DOOR ADJUSTMENT If you need to adjust your door front/back, up/down or left/right, please follow the below instructions. Front/Back Adjustment Up/Down Adjustment Left/Right Adjustment...
- Page 14 CABINET INSTALLATION GUIDE Thank you for your purchase! Have questions or need help? Please call our customer service 8:30 a.m. - 5 p.m., CST, Monday - Friday. 1.833.748.4846 Support@quickassemblycabinets.com...


Need help?
Do you have a question about the W1830 and is the answer not in the manual?
Questions and answers