Table of Contents
Advertisement
Quick Links
Advertisement
Table of Contents

Related Manuals for GAS MAX PA1 Series


Summary of Contents for GAS MAX PA1 Series
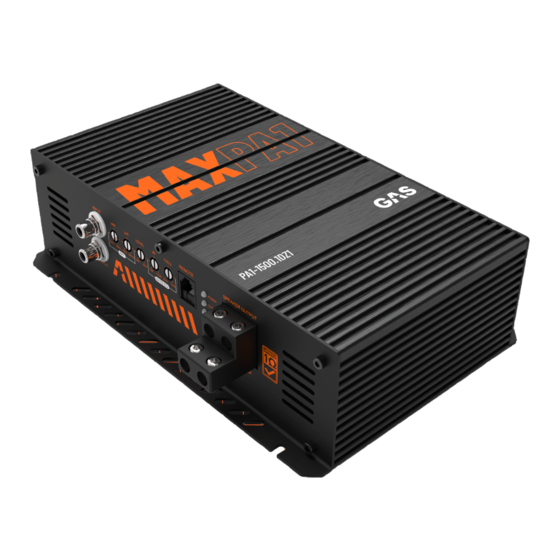
- Page 1 PA1-1500.1DZ1 / PA1-1500.1DZ2 HARDCORE CAR AUDIO...
- Page 2 We are the NO BULLSH!T car audio brand! Every single product with the GAS logo on it is born out of passion, the same that has driven us for two generations and that will keep us rolling up to your...
-
Page 3: Table Of Contents
Level (gain) / Bass EQ / Bass Remote / Power indicator..... Clip indicator / Protect indicator / Speaker output / Ground..... Remote / Power................HOW TO......................Install amplifier................Connect speakers................Tweaking & settings................. TROUBLESHOOTING..................No power..................No sound..................Unwanted noise................Distortion..................Protection................... WARRANTY & DISPOSAL................THE GAS WORLD................... -
Page 4: Xsafety
There’s a first time for everything, if you need help - ask a friend or contact your local GAS AUDIO POWER dealer/installer. We want you to experience your products to the MAX, but we don’t want you to injure yourself or others. -
Page 5: Xunpacking
UNPACKING We know you’re excited to dive head first into installing your new amplifier, but before you do: Make sure that the amplifier and all the accessories are included in the packaging. Amplifier Manual Screws Sticker Allen keys (1pc) (1pc) (6pcs) (1pc) (2pcs) -
Page 6: Xspecifications
SPECIFICATIONS We take pride in our work! True, honest specifications and power ratings are an important part of all amplifiers. Listening, measuring and engineering are essential parts in our workshop. That’s how we make sure to bring you an awesome product with NO BULLSH!T. MAX PA1-1500.1DZ1 MAX PA1-1500.1DZ2 Component... -
Page 7: Recommended Cable Sizes
SPECIFICATIONS RECOMMENDED CABLE SIZES MAX PA1-1500.1DZ1 RECOMMENDED MINIMUM SIZE MAX SIZE 2AWG (35mm2) 2AWG (35mm2) Power cable Speaker cable 14AWG (2.5mm2) 8AWG (10mm2) REM cable 18AWG (0.75mm2) 12AWG (4mm2) MAX PA1-1500.1DZ2 RECOMMENDED MINIMUM SIZE MAX SIZE Power cable 2AWG (35mm2) 2AWG (35mm2) Speaker cable 14AWG (2.5mm2) -
Page 8: Functions
FUNCTIONS NO COMPROMISES - that’s the spirit of the MAX series. The MAX amplifiers are made for the enthusiasts out there who crave crazy amounts of power! We’ve packed these amplifiers with lots of cool features. We know you’re itching to start building your new sound system, but make sure to read through these pages - so you can get the most out of your drivers! LOW LEVEL INPUT INPUT (mono). -
Page 9: Level (Gain) / Bass Eq / Bass Remote / Power Indicator
FUNCTIONS LEVEL (GAIN) LEVEL. Sync your head unit’s output signal with the amplifier. Follow the HOW TO instructions BASS EQ BASS EQ. Boost the bass with variables at 35-70Hz and 0-12dB. Follow the HOW TO instructions BASS REMOTE REMOTE. Use this to connect bass remote control knob for easy access and adjustment... -
Page 10: Clip Indicator / Protect Indicator / Speaker Output / Ground
FUNCTIONS CLIP INDICATOR CLIP. When distortion exceeds 1%, the CLIP indicator glows yellow. If it glows static, read HOW TO instructions. PROTECT INDICATOR PROTECT. Illuminates when the amplifier in- dicates a failure. If protect glows, read TROUBLE SHOOTING. SPEAKER OUTPUTS SPEAKER OUTPUT. -
Page 11: Remote / Power
FUNCTIONS REMOTE REM. Terminal input connector for the unit that controls the turn- on signal. GROUND GND. Terminal input connector for ground cable ( - power cable). The GND cable must be in direct contact to the vehicle chassis or the power source’ s neg. -
Page 12: How To
HOW TO A well-built sound system will set you aside from the rest and elevate your vehicle! It’s important that you carefully read the instructions on the following pages. This is to make sure that you install and use the amplifier correctly, for the true MAX EXPERIENCE! INSTALL AMPLIFIER Make sure your vehicle is up to task. - Page 13 HOW TO It’s time to find the perfect location to place your amplifier! Since the amplifier produces heat you don´t want to install it where it might get overheated. Find a place where air can circulate around it to stay cool. Also leave enough space so it´s easy to connect your cables and reach for the controls.
- Page 14 HOW TO Use the right speaker cable for the job! Make sure to use the recommended size, and follow the polarity of the speaker wire from the speaker to the amplifier. Speaker cable See the SPECIFICATION chapter for recommended cable sizes, or use this table to find your minimum recommended size for speaker cables: 0-1m 1-2m...
- Page 15 HOW TO We’re almost there! Are you ready? When all cables have been installed and secured with cable ties and wire looms, you’re ready to start up your system. Follow the instructions on your amplifier and/or in the manual to make sure that each cable is connected to the correct output and input.
-
Page 16: Connect Speakers
HOW TO CONNECT SPEAKERS Make sure you got everything you need when connecting your subwoofers/speakers to your sound system’s new powerhouse. Go for the classical setup and connect a great subwoofer to your amplifier, or go the extra mile with TWICE the bass and performance of your sound system by connecting two subwoofers to your amplifier! Make sure to have the correct load on your amplifier, going below specified impedance will damage your amplifier. -
Page 17: Tweaking & Settings
HOW TO TWEAKING & SETTINGS The devil is in the details. Tweak the settings on your MAX amplifier using the following recommendations and cross the line that separates the average user from the hardcore high-power audio junkie! LEVEL (GAIN) Remember that the level/gain setting is not a volume control! It’s there to let you sync your head unit’s output signal with the amplifier. - Page 18 HOW TO Use an oscilloscope for high precision result When you are setting the level/gain on your amplifier with an oscilloscope you are measuring the output power of the amplifier. WARNING! Make sure that the positive speaker cable is removed from the amplifier. Set the level/gain to minimum.
- Page 19 HOW TO BASS REMOTE With the MAX PA1-1500.1DZ1 / PA1-1500.1DZ2 amplifier, we have included an awesome bass remote. The included bass remote control makes it possible for you to fine tune the level of bass from the front seat while listening to your favorite song. The max level will be determined by how the level/gain knob was set on the amplifier in the previous stage.
- Page 20 On the following page we show the most common settings to use on your amplifier. If you want more help/guidance in how to use the filter settings, consult your local GAS CAR AUDIO dealer.
- Page 21 HOW TO SUBWOOFER: Set the HPF dial to 15Hz and the LPF dial to 80Hz, this gives you a good starting point for tweaking and finding the desired crossover points. (The HPF can be used as a Subsonic filter. If you set the frequency dial at 30Hz, frequencies below will be attenuated by 12db per octave.
- Page 22 BASS EQ in default setting or consult with your local GAS AUDIO POWER dealer. If you use the BASS EQ, make sure to turn down your level/gain first (to 0db) before you start adjusting it.
-
Page 23: Troubleshooting
Check your head unit to make sure no settings are limiting the amplifier functions. Check all signal cables. Check all speaker cables. Check all speakers. When all of the above has been tested/looked over, and all is as it should be but there’s still no sound, consult your local GAS AUDIO POWER dealer. -
Page 24: Warranty & Disposal
Alternative arrangements may apply in other jurisdictions. GAS AUDIO POWER is a global partner of the European Mobile Media Association, an organization that focus on promoting the custom made mobile media installations to consumers. -
Page 25: The Gas World
THE GAS WORLD You’ve entered the world of GAS. We aim to please, and we’ve made sure to have products made for you. No matter what stage of the LOUD-addiction you might find yourself in, there is a GAS product to fill your need. - Page 26 THANKS FOR JOINING GAS AUDIO POWER! GAS AUDIO POWER and SHAKY are registered trademarks by Winn Scandinavia AB and is protected by relevant laws and jurisdictions such as Copyright and Trademark laws. Winn Scandinavia AB Elementvägen 15, 70227 Örebro, Sweden www.winnscandinavia.com Winn Scandinavia AB reserves for possible typos, factual or numeric errors that may have been printed on any products, package designs, user manuals and/or other included accessories.
Need help?
Do you have a question about the MAX PA1 Series and is the answer not in the manual?
Questions and answers