Table of Contents
Advertisement
Quick Links
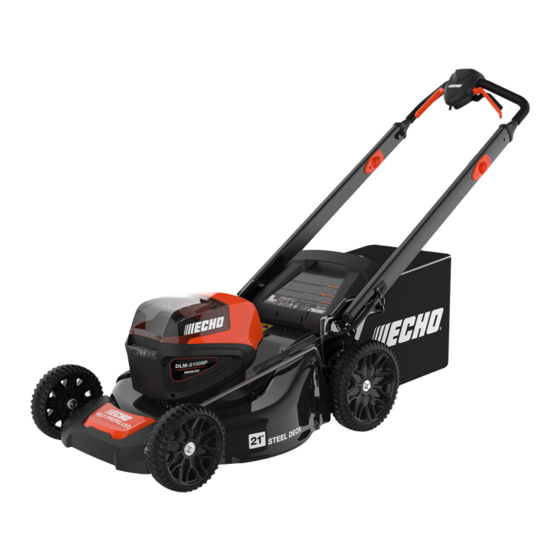
DLM-2100SP
This product contains chemicals known to the State of California
to cause cancer, birth defects, or other reproductive harm.
Cancer and Reproductive Harm www.P65Warnings.ca.gov
Read and understand all provided literature before use.
Failure to do so could result in serious injury.
Note: This product complies with CAN ICES-002 / NMB-002
99922238006
© 03/2024 ECHO Incorporated
Operator's
Manual
Mower
Advertisement
Table of Contents

Subscribe to Our Youtube Channel
Related Manuals for Echo DLM-2100SP


Summary of Contents for Echo DLM-2100SP
- Page 1 Cancer and Reproductive Harm www.P65Warnings.ca.gov Read and understand all provided literature before use. Failure to do so could result in serious injury. Note: This product complies with CAN ICES-002 / NMB-002 99922238006 © 03/2024 ECHO Incorporated...
-
Page 2: Table Of Contents
DLM-2100SP TABLE OF CONTENTS Introduction ........................3 Servicing Information .......................3 Parts / Serial Number ....................3 Service........................4 ECHO Consumer Product Support ................4 Product Registration ....................4 Additional Literature ....................4 Safety ..........................5 Manual Safety Symbols and Important Information...........6 International Symbols ....................6 Lawn Mower Safety Warnings ...................7 FCC Statement ......................12... -
Page 3: Introduction
Service Service of this product during the warranty period must be performed by an Authorized ECHO Service Dealer. For the name and address of the Authorized ECHO Service Dealer nearest you, ask your retailer or call: 1-800-432-ECHO (3246). Dealer information is also available on our Web Site www.echo-usa.com. -
Page 4: Service
Register your ECHO equipment online at www.echo-usa.com or by filling out the product registration sheet included in this manual. Registering your product confirms warranty coverage and provides a direct link to ECHO if we find it necessary to contact you. -
Page 5: Safety
Note: This enclosed message provides tips for use, care and maintenance of the unit. CIRCLE AND SLASH SYMBOL This symbol means the specific action shown is prohibited. Ignoring these prohibitions can result in serious or fatal injury. 99922238006 © 03/2024 ECHO Incorporated... -
Page 6: Manual Safety Symbols And Important Information
CAUTION — Do not stare at operating lamp. WARNING — Beware of thrown objects — keep bystanders away. WARNING — Keep hands and feet away from the blades. WARNING — Disconnect all batteries before maintenance. 99922238006 © 03/2024 ECHO Incorporated... -
Page 7: Lawn Mower Safety Warnings
Loose clothes, jewelry or long hair can be caught in moving parts. • While operating the lawnmower, always wear long trousers. Exposed skin increases the likelihood of injury from thrown objects. 99922238006 © 03/2024 ECHO Incorporated... - Page 8 • Do not use the lawnmower if the switch does not turn it on and off. Any lawnmower that cannot be controlled with the switch is dangerous and must be repaired. 99922238006 © 03/2024 ECHO Incorporated...
- Page 9 Before cleaning or inspecting the lawnmower, turn off the motor, wait until the blade(s)comes to a complete stop, operate the disabling device and/or remove all batteries, if removable. Accidental contact with the moving blade and moving parts may result in personal injury. 99922238006 © 03/2024 ECHO Incorporated...
- Page 10 Lawnmowers are dangerous in the hands of untrained users. Battery lawnmower use and care • Use only with ECHO eFORCE 56V battery series. Use of any other batterypacks may create a risk of injury and fire. • Recharge only with ECHO eFORCE 56V battery series chargers.A charger that is suitable for one type of battery pack(s) may create a risk of fire when used with another battery pack(s).
- Page 11 Charger Usage 39° F (4°C) - 104°F (40°C). Hot batteries in high ambient temperatures require longer charge times. To maximize battery life of batteries being stored more than 3 months, ECHO recommends batteries being stored at 3 green lights on the battery capacity indicator (BCI) and at room temperature.
-
Page 12: Fcc Statement
Increase the separation between the equipment and the receiver. • Connect the equipment into an outlet on a circuit different from that to which the receiver is connected. • Consult the dealer or an experienced radio/TV technician for help. 99922238006 © 03/2024 ECHO Incorporated... -
Page 13: Description
Locate the safety label(s) on your unit. Make sure the label(s) is legible and that you understand and follow the instructions on it. If a label cannot be read, a new one can be ordered from your ECHO dealer. Safety label is for example only. Your label my appear slightly different. -
Page 14: Contents
Due to packaging restrictions, some assembly may be necessary. After opening the carton, check for damage. Immediately notify your retailer or ECHO Dealer of damaged or missing parts. Use the contents list to check for missing parts. Mower Operator's manual... -
Page 15: Assembly
Remove the rubber edge guard from the upper handle. Insert the upper handle (3) into the lower handle (4). Put the bolts (25) through the holes and tighten with the nuts (26), using a screwdriver (not included). 99922238006 © 03/2024 ECHO Incorporated... -
Page 16: Unfold The Lower Handle
Make sure that the two handle pins are in the same position. Unfold the Lower Handle Pull up on the handle holes (13) to release the lower handles (4). Fold the lower handle up until the handle pins (P) lock into position. 99922238006 © 03/2024 ECHO Incorporated... -
Page 17: Mower Functions
Remove the side discharge chute. Open the rear discharge door and hold it. Hold the the grass catcher (8) by its handle and engage the hooks (14) on the door rod (15). Close the rear discharge door. 99922238006 © 03/2024 ECHO Incorporated... -
Page 18: Install The Mulch Plug
Keep the mulch plug installed. Remove the battery and safety key. Open the side discharge door (16) and hold it. Line up the recesses of the side discharge chute (9) below the pivot. Close the side discharge door. 99922238006 © 03/2024 ECHO Incorporated... -
Page 19: Set The Cutting Height
Set the Cutting Height The machine can be set to different cutting heights. Pull the height adjustment lever (6) rearward to increase the cutting height. Pull the height adjustment lever forward to decrease the cutting height. 99922238006 © 03/2024 ECHO Incorporated... -
Page 20: Installing And Removing The Battery
Open the battery door (17). Remove the safety key (19). Press the battery release button (18) on the mower. This will cause the battery to raise out of the tool slightly. Remove battery from the product. 99922238006 © 03/2024 ECHO Incorporated... -
Page 21: Operation
Press LED light button (21) to turn on the LED headlights. Stopping the unit Release the start handle to stop the machine. Note: Always remove the safety key and battery after you complete the work. 99922238006 © 03/2024 ECHO Incorporated... -
Page 22: Self-Propel Drive System
• Press and hold the start button (1), then pull up on the drive lever (11) or pull up on the drive lever (11), then press the start button (1). 99922238006 © 03/2024 ECHO Incorporated... -
Page 23: Operate On Slopes
Remove the safety key. Remove the battery. Open the rear discharge door and hold it. Hold the grass catcher by its handle and unhook it from the door rod. Close the rear discharge door. Empty the grass catcher. 99922238006 © 03/2024 ECHO Incorporated... -
Page 24: Operation Tips
Servicing Dealer for maintenance. To help you decide whether you want to DO-IT-YOURSELF or have the Dealer do it, each maintenance task has been graded. If the task is not listed, see your Dealer for repairs. 99922238006 © 03/2024 ECHO Incorporated... - Page 25 NOTICE - Time intervals shown are maximum. Actual use and your experience will determine the frequency of required maintenance. MAINTENANCE PROCEDURE NOTES: * Replacement is recommended based on the finding of damage or wear during inspection. 99922238006 © 03/2024 ECHO Incorporated...
-
Page 26: Cleaning Battery And Battery Compartment
Open the battery door (17). Depress battery release button (18) and slide battery out of battery compartment. Remove the safety key (19). Use compressed air or a soft bristle brush to remove debris from battery and battery compartment (23). 99922238006 © 03/2024 ECHO Incorporated... -
Page 27: Replace The Blade
Make sure the arrows on the fan engage the holes on the blade. 10. Securely tighten the blade bolt. Recommended tightening torque: 33-37 Nm. Apply Loctite # 242 or equivalent to bolt threads each time blade is removed and reinstalled. 99922238006 © 03/2024 ECHO Incorporated... -
Page 28: Troubleshooting
Remove the battery and are sticking to the clean the unit. Wait until the The lawn underside of the deck. grass dries before mowing. mower does not mulch properly. The mulching plug is Install the mulching plug. missing. 99922238006 © 03/2024 ECHO Incorporated... - Page 29 Stop the motor, and inspect The motor shaft is The lawn for damage. Contact your bent. mower is dealer for repair. excessively Repair before restarting. If noisy and The blade is vibration persists, contact vibrates. unbalanced. your dealer. 99922238006 © 03/2024 ECHO Incorporated...
- Page 30 Remove batteries and safety key, Blade will not turn. remove obstruction, try again. Start mower, at first not making a full Motor will not reach cut, then proceed to cut normally. If full speed. problem persists, consult authorized dealer. 99922238006 © 03/2024 ECHO Incorporated...
-
Page 31: Storage
Remove the battery and safety key. Pull through the handle holes to fold away the handles. Lock the handles into position. Stand the machine on end and make sure that the brackets touch the floor. 99922238006 © 03/2024 ECHO Incorporated... -
Page 32: Storage After Use
If battery is stored for longer than six months, charge it to 100% capacity. Charger Remove battery from charger. Disconnect charger from power supply. Store in a dry, dust-free place, out of the reach of children. 99922238006 © 03/2024 ECHO Incorporated... -
Page 33: Specifications
Battery is charging Green Fully charged Battery is too warm: (Remove for approx.30 minutes to allow to cool) OFF` Defective battery: (Remove and replace with blinking new battery if this occurs) Charge Time See Battery Operator's Manual 99922238006 © 03/2024 ECHO Incorporated... -
Page 34: Product Registration
Please go to http://www.echo-usa.com/Warranty/Register-Your-ECHO to register your new product online. It's FAST and EASY! NOTE: your information will never be sold or misused by ECHO, Incorporated. Registering your purchase enables us to contact you in the unlikely event of a service update or product recall, and verifies your ownership for warranty consideration. - Page 35 DLM-2100SP PRODUCT REGISTRATION 99922238006 © 03/2024 ECHO Incorporated...
-
Page 36: Warranty
ECHO dealer within the warranty period. The expense of delivering the product to the service center for warranty work and the expense of returning it back to the owner after repair or replacement will be paid by the owner. ECHO Incorporated’s, responsibility in respect to claims is limited to making the... - Page 37 The warranty does not extend to repairs made necessary by normal wear or by the use of parts or accessories which are either incompatible with the ECHO brand 56 Volt outdoor product or adversely affect its operation, performance, or durability.
- Page 38 NOTES DLM-2100SP NOTES 99922238006 © 03/2024 ECHO Incorporated...
- Page 39 DLM-2100SP NOTES NOTES 99922238006 © 03/2024 ECHO Incorporated...
- Page 40 405LMS100001 - 405LMS999999 417LMS100001 - 417LMS999999 ECHO INCORPORATED 400 Oakwood Road Lake Zurich, IL 60047 www.echo-usa.com...
Need help?
Do you have a question about the DLM-2100SP and is the answer not in the manual?
Questions and answers
My new mower blade want engage
The Echo DLM-2100SP mower blade may not engage due to an obstruction. To fix this, remove the batteries and safety key, clear any obstruction, and try again.
This answer is automatically generated
self propelled tries to engage but kicks out before it get fully engaged