Advertisement
Table of Contents
- 1 Connections for Your Vcr
- 2 Before You Operate Your Vcr
- 3 Message Center Front Panel Display
- 4 Vcr Status Displays
- 5 The Buttons on Your Remote
- 6 Programming Your Remote
- 7 Main Menu
- 8 Clock Menu
- 9 Setup Menu
- 10 Watching Tv through the Vcr
- 11 Camcorder Connected to Vcr
- 12 Playing Tapes
- 13 Instant Recording
- 14 Troubleshooting
- Download this manual
Advertisement
Table of Contents

Related Manuals for Zenith VRA424


Summary of Contents for Zenith VRA424
- Page 1 Operating Guide and Warranty for your new Zenith Entertainment Machine Model thanks for VRA424 choosing zenith...
- Page 2 • CAUTION: Do not attempt to modify this product in any way without written authorization from Zenith Electronics Corporation. Unauthorized modification could void the user’s authority to operate this product. This class B digital apparatus meets all requirements of the Canadian Interference-Causing Equipment Regulations.
- Page 3 Message Center Front Panel Display Auto Clock Set System Hook-up Cable (VCR to TV) VCR design and specifications are subject to change without prior notice. I N S TA L L AT I O N P A G E 3...
-
Page 4: Connections For Your Vcr
Antenna Flat Wire (300 ohm) 300/75 ohm Adaptor (Not provided) VHF/UHF/CATV Cable TV Wall Jack Turn off power or unplug VCR before making any connections. Back Panel of Stereo VCR AUX 1 R-AUDIO-L VIDEO VHF/UHF/CATV CH3 CH4 Cable TV Wall Jack Turn off power or unplug VCR before making any connections. - Page 5 Use A/V connections for a better picture. Back Panel of Stereo VCR AUX 1 R-AUDIO-L VIDEO VHF/UHF/CATV CH3 CH4 A/V cable is not provided with VCR. Accessory Audio/Video (A/V) Connections to VCR Back Panel of Stereo VCR AUX 1 R-AUDIO-L VIDEO VHF/UHF/CATV CH3 CH4 A/V cable is not provided with VCR.
-
Page 6: Before You Operate Your Vcr
Connect the Power (Required) Plug your VCR into an unswitched 120 Vac, 60 Hz household power outlet. Turn on the VCR by pressing the POWER on the remote or on the VCR’s front panel. Do not plug the VCR into a switched power outlet. - Page 7 3. Press NUMBER to choose desired option to be changed. 4. Press QUIT/CC to exit menu, or wait a few minutes and the VCR returns to normal operation. Select SpeakEZ Function ON/OFF A voice tells you how to use the features in the menus if SpeakEZ is ON.
- Page 8 Some things you must do and others you may Set Date and Time for Clock want to do Set the clock in the VCR to the current before you date and time. See CLOCK Menu for can operate details. your VCR Your VCR also has an Auto-Clock Set feature.
- Page 9 SETUP menu. We recom- mend keeping this option ON. See the SETUP menu for details. If you have a stereo VCR, select the audio format (HI-FI or NORMAL) to use when you play a tape. We recommend setting this option to HI-FI.
- Page 10 1. Set Date and Time for Clock. 2. Select Tuning Band for VCR. 3. Use Auto Channel to find channels. 1. Turn on VCR, TV, and cable box (if used). 2. Select TV (or CATV) for SOURCE on SETUP menu. 3. Obtain listing of PlusCode channels.
- Page 11 Channel 19 Channel 200 Cable Box or DBS /e je s to p p o w s p /e Testing your VCR with Cable Box and DBS Manufacturer Numbers Manufacturer Numbers Manufacturer ARCHER 1, 5, 6, 37, 49 CABLETENNA 1,37,49...
- Page 12 P A G E 1 2 I N S TA L L AT I O N Setup for VCR Plus+®C Before you can record programs On-Screen Instructions for TV Tuning Band with VCR Plus+®C , you START Press VCR+ must tell this...
- Page 13 Setup for VCR Plus+®C recording Channel Mapping Worksheets Channel found Network or Published via Auto Channel Station ID PlusCode (TV Ch/Cable Ch) Channel (VCR+ Ch) NOTE: Two PlusCode channel numbers may be listed for certain networks or stations. Enter both numbers on the worksheet.
- Page 14 Front Panel Diagram Descriptions of items you need to know to operate Front Panel Controls your VCR. These controls perform basic VCR operations. The Remote performs basic as well as advanced VCR operations. POWER On/Off Stop/Eject Button Selector power stop/eject...
-
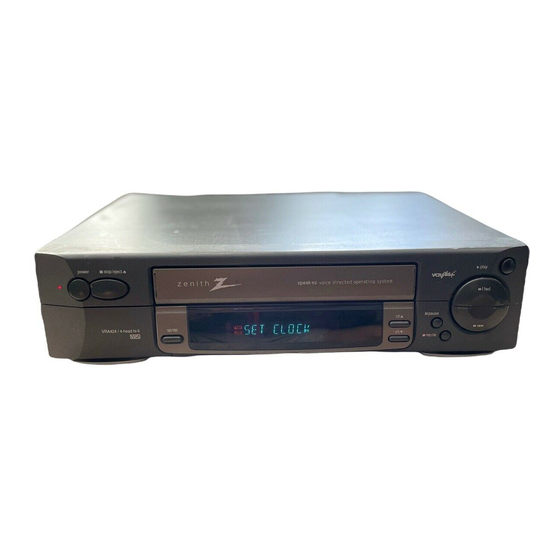
Page 15: Message Center Front Panel Display
The current time shows even while the VCR is off. Clock Message SET CLOCK — VCR clock is not set, or there was an extended power interruption. Playback Messages AUTO TRACK — Tape tracking is being adjusted from VCR. -
Page 16: Vcr Status Displays
Current date, day, and time Tape Counter Position VCR Status Display The VCR Status Display appears on the TV when a VCR function starts, like when you change a channel or select a different VCR mode. For example, pressing STOP while the VCR is in PLAY mode shows STOP in the display. -
Page 17: The Buttons On Your Remote
F FWD (Fast Forward)—Advances tape rapidly. MEMORY — Returns real-time tape counter to zero (M 0:00:00). MENU — Shows main menu. Accesses Zenith TV menus while in the TV mode. MUTE — Press to turn off TV sound. Press again to restore TV sound. -
Page 18: Programming Your Remote
If you are using Zenith products, the remote comes Mode Selector programmed for the most commonly used codes. For other brands — or if your remote fails to control your Zenith product — you will have to program the remote. Follow these steps for each product: 1. - Page 19 STILL modes. When the Ring is released, PLAY will resume at normal playback speed. Some of the speeds given in the pictorial above are not indicated in the VCR Status Display shown on the TV. Some video “noise” may be present in REV (Reverse) mode.
-
Page 20: Main Menu
VCR returns to normal operation. Note: Perform menu operations with the VCR and TV on, and tune the TV to channel 3 or 4. The VCR must also be in the VCR mode of operation. Press TV/VCR repeatedly until panel. -
Page 21: Clock Menu
Clock Menu The Clock Menu sets the clock in the VCR to the current time. There are two options. AUTO and MANUAL Auto Clock Set AUTO automatically sets the clock in the VCR to the current time and date. AUTO works only in areas where Data Service (DS) signals are provided along with normal TV signals. - Page 22 3. Press QUIT/CC to exit the menu system. Note: Set the VCR in TIMER mode by pressing POWER to turn off the VCR. The TIMER SET appears in the front panel of the VCR. You cannot operate the VCR manually while it is recording.
-
Page 23: Setup Menu
VCR. Choose AUX1 if you want to see the program from accessory equipment, such as a camcorder, connected to the Audio/Video (A/V) IN jacks on the VCR rear panel. Choose AUX2 if you want to see the program from accessory equipment, such as a camcorder, connected to the Audio/Video (A/V) IN jacks on the VCR front panel. - Page 24 Selects HI-FI or NORMAL for tape playback. HI-FI (High Fidelity) provides stereo sound, if present on the tape, to the left and right VCR AUDIO output jacks on the back of the VCR. NORMAL provides monaural sound, regardless of the audio format present on the tape.
-
Page 25: Watching Tv Through The Vcr
TV. Selects cable box channels at the cable box. Selecting Channels at the TV when VCR is 1. Turn TV and VCR on. 2. Place VCR in TV mode by pressing TV/VCR on the remote repeatedly until the symbol disappears from the VCR front panel. -
Page 26: Camcorder Connected To Vcr
SOURCE Shows the program source—TV, CATV, or AUX—selected for the VCR to receive. TUNER The VCR is using its Tuner to receive programs from an antenna or cable. Selects programs for the VCR from a rooftop-type antenna. CATV Selects programs for the VCR from Cable TV. -
Page 27: Playing Tapes
2. Press STOP/EJECT at the VCR until the cassette is ejected. Note: This VCR records only in SP and EP speeds. Your VCR sets the playback speed automatically to the speed used to record the tape. (Continued on next page) - Page 28 Press PLAY to resume normal tape playing. Note: When the reverse slow mode continues for more than 30 secondes, the VCR will auto- matically change to play mode. Tape Rewind and Fast Forward (While in Stop mode) Press and release REW or F FWD (Fast Forward), as desired.
-
Page 29: Instant Recording
4. Select the channel to be watched and recorded at the VCR. If you have a cable box, select the cable box output channel (usually 3 or 4) at the VCR. Select cable box channels at the cable box. - Page 30 A/V input jacks, select the A/V source at the TV for a better picture. Select the channel to be watched and recorded at the VCR. If you have a cable box, select the cable box output channel (usually 3 or 4) at the VCR.
- Page 31 TV’s channel selector. Note: To return to the show you’re recording, select channel 3 or 4 at the TV. Place the VCR in the VCR mode by pressing TV/VCR on the remote to show symbol in the VCR’s front panel.
- Page 32 Timer by following the procedure in the TIMER MENU section. If you have a cable box, select channel 3 or 4 (at the VCR) as the channel to be record- ed. Keep your cable box on when using the Timer to record.
- Page 33 Simply enter the PlusCode number for your favorite show from the TV listing, and your VCR does the rest. It turns on at the proper time, selects the channel to be recorded, and starts recording. You can record a show once, or on a daily or weekly basis.
-
Page 34: Troubleshooting
TV to receive the video signal from the VCR. You will probably use the Antenna In connec- yourself. tion to the TV. Select channel 3 or 4 at the TV. Place the VCR in the VCR mode by pressing TV/VCR on the remote repeatedly until it on and select channel 3 or 4 at the VCR. - Page 35 Possible Cause Camcorder image is not shown. Camcorder is off. Camcorder image via A/V input VCR SOURCE is not set to AUX. to VCR is not shown on TV screen. Timer recording is not possible. Clock in VCR is not set to correct time.
- Page 36 See your Zenith approved service center for cleaning. Cabinet Cleaning Clean the outside surfaces of the VCR with a soft lint-free cloth as required. Use care not to scratch the VCR during cleaning. Stereo Audio Record and/or Playback Problems Possible Cause TV is not Stereo-compatible.
- Page 37 Recording ......33 VCR Status Displays ....... . 16 Warranty.
- Page 38 Broken or lost remote? Perhaps you would just like the convenience of having a second remote on hand. Order your replacement remote control direct from Zenith! To ensure that you receive the correct remote, have your television's model number ready when you call.
- Page 39 N OT E S P A G E 3 9 Notes Use this page to makes notes.
- Page 40 Read your Operating Guide carefully so that you will understand the operation of your set and how to adjust the customer controls. Carry-In Service The video product must be taken to a U.S. or Canadian Zenith authorized service center for warranty service and must be picked up by the owner.
Need help?
Do you have a question about the VRA424 and is the answer not in the manual?
Questions and answers