
Related Manuals for Zenith VRC4101


Summary of Contents for Zenith VRC4101
- Page 1 VRC4101 E N J O Y T H E V I E W ® o p e r a t i n g g u i d e / w a r r a n t y...
- Page 2 • CAUTION: Do not attempt to modify this product in any way without written authorization from Zenith Electronics Corporation. Unauthorized modification could void the user’s authority to operate this product. This class B digital apparatus meets all requirements of the Canadian Interference-Causing Equipment Regulations.
-
Page 3: Safety Tips
IMPORTANT SAFETY INSTRUCTIONS These simple precautions will help ensure that you get many years of safe enjoyment from your new product. 1. Read Instructions Read all of the safety and operating instructions before operating the product. 2. Retain Instructions Keep all safety and operating instructions for future reference. - Page 4 SA F E T Y T I P S P A G E 4 IMPORTANT SAFETY INSTRUCTIONS These simple precautions will help ensure that you get many years of safe enjoyment from your new product. 15. Lightning For added protection for this product during a lightning storm, or when product is left unattended...
-
Page 5: Table Of Contents
INSTALLATION ......6-11 VCR Features Chart ......6 Connections for Your VCR . -
Page 6: Vcr Features Chart
P A G E 6 I N S TA L L AT I O N VCR Features Chart This page shows the features of your VCR and the differences between the models. FEATURES Easy Watch Playback 4-Heads (Special Video Effects) -
Page 7: Connections For Your Vcr
Antenna Flat Wire (300 ohm) 300/75 ohm Adaptor (Not provided) Cable TV Back Panel of Typical TV Wall Jack Turn off power or unplug VCR before making any connections. Back Panel of Typical TV ANT. AUDIO VIDEO AUDIO VHF/UHF /CATV... -
Page 8: Connections 7
Use A/V connections for a better picture. Back Panel of Monaural VCR ANT. AUDIO VIDEO MONO LINE1(AUX1) A/V cable is not provided with VCR. Accessory Audio/Video (A/V) Connections to VCR Back Panel of Monaural VCR ANT. AUDIO VIDEO MONO LINE1(AUX1) A/V cable is not provided with VCR. -
Page 9: Before You Operate Your Vcr
Note: Perform menu operations with the VCR and TV on, and tune the TV to channel 3 or 4. The VCR must also be in the VCR mode of operation. Press the TV/VCR button repeatedly until VCR indicator light appears in the front panel. - Page 10 LANGUAGE SELECT option on the SETUP menu for details. Set Date and Time for Clock Set the clock in the VCR to the current date and time. See CLOCK Menu on page 16 for details. Your VCR also has an Auto-Clock Set feature.
-
Page 11: Before You Operate Your Vcr
Before you operate your VCR Some things you must do and others you may want to do before you can operate your VCR. Select Source for VCR (Optional) Set the source of the VCR for the type of program signal you have connected to the ANT IN jack on the back of the VCR. -
Page 12: Controls And Displays
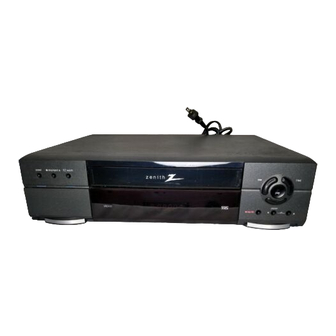
C O N T R O L S A N D D I S P L AY S Front Panel Diagram Descriptions of items you need to know to operate your VCR. Front Panel Controls These controls perform basic VCR operations. The Remote performs basic as well as advanced VCR operations. Stop/Eject POWER On/Off Selector... -
Page 13: Message Center Front Panel Display
Message center front panel display Information appears in the Front Panel Display depending on the VCR function being used. A Cassette is in the VCR VCR is Recording VCR functions are available and channels are selected at VCR Front Panel Display shows which VCR function you are using. -
Page 14: Vcr Status Displays
C O N T R O L S A N D D I S P L AY S VCR Status Displays On-Screen displays tell you the status of the tape inserted and VCR functions. Current mode of operation (STOP, PAUSE, RECORD, PLAY, etc.) -
Page 15: Operation
PAUSE — Pauses tape temporarily during playback or record. PLAY — Begins tape playback. POWER — Turns VCR On and Off. Also turns VCR Timer Off and On, if programmed. QUIT — Exits menu system. REC/ITR — Begins tape recording. -
Page 16: Clock Menu
O P E R AT I O N Clock Menu The Clock Menu sets the clock in the VCR to the current time. There are two options AUTO and MANUAL. Auto Clock Set AUTO automatically sets the clock in the VCR to the current time and date. -
Page 17: Timer Menu
Timer Menu The TIMER Menu tells the VCR when to record a program on a day and at a time you specify. You can specify eight different events to be recorded in a one-year period. MAIN MENU Press 2 CLOCK :... -
Page 18: Setup Menu
Selects TV, CATV, AUX1, or AUX2 as the source of the program to watch or record. Choose TV if you have an antenna connected to the VCR. Choose CATV if you have a cable system (with or without a cable box) connected to the VCR. Choose AUX1 if you want to see the program from accessory equipment, such as a camcorder, connected to the Audio/Video (A/V) IN jacks on the VCR rear panel. -
Page 19: Watching Tv Through The Vcr
A/V input jacks, check your TV operating manual to select the A/V source for a better picture. 4. Select the channel you’d like to watch at the VCR. If you have a cable box, select channel 3 or 4 at the VCR. -
Page 20: Camcorder Connected To Vcr
CATV Selects programs for the VCR from Cable TV. AUX1 Selects programs for the VCR from the rear R-AUDIO-L—VIDEO IN jacks (where you may have connected your camcorder). AUX2 Selects programs for the VCR from the front R-AUDIO-L—VIDEO IN jacks (where you may have connected your camcorder). -
Page 21: Playing Tapes
1. Press STOP if the tape is playing. 2. Press STOP/EJECT at the VCR until the cassette is ejected. Note: This VCR records only in SP and EP speeds. Your VCR sets the playback speed automatically to the speed used to record the tape. -
Page 22: Playing Tapes
P A G E 2 2 O P E R AT I O N Playing Tapes This page explains how to use the remote to play tapes on your VCR. Auto/Manual Tracking Adjustment Your VCR adjusts tracking automatically when you play a tape. If the tape was recorded on a different VCR, streaks (video noise) may appear. -
Page 23: Instant Recording
A/V source at the TV for a better picture. Select the channel to be watched and recorded at the VCR. If you have a cable box, select the cable box output channel (usually 3 or 4) at the VCR. Select cable box channels at the cable box. -
Page 24: Instant Recording
A/V source at the TV for a better picture. Select the channel to be watched and recorded at the VCR. If you have a cable box, select the cable box output channel (usually 3 or 4) at the VCR. Select cable box channels at the cable box. - Page 25 Note: To return to the show you’re recording, select channel 3 or 4 at the TV. Place the VCR in the VCR mode by pressing the TV/VCR button on the remote to show the VCR indicator light in the VCR’s front panel.
-
Page 26: Recording While You're Away
TIMER MENU section. If you have a cable box, select channel 3 or 4 (ar the VCR) as the channel to be recorded. Keep your cable box on when using the Timer to record. -
Page 27: Easy Watch Playback
Note: When you set the timer for more than two timer programs. The VCR starts playing back from the earliest one when you use Easy Watch Playback. O P E R AT I O N P A G E 2 7... -
Page 28: Troubleshooting
Please refer to this chart before calling for service. First, turn on the TV and VCR. Select appropriate input for the TV to receive the video signal from the VCR. You will probably use the Antenna In connection to the TV. Select channel 3 or 4 at the TV. -
Page 29: Troubleshooting
Do not use a dry-type head-cleaning system. It may seriously damage the VCR and cassettes used in the VCR. Snow, streaking in picture, and horizontal pulling indicate the need for professional video head cleaning. See your Zenith approved service center for cleaning. -
Page 30: Specifications
More than 43 dB (SP mode) (LINE) -6.0 dBm more than 47 kohms (LINE) -6.0 dBm less than 1.5 kohms More than 43 dB (SP mode) 200 Hz to 10kHz (SP mode) Hook-up Cable (VCR to TV) (1) Batteries (2) Remote Control (1) - Page 31 ZENITH 5 FUNCTION REMOTE Broken or lost remote? Need a second remote or more functions? Order direct from Zenith!! • Operates TV, VCR, CD, DVD, DIVX, DSS & Cable Box • Operates PIP and Most Screen Menus • Extended Range & MORE!!! Orders 1 year or more after product purchase may receive upgraded models.
-
Page 32: Warranty
Read your Operating Guide carefully so that you will understand the operation of your set and how to adjust the customer controls. Carry-In Service The video product must be taken to a U.S. or Canadian Zenith authorized service center for warranty service and must be picked up by the owner. TV Set Performance It is the owner’s responsibility to maintain the TV receiver with which the video product is used, and the associated antenna...
Need help?
Do you have a question about the VRC4101 and is the answer not in the manual?
Questions and answers
how to record. i have no remote
To record with the Zenith VRC4101 without a remote:
1. Turn on the TV and VCR.
2. Insert a blank tape into the VCR.
3. Set the recording speed using the SP/EP button on the VCR.
4. Press the REC/ITR button on the VCR until recording begins. The REC indicator light will appear.
5. To stop recording, press the STOP or STOP/EJECT button on the VCR.
Note: You may not be able to set timer recordings or switch between TV and VCR mode without the remote.
This answer is automatically generated