Table of Contents
Advertisement
Quick Links
Model # 900138: Page 1
USER MANUAL
Bottled Water Dispenser
Model # 7LCHSSF,7LCH
WARNING
TO REDUCE THE RISK OF INJURY AND
PROPERTY DAMAGE, USER MUST READ
THIS MANUAL BEFORE ASSEMBLING,
INSTALLING & OPERATING DISPENSER.
SAVE FOR FUTURE USE
IMPORTANT: Do NOT Return Dispenser To Store.
If you have a question or problem, please contact 888-828-1426 for assistance.
LC-ETI.7LUM
Advertisement
Table of Contents

Related Manuals for Electrotemp Technologies 7LCHSSF


Summary of Contents for Electrotemp Technologies 7LCHSSF
- Page 1 Model # 900138: Page 1 USER MANUAL Bottled Water Dispenser Model # 7LCHSSF,7LCH WARNING TO REDUCE THE RISK OF INJURY AND PROPERTY DAMAGE, USER MUST READ THIS MANUAL BEFORE ASSEMBLING, INSTALLING & OPERATING DISPENSER. SAVE FOR FUTURE USE IMPORTANT: Do NOT Return Dispenser To Store.
-
Page 2: Safety Precautions
Page 2 SAFETY PRECAUTIONS To reduce risk of injury and property damage, user must read this entire manual before assembling, installing & operating dispenser. Failure to execute the instructions in this manual can cause personal injury or property damage. This product dispenses water at very high temperatures. Failure to use properly can cause personal injury. -
Page 3: Table Of Contents
You will need this information to obtain warranty service. Product Bottled Water Dispenser Model Number 7LCHSSF,7LCH Serial ID Number Date of Purchase IMPORTANT: Do NOT Return Dispenser To Store. If you have a question or problem, please contact 888-828-1426 for assistance. -
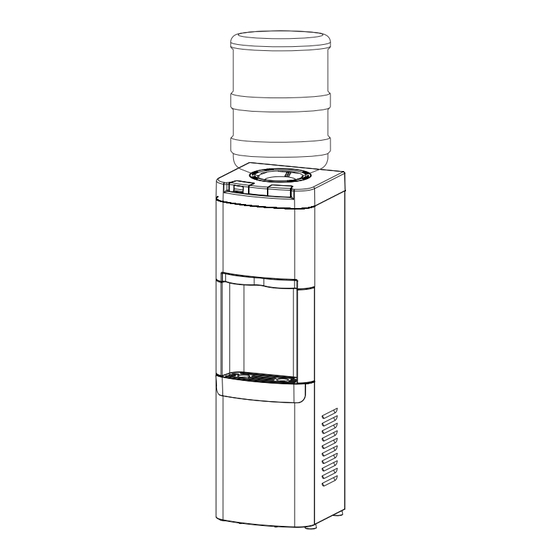
Page 4: Specifications
Hot Capacity / Hour 1 Gallon Hot Temp Range 65°C – 93°C / 149°F – 199°F Dimensions 91.3 cm H x 28.6 cm W x 27.5 cm D 7LCHSSF Net Weight 13.9 kg 7LCH Net Weight 13.5 kg PARTS & FEATURES Bottle Probe... -
Page 5: Assembly
Page 5 ASSEMBLY Keep plastic bags away from children. Remove dispenser from packaging. Unpack drip tray and insert into dispenser. Properly dispose all of packaging. IMPORTANT: Do NOT Return Dispenser To Store. If you have a question or problem, please contact 888-828-1426 for assistance. -
Page 6: Cleaning Prior To Initial Use
Page 6 CLEANING PRIOR TO INITIAL USE Your cooler had a long journey over the ocean inside of a sealed container and baked by the sun on the deck of the ship. It is possible that it has a stagnant smell. To remove the odor please clean it before its initial use. -
Page 7: The History Of Different Caps On Large Water Bottles
Page 7 THE HISTORY OF DIFFERENT CAPS ON LARGE WATER BOTTLES Water coolers were invented about 60 years ago. Originally glass bottles were used with plain caps. These caps were solid on the top. Water coolers were open at the top. The Water bottle needed to be inverted quickly into the opening. -
Page 8: Spill, No-Leak Bottle Receptacle Diagram
Page 8 NO-SPILL, NO-LEAK BOTTLE RECEPTACLE DIAGRAM IMPORTANT: Do NOT Return Dispenser To Store. If you have a question or problem, please contact 888-828-1426 for assistance. -
Page 9: Installation
Page 9 INSTALLATION To prevent accidental tip hazard, dispenser must be securely anchored to wall as shown. Place dispenser upright. Locate dispenser on a hard and level surface in a cool shaded location near a grounded wall outlet. Notice: Do NOT plug in power cord yet. If dispenser is not fully leveled it will self correct with the weight of a full bottle of water. -
Page 10: Operation
Page 10 OPERATION This unit is intended for water dispensing only. Do NOT use other liquids. Do NOT use for other purposes. This dispenser has been designed to use water bottles with 3 & 5 gallon capacity. Do NOT use alternative bottles. Initial Set Up Notice: To prevent damage to compressor, allow unit to sit upright for at least 4 hours prior to operating. - Page 11 Page 11 Dispensing Hot Water This unit dispenses water at temperatures that can cause severe burns. Avoid direct contact with hot water. Keep children and pets away from unit while dispensing. Never allow children to dispense hot water without proper and direct supervision.
-
Page 12: Proper Care & Cleaning
Page 12 PROPER CARE & CLEANING General Cleaning Perform: As needed (usually once every 12 weeks) Time Required: 5 minutes. Note: Do NOT use abrasive materials or chemical cleaners. Clean cabinet surfaces with a soft cloth and warm soapy water, then rinse. Wipe dust from back of dispenser to improve efficiency. - Page 13 Page 13 Remove probe assembly by turning it counter clockwise. Remove plastic baffle from inside reservoir. Clean probe assembly and baffle with a soft cloth using a mixture of one gallon tap water and 1 tablespoons unscented household bleach, then rinse. 10.
-
Page 14: Troubleshooting
Page 14 TROUBLESHOOTING Dispenser does not operate. Make sure the power cord is properly connected to a working outlet. • Water is leaking. Bottle may have a leak. Remove bottle and replace with new bottle. • If leak remains, remove bottle and call 888-828-1426 for assistance. •... - Page 15 Free Manuals Download Website h p://myh66.com h p://usermanuals.us h p://www.somanuals.com h p://www.4manuals.cc h p://www.manual-lib.com h p://www.404manual.com h p://www.luxmanual.com h p://aubethermostatmanual.com Golf course search by state h p://golfingnear.com Email search by domain h p://emailbydomain.com Auto manuals search h p://auto.somanuals.com TV manuals search h p://tv.somanuals.com...
Need help?
Do you have a question about the 7LCHSSF and is the answer not in the manual?
Questions and answers