bNovate Technologies BactoSense Instruction Manual
Rapid bacterial monitoring system
Hide thumbs
Also See for BactoSense:
- User manual (163 pages) ,
- Reference handbook (71 pages) ,
- Quick start manual (2 pages)

Related Manuals for bNovate Technologies BactoSense


Summary of Contents for bNovate Technologies BactoSense
- Page 1 Document number: 40102-02EN Version: 02 Valid from: SW 2.2 Instruction Manual BactoSense Rapid Bacterial Monitoring System...
- Page 2 © bNovate Technologies SA, subject to technical changes without notice. This document has been written by bNovate Technologies SA. Copying or modifying the content or giving this document to third parties is permitted only with the express consent of bNovate Technologies SA.
- Page 3 Technologies SA Tel. +41 21 552 14 21 Ch. Dent d’Oche 1A info@bnovate.com CH-1024 Ecublens www.bnovate.com Switzerland...
-
Page 4: Table Of Contents
3 Instrument Overview ........6 3.1 BactoSense overview ....... 6 3.2 Technical data . - Page 5 12 Supply Scope, Accessories and Consumables ....83 12.1 BactoSense ........83 12.2 Accessories .
-
Page 6: Glossary
The terms used in this document can be found with in depth explanations in the Reference Handbook. TERM EXPLANATION Autosampler Automated sampling device, part of the BactoSense Multi instrument. Cartridge Cartridge with fluorescent dyes, bleach, rinse and waste compartments. -
Page 7: General User Information
About this instruction manual This instruction manual provides the user with helpful information about the entire life cycle of the BactoSense and its peripheral devices. Before commissioning and using the instrument, you should be completely familiar with the instruction manual. -
Page 8: Declaration Of Conformity, Norms And Classifications
For more details on the CE mark, please refer to the separate declaration of conformity. For UL/CSA/FCC compliance, please refer to the CB test report. (https://certificates.iecee.org: CH-11152). The BactoSense is classified as a Class 1 Laser product according to the standard IEC 60825-1:2014. -
Page 9: Safety Symbols
Pictograms All pictograms used in this document are explained below: Additional information about the current topic. Practical procedures when working with the BactoSense. The screenshot is an example of the graphical user interface and may be different on your instrument. -
Page 10: Intended Use Of The Bactosense
General User Information Intended use of the BactoSense The intended use of the BactoSense and peripheral equipment is the measurement of the concentration of microbial cells in drinking water. The instrument must be operated by trained technical personnel who have read and understood the content of the instruction manual. -
Page 11: Instrument Overview
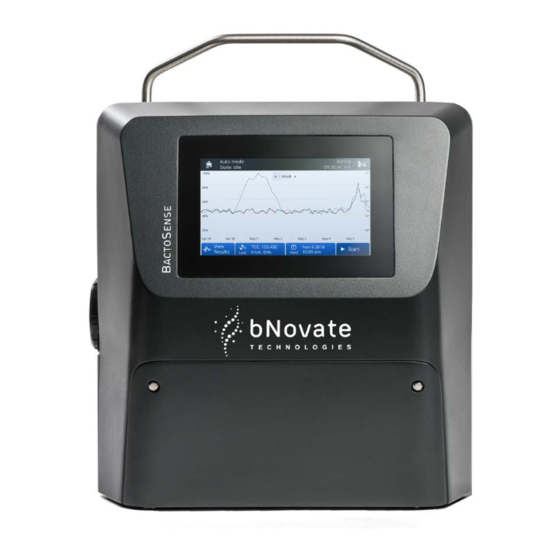
Instrument Overview Instruction Manual BactoSense Instrument Overview BactoSense overview Below an overview of the BactoSense is shown. An overview of the cartridge can be found in section 6.5.2. Figure 3-1 BactoSense overview Handle Wall mount Desiccant bag compartment cap Online sampling device... - Page 12 Instruction Manual BactoSense Instrument Overview 3.1.1 Type plate of the BactoSense The type plate of the BactoSense can be found on the right hand-side of the instrument. Figure 3-2 Type plate of the BactoSense. Manufacturer Product name Serial number Barcode...
- Page 13 Instruction Manual BactoSense 3.1.2 Type plate of the BactoSense power supply The type plate of the BactoSense power supply can be found on the power supply and has the following elements: Figure 3-3 Type plate of the BactoSense power supply.
-
Page 14: Technical Data
Instruction Manual BactoSense Instrument Overview Technical data Table 3-1 Technical data of the BactoSense GENERAL Operating environment Indoor use Operating altitude Max. 2000 m (6600 feet) above sea level Operating temperature 5 °C – 30 °C Operating humidity 10 % – 90 % RH Storage temperature 10 °C –... - Page 15 Instrument Overview Instruction Manual BactoSense Analogue and digital outputs 2 x analogue outputs 0/4 – 20 mA, galvanically isolated, recommended 250 Ohm load. 4 x digital outputs, freely configurable, SSR output: Max. 60 VDC or 30 VAC, max. 550 mW, ON-resistance 25 Ohm.
- Page 16 Instruction Manual BactoSense Instrument Overview Online sampling device Flow through device: 200 – 400 mL/min Pressure in device: Max. 0.5 bar Aspirated volume: 260 μL Measured volume: 90 μL Inlet tubing • Material: PFA (transparent) • Outer diameter: 6.35 mm (1/4”) •...
-
Page 17: Safety
If the Instruction Manual is lost, you can contact bNovate to request a replacement www.bnovate.com/contact. Moisture or condensation on the electrical components If moisture enters the instrument, the BactoSense can be damaged. • The covers and lids must always be attached during operation. -
Page 18: Safe Handling Of Chemicals
Instruction Manual BactoSense Safety Use of aggressive chemicals Use of aggressive chemicals can cause damage to instrument components. • Do not use aggressive chemicals or cleaning agents. CAUTION! • Should the instrument come in contact with aggressive chemicals, clean it thoroughly with a neutral cleaning agent. -
Page 19: Preventing Unauthorized Online Access
Safety Instruction Manual BactoSense Preventing unauthorized online access bNovate instruments are equipped with an integrated web user interface. Any malintending internet user can access your instrument when you expose the instrument directly to the internet. CAUTION! Please note the following points to prevent this: •... -
Page 20: Installation
• Use the original packaging of the BactoSense when returning components. Unpacking the BactoSense Carefully follow the procedure below to unpack the BactoSense instrument from its packaging. WORK STEP ADDITIONAL INFO / IMAGES Open the box and remove the first lid. -
Page 21: Placement Of The Bactosense
Installation Instruction Manual BactoSense Placement of the BactoSense The BactoSense can be operated as a bench top instrument on a flat surface, or mounted to a wall or panel. Note the following points for selecting an appropriate operating location: •... -
Page 22: Connecting The Bactosense To Power
The power supply comes in an IP67 enclosure and a cable with either a plug type J, type E or type G. For connecting the BactoSense to power using one of these plugs supplied by bNovate, follow the instructions in section 5.3.1. - Page 23 5.3.2 Modifying the standard power supply unit with a different connector The following procedure only applies, if the BactoSense shall be connected to a power source with a different plug than what has been delivered together with the standard power supply unit (J, E or G). In that case, the power supply unit is opened and the new connector installed manually.
- Page 24 Instruction Manual BactoSense Installation WORK STEP ADDITIONAL INFO / IMAGES Ensure that the power supply is not connected to power. DANGER! Remove the cover of the enclosure by unscrewing the four screws (circles). Remove the C13 connector (A) and unscrew it to open.
-
Page 25: Connecting The Io-Box
5.3.1. Connecting the IO-box The IO-box is an accessory to the BactoSense. It can be used to connect the in- and outputs of the BactoSense to a Programmable Logic Controller (PLC) / SCADA system. The following in- and outputs can be connected to the box: Digital •... - Page 26 The digital inputs (ports 14 – 17) must be connected with a voltage of 5 – 25 V to produce an input signal of 1. Otherwise the signal is 0. • If any of the digital inputs is 1 (e.g. 1-0-0-0), the BactoSense enters “PLC-mode”. For more information refer to the Reference Handbook, section 2.2.
- Page 27 Installation Instruction Manual BactoSense 5.4.2 IO-box reference table Table 5-1 IO-box reference table Terminal Function Terminal Color Cable Color Digital output 1 - c Grey Digital output 1 - no Grey Blue Digital output 2 - c Grey Pink Digital output 2 - no...
- Page 28 Instruction Manual BactoSense Installation 5.4.3 Connecting the IO-box WORK STEP ADDITIONAL INFO / IMAGES Insert the two M16 plugs of the IO-box on the right-hand side of the instrument. Remove the cover of the enclosure by unscrewing the four screws (circles).
-
Page 29: Connecting The Outputs Without Io-Box
Instruction Manual BactoSense Connecting the outputs without IO-box The BactoSense exposes the outputs on a 12 pin M16 female connector. The use of an IO- box is recommended however. The pinout of the connector is given below. Figure 5-2 Overview of the output connector pinout... -
Page 30: Connecting The Inputs Without Io-Box
Installation Connecting the inputs without IO-box The BactoSense exposes the inputs on a 5 pin M16 female connector. The use of an IO-box is recommended. The pinout of the connector is given below. Figure 5-3 Overview of the input connector pinouts... -
Page 31: Installation Of The Manual Sampling Device
Carefully insert the connector of the sampling device into the sampling device port on the left hand-side of the BactoSense by inserting the metallic positioning pins located inside of the sampling device connector into the openings on the BactoSense sampling... - Page 32 Instruction Manual BactoSense Installation WORK STEP ADDITIONAL INFO / IMAGES Then tighten the knurled fixation ring until the sampling device is installed tightly. Finger-tightening only. Do not use any tools. CAUTION! It is recommended to clean the sampling device after installation. If a Washstation is available, follow the procedure in section 8.2.2, otherwise the procedure in section...
-
Page 33: Installation Of The Online Sampling Device
In drinking water installations, connect the outlet tubing to a drain to make sure that water which has been diverted from the drinking water pipe system is not returned after WARNING! flowing through the additional fittings, tubings and BactoSense sampling device. - Page 34 8.2.4. WORK STEP ADDITIONAL INFO / IMAGES Make sure the sampling device is not installed at the BactoSense. Unscrew the nuts of the two connectors on the sampling device. If necessary use a spanner. Be careful not to lose the ferrules located inside the nut.
- Page 35 Installation Instruction Manual BactoSense 5.8.2 Installing the online sampling device at the BactoSense In this section, the installation of the online sampling device with attached inlet and outlet tubings is described. Figure 5-6 Typical installation for the online mode using the online sampling device.
- Page 36 Flow rate range: 200 to 400 mL/min. If the flow rate is not within the specified limits, results may be inaccurate or the BactoSense may CAUTION! be damaged. Make sure the pressure in the sampling device does not exceed 0.5 bar.
-
Page 37: Connectivity Options
Installation Instruction Manual BactoSense Connectivity options The BactoSense offers several options for integration and online data access. Table 5-2 BactoSense connectivity options Connectivity Option Documentation Web user interface Reference Handbook, chapter 5 HTTP and HTTPS Reference Handbook, section 6.3 Modbus TCP Reference Handbook, section 3.1... -
Page 38: General Operations And Configurations
Switching off If you are logged in and want to switch the BactoSense off, tap on the logout button on the top right corner of the user interface and select Power off. If you want to switch off from the login page itself, press the power button for 10 seconds. - Page 39 To log in again, follow the procedure described in section 6.2.1. 6.2.3 Auto logout The BactoSense auto logout is a functionality to automatically log out from the user interface after a configurable time period of user interface inactivity. The auto logout can be configured by Admin users.
- Page 40 Save. 6.2.5 Changing password requirements Admin users can change the requirements for user role passwords. WORK STEP Navigate to the BactoSense Home menu and press on System settings. Press the Users button. Press the Settings button. Change the password requirements: •...
- Page 41 General Operations and Configurations Instruction Manual BactoSense 6.2.6 User roles and permissions Table 6-1 User roles and permissions RIGHT BASIC ADVANCED ADMIN View last result View all results and export Start, stop, and schedule measurement ...
-
Page 42: Basic Configurations
Instruction Manual BactoSense General Operations and Configurations RIGHT BASIC ADVANCED ADMIN Create other users Change authentication settings Set device name Set date and time Change network settings Change services settings Activate Modbus with key or deactivate ... - Page 43 General Operations and Configurations Instruction Manual BactoSense 6.3.2 Changing date and time Date and time can only be changed by admin users. If time synchronization is enabled, either with NTP servers or through Modbus TCP, your manual date and time settings will be overridden during the next synchronization.
-
Page 44: The Bactosense User Interface
Instruction Manual BactoSense General Operations and Configurations The BactoSense user interface 6.4.1 General structure and home menu Figure 6-2 The Home menu of the BactoSense user interface. The BactoSense user interface is divided into 3 main sections: Top bar Content view... - Page 45 General Operations and Configurations Instruction Manual BactoSense 6.4.2 Top bar status icons Top bar icons are displayed in the bar in the top of the display. They indicate the status of the instrument. Table 6-2 Top bar icons ICON DESCRIPTION...
-
Page 46: Cartridge Management
Cartridge management The BactoSense cartridges contain the reagents required for measuring and maintaining the instrument clean. The BactoSense can be operated with different cartridge types. In the following sections, the handling of the cartridge is explained. Cartridge storage, transportation and refill are described in chapter 11. - Page 47 General Operations and Configurations Instruction Manual BactoSense 6.5.2 Cartridge overview Figure 6-3 Overview of the cartridge installed in the BactoSense Waste connector (black or beige) Rinse connector (blue) Clean connector (red) Dye connector (green) ...
- Page 48 Instruction Manual BactoSense General Operations and Configurations Strictly follow the procedure of the on-screen wizard for removing or installing a cartridge. This procedure includes an automatic initialization and priming of the cartridge, which is important for proper functioning. Do not remove or install cartridges without this procedure.
- Page 49 General Operations and Configurations Instruction Manual BactoSense 6.5.5 Removing a cartridge This procedure is intended for the removal of a cartridge, without immediate installation of another cartridge. If you want to exchange cartridges, follow the procedure described in section 6.5.4.
- Page 50 6.5.6 Installing a cartridge This procedure is intended for the installation of a cartridge, when no other cartridge is installed in the BactoSense. If there is already a cartridge and you want to exchange cartridges, follow the procedure described in section 6.5.4.
-
Page 51: Switching Between Sampling Devices
6.4.2. Switching between sampling devices The BactoSense can be operated with either the manual or the online sampling device. The following procedure describes the exchange of sampling devices. Sampling device storage information can be found in section 11.1.2. - Page 52 Make sure the white sealing plug still sits tightly in the connector of the sampling device. If not, it may have remained in the BactoSense sampling device connector. In this case carefully remove it with tweezers and place it back in the sampling device.
- Page 53 Make sure the white sealing plug still sits tightly in the connector of the sampling device. If not, it may have remained in the BactoSense sampling device connector. In this case, carefully remove it with tweezers and place it back in the sampling device.
-
Page 54: Operational Qualification
BactoSense. • To assess the cleanliness of the BactoSense and rule out a contamination, perform the cleanliness verification procedure in section 6.7.1. • To do a full instrument validation procedure, use the Validation Kit (see section 12.3). - Page 55 After finishing, press the Next button to review the results. Look at the results and compare them to the reference values indicated below. The BactoSense is clean if the following criteria are fulfilled: For TCC cartridges: TCC [/mL] < 300 •...
-
Page 56: Measurements
Measuring automatically in online mode Measuring in online (also called automatic or auto) mode describes a configuration, in which the BactoSense is connected to a water source using the online sampling device, and automatically draws and measures a sample at predefined intervals. - Page 57 30 min and as long as 6 hours. If needed, you can delay the starting time The time setting of the BactoSense by unchecking the Start immediately box is described in section 6.3.2.
- Page 58 Instruction Manual BactoSense Measurements WORK STEP ADDITIONAL INFO / IMAGES If a measurement is running, you can select whether you want to abort it immediately, or wait for completion. If you don’t continue with another measurement series within the next hours,...
- Page 59 Measurements Instruction Manual BactoSense Figure 7-2 Auto mode plot settings Adjust the percentage scale. Touch the upper half of the scale bar to move the upper limit. Touch the lower half to move the lower limit. Adjust the counts scale. Touch the upper half of the scale bar to move the upper ...
-
Page 60: Measuring In Manual Mode
Measuring in manual mode Measuring in manual mode describes a configuration, in which the manual sampling device is connected to the BactoSense, and the operator attaches individual grab samples collected in 5 mL screw cap tubes to the instrument. 7.3.1 Performing a measurement in manual mode The following instructions show how to configure and start a measurement in manual mode. - Page 61 Measurements Instruction Manual BactoSense WORK STEP ADDITIONAL INFO / IMAGES Attach a 5 mL screw-cap tube containing 2 – 5 mL of sample to the manual sampling device. Press the Start button. The estimated protocol duration and expected termination timepoint are displayed.
- Page 62 Instruction Manual BactoSense Measurements 7.3.2 Reviewing manual measurement results This page shows a measurement result. From here, the user can delete a measurement, look up older results or export results. Expert users can re-gate the measurements. Some actions are bound to specific roles (Basic, Advanced or Admin).
-
Page 63: Regating Measurements
Measurements Instruction Manual BactoSense 7.3.3 Renaming measurements Measurements can be renamed from their result details view. WORK STEP Navigate to the Home menu and press Results (Manual) or Results (Auto). In the results list, select the measurement you want to rename. -
Page 64: Exporting Measurements
Instruction Manual BactoSense Measurements Exporting measurements There are multiple ways to retrieve measurement data. Retrieval via HTTP, HTTPS, FTP and the web interface are described in the Reference Handbook in chapter 5 and chapter 6. In this section, data export to a USB drive is described. -
Page 65: Available Analysis And Maintenance Protocols
PROTOCOL NAME PROTOCOL DESCRIPTION Clean Optics Launches a cleaning step that washes all components in contact with the sample inside the BactoSense, except the sampling device. Clean Sampling Device Cleans the manual sampling device such that the outside with Washstation... - Page 66 This protocol is used with the manual sampling device installed. 7.7.3 Performing a Prime Priming preconditions the BactoSense with the sample. Priming can be used to reduce the carryover of cells or unwanted substances, and takes approximately 5 minutes. Use a Prime under the following circumstances: •...
-
Page 67: Maintenance
Maintenance Instruction Manual BactoSense Maintenance BactoSense maintenance refers to the activities and procedures performed to ensure the proper functioning, accuracy, and reliability of the instrument over its life cycle. BactoSense service duty Adhering to the maintenance schedule is important to ensure a long instrument lifetime, safe operation and correct measurement results. -
Page 68: Periodic Preventive Maintenance By Service Professional
Maintenance Periodic preventive maintenance by service professional Preventive maintenance of the BactoSense is a scheduled intervention to replace wear parts, update the software and inspect and validate the instrument. Preventive maintenance is important to prevent failures and optimize the performance and reliability. It can only be conducted by service professionals specifically trained by bNovate. - Page 69 Maintenance Instruction Manual BactoSense WHEN WHAT PROCEDURE Replace the desiccant bag. Error E08 appears (internal Internal humidity is not See instructions in section humidity) within specified limits. 8.2.5. Replace the desiccant bag See consumables list in section 12.3. See section 8.2.6.
- Page 70 Instruction Manual BactoSense Maintenance WORK STEP ADDITIONAL INFO / IMAGES Press the Next button. Mount the Washstation by screwing it on the manual sampling device, similar to a sample tube. Make sure you install it to the end of the thread.
- Page 71 For specifications refer to the technical information in section 3.2, and for the part numbers to section 12.3. Never use a spanner on the sampling device when attached to the BactoSense CAUTION! Wear nitrile gloves when manipulating the sampling device or any other components...
- Page 72 If not, it may have remained in the BactoSense sampling device connector. In this case carefully remove it with tweezers and place it back in the sampling device. Unscrew the nuts of the two connectors on the sampling device using a spanner.
- Page 73 Maintenance Instruction Manual BactoSense WORK STEP ADDITIONAL INFO / IMAGES Discard the old tubings with ferrules. Take the new tubings and install the nut and ferrule as illustrated. Screw the nut on the online sampling device using a clamp. Make sure the blue FEP tubing is connected to the top fluidic connector (see figure 5-5 in section 5.8).
- Page 74 Maintenance 8.2.6 Replacement of the sampling device filter The sampling device of the BactoSense contains a 25 μm filter which can be replaced by the user. The filter is a consumable listed in section 12.3. Wear fresh, non-powdered nitrile gloves when handling the samples, sampling device, or any components which come in contact with them.
- Page 75 When running out of disk space, old data can be deleted. Make sure you retrieve all data from other users and your data before deleting it from the BactoSense. CAUTION! WORK STEP Navigate to the Home menu in the BactoSense user interface. Press the Maintenance button. Press the Delete old measurements button.
-
Page 76: Error And Warning Messages
Instruction Manual BactoSense Error and Warning Messages Error and Warning Messages If the instrument encounters a problem, it enters a different state, depending on the severity of the issue. There are warnings, noncritical errors and critical errors, each having different implications and requiring different actions. -
Page 77: Critical Errors
Error and Warning Messages Instruction Manual BactoSense Critical errors Critical errors interrupt the workflows of the instrument and require human intervention. The error source needs to be eliminated and the instrument set into running conditions again. Critical errors need to be cleared. -
Page 78: Error And Warning Logs
Instruction Manual BactoSense Error and Warning Messages Error and warning logs The error and warning log views can be accessed separately through the user interface Home menu when pressing the Logs button. Figure 9-1 : Error logs Type of the event Critical error ... -
Page 79: Clear Errors
The instrument is ready to analyze again. Automatic self-check automatic self-check tool checks that each component of the BactoSense is functioning correctly and identifies those that are not. It can be used to identify problems with the instrument. WORK STEP... -
Page 80: Troubleshooting
Table 10-1 Troubleshooting actions OBSERVATION RESOLUTION Nothing on display • Check whether the BactoSense is connected to power and switched on. Error message on • Respond to the error message as described in the chapter 9 the display about Error Messages in this manual. Additional information can be found in the Reference Handbook in chapter 7. -
Page 81: Storage, Transport And Disposal
• Non-vibrating, non-corrosive, dark and clean environment Re-installation After storage, follow the general installation instructions described in chapter 5. If the BactoSense has been stored for more than one month, perform an instrument validation using the Validation Kit before the first measurement to ensure proper functioning. - Page 82 Instruction Manual BactoSense Storage, Transport and Disposal 11.1.2 Storage of the sampling devices Note: The BactoSense should always have a sampling device installed. This procedure refers to storage of additional sampling devices if available. Preparations WORK STEP Remove and clean the sampling device according to the instructions in section 6.6.2 (manual sampling device) or section 6.6.1 (online sampling device).
- Page 83 WORK STEP Wear protective gloves and goggles. Follow the cartridge removal procedure in section 6.5.5 to safely remove the cartridge from the BactoSense. Make sure the liquid connectors of the cartridge are all tightly sealed with the respective plugs. Pack the cartridge in its original cardboard box with foam inserts.
-
Page 84: Transport
11.2 Transport 11.2.1 Transport of the BactoSense Refer to the following transportation instructions to safely transport the BactoSense. Note that the storage conditions for humidity and temperature listed in section 3.2 and 11.1.1 apply. Make sure the manual sampling device is installed for transportation. -
Page 85: Returning The Bactosense Or Accessories
After transport, follow the general installation instructions in section 6.5.6. 11.3 Returning the BactoSense or accessories In case you return the BactoSense or accessories to bNovate or a distribution partner, please follow the instructions in this section. Do not return contaminated materials Instruments that have come into contact with hazardous media must not be sent without prior decontamination and accompanied certificate of decontamination. - Page 86 If you ship additional items, label them with the serial number of the BactoSense. Indicate with stickers that the contents of the parcels are fragile, shall be kept dry, and shall only be transported in the indicated orientation.
-
Page 87: Recycling And Disposal
Storage, Transport and Disposal Instruction Manual BactoSense 11.4 Recycling and disposal The disposal of the BactoSense, accessories and consumables has to be carried out in compliance with regional statutory regulations. The BactoSense contains no environmentally damaging sources of radiation. Table 11-2 Materials and their recycling or disposal... -
Page 88: Supply Scope, Accessories And Consumables
Instruction Manual BactoSense Supply Scope, Accessories and Consumables Supply Scope, Accessories and Consumables 12.1 BactoSense Table 12-1 BactoSense instrument ART. NO. NAME IMAGE 200001 BactoSense Rapid Bacterial Monitoring System with packaging, certificates, screw-cap tubes, manual sampling device, power supply. -
Page 89: Accessories
Accessories can be ordered upon need, for example if you need spare parts. bNovate Technologies recommends to order a second cartridge with your instrument in order to have a replacement cartridge when required. Table 12-2 Accessories for the BactoSense ART. NO. NAME... -
Page 90: Consumables
Hex nut screwdriver, 7mm, for cartridge compartment door 12.3 Consumables Available consumables are listed below. They can be ordered through your local sales team. Table 12-3 Consumables of the BactoSense ART. NO. NAME 200003 Screw cap tubes 5 mL, 25 pcs set... -
Page 91: Contact
Description of instrument behavior and the work steps when the problem occurred. • Description of what you did when trying to solve the problem yourself. • Documentation of the third-party products you use in conjunction with the BactoSense. • Description of operation conditions (place, power supply, measured medium, temperature etc.). -
Page 92: Index
Instruction Manual BactoSense Index Index Web user interface Inputs 9 Connectivity 32 Connection Accessories 84 Consumables 85 Instrument placement 15 Additional Documentation 2 Contact Intended use 2 Analog Output 24 Customer service IO box 17 Assembly 28 Critical errors 72... - Page 93 Index Instruction Manual BactoSense Exchange Ferrules Safety 4 Warning 14 Filter Points symbols Installation Symbols Washstation 64 Protocols Sample 51 Wavelength 10 Removal Conditions Web user interface 14 Replacing tubings Types Tubing Volume Tubings Sampling device 1 Optics 60 Filter...
- Page 94 Technologies SA Tel. +41 (0)21 552 14 21 Ch. Dent d’Oche 1A info@bnovate.com CH-1024 Ecublens www.bnovate.com Switzerland...
Need help?
Do you have a question about the BactoSense and is the answer not in the manual?
Questions and answers