
Related Manuals for FURNITUREBOX ASHTON


Summary of Contents for FURNITUREBOX ASHTON
- Page 1 ASHTON BOX SHELVES ASSEMBLY GUIDE SCAN ME www.furniturebox.co.uk Scan QR code for more tips, advice and assembly video or visit furniturebox.co.uk/club/ashton...
- Page 2 Important - Please read these instructions fully before starting assembly SAFETY AND NO POWER TOOLS CARE ADVICE SAFETY AND CARE ADVICE • Check you have all the components and • Only clean using a damp tools listed. cloth and mild detergent, do no use bleach or •...
- Page 3 PLEASE CHECK CAREFULLY AND MAKE SURE YOU HAVE ALL FITTINGS AND TOOLS LISTED BELOW BEFORE YOU START. NOTE: The quantities above are the correct amount to complete the assembly. In some cases more fittings may be supplied than are required. www.furniturebox.co.uk...
- Page 4 STEP Use a clean, flat, soft surface to avoid any bumps or scratches. Diagrams & instructions show assembly with back of unit facing you to begin with. First, assemble the lower section of the unit. Take bottom side panel [1] and attach 4 x shelf beams [5]. Align pre- drilled holes and connect using 1 x washer [B] + bolt [A] for each shelf beam - 4 in total.
- Page 5 STEP Attach bottom side panel [2] using 1 x washer [B] + bolt [A] for each shelf beam - 4 in total. Tighten with Allen key [C]. www.furniturebox.co.uk...
- Page 6 STEP Next, assemble the top section of the unit. Take top side panel [3] and attach 6 shelf beams as per diagram. 5x beam [5] and 1x beam [6] - beam 6 has a central hole in it for the back brace.
- Page 7 Carefully, and with help, lift the completed top section and slot the connecting plates [E] into the frame of the lower section. Secure with 1x washer [B] + bolt [A] - 4 in total. Tighten with Allen key [C]. www.furniturebox.co.uk...
- Page 8 STEP Now attach the back support brace [7]. Connect each end, and the centre, of the X shaped brace to the pre-drilled holes in shelf beams. Use 1x washer [B] + bolt [A] - 5 in total. Tighten with Allen key [C]. Follow us on Instagram @furniturebox_uk...
- Page 9 Now connect the 5x shelves [8]. Align pre-drilled holes in shelves with the tabs on the shelf beams, and secure using 4x washer [B] + bolt [A] for each shelf - 20 in total. Tighten with Allen key [C]. Add 4x feet [D] to the bottom legs. www.furniturebox.co.uk...
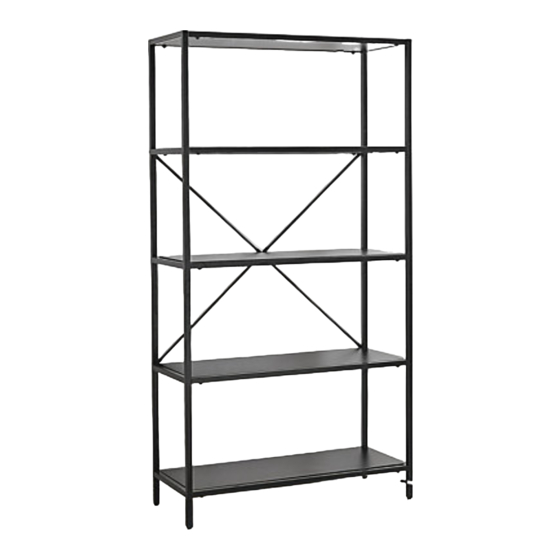
- Page 10 STEP Check stability - your shelves are now complete. We strongly advise you use the anti-tipping kit provided to secure your shelves to the wall- see overleaf. Follow us on Instagram @furniturebox_uk...
- Page 11 Please use appropriate fixings for your wall and get professional advice if unsure. Fixings - STEP Fasten 1x fixing block [A] onto the corre sponding position of the wall with the bulge tube [C] and core [D] www.furniturebox.co.uk...
- Page 12 STEP Fasten a second fixing block [A] at the corresponding position on the back of the shelving top plate with screws [E] STEP Loop the strap [B] through both fixing blocks [A] - on the wall and on the back of the shelves.
- Page 14 ACTIVATE YOUR GUARANTEE ONLINE scan this QR code with your phone to read the full guarantee on line and register your product. It only takes a moment to fill out. Or visit: furniturebox.co.uk/our-guarantee...
Need help?
Do you have a question about the ASHTON and is the answer not in the manual?
Questions and answers