EMPORIA VUE Installation Manual
Smart home energy monitor gen 3
Hide thumbs
Also See for VUE:
- Installation manual (21 pages) ,
- Installation manual (26 pages) ,
- Installation manual (27 pages)
Advertisement
Quick Links
Advertisement

Subscribe to Our Youtube Channel
Related Manuals for EMPORIA VUE


Summary of Contents for EMPORIA VUE
- Page 1 Installation Guide...
-
Page 2: Safety Information
Improper installation or use of the equipment can be dangerous or even fatal. In no event shall Emporia be liable to you or any third party for any damages, either direct or indirect, arising from or related to any personal injury as a result of your failure to follow the safety information and instructions in this Installation Guide. - Page 3 Ensure no wiring for voltage measurement, current measurement, power, or data are frayed or have exposed conductors. Ensure there are no cracks, breaks, or other defects in the enclosure of the Vue or CTs. If you believe any of the Emporia Vue components may ...
- Page 4 Safety information (continued) Do not position the Emporia Vue so that it is difficult to operate disconnecting devices or breakers. Do not use 3rd party accessories or Current Transformers (CTs) with the Emporia Vue. The Vue and CTs are customized and integrated. Third party accessories or CTs may compromise the data accuracy and equipment safety.
-
Page 5: Before You Get Started
Before you get started The Emporia Vue is installed in a home’s electrical panel. The main breaker will need to be set to the off position, which will shut off all of the power in the home. However, the service mains will remain energized and dangerous. -
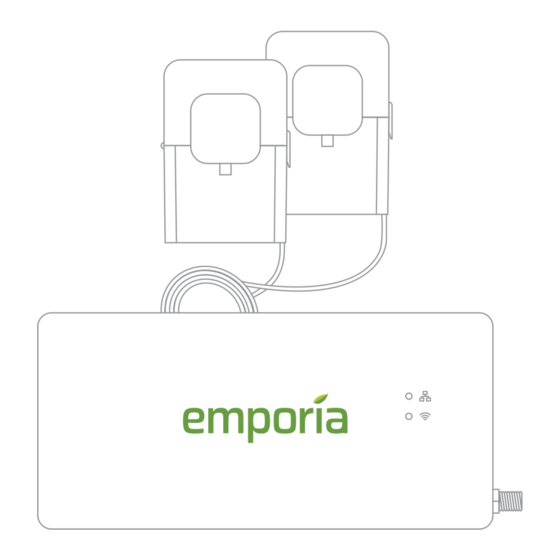
Page 6: What's In The Box
What’s in the box The Emporia Vue contains the following items. If any of these items are missing or if you believe they’ve been damaged, contact support immediately. Vue energy monitor Two or three (depending on bundle) Main 200A current... - Page 7 Energy monitor connections The energy monitor is the hub of the Emporia Vue. The screw terminal port for the wiring harness is located on the left-hand side of the monitor. The screw terminal ports across the top of the monitor...
- Page 8 Also, if you plan to connect the Vue to the internet via Wi-Fi, this is a great time to use a phone to check the signal strength of the Wi-Fi network next to the electrical panel in the home.
- Page 9 OFF position. Note that these may be located outside of the panel in which you're installing the Vue. Next, remove any screws holding the cover to the panel and remove the cover to access the circuit breakers and...
- Page 10 Find a place that works. If the Vue is to be mounted on a DIN rail, the monitor has two threaded screw holes to attach mounting hardware using two M3 screws and lock washers (sold separately).
- Page 11 LAN connection, a Wi-Fi connection, or both. If both are implemented, the Vue will prioritize wired LAN. If a wired LAN is unavailable, the Vue will attempt to connect over Wi-Fi. Choose the preferred method(s) and go to the corresponding step below.
- Page 12 Then, use a screwdriver to remove a knockout from the electrical panel. Next, feed the cable through the hole to the Vue and plug it in the socket on the right-hand side of the energy monitor marked Need help? emporiaenergy.com/support...
- Page 13 . Finally, plug the hole with the knockout plug. It’s acceptable to install the antenna inside of a wall. Need help? emporiaenergy.com/support support@emporiaenergy.com 1-844-EMPORIA (367-6742) ...
- Page 14 The Vue will be installed differently depending on whether the solar is a breaker-fed or a line-side tap installation.
- Page 15 To avoid clutter, unscrew the 22 AWG wires from the screw terminals, cut them to size, and reattach them ensuring the black and white wires match the icons on the front of the Vue. DANGER: The service mains are energized! Meter...
- Page 16 To avoid clutter, unscrew the 22 AWG wires from the screw terminals, cut them to size, and reattach them ensuring the black and white wires match the icons on the front of the Vue. DANGER: The service mains are energized! Solar Panels...
- Page 17 To avoid clutter, unscrew the 22 AWG wires from the screw terminals, cut them to size, and reattach them ensuring the black and white wires match the icons on the front of the Vue. DANGER: The service mains are energized! Inverter...
- Page 18 Black (L1) provides power and voltage sensing, White connects to Neutral, and Red (L2) Blue (L3) provide voltage sensing only (if applicable). power & voltage & voltage neutral or neutral Need help? emporiaenergy.com/support support@emporiaenergy.com 1-844-EMPORIA (367-6742) ...
- Page 19 2.) Wiring to an in-use breaker If wiring to an in-use breaker, use the splicing wires / wire nuts included with the Vue for breakers rated up to 15A. Any amapacity rating may be used if the splicing wire gauge matches the existing wire and meets applicable electric codes.
- Page 20 Go to the step below based on the system. If you’re unsure, contact Emporia Support and we’ll help you through it. Step 7(a) Common in N. American homes Two empty breakers ...
- Page 21 Black (L1) Red (L2) wires from the harness to each of the hot leads from each breaker. Any empty breaker size can be used in this scenario (not limited to 15A) Need help? emporiaenergy.com/support support@emporiaenergy.com 1-844-EMPORIA (367-6742) ...
- Page 22 Step 7(b): No empty breaker and two Main CTs Common in N. American homes Secure the White (N) Blue (L3) wires from the wire harness to the neutral bus bar. Turn off two vertically adjacent (stacked) 15A single pole breakers and remove their wires.
- Page 23 (L2), and Blue (L3) wires from the harness to each of the hot leads from each breaker. Any empty breaker size can be used in this scenario (not limited to 15A) Need help? emporiaenergy.com/support support@emporiaenergy.com 1-844-EMPORIA (367-6742) ...
- Page 24 Step 7(d): No empty breaker and three Main CTs Common in European 3-phase homes Common in N. American commercial systems Uncommon in N. American homes Secure the White (N) wire from the wire harness to the neutral bus bar. Turn off three vertically adjacent (stacked) 15A single pole breakers and remove their wires.
- Page 25 MCB and secure the Black (L1) wire from the harness to the hot lead from the MCB. Any empty MCB size can be used in this scenario (not limited to 15A) Need help? emporiaenergy.com/support support@emporiaenergy.com 1-844-EMPORIA (367-6742) ...
- Page 26 Wire to the MCB. A larger amp breaker may be used if the gauge of the splicing wire matches the existing gauge wire from the breaker meeting the national and regional codes Need help? emporiaenergy.com/support support@emporiaenergy.com 1-844-EMPORIA (367-6742) ...
- Page 27 Step 8: Plug in and connect the Branch current transformers If the Vue has Branch CTs, open the clasps on the CTs and place each clamp around the non-neutral leg from the breaker that is to be monitored. Then shut the clasps to secure the CTs.
- Page 28 Most accurate - Attach one branch sensor on each leg of the breaker Less accurate - Attach one branch sensor on a single leg and use an app multiplier. Need help? emporiaenergy.com/support support@emporiaenergy.com 1-844-EMPORIA (367-6742) ...
- Page 29 Step 8 (continued): A note about solar monitoring For the Vue to be able to calculate how much energy from the system is going to and from the grid, Branch CTs will need to be connected to the incoming leads from the inverter regardless of whether the solar is a breaker-fed or a line-side tap installation.
- Page 30 Step 9: Take a photo of your system Before replacing your panel cover, take photos of the installation in case you need to contact support.
- Page 31 Then, close the panel. Once the panel cover is replaced, the antenna connector and screw terminal ports on the Vue will not be accessible. Need help? emporiaenergy.com/support ...
-
Page 32: Step 11: Complete Setup
Return to the Emporia app to continue the setup process that you began in Step 1 by scanning the QR code on the Vue or Getting Started Guide to connect the Vue to the internet via Wi-Fi or wired LAN connection. -
Page 33: Troubleshooting Tips
Here are some of our most frequent troubleshooting tips. For more help, check out the Emporia Help Center online at help.emporiaenergy.com. The Emporia app is not finding the Vue after I’ve installed it. Ensure the Vue has power: Check for a flashing Wi-Fi light. - Page 34 Troubleshooting Tips (continued) Try power cycling the breaker to which the Vue is connected. Try restarting the Emporia App. Try rebooting your phone. The Emporia Energy app isn’t getting real-time data from the Vue. Ensure all current transformers are securely fastened around their respective cables in the electric panel.
- Page 35 Vue LED lights The Vue has two LED lights on the front of the energy monitor, that can help trouble- shoot the status of the internet connection and whether or not the monitor has power. Wi-Fi (and indication of power) 1 blink every 3 seconds Not connected to router.
-
Page 36: Technical Details
Technical Details Energy Monitor (EMV3A) • Supported system configurations: • Single phase, 2-wire systems (Up to 240V) • Single-split phase, 3-wire systems (Up to 240V/480V LN/LL) • 3-phase, 4-wire Wye systems with earthed (TN or TT) neutral (no-Delta) (Up to 240V/415V LN/LL) •... -
Page 37: Information De Sécurité
à l'intérieur du panneau électrique de votre maison et une tension dangereuse pouvant entraîner des blessures ou la mort. Emporia vous prions de bien vouloir que l'installation soit effectuée par une personne qualifiée, telle qu'un électricien agréé ou un autre professionnel qualifié, conformément au code... - Page 38 (ou de service) d'un bâtiment avant l'installation ou l'entretien transformateurs de courant. L'Emporia Vue doit être câblé à l'aide de fils de cuivre 16AWG, 600V, UL1015, 105° C (ou plus) Il est recommandé de câbler l'Emporia Vue au disjoncteur le ...
- Page 39 à ce qu'ils n'entrent pas directement en contact avec les bornes sous tension ou les bus. L'Emporia Vue ne doit pas être monté à moins de 50,8 mm (2 pouces) de toute pièce sous tension, y compris les conducteurs primaires, les bornes primaires et les cosses primaires ;...
- Page 40 An instrument should only be used at or below its rated measurement category and voltage. For example, the Vue Energy Monitor is CAT III rated and can be used to monitor CAT I, CAT II, and CAT III circuits.
- Page 41 Caution: Any changes or modifications not expressly approved by Emporia void the user's authority to operate the equipment. Designed by Emporia Corp in Littleton, Colorado, USA. Manufactured by VVDN Technologies Pvt. Ltd.
Need help?
Do you have a question about the VUE and is the answer not in the manual?
Questions and answers
Enable ipad