
Subscribe to Our Youtube Channel
Related Manuals for Genmitsu Z6


Summary of Contents for Genmitsu Z6
- Page 1 Genmitsu English 01 - 26 Z6 Dual-Laser Engraving / Marking Machine Z6 Dual-Laser-Gravier- / Markiermaschine Deutsch 28 - 54 V1.0 Dec. 2023...
-
Page 2: Table Of Contents
Contents Welcome Safety Guideline Product Details and Accessories Configurations Function Packing List Product Parameters Assembly Guide Host Interface Introduction Frequently Asked Questions... -
Page 3: Welcome
Included in your package will be a USB Drive, that contains: ● Sample Engraving Files ● User Manual Help, support and ideas can be found on our Facebook Group. (SainSmart Genmitsu CNC Users Group, https://www.facebook.com/groups/SainSmart.GenmitsuCNC). Scan QR code to join us For any warranty or support problems please email us at support@sainsmart.com... -
Page 4: Safety Guideline
Safety Guideline Always exercise safety and caution when working with laser marking systems. Consider the listed recommendations to minimize risk: Laser processing is risky and users should carefully consider whether the object is suitable for laser processing. You must be at least 13 years old to operate the laser engraver. Direct exposure to the laser beam can cause severe bums and eye damage. - Page 5 Safety Guideline Be sure to disconnect the power when cleaning, maintaining or servicing the laser equipment. DO NOT stare at the bright and intense light appearing during the engraving process. Doing so can cause serious eye damage. Never use the laser except for the purpose intended. SainSmart does not accept any responsibility or liability for any use or misuse of the Laser.
-
Page 6: Product Details And Accessories
Product Details and Accessories 300mm 165mm 262mm 262mm... -
Page 7: Configurations
Configurations 1. Standard Mode Perfect for items that can fit within the Grid Base work area. Used with the positioning plate for quick, repeatable workflows. 2. Handheld Mode Suitable for sloping, vertical walls, etc. Simply install the handheld support and place it against your engraving surface. -
Page 8: Function
Function Power Light Working on 1064nm Working on 455nm Action Button... - Page 9 Function Handle USB Drive Port Laser Handheld Tube Control Panel Stylus Host Switch DC Input...
-
Page 10: Packing List
Packing List Laser Module Host Electric Lifting Stand Protective Shield Left Tripod (C1) Right Tripod (C2) Square-shaped Hold U-shaped Base Allen Wrench (3) M5Χ12 (9) M3Χ12 Hex Positioning Plate (2.5mm; 3mm) Flat Head Screw Socket Cap Screw... - Page 11 Packing List Power Supply Draft Pieces Test Card Scratch Art Paper USB Drive Z-axis Cable Stylus Marker Brush User Manual (for Stand) Optional Accessories MD-18 Rotary Roller MD-19 Rotary Rolle...
-
Page 12: Product Parameters
Product Parameters Model Material High Strength Anodized Aluminum & ABS Laser Head 1064nm Fiber Laser 455nm Blue Laser Laser Power Metal, ABS, Opaque Plastic, Paper, Wood, Bamboo, Cloth, Acrylic, Plastic, Engravable Materials Materials with Lacquered Finish Leather, Bread, Fruit, Glass, Ceramic Dual Red Dot Motorized Focusing Laser Focus Forced Air Cooling... -
Page 13: Assembly Guide
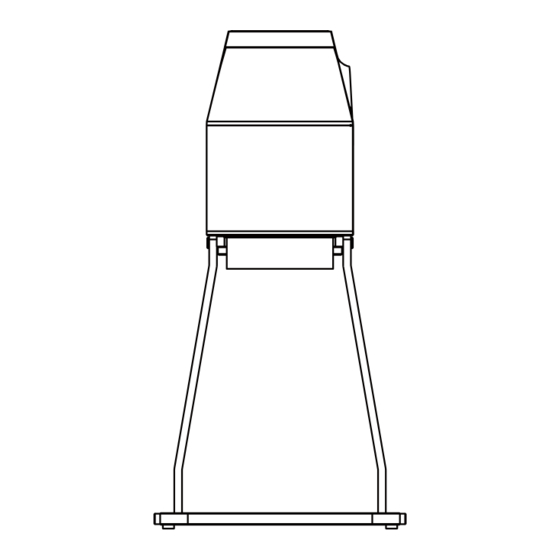
Assembly Guide Mounting the Handheld Mode What you will need: 1. Install both tripods to the laser module with (4) M3X12 Hex Socket Cap Screw. Laser Module Laser Module Left Tripod (C1) (2) M3Χ12 Hex Socket Cap Screw Left Tripod (C1) Right Tripod (C2) Square-shaped Hold Laser Module... - Page 14 Assembly Guide 2. Install U-shaped base to the tripods with (4) M3X12 Hex Socket Cap Screw. 3. Place the holder in the base to stabilize the laser module. (4) M3Χ12 Hex Socket Cap Screw Square-shaped Hold...
- Page 15 Assembly Guide Mounting the Protective Shield Protective Shield...
- Page 16 Assembly Guide Mounting the Standard Mode What you will need: 1. Align the laser module with the screw holes in the electric lifting stand and secure it with the knob. Electric Lifting Stand Laser Module Laser Module Knob Electric Lifting Stand Z-axis Cable (for Stand)
- Page 17 Assembly Guide 2. Connect the electric lifting stand with the cable. Z-axis Cable Port in the Bracket Port in Stand...
- Page 18 Assembly Guide Mounting the Positioning Plate What you will need: (3) M5Χ12 Flat Head Screw Positioning Plate (3) M5Χ12 Flat Head Screw Positioning Plate...
-
Page 19: Host Interface Introduction
Host Interface Introduction System Toolbar System Toolbar Align Toolbar Zoom Toolbar Draw Toolbar Object Property Status Column... - Page 20 Host Interface Introduction Drawing Bar Detail Circle, square, line, etc. Enter text Barcode or QR code BMP, PNG and other format files DXF, PLT format files...
- Page 21 Host Interface Introduction Click to select the desired shape to create. Click to edit the text, and click to make a secondary change. To select the font To set the font height To set the font space To set the spacing between lines...
- Page 22 Host Interface Introduction Click to select the desired shape to create.
- Page 23 Host Interface Introduction Click to select the desired picture for marking or engraving, you can adjust the parameters on the object property window.
- Page 24 Host Interface Introduction Click to select the desired vector graphic for marking or engraving, you can adjust the parameters on the object property window.
-
Page 25: Frequently Asked Questions
How do you focus the To focus the Genmitsu Z6, place the material on the stage, Genmitsu Z6 laser then adjust the left knob to achieve the desired focus. Once engraving machine? the focus is set, lock it in place. - Page 26 Engraving & What image formats does Z6 (bmp/png/jpg/plt/dxf/imf) Cutting Related the software support? Questions Can the machine engrave Yes, the machine can engrave on curved surfaces. However,...
- Page 27 Frequently Asked Questions Tyeps Question Solution Why is there a big Materials of different colors have different optical properties, difference in the processing and the absorption and reflection of laser energy are different. effect of materials with the Therefore, when engraving materials of the same type but same material but different different colors, it’s recommended to set different power and colors using the same file?
- Page 28 Frequently Asked Questions Tyeps Question Solution For ordinary bitmaps: 1. Resize the image to the desired size. 2. Select Grayscale to create a grayscale image. How do I set parameters Parameter 3. Check the fixed DPI (it’s recommended to set X and Y to for engraving portrait Settings 300).
- Page 29 Inhalt Willkommen Sicherheitsrichtlinien Produktdetails und Zubehör Konfigurationen Funktion Packliste Produkt Parameter Montageanleitung Einführung in die Host-Schnittstelle Häufig gestellte Fragen...
-
Page 30: Willkommen
Willkommen Vielen Dank Dass Sie die Z6 Dual-Laser-Gravier- / Markiermaschine von SainSmart gekauft haben. In Ihrem Paket finden Sie einen USB-Stick, der Folgendes enthält: ● Beispieldateien für Gravuren ● Benutzerhandbuch Hilfe, Unterstützung und Ideen finden Sie in unserer Facebook-Gruppe. (SainSmart Genmitsu CNC Users Group, https://www.facebook.com/groups/SainSmart.GenmitsuCNC). -
Page 31: Sicherheitsrichtlinien
Sicherheitsrichtlinien Gehen Sie bei der Arbeit mit Lasermarkierungssystemen stets sicher und vorsichtig vor. Beachten Sie die aufgeführten Empfehlungen, um das Risiko zu minimieren: Die Laserbearbeitung ist mit Risiken verbunden, und die Benutzer sollten sorgfältig prüfen, ob das Objekt für die Laserbearbeitung geeignet ist. Sie müssen mindestens 13 Jahre alt sein, um den Lasergravierer zu bedienen. - Page 32 Sicherheitsrichtlinien Trennen Sie das Gerät unbedingt von der Stromversorgung, wenn Sie es reinigen, pflegen oder warten. Blicken Sie NICHT in das helle und intensive Licht, das während des Graviervorgangs erscheint. Andernfalls kann es zu schweren Augenschäden kommen. Verwenden Sie den Laser niemals für einen anderen als den vorgesehenen Zweck. SainSmart übernimmt keine Verantwortung oder Haftung für den Gebrauch oder Missbrauch des Lasers.
-
Page 33: Produktdetails Und Zubehör
Produktdetails und Zubehör 300mm 165mm 262mm 262mm... -
Page 34: Konfigurationen
Konfigurationen 1. Standard-Modus Ideal für Gegenstände, die in den Arbeitsbereich der Grid Base passen. Wird zusammen mit der Positionierplatte für schnelle, wiederholbare Arbeitsabläufe verwendet. 2. Handheld-Modus Geeignet für schräge, vertikale Wände usw. Installieren Sie einfach die Handhalterung, und legen Sie sie an die zu gravierende Fläche an. -
Page 35: Funktion
Funktion Strom Licht Arbeiten an 1064nm Arbeiten an 455nm Aktionstaste... - Page 36 Funktion Griff USB Treiber Port Laser Handheld Tube Bedienfeld Stylus Gastgeber Schalter Gleichstromeingang...
-
Page 37: Packliste
Packliste Lasermodul Gastgeber Elektrischer Hebeständer Schutzschild Linkes Stativ (C1) Rechtes Stativ (C2) Quadratische Halterung U-förmige Basis Inbusschlüssel (3) M5Χ12 (9) M3Χ12 Positionierplatte (2.5mm; 3mm) Senkkopfschraube Innensechskantsch... - Page 38 Packliste Stromversorgung Entwurfsteile Testkarte Kratzkunstpapier USB-Laufwerk Z-Achsen-Kabel Stylus Marker Pinsel Benutzerhandbuch (für Ständer) Optional Accessories MD-18 Drehrolle MD-19 Drehrolle...
-
Page 39: Produkt Parameter
Produkt Parameter Modell Material Hochfeste eloxiertes Aluminium & ABS Laserkopf 1064nm Faserlaser 455nm Blauer Laser Laserleistu Papier, Holz, Bambus, Stoff, Acryl, Metall, ABS, undurchsichtiges Kunststoff, Gravierbare Materialien Kunststoff, Leder, Brot, Obst, Glas, Materialien mit lackierter Oberfläche Keramik Laserfokus Dualer roter Punkt motorisierte Fokussierung Kühlung Gezwungene Luftkühlung 70mm×70mm (2.76”×2.76”) -
Page 40: Montageanleitung
Montageanleitung Montage des Handheld-Modus Was wird benötigt: 1. Befestigen Sie beide Stative mit (4) M3Χ12 Innensechskantschrauben am Lasermodul. Lasermodul Lasermodul Linkes Stativ (C1) (2) M3Χ12 Innensechskantschraube Linkes Stativ (C1) Rechtes Stativ (C2) Quadratische Halterung Lasermodul U-förmige Basis Inbusschlüssel (2.5mm) (2) M3Χ12 Innensechskantschraube (8) M3Χ12 Innensechskantschraube Rechtes Stativ(C2) - Page 41 Montageanleitung 2. Befestigen Sie die U-förmige Basis mit (4) M3Χ12-Innensechskantschrauben an den Stativen. 3. Setzen Sie den Halter in die Basis, um das Lasermodul zu stabilisieren. (4) M3Χ12 Innensechskantschraube Quadratische Halterung...
- Page 42 Montageanleitung Montage des Schutzschildes Schutzschild...
- Page 43 Montageanleitung Montage des Standardmodus Was wird benötigt: 1. Richten Sie das Lasermodul auf die Schraubenlöcher im elektrischen Hebeständer aus und befestigen Sie es mit dem Knopf. Elektrischer Hebeständer Lasermodul Lasermodul Knob Elektrischer Hebeständer Z-Achsen-Kabel (für Ständer)
- Page 44 Montageanleitung 2. Verbinden Sie den elektrischen Hebeständer mit dem Kabel. Z-Achsen-Kabel Anschluss in der Klammer Anschluss für Ständer...
- Page 45 Montageanleitung Montage der Positionierungsplatte Was wird benötigt: (3) M5Χ12 Senkkopfschraube Positionierungsplatte (3) M5Χ12 Senkkopfschraube Positionierungsplatte...
-
Page 46: Einführung In Die Host-Schnittstelle
Einführung in die Host-Schnittstelle System-Symbolleiste System-Symbolleiste Ausrichtungs-Symbolleiste Zoom-Symbolleiste Zeichnen-Symbolleiste Objekt-Eigenschaft Status-Spalte... - Page 47 Einführung in die Host-Schnittstelle Detail der Zeichenleiste Kreis, Quadrat, Linie, etc. Text eingeben Strichcode oder QR-Code BMP, PNG und andere Dateiformate Dateien im Format DXF, PLT...
- Page 48 Einführung in die Host-Schnittstelle Klicken Sie auf , um die gewünschte Form auszuwählen, die Sie erstellen möchten. Klicken Sie auf , um den Text zu bearbeiten, und auf , um weitere Änderungen vorzunehmen (Größe, Farbe, Format). Zur auswahl der schriftart Zum einstellen der schrifthöhe Zum einstellen des schriftabstands Zum einstellen des abstandes...
- Page 49 Einführung in die Host-Schnittstelle Klicken Sie auf und wählen Sie Barcode oder QR-Code zur Bearbeitung aus.
- Page 50 Einführung in die Host-Schnittstelle Klicken Sie auf , um das gewünschte Bild für die Markierung oder Gravur auszuwählen. Sie können die Parameter im Fenster mit den Objekteigenschaften anpassen.
- Page 51 Einführung in die Host-Schnittstelle Klicken Sie auf , um die gewünschte Vektorgrafik zum Markieren oder Gravieren auszuwählen. Sie können die Parameter im Objekteigenschaftenfenster anpassen.
-
Page 52: Häufig Gestellte Fragen
Betriebs den Strom Gerät initialisiert und nimmt die ursprüngliche Aufgabe nicht verliert? wieder auf. Um das Genmitsu Z6 zu fokussieren, legen Sie das Material Wie fokussiert man das auf den Tisch und stellen dann mit dem linken Drehknopf den Fragen zum Genmitsu Z6 gewünschten Fokus ein. - Page 53 Häufig gestellte Fragen Tyeps Frage Lösung Wenn das Gerät nach dem Einschalten nicht reagiert, können Sie Folgendes überprüfen: a. Vergewissern Sie sich, dass der Netzstecker auf der Maschinenseite richtig eingesteckt ist. Warum reagiert das Gerät Fragen zum b. Überprüfen Sie den elektrischen Status der Steckdose. nach dem Einschalten Gerät c.
- Page 54 Häufig gestellte Fragen Tyeps Frage Lösung Welche Bildformate Z6 (bmp/png/jpg/plt/dxf/imf) werden von der Software unterstützt? Kann das Gerät Ja, das Gerät kann auf gekrümmten Oberflächen gravieren. Wenn jedoch die Krümmung des Materials oder der gravierte Materialien mit gekrümmter Oberfläche Grafikbereich zu groß ist, kann es zu leichten Verformungen kommen.
- Page 55 Häufig gestellte Fragen Tyeps Frage Lösung Wenn das Material nicht durchgeschnitten werden kann, sollten Sie dies tun: 1. Stellen Sie sicher, dass das Gerät und das Graviermaterial parallel zur Arbeitsfläche stehen. Fragen zum Warum kann das Material 2. Prüfen Sie, ob die Schutzlinse des Lasermoduls sauber ist. Gravieren und 3.
- Page 56 Häufig gestellte Fragen Tyeps Frage Lösung Für normale Bitmaps: 1. Ändern Sie die Größe des Bildes auf die gewünschte Größe. 2. Wählen Sie Grayscale, um ein Graustufenbild zu erstellen. Wie stelle ich die 3. Aktivieren Sie die festen DPI-Werte (es wird empfohlen, X Parameter- Parameter für die Gravur und Y auf 300 einzustellen).
- Page 57 Genmitsu Desktop CNC & Laser Email: support@sainsmart.com Facebook messenger: https://m.me/SainSmart Help and support is also available from our Facebook Group Vastmind LLC, 5892 Losee Rd Ste. 132, N. Las Vegas, NV 89081 Facebook Group...
Need help?
Do you have a question about the Z6 and is the answer not in the manual?
Questions and answers