Advertisement
Product Description
Multifunctional Bluetooth game controller, supports for PC, SWITCH console, Android smart phone, Android TV, Android box, IOS (13.0 above version MFI games)
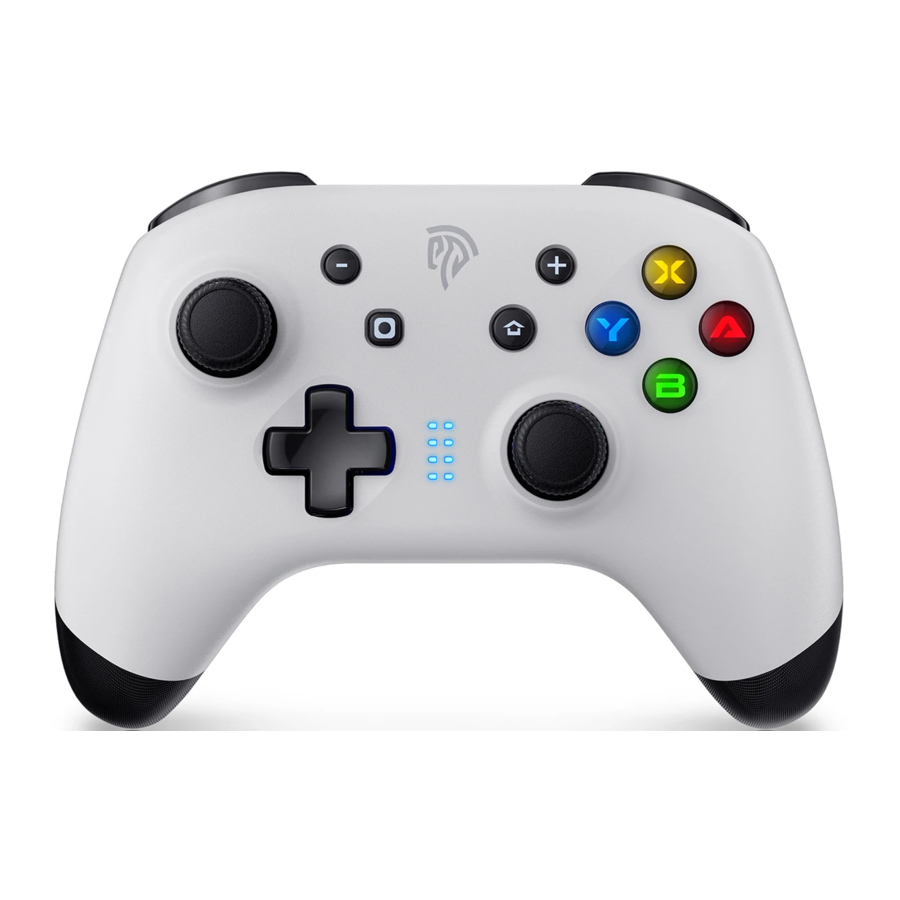
Product Diagram

- Left 3D/L3
- Right 3D/R3
- Back
- Start
- Turbo/snapshot
- HOME
- A/ B/ X/ Y
- Direction Keys
- Channel and Charging Indicator Light

- TYPE-C Charging Port
- Left Trigger L
- Right Trigger R
- Linear Pressure Sensing ZL
- Linear Pressure Sensing ZR

- Reset Hole
- Programming Key M1, M3
- Programming Key M2, M4
- Product Back Stick Area
Product Details
| Battery Capacity | 600mA |
| Utility time | ≥ 10 Hours |
| Charging Time | 2.5-3 Hours |
| Charging Current | 530mA |
| Charging Type | TYPE C |
Mode and Connection
Connect Switch
- For the first connection, press X + HOME while in Power-off state; If not the first connection, in Power-on state, shortly press HOME to connect automatically; Switch Bluetooth connection supports Home key to wake up the host.
- Turn on Switch, select "controller" and then select "Change Grip / Order", the controller will automatically identify and pair the Switch host, after it's successfully connected, the corresponding LED light will keep on.
Connect your phone
- Android mode: If for first connection, B + HOME; if not the first connection, just short press the HOME key to start up. In Bluetooth pairing mode, LED1 flashes, means it's successfully connected. LED1 keep on; the device name is Gamepad.
- IOS mode: If for first connection, A + HOME; if not the first connection, just short press HOME to turn on. Enter Bluetooth pairing mode, LED2 lights flash, after it's successfully connected, the corresponding LED light will keep on.
Connect to PC
Connect the controller to PC through USB data cable. After successfully connected, the indicator lights on, default Xinput mode, Led1 + Led4 light is on, long press Turbo to switch to Dinput mode, with a vibration, the indicator lights LED2 and LED3 keep solid on, then it means switch mode successfully.
Light management
- The A/ B / X / Y backlight will be automatically turned off if the wireless connection has no any button pressing within 5minutes, and the controller will be automatically turned off.
- The A/ B / X / Y backlight will be adjusted by pressing the ZL + ZR + R3 + UP / DOWN buttons each time. It has level 0 to level 4, 5 levels for the brightness, all backlights will be off if at level 0.
- Long press L + R for 5 seconds to turn off or turn on the A/ B/ X/ Y backlight
TURBO Key Settings
- Long press the key set to TURBO function and press TURBO again. If the light flashes quickly, it means it's set successfully.
For example, press and hold TURBO key in the game, press and it can be the quick hit function and the light quickly flashes. - Long press the TURBO function button again, and press the TURBO button again, then you can cancel the TURBO function.
Note: Keys A, B, X, Y, L, R, ZL, ZR can be set to TURBO keys - If for Switch, you need to set the screen-shot button as the TURBO button.
Setting steps:
- Press both the right stick and screen-shot button simultaneously, then the screen-shot button will be set as the TURBO button;
- Set or cancel the burst function as the operations mentioned in the step 1 and step 2.
Dual vibration adjustment
5 level adjustment: level 1-5 are: 100%, 75%, 50%, 25%, 0
Adjustment method: hold Turbo + UP / DOWN to enhance or weaken the vibration intensity in level range 1-5, the indicator indicates the current vibration intensity.
Key programming settings
Mode 1:
- Press M1 and then press the BACK button, all the lights keep long on, the macro programming entry start mode.
- Press and hold down the keys that you want to combine. (Like L, R3 at the same time)
- Press M1 again to confirm the combination key, set 0K, light recovery mode indication is on, at this time, the combination setting is successful. When pressing M1, L and R3 have both function (trigger triggered).
Mode 2:
- Press down the M1 and then hold down the START button, when the four lights long light on, and start the macro programming entry mode.
- Press and hold down the keys that you want to combine. (Like L, R3 in succession)
- Press M1 again to confirm the combination key, set OK, light recovery mode indication is on, at this time, the combination setting is successful. When pressing M1, L and R3 trigger the function successively.
(Note: The L and R3 spacing time will be mapped to the M key) - M1, M2, M3, and M4 are set in the same way.
- Macro button mode 2 saves the sequence of keys, and saves the time and interval of each button press, to ensure that the various actions are correct.
- Default key value: factory set M1-B, M2-A, M3-Y, M4-X.
- Macro-key data sharing universally for Xinput Dinput Switch
- Long press M1 / M3 + M2 / M4 until the motor shortly vibrates, to clear the programming setting, restore the initial programming setting.
Reset the Device
You can reset the controller if it is abnormally inoperable during use. Only need to click the RESET hole at the bottom of the controller with something like a crankpin or toothpick, until you hear the sound of "tap" of the resetting switches, the controller power is turned off and the reset is successful.
Charging
- When charging, the 4 indicators flash slowly at the same time;
- The last 4 indicator lights are keep long on while it's full charged.
- Wired connection can be used while charging spontaneously, the corresponding indicator light flashes, and will keep long on while it's full charged.
- When the controller's battery power is below 20%, the indicator will flash to remind a low power status under the current mode.
Packing list
1X Wireless Controller
1X 1M Type-C Cable
1X Product Manual
1X After-service Card
After-sale services
Read the following information to get better services.
Dear customers:
Thank you for purchasing EasySMX products. If you have any problems or suggestions, please contact us quickly and we will answer you as soon as possible.
Contact Information
United States: easysmx@easysmx.com
United Kingdom: easysmx@easysmx.com
France: fiona@easysmx.com
Germany: leslie@easysmx.com
Spain: support.es@easysmx.com
Italy: support.it@easysmx.com
Russia: support.ru@easysmx.com
Japan: support.jp@easysmx.com

Follow us for the best after-sales service and the latest news!
EasySMX co., Limited
Email: easysmx@easysmx.com
Web: www.easysmx.com
Documents / Resources
References
Download manual
Here you can download full pdf version of manual, it may contain additional safety instructions, warranty information, FCC rules, etc.
Advertisement


Need help?
Do you have a question about the Bayard 9124 and is the answer not in the manual?
Questions and answers