Table of Contents
Advertisement
Quick Links
Advertisement
Table of Contents

Related Manuals for Environmental Express T80WL


Summary of Contents for Environmental Express T80WL
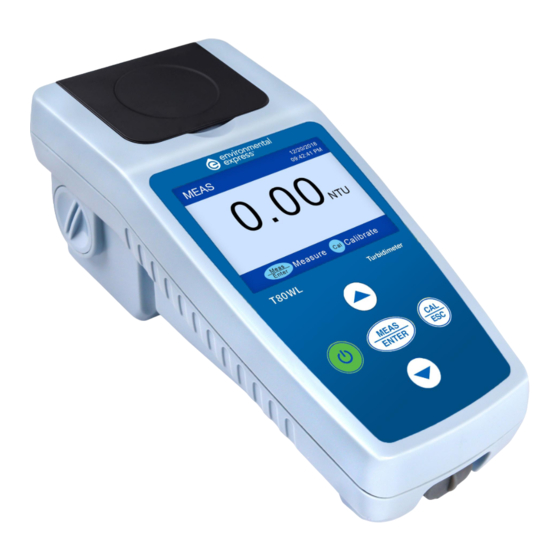
- Page 1 T80WL Portable Turbidity Meter Instruction Manual...
-
Page 2: Table Of Contents
Table of Contents Introduction ....................... - 3 - Technical Specifications .................... - 4 - Instrumentation Illustration ..................- 5 - Overview ......................- 5 - Configuration .......................- 6 - Display Mode ...................... - 7 - Keypad ........................- 8 - Power Supply ......................- 8 - Meter Calibration .......................- 9 - Preparation for Calibration .................. -
Page 3: Introduction
INTRODUCTION Environmental Express T80WL Thank you for purchasing Turbidity Meter (hereafter referred to as the instrument). The instrument uses tungsten filament lamp (400 – 600nm) as the light source and 90° scattering method, which is compliant with U.S EPA 180.1 method for the determination of of turbidity in drinking, ground, surface, and saline waters, domestic and industrial wastes. -
Page 4: Technical Specifications
TECHNICAL SPECIFICATIONS Measurement 90° scattering measurement Method Light Source Tungsten (400 – 600nm) filament lamp, compliant with US EPA 180.1 Method 0 to 1000 NTU (FNU), automatic range switch 0.01 to 19.99 NTU (FNU) Measuring Range 20.0 to 99.9 NTU (FNU) 100 to 1000 NTU (FNU) Accuracy ≤... -
Page 5: Instrumentation Illustration
Dimension and Meter: (90×203×80) mm/385g Weight Test Kit: (310×295×110) mm/1.5kg INSTRUMENTATION ILLUSTRATION Overview ① ② ③ ⑪ ④ ⑥ ⑤ ⑩ ⑦ ⑨ ⑧ Diagram-1 Flip cover of the sample vial holder (Close the Dust-proof plug (Take off the plug when ①... -
Page 6: Configuration
Built-in lithium battery (Rechargeable) ⑥ Lamp cover 3.2Configuration Calibration Solutions: ① 0.0, 20.0, 100, 400, 800 NTU ② Carrying case ⑨ ③ T80WL Turbidimeter ① ④ Microfiber cloth ⑧ ② ⑤ Power adaptor (5V 1A) ③ ⑥ Silicone oil (10 ml) ⑦... -
Page 7: Display Mode
3.3 Display Mode Measurement Mode Measurements and unit Measuring Operation Guide Mode Battery icon Calibration solution Measurements and unit Progress bar Calibration Operation guide Mode Calibration mode Standard values Calibration Operation guide Menu Finished calibration indicator - 7 -... -
Page 8: Keypad
Keypad Diagram 3 3.5:Power Supply Keypad Functions Power on/off In measurement mode: press to enter calibration mode In calibration mode: press to exit calibration mode In measurement mode: long press to switch measurement units NTU-FTU In measuring mode: Short press the key to perform normal measurement; long press the key to perform average measurement ... -
Page 9: Meter Calibration
· Charge via Power adaptor: connect instrument and power adaptor with a USB cable. Adaptor specification: AC100 to 240V, 50/60Hz, output: 5V/1A. *Note: Please use the power adapter we provide in the kit to charge your turbidimeter. · Charge via Computer: connect instrument and a computer with a USB cable. Under normal circumstances, it is recommended to use the power adapter to charge the lithium battery to ensure the performance. - Page 10 c) Clean vial surface Apply a small drop of silicone oil on the surface of the vial and wipe it off with a lint-free cloth to evenly distribute the silicone oil on the surface in order to cover smudges and scratches, which helps light scattering.
-
Page 11: Calibration Procedure (Take 0 Ntu And 20 Ntu As An Example)
4.2 Calibration Procedure (Take 0 NTU and 20 NTU as an example) 1) Instrument warm up (only required for low-range or high-accuracy measurement): Power on the instrument, set parameter P2 (continuous measurement time) to 5 times. Long press start continuous measurement (don't insert the vial), then wait for 3 to 5 minutes. 2) Open the flip cover and place the 0.0 NTU calibration vial. -
Page 12: Notes For Calibration
6) If you want to continue to calibrate 100, 400 and 800 NTU, place the 100 NTU calibration vial in the sample vial holder and press to calibrate. After calibration is done, press to confirm; repeat the steps to calibrate 400 NTU and 800 NTU. After calibration is done, press to return to measurement mode. -
Page 13: Turbidity Measurement
e) The instrument does not automatically recognize the calibration solution. If the wrong solution is selected for calibration, the measurement will be completely wrong. In this case, it can be restored by recalibrating with the correct calibration solutions. Place the instrument on a flat and level surface. Do not hold the instrument in hand while operating. g) If using Formazin standards for calibration, please make sure to use the freshly made Formazin standard to ensure calibration accuracy. -
Page 14: Notes For Measurement
Diagram 6 5.4 Notes for Measurement Keep the sample stable: After the vial is placed into the sample cell, it is recommended to wait for 1 to 2 minutes before calibration, as the solution will experience some shaking when the vial moves, which may result in inaccurate measurements. -
Page 15: Lamp Replacement
6 LAMP REPLACEMENT 6.1 Light Source Check Observe the light source on the left side of the sample vial holder as in Diagram 11. Turn on the instrument, and press The light source will light up for 5 seconds. If it’s not lighting up or it’s flashing, please replace the lamp. -
Page 16: Warranty
AMCO 0.0 NTU calibration 35635-24 0.0 NTU/100mL 1 bottle solution 20/100/400/800 NTU Compatible with 35635-20 4 bottles AMCO polymer T80WL&T100WL 35635-25 Sample vials with lid Φ25×60mm,1# to 6# 6 pcs 35635-30 Tungsten filament lamp 1 pc 35635-06 Rechargeable lithium battery 3.7 V...
Need help?
Do you have a question about the T80WL and is the answer not in the manual?
Questions and answers