
Related Manuals for Salter RUN-01 PT-1897


Summary of Contents for Salter RUN-01 PT-1897
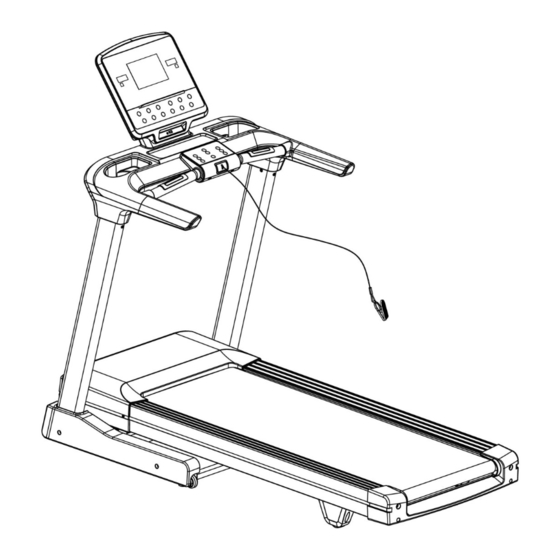
- Page 1 PT-1897 TREADMILL RUN-01 OWNER’S MANUAL OWNER’S MANUAL V022024 ENGLISH PT-1897 TREADMILL RUN-01...
-
Page 2: Safety Instructions
1. SAFETY INSTRUCTIONS 1. Read all warnings posted on the equipment. 2. Read this Owner's Manual and follow it carefully before using the equipment. 3. We recommend that two people be available for assembly of this product. 4. Keep children and pets away from the equipment. Do not allow children and pets to use or play on the equipment. -
Page 3: Special Safety Precautions
2. SPECIAL SAFETY PRECAUTIONS Power source: 1. Choose a place in reach of a socket when placing the treadmill. 2. Always connect the appliance to a socket with a grounded circuit and no other appliances connected to it. It is recommended not to use any extension cords. - Page 4 OWNER’S MANUAL V022024 ENGLISH PT-1897 TREADMILL RUN-01...
-
Page 5: Parts List
5. PARTS LIST Description Specification QTY NO. Description Specification QTY Bottom frame Bottom panel Main frame Front panel support Incline frame Bottom panel support Display frame Front key board Handlebar frame Bottom key board Display support frame Safety key seat Left column Safety key Right column... - Page 6 NO. Description Specification QTY NO. Description Specification Bolt M8x50 L20 Power outlet Bolt M8x45 L20 Overload protector Bolt M8x25 L15 Magnet ring Bolt M8x15 Magnet core Bolt M8x65 Power cable Length 200 Bolt M6x60 AC wire brown Length 350 Bolt M8x40 AC wire brown...
- Page 7 NO. Description Specification Description Specification QTY NO. Filter Wireless heart rate receiver If with wireless heart rate Inductor Heart rate belt function AC wire length 350mm HRC connection wire If with filter and inductor Earthed wire length 350mm Screw ST4.2x12 OWNER’S MANUAL V022024 ENGLISH PT-1897 TREADMILL RUN-01...
- Page 8 6. ASSEMBLY INSTRUCTIONS STEP 1: 1. Open the package and put the mainframe A onto the floor. Attention: Don’t open the packing belt (P) before set up of the treadmill. STEP 2: Lift up column A07,A08 first; Then fix the column A07, A08 to the mainframe A with 6* bolt M8*15 D11 and 6* Lock washer D31 by 5# Allen wrench B10 .
- Page 9 STEP 4: 1. Remove the display cover C11 by cross solid wrench B08. STEP 5: Connect the wires which squared in ① with the wires which squared in ②. Please insert the display C into the slot of the display support frame B. ATTENTION: PLEASE MAKE SURE THE WIRES ARE NOT SQUEEZED BY ANYTHING.
- Page 10 STEP 7 Cut off belt P; STEP 8 1. Take apart the bolt M8*15 ( b) in the bottom side of the steel cable (f) with 5# Allen wrench B10. STEP 9 1. Take apart the bolt M8*15 (b) in the top side of the steel cable (f) with 5# Allen wrench B10.
- Page 11 STEP 10 1. Fix the bottom cover C06&C07 to the mainframe A with 4*bolt M5*16 D18 by Cross solid wrench B08. STEP 11 1. Please insert the safety key D into the safety key slot and nip the safety clip to your cloth.
- Page 12 7. INSTRUCTIONS FOR USE GETTING STARTED 7.1 TURN POWER ON Put the power cord into the electrical outlet. Flip the switch to the “ON” position. The screen will wake up. 7.2 SAFETY KEY AND CLIP The safety key is designed to cut the main power to the treadmill should your fall.
-
Page 13: Usb Charging
7.6 USB CHARGING You can charge your electronic devices during exercise through the USB . 7.7 MP3 You can connect your mobile phone with MP3 wire to play music, choose music and adjust the volume of music by your mobile phone buttons. 7.8 TURN OFF: Put the switch in the OFF position. -
Page 14: Button Function
8.1 CONSOLE OVERLAY DISPLAY 1) "TIME" window: Display running time. Display range is 0:00-18h. When get to the maximum time limit, it will not stop and count from 0:00 again. In countdown mode the display range is 99 mins-0 min. When reach to 0:00, the time window will show "END", after 5 seconds it will stop and enter into standby mode. -
Page 15: Quick Start
“START”: When getting through the power and safety key attached, press this button at any time to start the machine. “STOP”: When running, press STOP button the machine will stop and all date recover to initial setting. "MODE": Press to choose running mode on standby mode: include time countdown mode”30:00”, distance countdown mode”1.00”, calorie countdown mode”50.0”... -
Page 16: Program Introduction
After set the any countdown mode, press the START key and the machine will be started after 3 seconds. During exercise you can press the key to adjust the speed or incline. Press stop key the machine will be stopped. 8.5 QUICK PROGRAM AND BUILT-IN PROGRAM You can enter into the program by pressing the any quick choice program key or press the "PROGRAM"... -
Page 17: Manual Program
INCLINE SPEED 10 10 INCLINE SPEED 10 12 12 12 12 12 INCLINE 8.7 MANUAL PROGRAM: The first program MANUAL is self-define program. User can set program according to their need, only one self- define program is available. Manual program setting: Press the MANUAL key to enter into MANUAL mode in the standby mode or press the PORGRAM key continuously until the program window shows"01". - Page 18 =(26---29) A little weight ≥30 Too fat 8.9 HRC PROGRAM (OPTIONAL) DEFAULT DEFAULT SEFAULT L-H: heart rate range (lowest-highest). In standby mode press the HRC key continuously until the distance window shows "HRC". Press the MODE key to enter into age adjustment window, and then change the age by key from 15 to 80 (please take the HRC parameter table for reference).
- Page 19 After begin exercise system will begin at a speed of 3.0km/h. system will detect your heart rate signal per 20 seconds, If the data is less than the 90% of the target heart rate, system will accelerate 1.0km/h. If the data is less than the 95% of the target heart rate, system will accelerate 0.5km/h. If the data is less than the 97% of the target heart rate, system will accelerate 0.3km/h.
-
Page 20: Maintenance
9. MAINTENANCE The maintenance of the device is simple. Before carrying out maintenance, disconnect the machine from the power supply and follow these guidelines: 9.1 CLEANING Dry and clean those areas exposed to perspiration, especially the console. It is recommended to use towels in ... -
Page 21: Adjusting The Running Belt
9.3 ADJUSTING THE RUNNING BELT Place the treadmill on level ground and set it at 6-8KPH to check and see if the Running Belt drifts from the center. 1. If the Running Belt drifts to the right, turn the adjusting bolt on the right side ¼ turn clockwise, then turn the left adjustment bolt ¼... -
Page 22: Environmental Note
For more information about the return system, collection and recycling of these products contact your City Council or the retailer. 11. WARRANTY CONDITIONS Consult the warranty of this equipment on www.salter.es. It is essential to indicate the serial number of the equipment for repairs under warranty. OWNER’S MANUAL V022024 ENGLISH...
Need help?
Do you have a question about the RUN-01 PT-1897 and is the answer not in the manual?
Questions and answers