Table of Contents
Advertisement
Quick Links
Advertisement
Table of Contents

Related Manuals for STEMA PRATO 04-3T/90


Summary of Contents for STEMA PRATO 04-3T/90
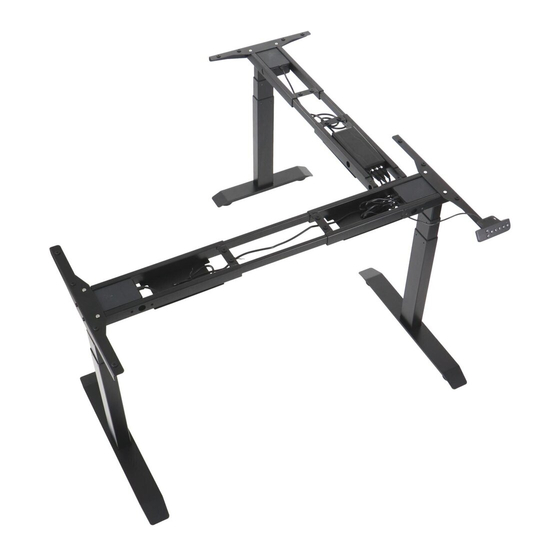
- Page 1 ELECTRIC FRAME PRATO 04-3T/90 Installation guide Page 1...
- Page 2 Specification Stage columns Load capacity 150 kg Max. speed 35 mm/s Input voltage AC 110-240 V Adjustable height 600-1250 mm Duty cycle 10% (2 minutes on / 18 minutes off) Working temperature 0-40 C Certification Accessories list Page 2...
- Page 3 Step 1 Unpack all components and check that you have everything shown in the diagram. Slide out of frame 5 completely beams. Step 2 Connect the columns 1 with the frame 5 and then fix them with screws A. Step 3 Fix the feet 2 to the columns 1 with screws A.
- Page 4 Step 4 Insert the beams 6 into the frame 5, adjust the length and lightly tighten with screws B. Screw parts 7 with screws B. Connect the two frames with screws D. Step 5 Fix the top pieces with 4 screws A and C. Page 4...
- Page 5 Step 6 Set the beams 6 in the right position and then screw the upper elements 4 to the table top using screws E. Insert the power adapter 9 into the location shown below. Screw the two elements 7 with screws B. Connect the circuit electric according to the diagram below.
- Page 6 Controller instruction Product first use Before using the desk for the first time, perform a reset operation. 1. Press and hold the "v" button for up to 5 seconds after the rack goes to the lowest position. "RST" will appear on the display.
- Page 7 10. Settings menu In order to call up the settings menu, press and hold the "M" button for at least 5 seconds. 1. Setting the lowest frame height 2. Setting the highest frame height 3. Setting the basic height of the frame (range 0-30 cm) 4.
- Page 8 EN Please read the manual carefully before assembly and use. If you have any doubts or queries, please contact your local distributor. CAUTION: using the frame with products heavier than the recommended weight may cause loss of stability leading to injury. Please follow the instructions carefully when assembling.
Need help?
Do you have a question about the PRATO 04-3T/90 and is the answer not in the manual?
Questions and answers