Table of Contents
Advertisement
Quick Links
l in da b | f o r a b e t te r c l i m a te
LindabPlafond XD
Exposed active chilled beam
Installation instructions
© 2022.11 Lindab Ventilation. All forms of reproduction without written permission are forbidden.
is the registered trademark of Lindab AB.
Lindab's products, systems, product and product group designations are protected by intellectual property rights (IPR).
Advertisement
Table of Contents

Related Manuals for Lindab Plafond XD


Summary of Contents for Lindab Plafond XD
- Page 1 Exposed active chilled beam Installation instructions © 2022.11 Lindab Ventilation. All forms of reproduction without written permission are forbidden. is the registered trademark of Lindab AB. Lindab's products, systems, product and product group designations are protected by intellectual property rights (IPR).
- Page 2 Lower battery ............35 4.2. Air connections (Plafond XD Body) ...... 19 Turnable battery ...........36 4.2.1 Air connection installation ........19 8. Accessories ..............37 4.2.2 Possible connections supply air ......19 Lindab reserves the right to make changes without prior notice 2022-11-04...
- Page 3 See also the separate document “Accessories." Lindab will also provide you with a full ventilation system, with a wide range of Lindab Safe components. See also “Air Duct Systems." 2.2 Safe operation Beware of sharp edges, especially of the coils. Always wear thin gloves and protective clothing.
-
Page 4: Installation
2.7 Installation 2.8 Where to find additional instructions or technical documentation It is important to use the Lindab brackets incl. in the deli- veries and the recommended amount for all installation In the following chapters we will refer to additional technical principles. - Page 5 2.10 Packing, unpacking guideline Bodies Covers Never use water pipe connections for lifting 6-31 kg ! 5-23 kg ! Body Cover 2 brackets included with Body 2 brackets included with Cover Lindab reserves the right to make changes without prior notice 2022-11-04...
-
Page 6: Product Labelling
Label when no JetCone system has been ordered. The product is factory pre-set with the customer-demanded primary air flow rate and static pressure loss settings. The label both records and guarantees the settings with personal signature of the responsible Lindab employee. Order : xx-xxxxx Pos : x.x m... - Page 7 Nominal Body length [m] Alea, Badge, Clyp, 9003 is included when Body type PLA-FW is ordered! Cubo, Gap, Trac, Zune Other coulors on request Badge Clyp Alea Cubo Zune Trac Lindab reserves the right to make changes without prior notice 2022-11-04...
- Page 8 Plugs : xx Sign. : • Mark: Marking noted on order Product ID : xxxxxxx • Product ID: Product number • Sign: To be signed when checked and commissioned on site Lindab reserves the right to make changes without prior notice 2022-11-04...
- Page 9 2.17.5 Connection covers for Plafond XD models There are no special Connection covers available, as stand- Condensation sensor and Regula Secura ard Covers for Plafond XD can be used. For details go to 5.5.1 in this document. Regula Multi connect card...
-
Page 10: Product Specification
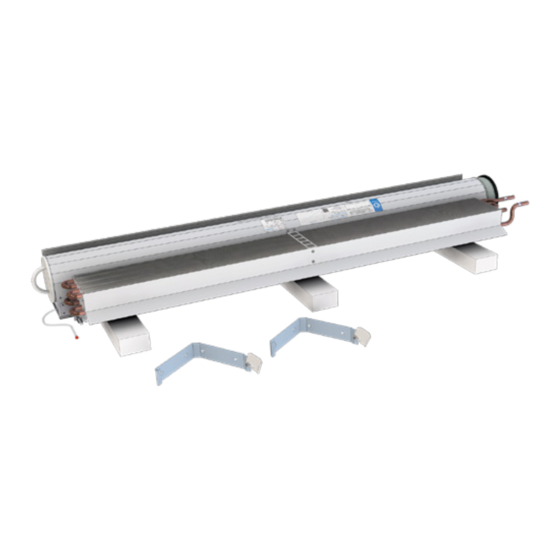
3. Product specification 3.1 Product description Plafond XD is an exposed, 1-way active chilled beam and can be standardly prepared for ventilation and cooling (2-pipe connection) or cooling and heating (4-pipe connection). The Plafond XD consists of a technical Body and Cover in seven different designs. - Page 11 5.5.1 in this document for details for installation details. The chosen Plafond XD Cover design will determine the outer dimensions of your Plafond XD, hidding the Body, connections and accessories. Lindab reserves the right to make changes without prior notice...
-
Page 12: General Structure
PLA-FC-Gap ** Two brackets are always PLA-FC-Trac included when ordering a Plafond XD Cover. PLA-FC-Zune Table 3. Plafond XD Covers, design end-gables and brackets, weight for all different types. Lindab reserves the right to make changes without prior notice 2022-11-04... -
Page 13: Capacity Test
3.9 Capacity test Lindabs active chilled beams are Eurovent-certified and tested according to EN-15116. Please visit Plafond XD on www.lindQST.com and see Eurovent for more details. Lindab reserves the right to make changes without prior notice 2022-11-04... -
Page 14: Water Connections
When connecting a panel or a beam with the piping system either a push-on fitting or a compression coupling should be used. Lindab have tested and recommends John Guest push on fittings as well as push-on fittings from Tectite (available as accessory. -
Page 15: Compression Fitting
• Please refer to the suppliers manual. = 70 mm (to ensure you can open the couplings again). Lindab flexible hoses are available with straight end (male) for direct connection to Lindab valves also. Lindab reserves the right to make changes without prior notice... - Page 16 Plafond XD 4.1.5 Possible connections water cooling or heating (2-pipe, standard) Identify the couplings and All the Plafond XD active chilled beams can have either a “2-pipe water connection” or connections for air and water. a "4-pipe water connection". Standing in front of the air con- nection side of the Plafond XD The 2-pipe water connection beam contains one water circuit only (cooling or heating).
- Page 17 Plafond XD 4.1.6 Possible connections water cooling and heating (4-pipe, standard) Identify the couplings and Plafond XD active beams with "4-pipe water connection" contains two water circuits, connections for air and water. one for heating and one for cooling. Standing in front of the air con- nection side of the Plafond XD All water pipe connections are Ø...
- Page 18 Installation instruction Plafond XD 4.1.7 Water pipe dimensions and placement. 4-pipe battery 2-pipe battery 4-pipe battery All pipes Ø=12 mm 2-pipe battery Dimensions valid for all Plafond XD Bodies. Lindab reserves the right to make changes without prior notice 2022-11-04...
- Page 19 Installation instruction Plafond XD 4.2 Air connections. 4.2.1 Air connection installation The primary air supply must be connected with instructions from a ventilation specialist. Lindab’s chilled beams can beneficially be used together with Lindab’s Safe duct systems. ® We recommend a flexible duct connection, like Lindab DRATMFU-125, to balance out different installation heights or directions between connection and duct and avoid sound will be diverted from piping system to the ceiling.
- Page 20 Supply link - L Heating link - S Cooling link - S Supply link - N Supply link - L Supply in - N Supply in 24V - L LINDAB Lindab reserves the right to make changes without prior notice 2022-11-04...
- Page 21 Supply in - 24V - L NB: Wire colours NB: Wire colours differ from standard LINDAB differ from standard NB: Wire colours differ from standard NB: Wire colours differ from standard Lindab reserves the right to make changes without prior notice 2022-11-04...
- Page 22 Regula Secura is pre-installed when the beam is ordered with plus features. See Regula Secura for more details. Condensation sensor and Regula Secura Condensation sensor Inlet pipe Strips Cable to Regula Secura from sensor Regula Secura Battery Lindab reserves the right to make changes without prior notice 2022-11-04...
-
Page 23: Installation Of Product
Plafond XD-FC (with Cover type Clyp), installation on the wall, sealed to the ceiling (FC) without the need of a top Cover (TC). 5.3.2 Installation on the wall, with distance to the ceiling (FW) - Page 24 The Body must always be installed before the Covers. All neccesary brackets are included in your order. The Plafond XD Body must always be covered by a single Cover. Two Covers are not allowed to overlap the Body. If the distance to the wall can not be covered by the max.
-
Page 25: Body Installation
"clicking in" the Body to the "Body grips" of the brackets! (Step C-D, see next page). 1. Unlock screw 2. Move to the right 3. Turn to unlocked position Lindab reserves the right to make changes without prior notice 2022-11-04... - Page 26 For long Bodies and Top Covers, Basic general steps to extra screws can be used. click in/out the Body Check TC center leveling with Reverse step C-D to brackets. de-install Body Lindab reserves the right to make changes without prior notice 2022-11-04...
- Page 27 Plafond XD 5.5.3 Cover installation (single Cover) All 7 Cover types are supplied with 2 two brackets each by default. See 3.2.2 for overview of the different Plafond XD Covers. All Cover brackets must be alligned with the Body brackets! 5.5.3.1 Recommendations...
- Page 28 Badge and Clyp Covers Badge Clyp Design end-gables for the design Covers Alea Cubo Zune Trac Design end-gables ordered seperately. No tools needed, magnets included for toolless installation. Lindab reserves the right to make changes without prior notice 2022-11-04...
- Page 29 The flexible brackets included make the PLA-XD ideal for instaling on gypsum walls. Body brackets in blue and Cover brackets in red. The new design Cover Zune in same configuration as the classic Badge on gipsum wall above. Lindab reserves the right to make changes without prior notice 2022-11-04...
-
Page 30: Adjustment And Commissioning
NB! For a simple but effective system, without flexibility need in primary airflow adjustment, the beam can be ordered without Lindab´s JetCone system. The Body will then be produced with a fixed number of open nozzles, according to the desired static pressure (Pa) and primary airflow demand (l/s). - Page 31 Plafond XD comes as standard with fixed (pre-ordered) angled JetCone Nozzles, which provides a perfect air spread pattern that reduces draft risk without losing capacity. For different purposes, you can order Plafond XD with 3 different air patterns as short, medium and long air throws. The default setting is short.
- Page 32 6.3.1 Measuring static nozzle pressure and air pressure 1. To measure the air pressure, a manometer, (analogue or digital) will be needed. Lindab recommends PC410. 2. Connect the measuring device with the measuring tube of the beam.
- Page 33 (0.089 √∆p stat 5. Adjust the 2 JetCone adjustment pins in the Plafond XD Body, so the mean value of the pins will correspond with the JetCone position factor J from your calculation. Lindab reserves the right to make changes without prior notice...
- Page 34 (planned) water flow rates (calculated with LindQST\waterborne calculator). Lindab refers to the proportional method, where all beams (panels or facade units) are balanced to the same proportion of the requested water flow rate. Lindab reserves the right to make changes without prior notice...
-
Page 35: Maintenance
7.2 Open inlet faceplate (taking off the Body Cover). see 7.3 Open inspection hatch. ESHU off 7.3 Open inspection hatch Open faceplate. See 7.2. Access to Plenum chamber 7.4 Lower battery Not relevant for Plafond XD Lindab reserves the right to make changes without prior notice 2022-11-04... - Page 36 REVERSE step D - C - B - A. D - Close the center support bracket. C - Lock battery screws (x6). B - Re-Insert the deflection plate. A - Lock deflection plate screws (x6). 180° Lindab reserves the right to make changes without prior notice 2022-11-04...
-
Page 37: Order Code
| fo r a bet te r cl imat e Installation instruction Plafond XD 8. Accessories Ask Lindab for the accessories mentioned in this document. Additional accessories (or additional dimensions) are available on request.** Order code Order number... - Page 38 We at Lindab have therefore made it our most important objective to contribute to an indoor climate that improves people’s lives. We do this by developing energy-efficient ventilation solutions and durable building products.
Need help?
Do you have a question about the Plafond XD and is the answer not in the manual?
Questions and answers